Flask 入门系列教程 01--hello world
Posted Qtest之道
tags:
篇首语:本文由小常识网(cha138.com)小编为大家整理,主要介绍了Flask 入门系列教程 01--hello world相关的知识,希望对你有一定的参考价值。
背景介绍
Flask是一个Python编写的Web 微框架,使用python编写,基于WerkzeugWSGI工具箱和 Jinja2模板引擎,让我们可以使用Python语言快速实现一个网站或Web服务。

安装

pip install Flask
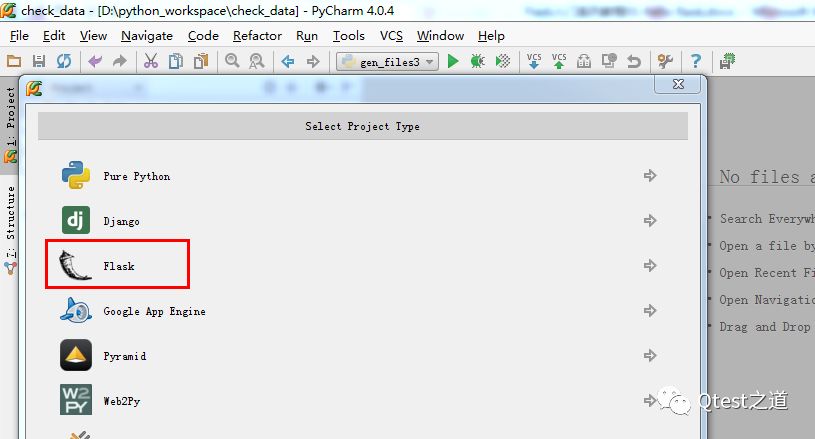
新建python flask项目
使用pycharm,file-new project,选择flask,然后输入项目的名称flask_test,template language和template folders默认即可。
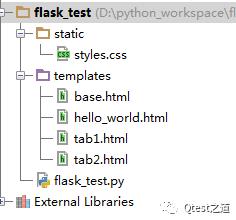
此时生成的文件结构如下:
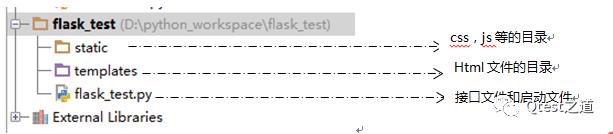
目录结构和代码详解
(1)static目录文件,即存储css,js等文件的默认目录。
(2)templates目录,即存储html文件的默认目录,可以通过如下代码来修改默认目录的位置:
app = Flask(__name__, static_folder='', template_folder='')
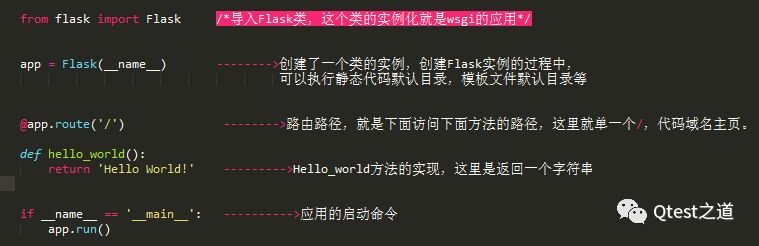
(3) flask_test.py:自动生成的文件代码和含义如下:
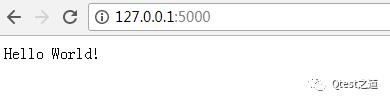
到这里一个简单的flask应用就运行成功了,是不是特别简单。
下面我们深入一点,使用模板文件,并集成bootstrap样式管理,来生成一个带有背景的hello word页面。
使用模板集成bootstrap
在flask中集成bootstrap,可以引入bootstrap相关的文件,也可以直接使用flask-bootstrap的Flask扩展。这里我们使用flask扩展的方式。首先
(1)安装flask-bootstrap:pip install flask-bootstrap,然后在刚才的flask_test.py中建立bootstrap实例。
from flask_bootstrap import Bootstrap
bootstrap = Bootstrap()
bootstrap.init_app(app)
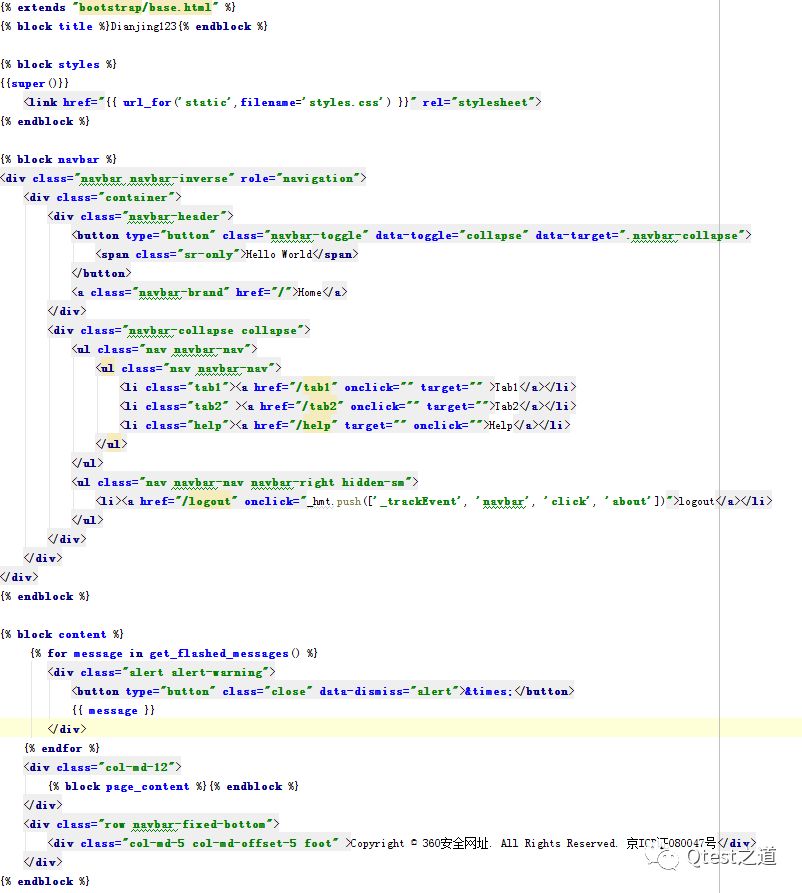
(2)建立模板文件和css文件,完成后,目录如下:
来看下base.html文件,它是整个系统的页面框架,这里继承bootstrap的base.html文件,并建立好系统的导航条。代码如下:
然后建立hello_world.html
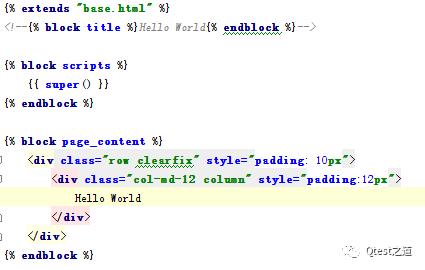
然后修改原来的hello_world实现方法,使它打开一个页面。
@app.route('/')
def hello_world():
return render_template('hello_world.html')
再次运行,打开http://127.0.0.1:5000/,一个带有导航条的html页面就出现了:
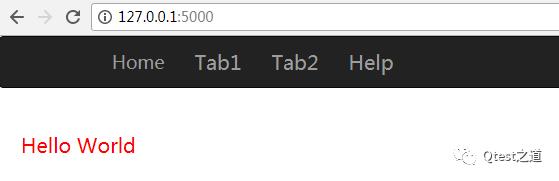
是不是已经感受到了flask的方便了,几行代码就能建立一个有交互的页面,点击Home就打开hello_world页面,点击Tab1和Tab2分别打开tab1.html和tab2.html。
这次就到这里了。后续还会继续分享flask入门系列之模板介绍。
Qtest是360旗下的专业测试团队!
是WEB平台部测试技术平台化、效率化的先锋力量!
陪伴是最长情的告白
每日为你推送最in的测试技术
以上是关于Flask 入门系列教程 01--hello world的主要内容,如果未能解决你的问题,请参考以下文章