NET CORE 管道模型及中间件使用解读
Posted DotNet技术谷
tags:
篇首语:本文由小常识网(cha138.com)小编为大家整理,主要介绍了NET CORE 管道模型及中间件使用解读相关的知识,希望对你有一定的参考价值。
说到NET CORE 管道模型不得不先来看看之前的ASP.NET 的管道模型,两者差异很大,.NET CORE 3.1 后完全重新设计了框架的底层,.net core 3.1 的管道模型更加灵活便捷,可做到热插拔,通过管道可以随意注册自己想要的服务或者第三方服务插件.
ASP.NET 管道
请求进入ASP.NET 工作进程后,由进程创建HttpWorkRequest 对象,封装此次请求有关的所有信息,然后进入HttpRuntime 类进行进一步的处理。HttpRuntime 通过请求信息创建HttpContext 上下文对象,此对象将贯穿整个管道,直到响应结束。同时创建或从应用程序池里初始化一个HttpApplication对象,由此对象开始处理之前注册的多个HttpModule。之后调用HandlerFactory 创建Handler处理程序,最终处理此次请求内容,生成响应返回。
以前的管道模型是全家桶方式,所有的管道不支持热插拔,一次性全部集成在里面,所有这也是ASP.NET 没有.NET CORE 性能好的一大原因所在。
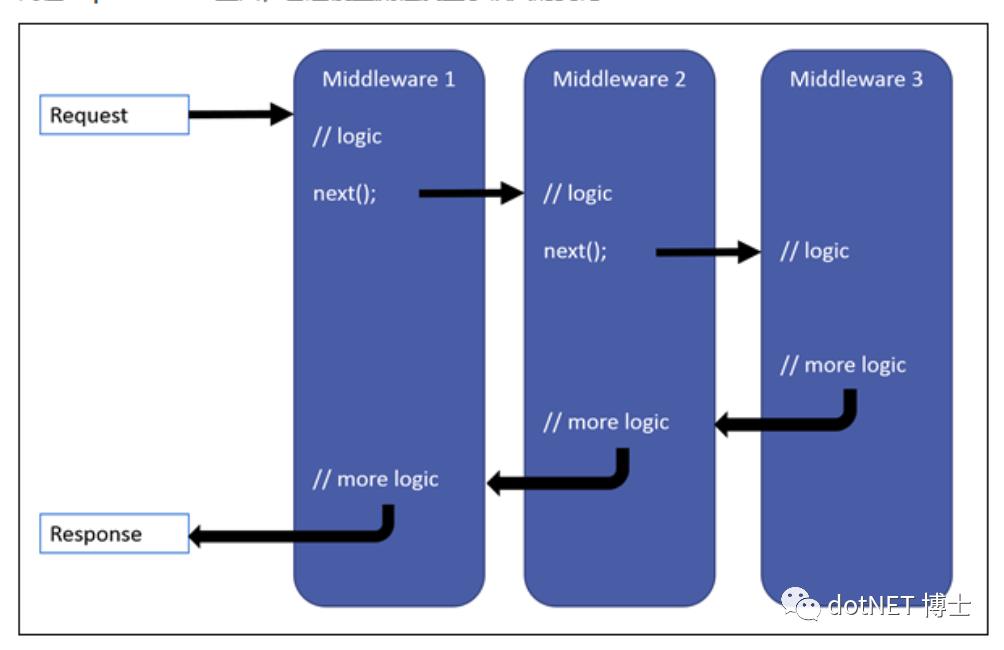
IHttpModule 和IHttpHandler 已经不复存在了,取而代之的是一个个中间件(Middleware)。Server将接收到的请求直接向后传递,依次经过每一个中间件进行处理,然后由最后一个中间件处理并生成响应内容后回传,再反向以此经过每个中间件,直到由Server发送出去。中间件就像一层一层的“滤网”,过滤所有的请求和响应。这一设计非常适用于“请求-响应”这样的场景--消息从管道头流入最后反向流出。
ASP.NET Core是一套全新的平台,已经不再向前兼容,设计更追求组件化,追求高性能,没有全家桶,那么ASP.NET Core是怎么搭建请求管道的呢?默认情况,管道只有一个404。然后你也可以增加请求的处理,这就是以前的Handler,只包含业务处理环节,其他的就是中间件,MiddleWare。
我们现在来看下几种中间件注册的模式:
以下的代码都把Configure 中的代码全部注释的情况下从零代码开始一个一个注册演示
终结者模式
-
public void Configure(IApplicationBuilder app, IWebHostEnvironment env){Console.WriteLine("Configure");app.Run(async (HttpContext context) => {await context.Response.WriteAsync("Hello World Run");});app.Run(async (HttpContext context) => {await context.Response.WriteAsync("Hello World Run Again");});}
运行代码后浏览器可以看到结果如下:
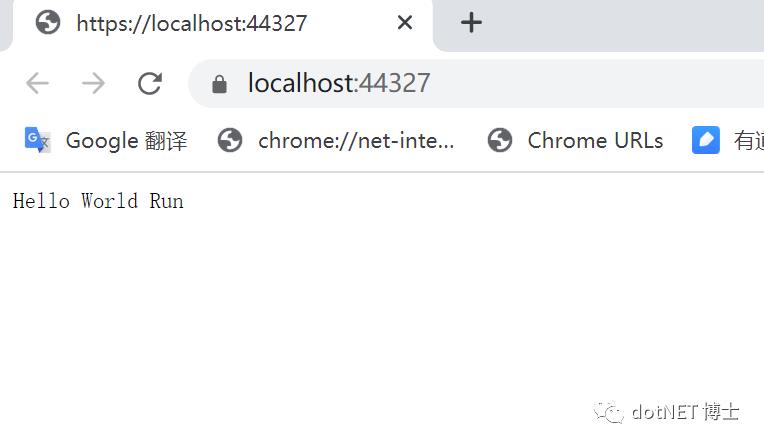
从上面的运行结果可以看出 Run 终结式 只是执行,没有去调用Next ,一般作为终结点。所谓Run终结式注册,其实只是一个扩展方法,最终还不是得调用Use方法,
Use 方式注册
public void Configure(IApplicationBuilder app, IWebHostEnvironment env){app.Use(async (context, next) =>{await context.Response.WriteAsync("Hello World Use1 <br/>");await next();//调用下一个中间件await context.Response.WriteAsync("Hello World Use1 End <br/>");});app.Use(async (context, next) =>{await context.Response.WriteAsync("Hello World Use2 Again <br/>");await next();});}
以上代码得出的结果如下:
Hello World Use1 <br/>Hello World Use2 Again <br/>
从运行结果 中hello world use 1 end <br/> 并未执行,主要是在它上面 next() 调用了下一个中间件,到那里已经终结到下一个中间件执行去了。
再来看下面的代码运行结果:
public void Configure(IApplicationBuilder app, IWebHostEnvironment env){app.Use(async (context, next) =>{await context.Response.WriteAsync("Hello World Use1 <br/>");});app.Use(async (context, next) =>{await context.Response.WriteAsync("Hello World Use2 <br/>");});}
结果如图:
第二个中间件也并未得到执行,use 方式注册中间件得出的结论是:Use注册动作 不是终结点 ,执行next,就可以执行下一个中间件 如果不执行,就等于Run
UseWhen可以对HttpContext检测后,增加处理环节;原来的流程还是正常执行的,代码如下 该方式注册可以实现一系列的验证拦截等操作,从管道的上一层管道进行合理性拦截匹配等等系列过滤,可以说类似于Filter 的实现
public void Configure(IApplicationBuilder app, IWebHostEnvironment env){app.UseWhen(context =>{return context.Request.Query.ContainsKey("Name");},appBuilder =>{appBuilder.Use(async (context, next) =>{await context.Response.WriteAsync("Hello World Use3 Again Again Again <br/>");await next();});});}
看了上面的几个管道应用模块的注册,我们再来一起解读下源代码
IApplicationBuilder 应用程序的组装者,RequestDelegate:传递一个HttpContext,异步操作下,不返回;也就是一个处理动作,Use(Func<RequestDelegate, RequestDelegate> middleware) 委托,传入一个RequestDelegate,返回一个RequestDelegate。ApplicationBuilder里面有个容器IList<Func<RequestDelegate, RequestDelegate>> _components,Use就只是去容器里面添加个元素。最终会Build()一下, 如果没有任何注册,就直接404处理。
核心代码如下:
public IApplicationBuilder Use(Func<RequestDelegate, RequestDelegate> middleware){_components.Add(middleware);return this;}public RequestDelegate Build(){RequestDelegate app = context =>{// If we reach the end of the pipeline, but we have an endpoint, then something unexpected has happened.// This could happen if user code sets an endpoint, but they forgot to add the UseEndpoint middleware.var endpoint = context.GetEndpoint();var endpointRequestDelegate = endpoint?.RequestDelegate;if (endpointRequestDelegate != null){var message =$"The request reached the end of the pipeline without executing the endpoint: '{endpoint.DisplayName}'. " +$"Please register the EndpointMiddleware using '{nameof(IApplicationBuilder)}.UseEndpoints(...)' if using " +$"routing.";throw new InvalidOperationException(message);}context.Response.StatusCode = 404;return Task.CompletedTask;};foreach (var component in _components.Reverse()){app = component(app);}return app;}
IApplicationBuilder build之后其实就是一个RequestDelegate,能对HttpContext加以处理,默认情况下,管道是空的,就是404;可以根据你的诉求,任意的配置执行,一切全部由开发者自由定制,框架只是提供了一个组装方式
看了源代码后我们再来对上面的中间件进行优雅的封装,封装后的代码如下:
public class FirstMiddleWare{private readonly RequestDelegate _next;public FirstMiddleWare(RequestDelegate next){this._next = next;}public async Task Invoke(HttpContext context){await context.Response.WriteAsync($"{nameof(FirstMiddleWare)},Hello World1!<br/>");await _next(context);await context.Response.WriteAsync($"{nameof(FirstMiddleWare)},Hello World2!<br/>");}}
使用注册中间件
public void Configure(IApplicationBuilder app, IWebHostEnvironment env){app.UseMiddleware<FirstMiddleWare>();}
我们可以再升级一点点,使用扩展方法,将这个类中的逻辑作为IApplicationBuilder的扩展方法。
public static class MiddleExtend{public static IApplicationBuilder UseFirstMiddleWare(this IApplicationBuilder builder){return builder.UseMiddleware<FirstMiddleWare>();}}
使用时代码如下:
app.UseFirstMiddleWare();
到这里.net core 管道模型和中间件注册使用已经告一段落了,后续我们继续来分享.net core 中的过滤器使用
♥ 给个[在看],是对我最大的支持 ♥
以上是关于NET CORE 管道模型及中间件使用解读的主要内容,如果未能解决你的问题,请参考以下文章