如何用 CSS 完成漂亮的加载
Posted 筑梦前端
tags:
篇首语:本文由小常识网(cha138.com)小编为大家整理,主要介绍了如何用 CSS 完成漂亮的加载相关的知识,希望对你有一定的参考价值。
为什么要做加载
只想说, 本文最重要的是对 CSS, 伪元素, keyframe的分享, 以及读者对这些东西的真正掌握, 我并不是怂恿大家在每一个页面的前面都去加一个酷炫的加载
我是如何做的
不同的页面, 对加载的设计也就可能不同. 本文设计的加载适合大多数页面.
并且, 本文假设读者已经非常熟悉伪元素, CSS 动画属性和keyframe,
学会使用 CSS 中的 :after 和 :before
keyframe 动画直通车
开始入门
在开始一起构建它前, 我们先看看它最后的效果

正如你所看到的, 我们将经历 4 个步骤
边框一个接一个地出现
红/橙/白色方块向里滑入
方块向外划出
边框消失
我们只需要 animation-direction: alternate 来完成步骤 1 和 2, 步骤 3 和 步骤 4 我们可以使用 reverse, 另外, 我们可以使用 animation-iteration-count: infinite 重复动画
首先, 我们先书写好基本的 html 结构
<!doctype html>
<html>
<head>
<!-- <link rel="preload"> for CSS, JS, and font files -->
<style type="text/css">
/*
* All the CSS for the loader
* Minified and vendor prefixed
*/
</style>
</head>
<body>
<div class="loader">
<!-- HTML for the loader -->
</div>
<header />
<main />
<footer />
<!-- Tags for CSS and JS files -->
</body>
</html>
构建 logo 本身

一开始我们先实现 logo 本身, 而不是最终版本的效果
父级元素 logo, 不同颜色的方块都是它的子元素
<div class="logo">
<div class="white"></div>
<div class="orange"></div>
<div class="red"></div>
</div>
我们用 less 来实现
.logo {
position: relative;
width: 100px;
height: 100px;
border: 4px solid black;
box-sizing: border-box;
background-color: white;
& > div {
position: absolute;
}
.red {
top: 0;
bottom: 0;
left: 0;
width: 27%;
border-right: 4px solid black;
background-color: #EA5664;
}
/* Similar code for div.orange and div.white */
}
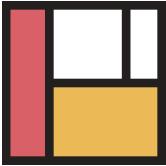
logo 的效果图如下
边框动画
接下来, 我们将进入棘手(有趣)的部分
CSS 不允许我们直接对 div.logo 的边框进行设置达到我们想要的效果, 所以我们必须去除原有的边框, 采用其他的办法来实现
我们要把四个边框分割开来, 然后让它们有序地出现, 所以, 我们可以使用覆盖整个 div 的两个透明的伪元素
废话少说, 就让我们开始吧, 我们先做出它最初始的样子. 我们让 div.logo :: before 绝对位于 div.logo 的左上角,代表方块的上边框和右边框
, 让 div.logo::after 绝对定位 div.logo 的右下角, 代表方块的下边框和左边框
现在, less 代码变成了这样
.logo {
position: relative;
width: 100px;
height: 100px;
box-sizing: border-box;
background-color: white;
&::before,
&::after {
content: '';
position: absolute;
width: 100%;
height: 100%;
box-sizing: border-box;
border: 4px solid transparent;
}
&::before {
top: 0;
left: 0;
border-top-color: black;
border-right-color: black;
}
&::after {
bottom: 0;
right: 0;
border-bottom-color: red; // Red for demo purposes only
border-left-color: red;
}
}
现在效果长这样
接下来, 我们就用 keyframe 做 div.logo::before 的第一个动画
我们将 width 和 height 初始都为 0, 然后用 keyframe 将 width 和
height 调整到 100%
随着我们在相应的时间把边框从透明变为黑色, 我们想要的最开始的效果就出来了
该代码展示了伪元素的初始动画
div.logo {
&::before,
&::after {
/* ... */
animation-timing-function: linear;
}
&::before {
/* ... */
animation: border-before 1.5s infinite;
animation-direction: alternate;
}
}
@keyframes border-before {
0% {
width: 0;
height: 0;
border-right-color: transparent;
}
24.99% {
border-right-color: transparent;
}
25% {
height: 0;
width: 100%;
border-right-color: black;
}
50%,
100% {
width: 100%;
height: 100%;
}
}
我们对 div.logo::after 重复相同的操作, 不要忘了调整时间和反转 width 和 height. 现在, 我们就有了最外层边框的整个动画.
方块动画
最后,我们一起来设置方块的动画
我们最大的挑战是无法连接 keyframes。因为,我们最终想要的动画中每个小方框都有一定的顺序, 为此, 我们作如下改变
0 to 25%:上边框和右边框显现
25 to 50%:下边框和左边框显现
50 to 65%:红色小方块显现
65 to 80%:橙色小方块显现
75 to 90%:白色小方块显现
红色小方框 keyframe 如下
@keyframes red {
0%,
50% {
width: 0;
opacity: 0;
}
50.01% {
opacity: 1;
}
65%,
100% {
width: 27%;
opacity: 1;
}
}
重复上面的代码,就可完成我们整个动画, 是不是很完美
总结
感谢你的阅读,最后附上 所有的源码(http://t.cn/R93jmwe),但个人建议,不要直接阅读源码,根据上面的提示在 codepen 中自己来一遍才是最佳实践
英文:Julien Benchetrit 译文:枫上雾棋
segmentfault.com/a/1190000010624216
以上是关于如何用 CSS 完成漂亮的加载的主要内容,如果未能解决你的问题,请参考以下文章
如何用 BeautifulSoup 等一秒钟来保存汤元素以让页面中的元素加载完成