Jenkins专辑之 - 基础部署篇
Posted 架构实验室
tags:
篇首语:本文由小常识网(cha138.com)小编为大家整理,主要介绍了Jenkins专辑之 - 基础部署篇相关的知识,希望对你有一定的参考价值。
今天开始将在192.168.99.129这台主机上通过Jenkins:2.241版本为例进行Jenkins系列的深入学习与分享。至于Jenkins是干啥的,这些没用的话就不说了,如果你看到我的笔记了,证明你至少是需要Jenkins为你助力的。
通过WAR包安装Jenkins
# 安装
nohup java -jar jenkins.war &
如何你想查看jenkins.war的配置选项,你可以执行以下命令
root@99-129:~# java -jar jenkins.war --help
Running from: /root/jenkins.war
webroot: $user.home/.jenkins
Jenkins Automation Server Engine 2.241
Usage: java -jar jenkins.war [--option=value] [--option=value]

Options:
   --webroot                = folder where the WAR file is expanded into. Default is ${JENKINS_HOME}/war
   --pluginroot             = folder where the plugin archives are expanded into. Default is ${JENKINS_HOME}/plugins
                              (NOTE: this option does not change the directory where the plugin archives are stored)
   --extractedFilesFolder   = folder where extracted files are to be located. Default is the temp folder
   --daemon                 = fork into background and run as daemon (Unix only)
   --logfile                = redirect log messages to this file
   --enable-future-java     = allows running with new Java versions which are not fully supported (class version 52 and above)
   --javaHome               = Override the JAVA_HOME variable
   --toolsJar               = The location of tools.jar. Default is JAVA_HOME/lib/tools.jar
   --config                 = load configuration properties from here. Default is ./winstone.properties
   --prefix                 = add this prefix to all URLs (eg http://localhost:8080/prefix/resource). Default is none
   --commonLibFolder        = folder for additional jar files. Default is ./lib

   --extraLibFolder         = folder for additional jar files to add to Jetty classloader

   --logThrowingLineNo      = show the line no that logged the message (slow). Default is false
   --logThrowingThread      = show the thread that logged the message. Default is false
   --debug                  = set the level of debug msgs (1-9). Default is 5 (INFO level)
... # 此处因为内容太多,省略
此时打开浏览器输入http://192.168.99.129:8080访问jenkins
在红色框内找到管理员的初始密码
root@99-129:~# cat ./.jenkins/secrets/initialAdminPassword
ae44c519786b49b19eaef942715d7991
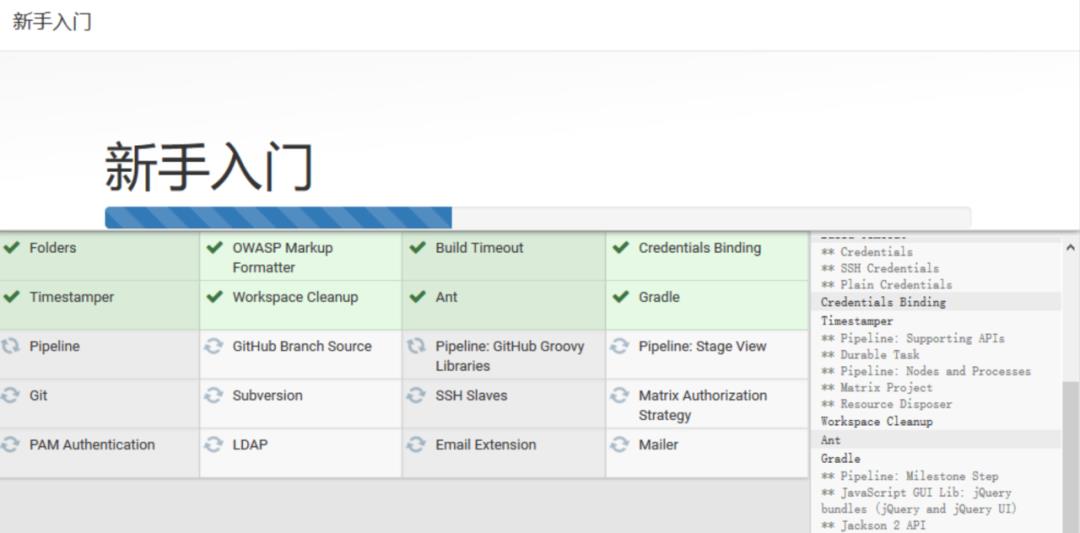
登录之后,选择插件进行安装,这里推荐安装建议安装的插件,如果出现插件安装失败,建议跳过安装,等登录上去之后,在进行安装插件

然后就是配置一个管理员账号,登录之后的界面如下:
这样通过war包安装的Jenkins就完成了。
使用Docker安装Jenkins
mkdir ~/workspace/
cd $_
docker run -d -p 8080:8080 -v $(PWD)/jenkins3:/var/jenkins_home -v /var/run/docker.sock:/var/run/docker.sock -v ~/.m2:/root/.m2 --name jenkins jenkins/jenkins:2.241
在安装容器运行起来之后,我们通过以下命令获取Jenkins初始账号密码
☸️ devcluster以上是关于Jenkins专辑之 - 基础部署篇的主要内容,如果未能解决你的问题,请参考以下文章
Jenkins基础篇 系列之-—10 执行 Jenkins CLI 命令
持续集成之jenkins实践教程 基础篇 4 集成redmine
Jenkins基础篇 系列之-—11 实现SQL脚本批量执行2