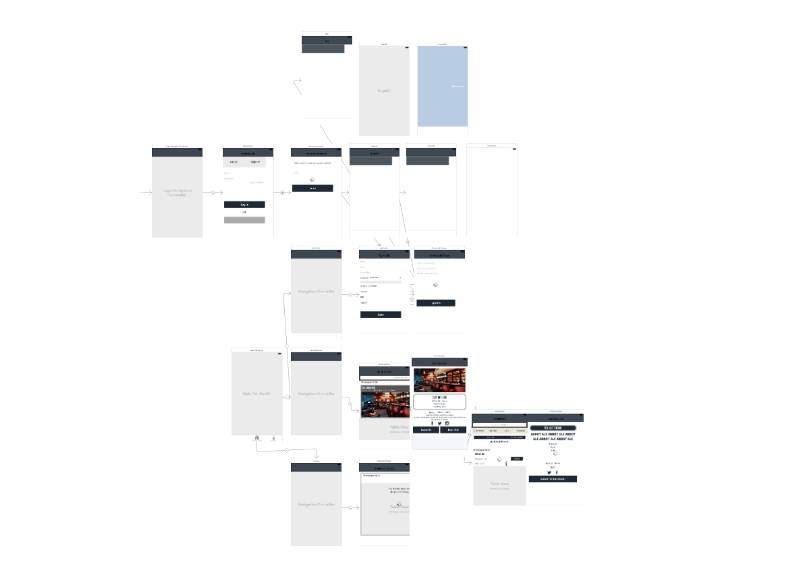
如何在xcode中使用storyboard
Posted
tags:
篇首语:本文由小常识网(cha138.com)小编为大家整理,主要介绍了如何在xcode中使用storyboard相关的知识,希望对你有一定的参考价值。
参考技术A 一、如何使用storyboard简单实现Push页面,步骤如下:1、创建一个带有storyboard的singleview application应用程序如图。
创建好的应用程序已经自动创建好了一个和MainStoryboard连接好的ViewController。
2、在MainStoryboard中,选中ViewController并拖入tableview以及tableviewCell,并且设置tableviewCell的style为Basic,Identifier为Cell,如果希望是自定义cell的则需要选择custom,如下图,之后可以插入一个NavigationController:
现在可以编码了,在ViewController.m中:
#pragmamark - UITableViewDataSource
-(NSInteger)tableView:(UITableView*)tableView numberOfRowsInSection:(NSInteger)section
return1;
-(UITableViewCell*)tableView:(UITableView*)tableView cellForRowAtIndexPath:(NSIndexPath*)indexPath
staticNSString*CellIdentifier = @"Cell";
UITableViewCell*cell = [tableView dequeueReusableCellWithIdentifier:CellIdentifier];
if(cell == nil)
cell= [[UITableViewCellalloc]initWithStyle:UITableViewCellStyleDefault
reuseIdentifier:CellIdentifier];
cell.accessoryType=UITableViewCellAccessoryDisclosureIndicator;
cell.textLabel.text=@"话题";
returncell;
3、现在实现简单的push功能:
再次打开MainStoryboard文件,新拖入一个TableViewController,并且在右边工程中新建一个TopicTableViewController的h文件和m文件,选中MainStoryboard中的TableViewController,将其class设置为TopicTableViewController,同上设置好tableview的cell。
如何在Xcode 8中更好地使用StoryBoard
原文:
译者:
苹果在Xcode 8中为 Interface Builder 的界面做了非常伟大的改善,Size Classes 变得更加直观,StoryBoard的使用也变得更加的便利,还有一个完整度惊人的 Interface Builder 预览界面,这对于那些对 interface Builder 的使用犹豫不决的人来说, 可能成为巨大的冲击。
在另一方面, 许多开发者在使用Interface Builder的时候仍然有一些麻烦, 尤其是在构建一个巨大的包含复杂导航的多屏幕应用的时候。
在这篇文章里, 我将分享给你一些处理项目里面的 StroyBoards 和 Nibs 的好建议,如果你还没有用过Interface Builder, 或者你正打算使用这个工具,那么这些建议可能对你很有用。
1. 如果是团队协作开发, 请为每一个屏幕使用一个单独的 StoryBoard,如果你是独立工作, 这依旧是一个好的习惯
你在项目里是不是有一个类似于这样的main.storyboard?

从设计师的角度来看这非常棒: 你可以很容易的看到完整的用户界面和导航流, 这正是使用Interface Builder想要达到的目的。
但是这对于开发者来说, 就可能会存在很多问题:
源码控制: StoryBoard 非常难解决合并时候产生的冲突, 所以单独的StoryBoard会使你在团队工作中变得更加轻松。
StoryBoard文件会变得非常臃肿和难以驾驭,你有多少次因为点错而无意中改变了ViewController的约束?
你需要为每一个ViewController分配一个StoryBoard的ID, 这非常容易出错: 因为你每次使用这个veiwcontroller的时候都要硬编码这个ID。
如何连接项目里面的不同的StoryBoard? 这里有两种方法:
使用Xcode7中所提供的StoryBoard Reference方案
通过代码来连接StoryBoard
你可以点击来阅读关于第一种方法的更多的内容。
我将要介绍第二种方法, 因为它在复杂的项目中非常的常见。
2. StoryBoard文件与相关的ViewController subclass使用相同的名称
这将简化命名的约定, 并且提供给你一些与第三条建议相关的好处。
3. 在UIViewController subclass中初始化StoryBoard
在初始化StoryBoard的Base ViewController的代码中, 我经常看到下面这样的代码:
let storyboard = UIStoryboard(name: “Main”, bundle: nil)
let homeViewController = storyboard.instantiateViewController(withIdentifier: “HomeViewController”)
这看起来一点都不清晰: 你需要知道这个StoryBoard的名字, 还需要提供这个ViewController在StoryBoard中的ID, 而且你在创建HomeViewController时, 每次都要使用这种方式。
这有一个更好的方式让你用代码在ViewController中使用类方法来初始化它和它所在的StoryBoard:
class HomeViewController: UIViewController {
static func storyboardInstance() -> HomeViewController? {
let storyboard = UIStoryboard(name: String.className(self),
bundle: nil) return
storyboard.instantiateInitialViewController() as?
HomeViewController
}
}
如果你按照之前的建议来操作, 你就可以避免硬编码 StoryBoard 的名称和实体类的名称。
let StoryBoard = UIStoryBoard(name: String.className(self), bundle: nil)
确保你的StoryBoard的名称和实体类的名称完全相同,否则,当视图引用这个StoryBoard时, 应用程序会崩溃。
这使你代码的可读性更高, 而且可以降低出错率:
class HomeViewController: UIViewController {
static func StoryBoardInstance() -> HomeViewController? {
let StoryBoard = UIStoryBoard(name: String.className(self),
bundle: nil) return
StoryBoard.instantiateInitialViewController() as?
HomeViewController
}
}
如果你想通过 instantiateInitialViewController()来访问ViewController, 请确保你在Interface Builder中设置这个ViewController为initialViewController . 如果你在相同的StoryBoard中有多个ViewController, 那么你需要使用instantiateViewController(withIdentifier: _ )
初始化这个ViewController的时候仅需要这一句代码:
let homeViewController = HomeViewController.StoryBoardInstance()
区别很明显吧!
你也可是使用类似的方法从nib中初始化view:
class LoginView: UIView {
static func nibInstance() -> LoginView? {
if let loginView =
Bundle.mainBundle.loadNibNamed(String.className(self),
owner: nil, options: nil)?.first as?
LoginView {
return loginView
}
return nil
}
}
4. 不要让你的项目加载太多StoryBoard segue.
如果你遵循了第一个建议,就不会产生这样的问题。但即使单个StoryBoard中有多个ViewController,使用segue在ViewController之间进行导航也可能也不是个好主意:
你需要为每一个segue命名, 这就很容易出错,毕竟使用硬编码的字符串名称始终不是一个好的编程习惯。
当你为segue添加少量 “if/else” 或 “switch” 语法的时候, PrepareForSegue方法将会变得丑陋而且不易读。
替代方案是什么呢?当我们按下导航到下一个ViewController的按钮的时候, 需要为这个按钮添加一个IBAction, 还有初始化这个ViewController的代码. 如果你采用了第三条建议, 那么它实际上就只有一行代码。
@IBAction func didTapHomeButton(_ sender: AnyObject) {
if let nextViewController =
NextViewController.storyboardInstance() {
// initialize all your class properties
// homeViewController.property1 = …
// homeViewController.property2 = …
// either push or present the nextViewController,
// depending on your navigation structure
// present present(nextViewController, animated: true,
completion: nil)
// or push
navigationController?.pushViewController(nextViewController,
animated: true)
}
}
5. 神秘的Unwind segue.
有的时候我们需要让用户回到前一个屏幕。
这里存在另外一个常见的错误:使用一个新的segue导航到前面的ViewController,这将创建一个相同实例的ViewController, 它会加入到视图栈中, 而不是释放当前处于最顶层的ViewController
从iOS7开始, Interface Builder 提供给你了 “unwind” 导航栈的方案.
StoryBoard 里的 Exit outlet
允许你返回到之前任意位置的屏幕,这听起来很简单,但是实际上它还需要一些会让开发者迷惑的额外操作:
通常当你为一个按钮创建一个outlet事件的时候, Interface Builder 将会为你创建对应的代码。在这个时候, 按住”control”从按钮拖动到“Exit” 上面的时候, 对应的代码就会出现在你的项目里。
通常当你为一个按钮创建一个outlet事件的时候, 它会为你的按钮在对应的类中做关联。如果是用 Unwind Segues, 你还需要在目标ViewController中编写代码。
prepareForUnwind 方法有 prepareForSegue 方法的全部缺陷. (请参考前面的说明)
那更简单的方式是什么样子的呢?
那么我们用代码简单的实现一下: 并不用给你的按钮创建一个”Unwind segue”相关的方法, 而是创建一个常规的方法来实现dismissViewController或者popViewController (请参考你自己的导航结构):
@IBAction func didTapBackButton(_ sender: AnyObject) {
// if you use navigation controller, just pop ViewController:
if let nvc = navigationController {
nvc.popViewController(animated: true)
} else {
// otherwise, dismiss it
dismiss(animated: true, completion: nil)
}
}
这就是今天的全部内容.我希望你能发现一些对你有用的东西. 如果你有任何评论、问题,或需要修正的内容, 随时和我联系。
▲长按二维码“识别”关注即可免费学习 iOS 开发
月薪十万、出任CEO、赢娶白富美、走上人生巅峰不是梦
--------------------------------------
商务合作QQ:2408167315
投稿邮箱:support@cocoachina.com
以上是关于如何在xcode中使用storyboard的主要内容,如果未能解决你的问题,请参考以下文章