篇一:centos7下haproxy负载均衡软件的搭建与使用
Posted 砂之寞架构说
tags:
篇首语:本文由小常识网(cha138.com)小编为大家整理,主要介绍了篇一:centos7下haproxy负载均衡软件的搭建与使用相关的知识,希望对你有一定的参考价值。
飘飘岁月,苒苒华年,时光总如白驹过隙,过往已成云烟;
浩浩生涯,源源技艺,磨练皆若细水长流,未来才是风范。
纵览已经发出去的技术笔记,今天看来有些显得混乱,显得充数。负载均衡,还没有讲负载均衡怎样怎样搭建,就讲了mysql主从分离的高可用,分布式文件系统的实时同步,显然不适合循序渐进的学习之道。发是发早了一点,但这两篇还是有一定的价值的。
之于上,以后我就按着顺序,篇一、篇二、篇三......,这样的顺序推送给大家,希望发送对大家起到一定的作用。当然,由于个人知识的广度与深度问题,内容难免瑕疵,望大家批评指正。
话不多说,直接主题。今天给大家推送的是分布式的基础篇,负载均衡器haproxy的搭建。
一、haproxy下载
说到下载haproxy,最近不知道怎么了,官网下载挺不方便的,当然你也可以去尝试https://www.haproxy.com/。如果确实不好弄,我在我的服务器上存放了一份,大家要是不介意的话,可以在
http://yuyuda.com/yyd_file/haproxy-1.7.8.tar.gz
处下载,是个1.7.8版本的,感觉挺稳定,我用在生产环境下没有什么问题。
二、解压,并安装
1、haproxy需要相应的linux内核
[root@yyd ~] # uname -r
3.10.0-693.21.1.el7.x86_64
上面红色的数字组合在一起就是31
2、解压、安装
[root@yyd ~] # tar -zxvf haproxy-1.7.8.tar.gz
[root@yyd ~] # cd haproxy-1.7.8/
[root@yyd ~/haproxy-1.7.8] # make TARGET=linux31 ARCH=x86_64 USE_PCRE=1 USE_OPENSSL=1 USE_ZLIB=1 USE_CRYPT_H=1 USE_LIBCRYPT=1
参数说明:TARGET指定内核版本;
ARCH指定CPU架构;
USER_PCRE支持PCRE库;
USE_OPENSSL支持openssl,目的是为了https协议;
USE_ZLIB支持zlib库;
USE_CRYPT_H支持CRYPT_H;
USE_LIBCRYPT支持LIBCRYPT。
如果上面这些没安装,yum install即可
[root@yyd ~/haproxy-1.7.8] # make install PREFIX=/usr/local/haproxy
[root@yyd ~/haproxy-1.7.8] # cd /usr/local/ && ll
[root@yyd /usr/local] # cd haproxy && ll

有上面三个目录。
如果上述过程未出错,说明安装成功,出错了按着错误提示解决,不能解决Google下。
3、创建haproxy运行的用户和用户组
[root@yyd ~/haproxy-1.7.8] # groupadd haproxy
[root@yyd ~/haproxy-1.7.8] # useradd -r -g haproxy haproxy
4、配置haproxy,下面是我配置成功的案例
[root@yyd ~/haproxy-1.7.8]# touch /etc/haproxy.cfg
[root@yyd ~/haproxy-1.7.8]# vim /etc/haproxy
#全局配置 global #设置日志 log 127.0.0.1 local3 info chroot /usr/local/haproxy #用户与用户组 user haproxy group haproxy #守护进程启动 daemon #最大连接数 maxconn 4000 #配置ssl tune.ssl.default-dh-param 2048 #默认配置 defaults log global #option httplog mode http option dontlognull timeout connect 5000 timeout client 50000 timeout server 50000 option http-server-close retries 3 timeout http-request 10s timeout queue 1m timeout connect 10s timeout client 1m timeout server 1m timeout http-keep-alive 10s timeout check 10s maxconn 3000 #前端配置,http_front名称可自定义 frontend http_front # 发起http请求到80端口,会被转发到设置的ip及端口 bind 0.0.0.0:80 #haproxy的状态管理页面,通过/haproxy?stats来访问 stats uri /haproxy?stats #配置acl规则,实现跳转 acl api hdr_beg(host) -i www.api.com acl web hdr_beg(host) -i www.web.com #重定向到https redirect prefix https://www.web.com if web acl nowww hdr_beg(host) -i a.com redirect prefix https://www.a.com if nowww acl www hdr_beg(host) -i www.a.com redirect prefix https://www.a.com if www #判断使用哪个后台服务 use_backend api if api use_backend web if web #隐藏haproxy在监控页面的版本号 stats hide-version #多长时间刷新一次监控页面 stats refresh 10s #默认使用哪个后端服务 #default_backend apache #设置监控页面的用户名和密码 stats auth test:123456 #前端配置,http_front_443名称可自定义 frontend http_front_443 # 发起http请求到443端口,会被转发到设置的ip及端口 #用此命令合并 cat xxx.pem yyy.key | tee test.pem bind 0.0.0.0:443 ssl crt /usr/local/haproxy/cert/test.pem #haproxy的状态管理页面,通过/haproxy?stats来访问 stats uri /haproxy?stats acl api hdr_beg(host) -i www.api.com acl web hdr_beg(host) -i www.web.com use_backend api_443 if api use_backend web_443 if web stats hide-version stats refresh 10s #default_backend apache stats auth test:123456 #后端配置,http_back名称可自定义 backend api #负载均衡方式 #source 根据请求源IP #static-rr 根据权重 #leastconn 最少连接者先处理 #uri 根据请求的uri #url_param 根据请求的url参数 #rdp-cookie 据据cookie(name)来锁定并哈希每一次请求 #hdr(name) 根据HTTP请求头来锁定每一次HTTP请求 #roundrobin 轮询方式 balance roundrobin #设置健康检查页面 option httpchk GET /check.html #传递客户端真实IP option forwardfor header X-Forwarded-For # inter 2000 健康检查时间间隔2秒 # rise 3 检测多少次才认为是正常的 # fall 3 失败多少次才认为是不可用的 # weight 30 权重 # 需要转发的ip及端口 server api_server_1 192.168.1.106:80 check inter 2000 rise 3 fall 3 weight 30 server api_server_2 192.168.1.107:80 check inter 2000 rise 3 fall 3 weight 30 backend api_443 #负载均衡方式 #source 根据请求源IP #static-rr 根据权重 #leastconn 最少连接者先处理 #uri 根据请求的uri #url_param 根据请求的url参数 #rdp-cookie 据据cookie(name)来锁定并哈希每一次请求 #hdr(name) 根据HTTP请求头来锁定每一次HTTP请求 #roundrobin 轮询方式 balance roundrobin #设置健康检查页面 option httpchk GET /check.html #https需要此配置 reqadd X-Forwarded-Proto: https # inter 2000 健康检查时间间隔2秒 # rise 3 检测多少次才认为是正常的 # fall 3 失败多少次才认为是不可用的 # weight 30 权重 # 需要转发的ip及端口 server api_1 192.168.1.106:80 check inter 2000 rise 3 fall 3 weight 30 server api_2 192.168.1.107:80 check inter 2000 rise 3 fall 3 weight 30 #####TCP配置######## listen mysql bind :6666 mode tcp #mysql健康检查 root为mysql登录用户名 #option mysql-check user root balance roundrobin server mysql1 192.168.1.106:3306 check inter 2000 rise 3 fall 3 weight 50 server mysql2 192.168.1.107:3306 check inter 2000 rise 3 fall 3 weight 30 |
上面配置,如果是我未写注释的,自己Google下具体意思。
三、启动haproxy服务
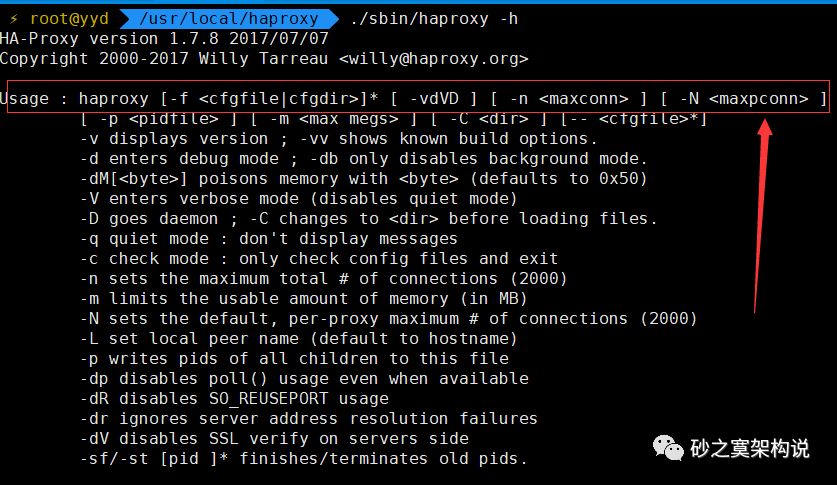
[root@yyd /usr/local/haproxy] # ./sbin/haproxy -h 查看下帮助文档

[root@yyd /usr/local/haproxy] # ./sbin/haproxy -f /etc/haproxy.cfg &
[root@yyd /usr/local/haproxy] # pstree -ap | grep haproxy

这是它的进程结构,说明启动成功。
四、访问
在浏览器中输入 192.168.1.105/haproxy?stats,看到如下页面,即大功告成
写着写着,不知不觉中已到23点53分,时间过得真他妈快,不能过24点,要不然就是明天的东西了,只能草草收笔,其中可能有不如意的地方,望各位谅解!
以上是关于篇一:centos7下haproxy负载均衡软件的搭建与使用的主要内容,如果未能解决你的问题,请参考以下文章