CentOS 6.x 编译安装 Nginx
Posted 佛系程序员修炼指南
tags:
篇首语:本文由小常识网(cha138.com)小编为大家整理,主要介绍了CentOS 6.x 编译安装 Nginx相关的知识,希望对你有一定的参考价值。
nginx [engine x] is an HTTP and reverse proxy server, a mail proxy server, and a generic TCP/UDP proxy server, originally written by Igor Sysoev. For a long time, it has been running on many heavily loaded Russian sites including Yandex, Mail.Ru, VK, and Rambler. According to Netcraft, nginx served or proxied 24.68% busiest sites in June 2018. Here are some of the success stories: Dropbox, Netflix,Wordpress.com, FastMail.FM.
摘自 nginx 官网http://nginx.org/en/的一段话,可以看到 nginx 是一个 HTTP 的代理服务器及反向代理服务器,邮件代理服务器,TCP/UDP 代理服务器,负载均衡器等,功能甚是强大。
一、系统环境
OS:CentOS 6.7 x64
Nginx:1.10.2
二、安装 Nginx
1 依赖安装
(1) 安装 gcc
由于是编译安装,因此,需要 gcc 的编译环境,执行如下命令,查看是否已经安装了 gcc
gcc -v
如果没有安装 gcc,执行如下命令安装:
[root@lab1 php]# yum -y install gcc
安装完成后,执行 gcc -v 可以看到版本信息
  [root@lab1 php]# gcc -v


  Using built-in specs.


  Target: x86_64-redhat-linux


  Configured with: ../configure --prefix=/usr --mandir=/usr/share/man --infodir=/usr/share/info --with-bugurl=[http://bugzilla.redhat.com/bugzilla](http://bugzilla.redhat.com/bugzilla) --enable-bootstrap --enable-shared --enable-threads=posix --enable-checking=release --with-system-zlib --enable-__cxa_atexit --disable-libunwind-exceptions --enable-gnu-unique-object --enable-languages=c,c++,objc,obj-c++,java,fortran,ada --enable-java-awt=gtk --disable-dssi --with-java-home=/usr/lib/jvm/java-1.5.0-gcj-1.5.0.0/jre --enable-libgcj-multifile --enable-java-maintainer-mode --with-ecj-jar=/usr/share/java/eclipse-ecj.jar --disable-libjava-multilib --with-ppl --with-cloog --with-tune=generic --with-arch_32=i686 --build=x86_64-redhat-linux


  Thread model: posix


  gcc version 4.4.7 20120313 (Red Hat 4.4.7-18) (GCC)
(2) 安装 pcre/zlib/openssl
root 用户执行如下命令安装 pcre/zlib/openssl
  yum -y install pcre pcre-devel


  yum -y install zlib zlib-devel


  yum -y install openssl openssl-devel
注:第(1) (2) 步也可以执行一条综合命令来一起安装
yum -y install gcc zlib zlib-devel pcre pcre-devel openssl openssl-devel
2 安装 Nginx
(1) 下载 nginx 源码
http://nginx.org/download/
此处选择1.10.2 版本, root 用户执行如下命令,下载 nginx 源码包
  [root@lab1 nginx]# pwd


  /opt/nginx


  [root@lab1 nginx]# wget http://nginx.org/download/nginx-1.10.2.tar.gz
注:如果使用其他版本,将上方的 1.10.2 更改为其他版本即可,前提是官方有对应的版本...
(2) 解压
  [root@lab1 nginx]# pwd


  /opt/nginx


  [root@lab1 nginx]# ls


  nginx-1.10.2.tar.gz


  [root@lab1 nginx]# tar zxf nginx-1.10.2.tar.gz
(3) 编译、安装
root 用户执行如下命令编译 nginx 源码:
  [root@lab1 nginx]# cd nginx-1.10.2


  [root@lab1 nginx-1.10.2]# pwd


  /opt/nginx/nginx-1.10.2


  [root@lab1 nginx-1.10.2]# ./configure --prefix=/usr/local/nginx --with-http_stub_status_module --with-http_ssl_module
编译成功:
注:
(1) 上面指定了编译目录, --prefix=/usr/local/nginx 表示编译到 /usr/local/nginx 环境,此时并不会生成 /usr/local/nginx 目录。
(2) 如果不指定路径,默认安装在 /usr/local/nginx 中
(3) 安装完成后(make install),可以使用 whereis nginx 来查询安装位置
(4) --with-httpstubstatusmodule --with-httpssl_module 表示添加 http status 模块以及 http ssl 模块
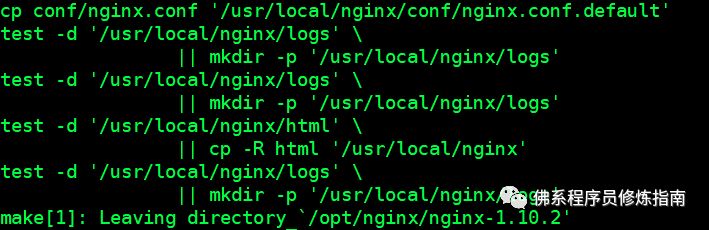
root 继续执行如下命令安装:
  [root@lab1 nginx-1.10.2]#


  [root@lab1 nginx-1.10.2]# pwd


  /opt/nginx/nginx-1.10.2


  [root@lab1 nginx-1.10.2]# make && make install
执行如下命令查看 nginx 安装位置:
  [root@lab1 nginx-1.10.2]# whereis nginx


  nginx: /usr/local/nginx
至此,nginx 已经成功安装
三、nginx 常用命令
1 测试配置文件
在 nginx 安装路径下的 sbin 中执行 ./nginx -t,进行配置文件测试,如下所示:
  [root@lab1 sbin]# pwd


  /usr/local/nginx/sbin


  [root@lab1 sbin]# ./nginx -t


  nginx: the configuration file /usr/local/nginx/conf/nginx.conf syntax is ok


  nginx: configuration file /usr/local/nginx/conf/nginx.conf test is successful
2 启停命令
启动:安装路径下的 sbin 下执行 ./nginx
  [root@lab1 sbin]# pwd


  /usr/local/nginx/sbin


  [root@lab1 sbin]# ./nginx
停止:安装路径下的 sbin 下执行 ./nginx -s stop 或者 ./nginx -s quit
  [root@lab1 sbin]# pwd


  /usr/local/nginx/sbin


  [root@lab1 sbin]# ./nginx -s stop


  [root@lab1 sbin]# ./nginx -s quit
重启:安装路径下的 sbin 下执行 ./nginx -s reload
  [root@lab1 sbin]# pwd


  /usr/local/nginx/sbin


  [root@lab1 sbin]# ./nginx -s reload
平滑重启: kill -HUP [nginx 主进程号]
[root@lab1 sbin]# ps -ef|grep nginx|grep master|awk '{print $2}'|xargs kill -HUP
3 配置防火墙
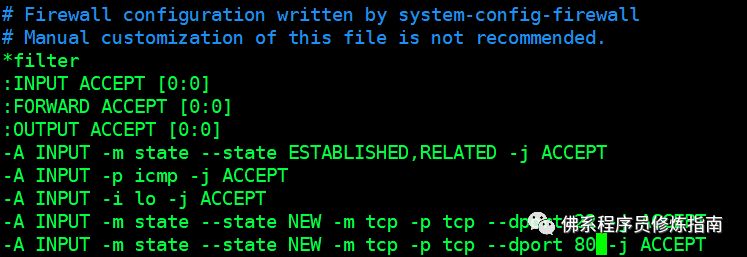
root 用户执行如下命令,编辑防火墙规则文件
[root@lab1 sbin]# vim /etc/sysconfig/iptables
在 22 端口配置的下方添加如下行:
-A INPUT -m state --state NEW -m tcp -p tcp --dport 80 -j ACCEPT
root 用户执行如下命令重启防火墙:
  [root@lab1 sbin]# vim /etc/sysconfig/iptables


  [root@lab1 sbin]# service iptables restart


  iptables: Setting chains to policy ACCEPT: filter          [  OK  ]


  iptables: Flushing firewall rules:                         [  OK  ]


  iptables: Unloading modules:                               [  OK  ]


  iptables: Applying firewall rules:                         [  OK  ]
4 验证 nginx
查看进程:
  [root@lab1 sbin]# ps -ef|grep nginx


  root       8917      1  0 12:47 ?        00:00:00 nginx: master process ./nginx


  nobody     8934   8917  0 12:48 ?        00:00:00 nginx: worker process


  root       8990   1477  0 12:51 pts/1    00:00:00 grep nginx
浏览器中输入:
http://192.168.56.130/
如出现以下内容,表示 nginx 运行正常:
附录一:配置 nginx 环境变量
root 用户编辑系统环境变量文件:
[root@lab1 sbin]# vim /etc/profile
在文件末尾添加如下信息,并保存退出:
  ##### nginx #####


  export NGINX_HOME=/usr/local/nginx


  export PATH=$NGINX_HOME/sbin:$PATH
注:
(1) /usr/local/nginx 与安装的 nginx 所在目录保存一致,可以使用 whereis nginx 查看 nginx 的安装目录
root 用户执行如下命令,使环境变量生效:
[root@lab1 sbin]# source /etc/profile
验证:
root 用户执行如下命令,查看 PATH 中是否有 nginx 的目录
  [root@lab1 sbin]# echo $PATH


  /usr/local/nginx/sbin:/opt/hbase/hbase-1.3.1/bin:/opt/hadoop/hadoop-2.7.4/bin:/opt/storm/apache-storm-1.0.4/bin:/opt/zookeeper/zookeeper-3.4.10/bin:/usr/java/jdk1.8.0_20/bin:/opt/hbase/hbase-1.3.1/bin:/opt/hadoop/hadoop-2.7.4/bin:/opt/storm/apache-storm-1.0.4/bin:/opt/zookeeper/zookeeper-3.4.10/bin:/usr/java/jdk1.8.0_20/bin:/usr/local/sbin:/usr/local/bin:/sbin:/bin:/usr/sbin:/usr/bin:/root/bin
配置环境变量以后,就可以在任何目录下直接执行 nginx 了
  nginx #启动nginx


  nginx -s stop    #停止 nginx


  nginx -s quit    #停止 nginx


  ngins -s reload    #重启 nginx
附录二、开机自启动
添加 rc.local 脚本
root 用户编辑 /etc/rc.local 脚本,并添加如下内容,保存退出:
  vi /etc/rc.local


  # nginx config


  /usr/local/nginx/sbin/nginx
示例:
注:
(1) /usr/local/nginx/sbin/nginx 该配置与你的 nginx 的安装目录相关,如果你的 nginx 安装在其他目录,那么你需要配置你自己的安装目录下的 sbin/nginx 命令。
(2) rc.local 脚本是在所有其他的初始化脚本执行完成之后才会执行。因此,配置在该脚本中的自启动服务可能有一部分延时。
以上是关于CentOS 6.x 编译安装 Nginx的主要内容,如果未能解决你的问题,请参考以下文章