android如何实现静默安装哦
Posted
tags:
篇首语:本文由小常识网(cha138.com)小编为大家整理,主要介绍了android如何实现静默安装哦相关的知识,希望对你有一定的参考价值。
原理
静默安装、卸载的原理就是利用pm install命令来安装apk,pm uninstall 来卸载apk.
智能安装是利用android系统提供的无障碍服务AccessibilityService,来模拟用户点击,从而自动安装.
private void installSlient()
String cmd = "pm install -r /mnt/sdcard/test.apk";
Process process = null;
DataOutputStream os = null;
BufferedReader successResult = null;
BufferedReader errorResult = null;
StringBuilder successMsg = null;
StringBuilder errorMsg = null;
try
//静默安装需要root权限
process = Runtime.getRuntime().exec("su");
os = new DataOutputStream(process.getOutputStream());
os.write(cmd.getBytes());
os.writeBytes("\\n");
os.writeBytes("exit\\n");
os.flush();
//执行命令
process.waitFor();
//获取返回结果
successMsg = new StringBuilder();
errorMsg = new StringBuilder();
successResult = new BufferedReader(new InputStreamReader(process.getInputStream()));
errorResult = new BufferedReader(new InputStreamReader(process.getErrorStream()));
String s;
while ((s = successResult.readLine()) != null)
successMsg.append(s);
while ((s = errorResult.readLine()) != null)
errorMsg.append(s);
catch (Exception e)
e.printStackTrace();
finally
try
if (os != null)
os.close();
if (process != null)
process.destroy();
if (successResult != null)
successResult.close();
if (errorResult != null)
errorResult.close();
catch (Exception e)
e.printStackTrace();
//显示结果
tvTest.setText("成功消息:" + successMsg.toString() + "\\n" + "错误消息: " + errorMsg.toString());
参考技术A 静默安装是指应用商店那些应用自动安装吗 参考技术B 要么root,要么给应用添加辅助功能
Android 无需root实现apk的静默安装
转载请注明出处:http://blog.csdn.net/yyh352091626/article/details/50533137
Android的静默安装似乎是一个很有趣很诱人的东西,但是,用普通做法,如果手机没有root权限的话,似乎很难实现静默安装,因为Android并不提供显示的Intent调用,一般是通过以下方式安装apk:
Intent intent = new Intent(Intent.ACTION_VIEW);
intent.setDataAndType(Uri.fromFile(file), "application/vnd.android.package-archive");
startActivity(intent);
Android系统把所有的Permission(权限)依据其潜在风险划分为四个等级,即"normal"、 "dangerous"、 "signature"、 "signatureOrSystem"。APK的安装对应的权限是 INSTALL_PACKAGES,权限等级属于后两者。所以,最终想实现APK的静默安装,必然需要一些特殊的处理,执行安装的这个进程,须为系统进程。
那么,我们就来看看Android自身是如何实现安装APK的。安装的命令是pm install... 我们定位到系统源码的/frameworks/base/cmds/pm/src/com/android/commands/pm/Pm.java这个文件,他实现了pm命令,我们看runInstall方法,这就是APK的安装过程。
    private void runInstall() {
        int installFlags = 0;
        int userId = UserHandle.USER_ALL;
        String installerPackageName = null;

        String opt;

        String originatingUriString = null;
        String referrer = null;
        String abi = null;

        while ((opt=nextOption()) != null) {
            if (opt.equals("-l")) {
                installFlags |= PackageManager.INSTALL_FORWARD_LOCK;
            } else if (opt.equals("-r")) {
                installFlags |= PackageManager.INSTALL_REPLACE_EXISTING;
            } else if (opt.equals("-i")) {
                installerPackageName = nextOptionData();
                if (installerPackageName == null) {
                    System.err.println("Error: no value specified for -i");
                    return;
                }
            } else if (opt.equals("-t")) {
                installFlags |= PackageManager.INSTALL_ALLOW_TEST;
            } else if (opt.equals("-s")) {
                // Override if -s option is specified.
                installFlags |= PackageManager.INSTALL_EXTERNAL;
            } else if (opt.equals("-f")) {
                // Override if -s option is specified.
                installFlags |= PackageManager.INSTALL_INTERNAL;
            } else if (opt.equals("-d")) {
                installFlags |= PackageManager.INSTALL_ALLOW_DOWNGRADE;
            } else if (opt.equals("--originating-uri")) {
                originatingUriString = nextOptionData();
                if (originatingUriString == null) {
                    System.err.println("Error: must supply argument for --originating-uri");
                    return;
                }
            } else if (opt.equals("--referrer")) {
                referrer = nextOptionData();
                if (referrer == null) {
                    System.err.println("Error: must supply argument for --referrer");
                    return;
                }
            } else if (opt.equals("--abi")) {
                abi = checkAbiArgument(nextOptionData());
            } else if (opt.equals("--user")) {
                userId = Integer.parseInt(nextOptionData());
            } else {
                System.err.println("Error: Unknown option: " + opt);
                return;
            }
        }

        if (userId == UserHandle.USER_ALL) {
            userId = UserHandle.USER_OWNER;
            installFlags |= PackageManager.INSTALL_ALL_USERS;
        }

        final Uri verificationURI;
        final Uri originatingURI;
        final Uri referrerURI;

        if (originatingUriString != null) {
            originatingURI = Uri.parse(originatingUriString);
        } else {
            originatingURI = null;
        }

        if (referrer != null) {
            referrerURI = Uri.parse(referrer);
        } else {
            referrerURI = null;
        }

        // Populate apkURI, must be present
        final String apkFilePath = nextArg();
        System.err.println("\\tpkg: " + apkFilePath);
        if (apkFilePath == null) {
            System.err.println("Error: no package specified");
            return;
        }

        // Populate verificationURI, optionally present
        final String verificationFilePath = nextArg();
        if (verificationFilePath != null) {
            System.err.println("\\tver: " + verificationFilePath);
            verificationURI = Uri.fromFile(new File(verificationFilePath));
        } else {
            verificationURI = null;
        }

        LocalPackageInstallObserver obs = new LocalPackageInstallObserver();
        try {
            VerificationParams verificationParams = new VerificationParams(verificationURI,
                    originatingURI, referrerURI, VerificationParams.NO_UID, null);

            mPm.installPackageAsUser(apkFilePath, obs.getBinder(), installFlags,
                    installerPackageName, verificationParams, abi, userId); //注意!!最终就是调用这个方法来进行安装的

            synchronized (obs) {
                while (!obs.finished) {
                    try {
                        obs.wait();
                    } catch (InterruptedException e) {
                    }
                }
                if (obs.result == PackageManager.INSTALL_SUCCEEDED) {
                    System.out.println("Success");
                } else {
                    System.err.println("Failure ["
                            + installFailureToString(obs)
                            + "]");
                }
            }
        } catch (RemoteException e) {
            System.err.println(e.toString());
            System.err.println(PM_NOT_RUNNING_ERR);
        }
    }
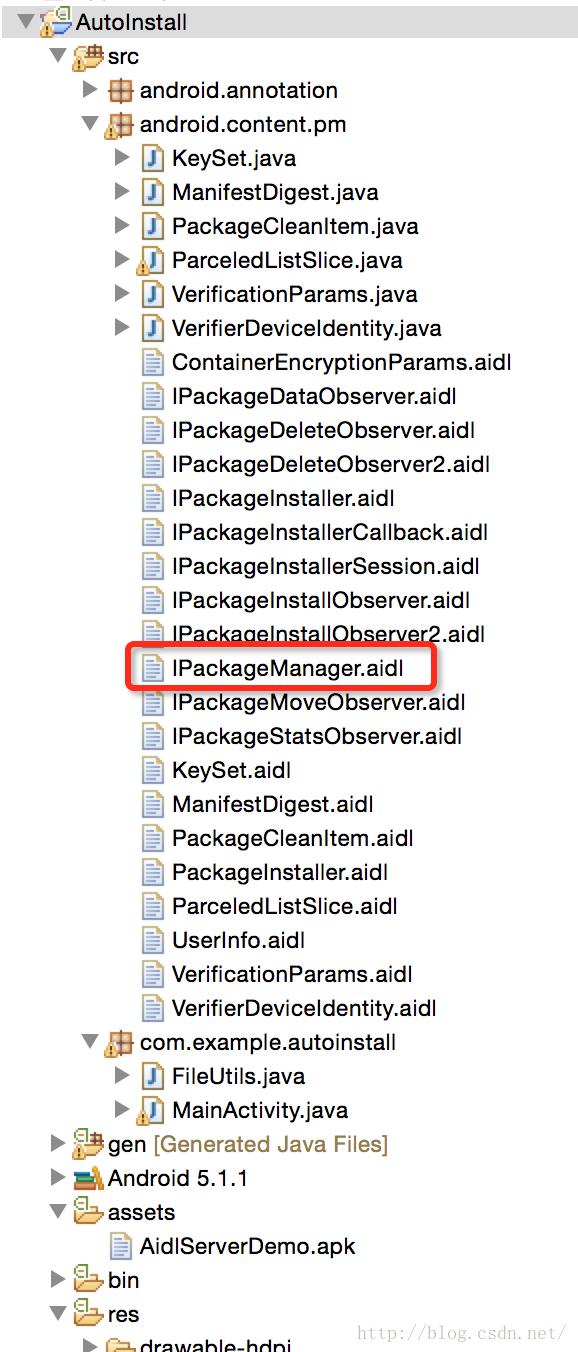
知道了这个过程之后,就大概知道怎么做了。既然系统底层把这个API屏蔽了,那就想办法去绕过这层屏蔽,来使用它。首先想到的就是使用AIDL,不知道AIDL这东西的,先问度娘去吧~~在上面的代码中,最终实现安装的那一句话,mPm.installPackageAsUser(...),mPm是个什么东西?不难发现,IPackageManager类型,那么这个类从哪里来?搜寻一下,位于/frameworks/base/core/java/android/content/pm这个包底下,拷贝到我们工程目录底下,包名不能变,只拷贝这一个文件的话,一定是不行了,会报其他的一些aidl找不到,相应地也拷贝过来。Android5.0中,aidl改动还是比较大的,所以要拷贝很多东西过来,还要进行一些改动...我也是花了挺久才改到他没报错。
最终,工程的目录如下所示~~
那么,如何来使用它呢?
1、先获取系统服务android.os.ServiceManager,这个又是隐藏的,怎么办?考验Java水平的时候到了~~没错,用反射机制,来获取ServiceManager类,以及该类里面的方法;
2、有了服务之后,我们就要去拿到IPackageManager这个对象;
3、调用IPackageManager里面的installPackage方法进行安装;
实现代码如下:
package com.example.autoinstall;

import java.io.File;
import java.io.FileOutputStream;
import java.io.IOException;
import java.io.InputStream;
import java.io.OutputStream;
import java.lang.reflect.Method;

import android.app.Activity;
import android.content.Intent;
import android.content.pm.IPackageInstallObserver2;
import android.content.pm.IPackageManager;
import android.content.pm.VerificationParams;
import android.net.Uri;
import android.os.Bundle;
import android.os.IBinder;
import android.os.RemoteException;
import android.view.View;

public class MainActivity extends Activity {

	@Override
	protected void onCreate(Bundle savedInstanceState) {
		super.onCreate(savedInstanceState);
		setContentView(R.layout.activity_main);
	}

	/**
	 * Button点击事件
	 * @param view
	 */
	public void install(View view)
	{
		String path = "";
        if (FileUtils.isSdcardReady()) {
            path = FileUtils.getSdcardPath();
        } else {
            path = FileUtils.getCachePath(this);
        }
		String fileName = path + "/AidlServerDemo.apk";
		File file = new File(fileName);

		try {
			if(!file.exists())
				copyAPK2SD(fileName);
			Uri uri = Uri.fromFile(new File(fileName));
                        // 通过Java反射机制获取android.os.ServiceManager
			Class<?> clazz = Class.forName("android.os.ServiceManager");
			Method method = clazz.getMethod("getService", String.class);
			IBinder iBinder = (IBinder) method.invoke(null, "package");
			IPackageManager ipm = IPackageManager.Stub.asInterface(iBinder);
			@SuppressWarnings("deprecation")
			VerificationParams verificationParams = new VerificationParams(null, null, null, VerificationParams.NO_UID, null);
                        // 执行安装(方法及详细参数,可能因不同系统而异)
			ipm.installPackage(fileName, new PackageInstallObserver(), 2, null, verificationParams, "");
		} catch (Exception e) {
			// TODO Auto-generated catch block
			e.printStackTrace();
		}

	}

	// 用于显示结果
	class PackageInstallObserver extends IPackageInstallObserver2.Stub {

		@Override
		public void onUserActionRequired(Intent intent) throws RemoteException {
			// TODO Auto-generated method stub

		}

		@Override
		public void onPackageInstalled(String basePackageName, int returnCode, String msg, Bundle extras) throws RemoteException {
			//returnCode<span style="font-family: Arial, Helvetica, sans-serif;">为1,就是安装成功</span>


		}
	};

	/**
	 * 拷贝assets文件夹的APK插件到SD
	 *
	 * @param strOutFileName
	 * @throws IOException
	 */
	private void copyAPK2SD(String strOutFileName) throws IOException {
		FileUtils.createDipPath(strOutFileName);
		InputStream myInput = this.getAssets().open("AidlServerDemo.apk");
		OutputStream myOutput = new FileOutputStream(strOutFileName);
		byte[] buffer = new byte[1024];
		int length = myInput.read(buffer);
		while (length > 0) {
			myOutput.write(buffer, 0, length);
			length = myInput.read(buffer);
		}
		myOutput.flush();
		myInput.close();
		myOutput.close();
	}
}
每个版本的系统源码里面的aidl可能会不一样,所以具体调用的方法和参数,还得根据实际情况而定,需要去仔细阅读Pm.java这个文件的源码。
在其他版本可能只需要拷贝这4个文件:PackageManager.java、 IPackageDeleteObserver.aidl 、IPackagerInstallObserver.aidl、 IPackageMoveObserver.aidl
然后,还需在配置清单文件里面添加INSTALL_PACKAGE权限
<uses-permission android:name="android.permission.INSTALL_PACKAGES"/>然后把该应用的uid设置为系统级别的,在manifest标签下添加以下属性
android:sharedUserId="android.uid.system"仅仅这样的话,还是没法实现静默安装,因为系统并不认为你这个app是系统级别的应用,所以,还应该对该应用的APK进行系统签名(注意:不是那个静默安装的APK,是这个实现静默安装程序的APK)。签名过程如下:
总共需要三个文件:
1、SignApk.jar %系统源码%/out/host/linux-x86/framework/signapk.jar
2、platform.x509.pem %系统源码%/build/target/product/security/platform.x509.pem
3、platform.pk8 %系统源码%/build/target/product/security/platform.pk8
打开终端,执行命令 java -jar SignApk.jar platform.x509.pem platform.pk8 未签名APK 签名后APK,例如
java -jar SignApk.jar platform.x509.pem platform.pk8 AutoInstall.apk AutoInstall_new.apk之后,把签名过后的APK安装到手机上,打开,点击静默安装,在去程序页看看,发现安装成功~~


测试的时候发现一个问题,就是这样的方法生成的APK只有在Android原生系统或者是自己编译的系统中才可以用,因为这样的系统才可以拿到platform.pk8 和platform.x509.pem这两个文件。比如在华为或小米的系统上,就无法安装了。用原始的Android中的key 来签名,程序在模拟器上运行OK(可能会出现重启的情况),不过放到G3手机上安装直接提示"Package ... has no signatures that match those in shared user android.uid.system",第三方Rom这样做也是处于保护系统安全的角度来考虑。
本文主要是提供了一种实现静默安装的思路,但是具体怎么做到兼容各个系统,举一反三,还需要各位看官去阅读Android系统源码。
另外,由于被墙的缘故,很多人都无法下载系统源码,这里再顺便附上Android5.0系统源码的云盘地址:链接: http://pan.baidu.com/s/1dElkPlZ 密码: 4pue
最后,附上Demo的下载地址:Android 无需root实现APK静默安装 源码