git本地仓库连接gitlab配置密钥以及实战应用
Posted 不将就就
tags:
篇首语:本文由小常识网(cha138.com)小编为大家整理,主要介绍了git本地仓库连接gitlab配置密钥以及实战应用相关的知识,希望对你有一定的参考价值。
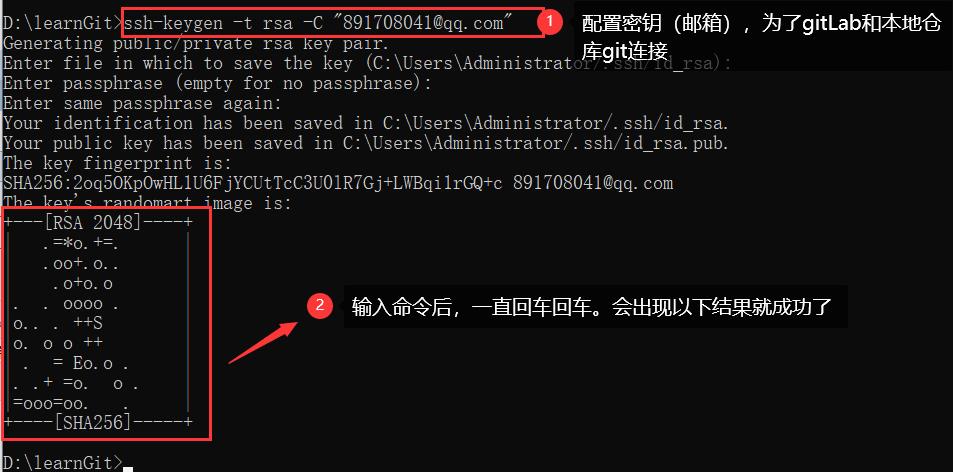
一、配置密钥(为了让gitLab和git的本地仓库建立连接)
1、先生成密钥。输入命令:ssh-keygen -t rsa -C "自己的QQ邮箱"。
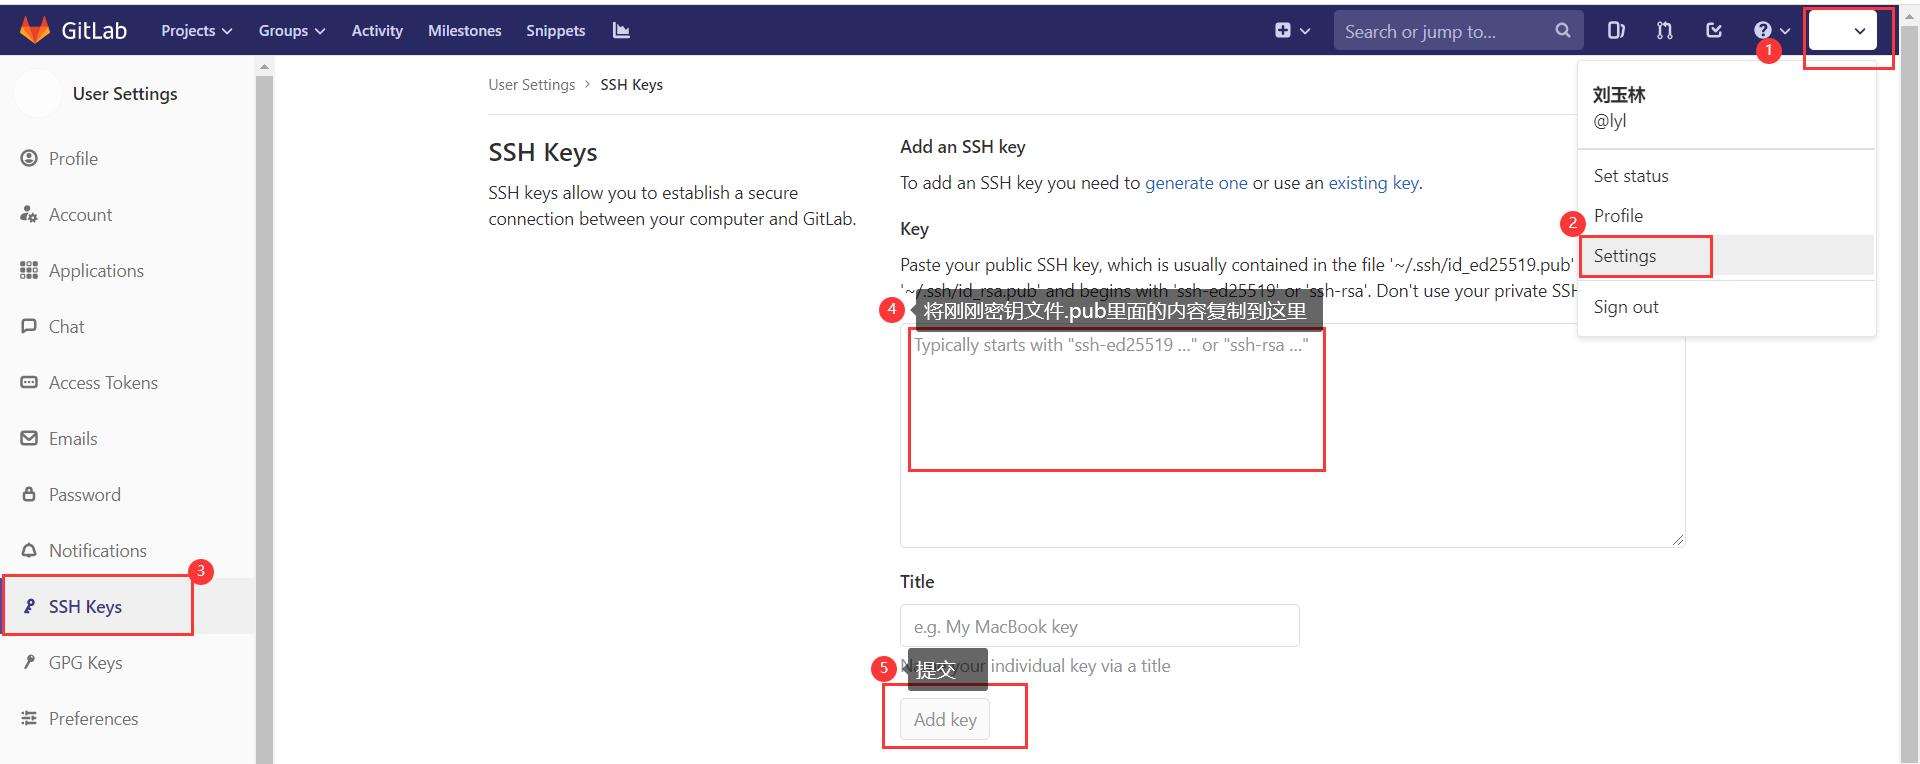
2、接下里是将生成的密钥复制到gitLab里面。使其连接成功。

二、共享别人的文件/代码
1、先克隆别人(wuya)的仓库。如果获取git clone后面的信息(别人给你发的),下面有具体的笔记;

这个时候我们能看见我们的这个路径D:\\learnGit下面多出了克隆的仓库
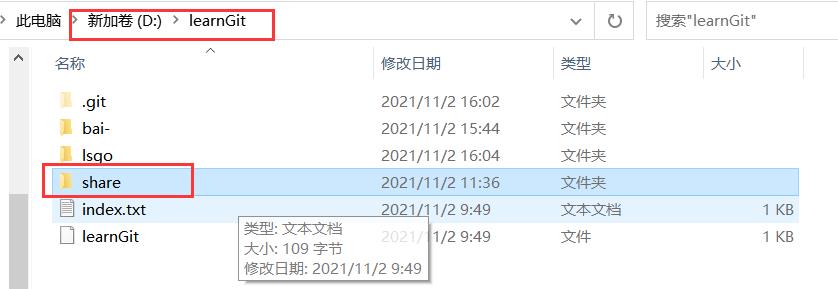
我们如果需要在别人(wuya)的仓库下操作时,需要先进入它的仓库里面,查看share下面的文件,

如果别人(wuya)有更新,就需要git pull更新一下。
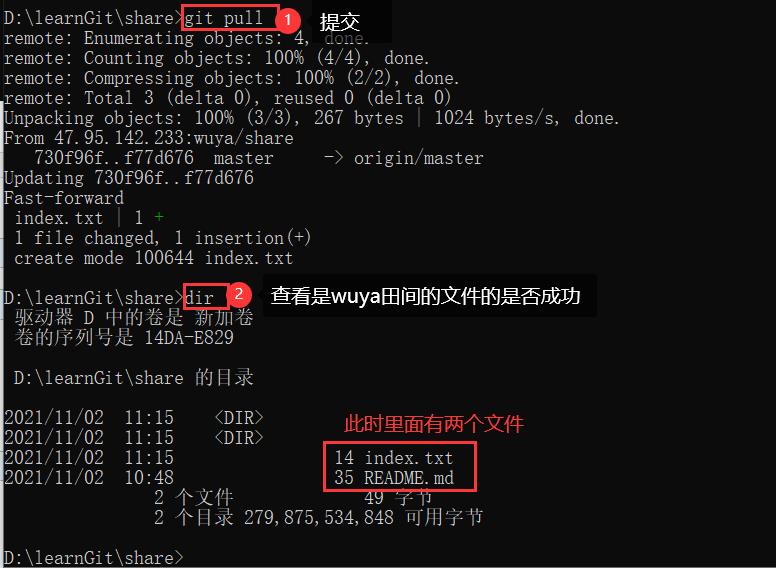
当我们需要在别人(wuya)的仓库内添加东西时,我们需要先提前输入命令:git pull 更新一下。
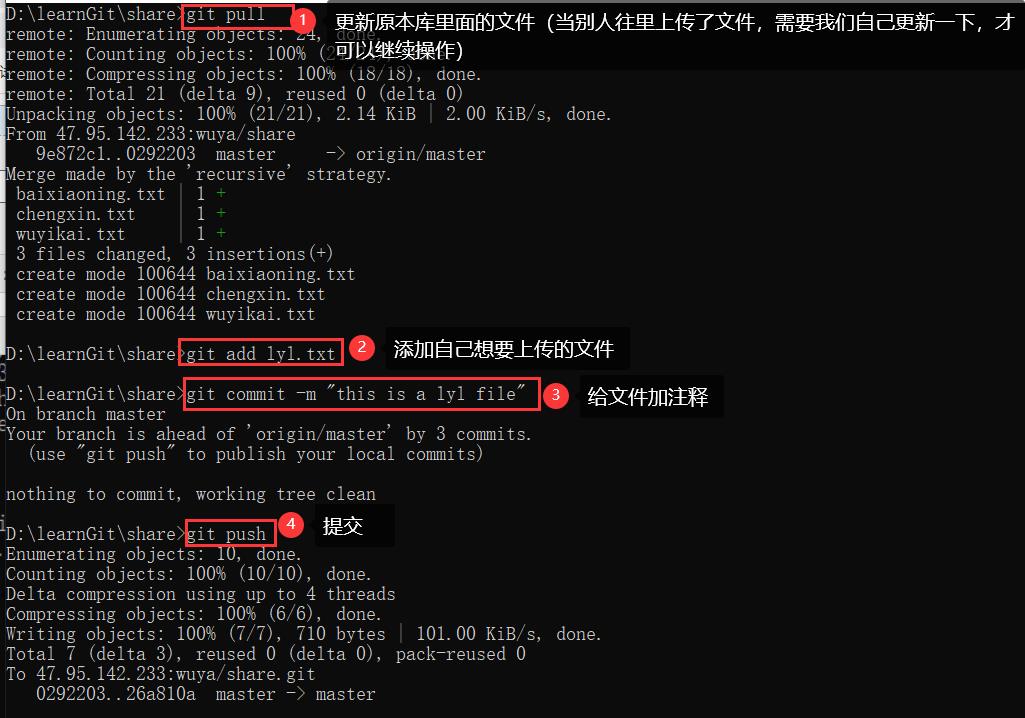
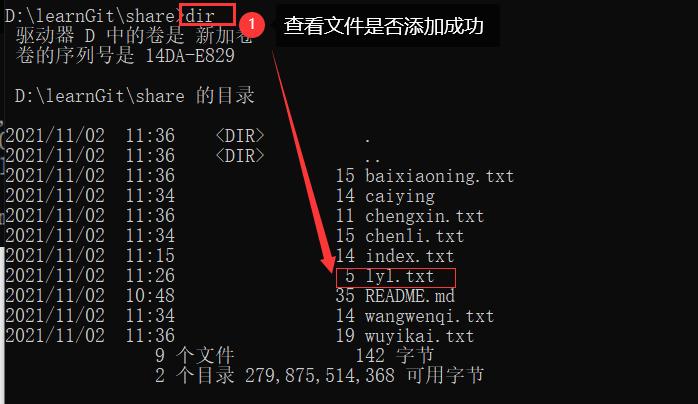
最后dir查看文件是否添加成功。
三、自己创建仓库让别人共享
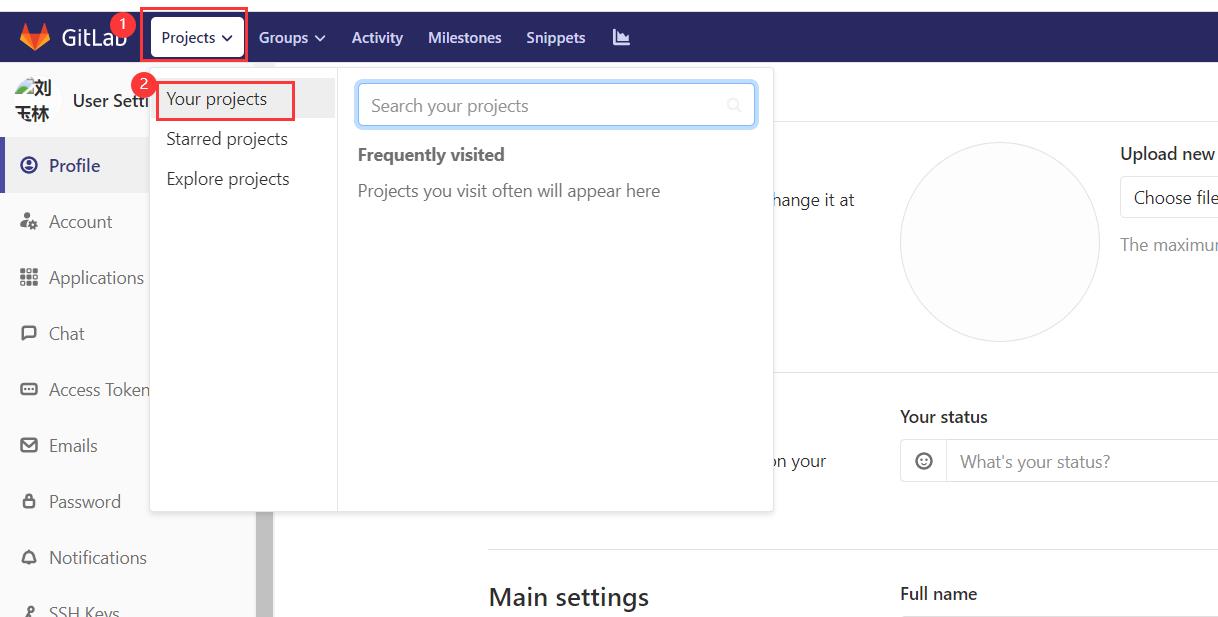
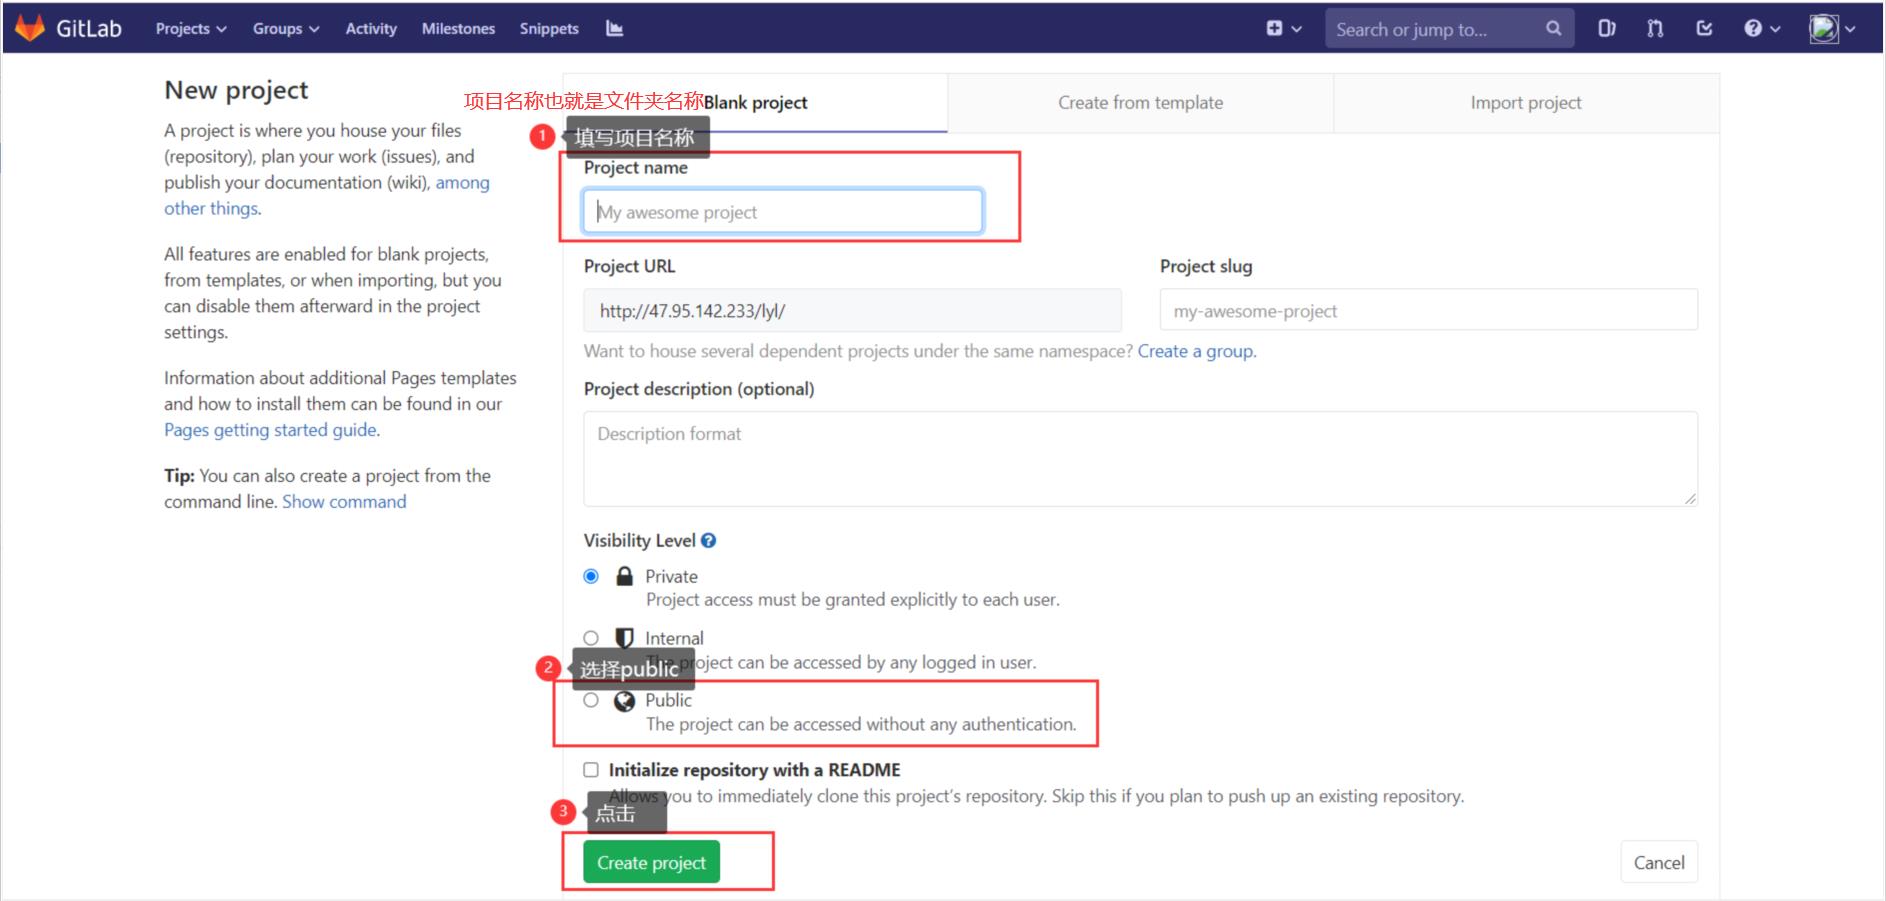
1、在首页点击projects——>your projects,等页面跳转后,再点击New project,填写项目名称等等内容,然后create project

点击create project后会跳转到这个页面,继续下面的操作。
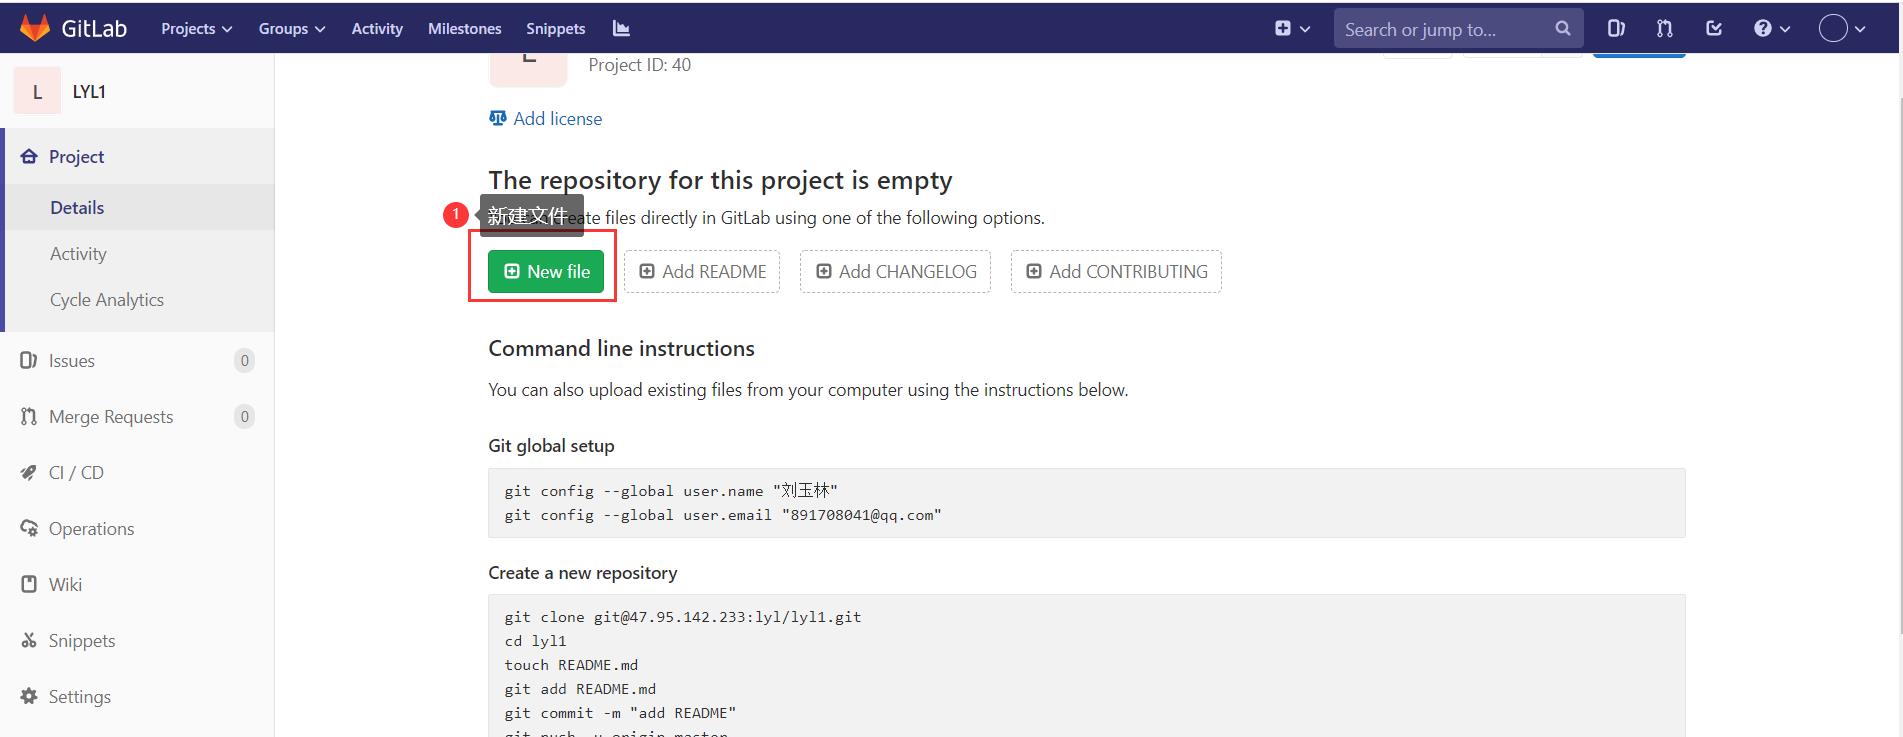
点击new file后会跳转到下面的页面。提交后点击旁边的setting——>member
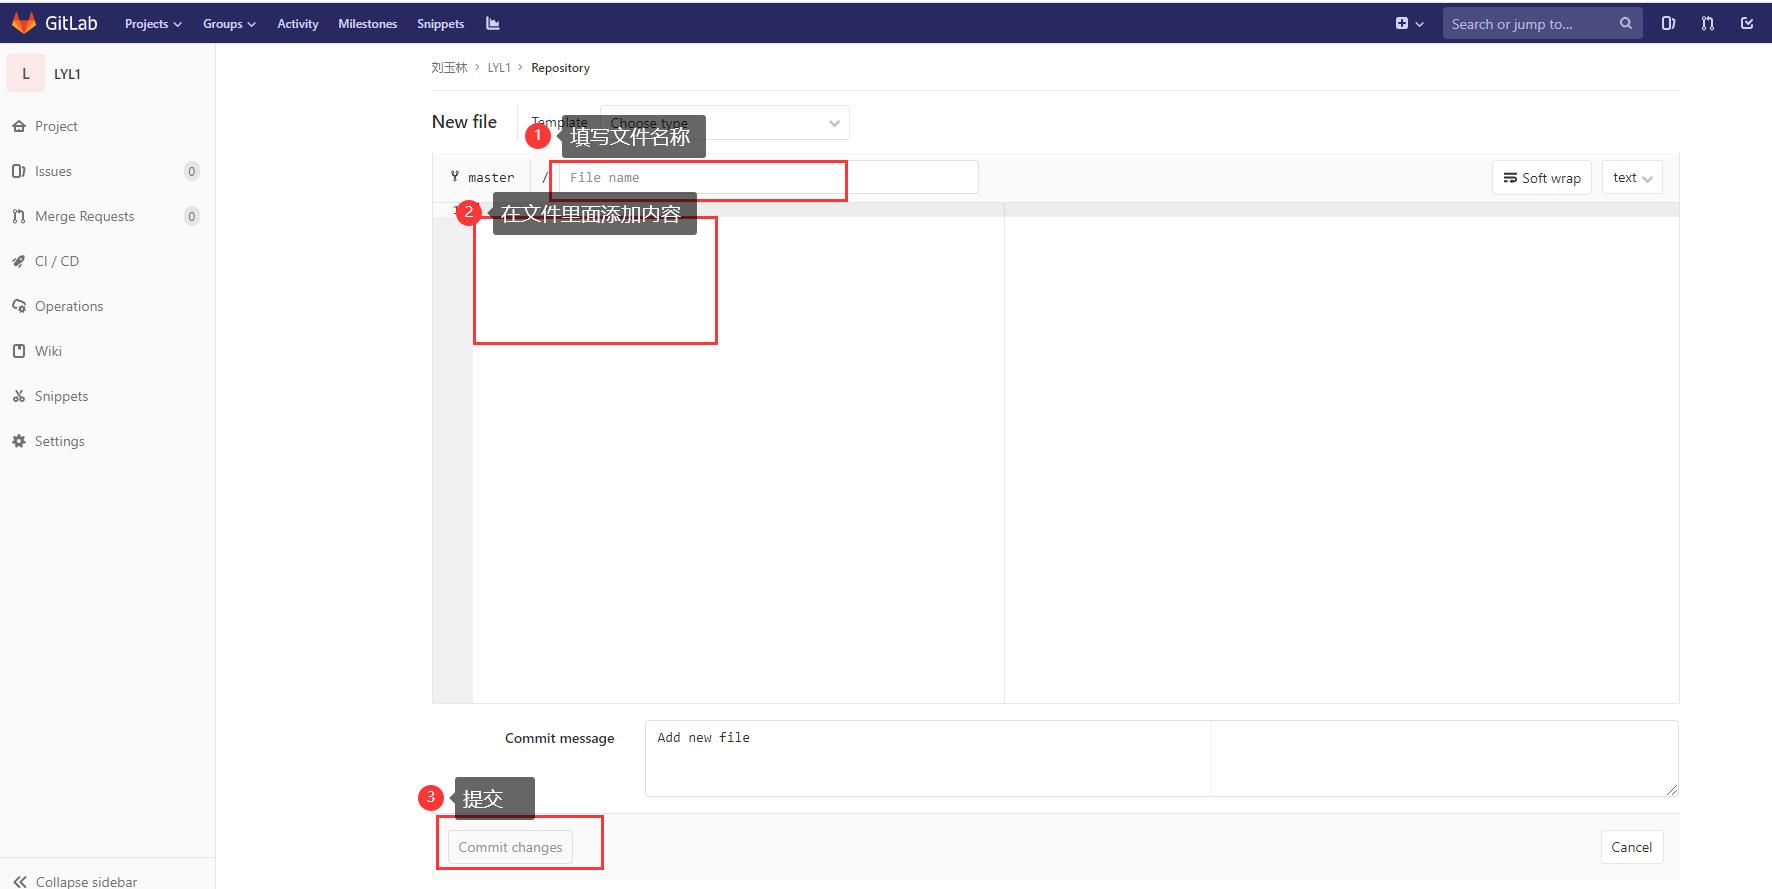
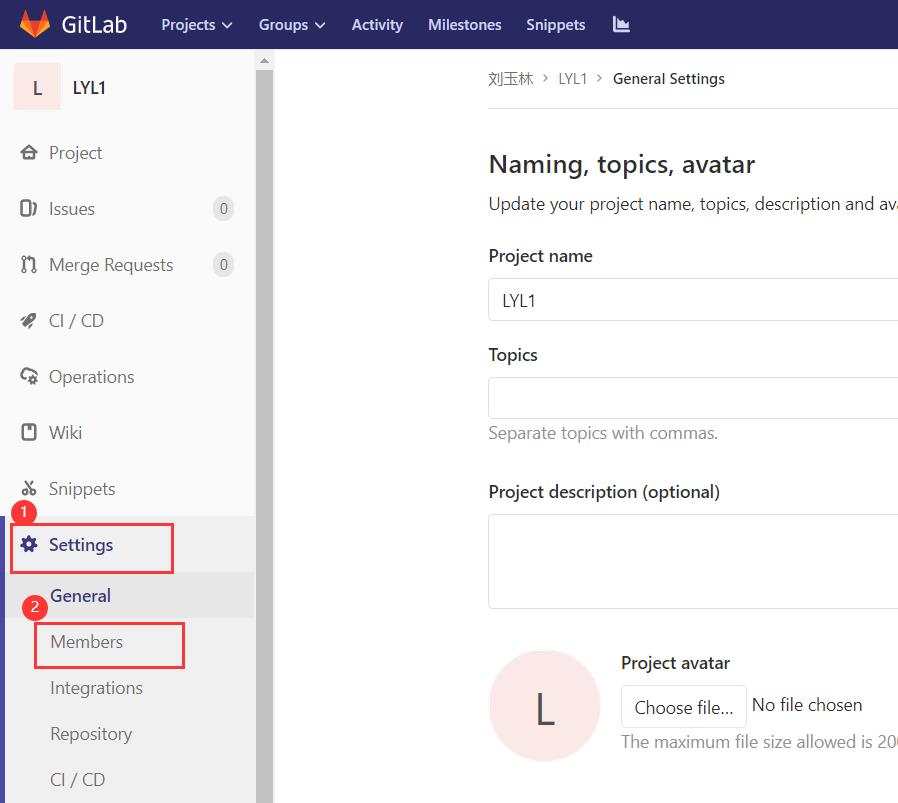
页面跳转后。填写下面的内容
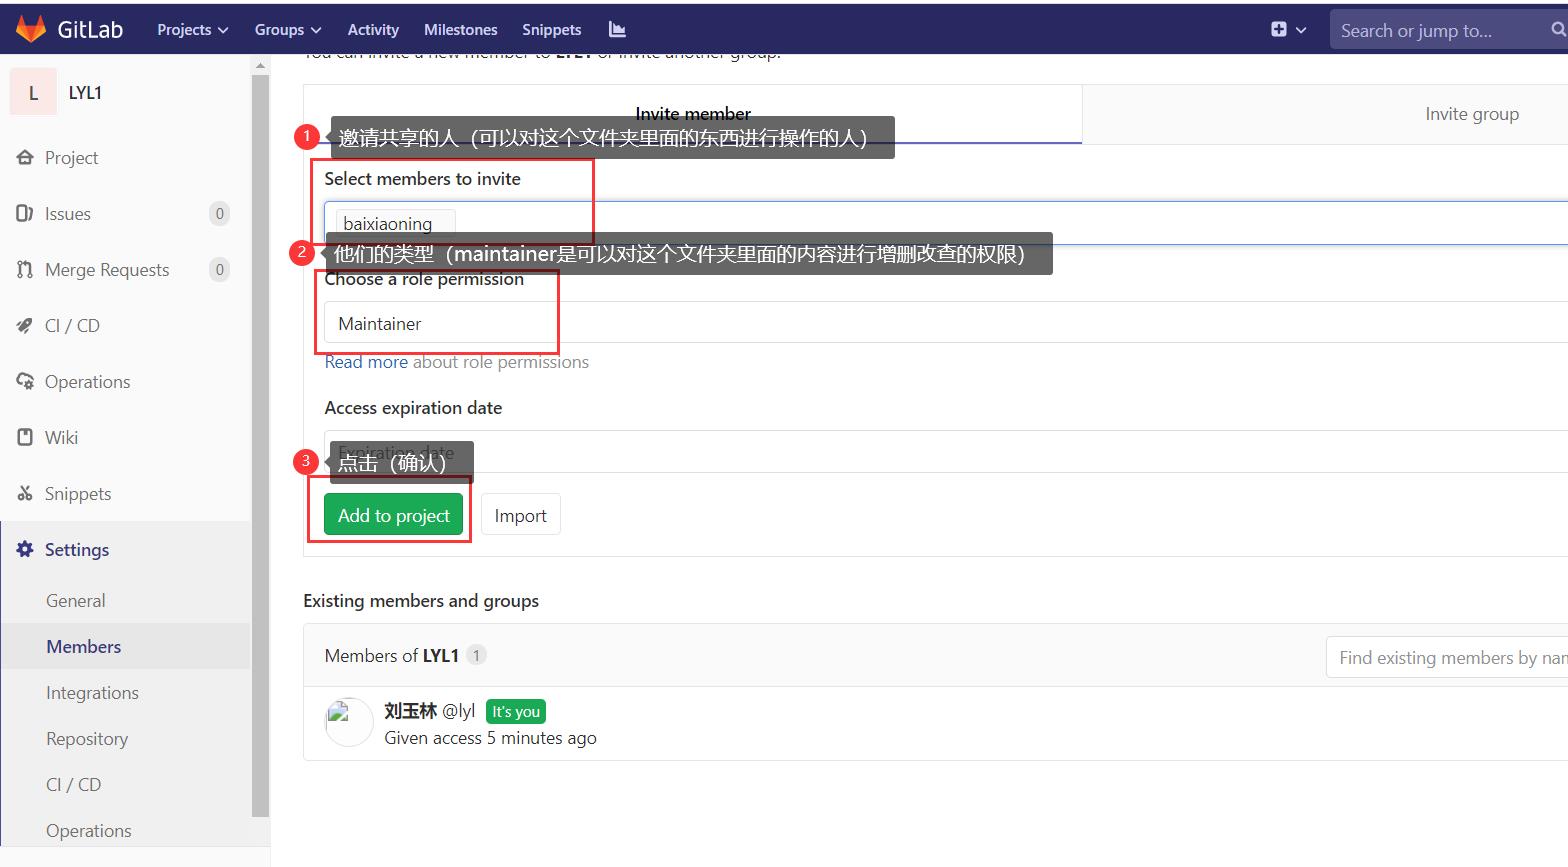
最后把ssh复制给别人,让他在cmd中任意的盘路径下克隆你的仓库,就可以对你仓库里面的文件进行操作了。

Linux上的gitlab日常操作
Linux上的gitlab日常操作
一、本地创建系统用户
1.创建zhangsan用户
[root@k8s gitlab]# useradd zhangsan
[root@k8s gitlab]# passwd zhangsan
Changing password for user zhangsan.
New password:
BAD PASSWORD: The password fails the dictionary check - it is too simplistic/systematic
Retype new password:
passwd: all authentication tokens updated successfully.
[root@k8s gitlab]# su - zhangsan
2.创建数据存放目录
[zhangsan@k8s ~]$ mkdir -p ~/zhangsan/gitlab
[zhangsan@k8s ~]$ cd zhangsan/gitlab/
[zhangsan@k8s gitlab]$
二、git用户信息配置
1.git信息配置
1.配置该git的使用者
 git config --global user.name "zhangsan"

2.配置git使用者的邮箱
git config --global user.email "zhangsan@qq.com"

3.使文本高亮
git config --global color.ui true
2.查看git信息状态
[zhangsan@k8s gitlab]$ cat ~/.gitconfig
[user]
	name = zhangsan
	email = zhangsan@qq.com
[color]
	ui = true
三、下载代码版本库
1.进行证书忽略
git config --global http.sslVerify false
2.下载版本库
[zhangsan@k8s gitlab]$ git clone https://192.168.1.8:8443/it-group01/it-items.git
Cloning into 'it-items'...
Username for 'https://192.168.1.8:8443': zhangsan
Password for 'https://zhangsan@192.168.1.8:8443':
warning: You appear to have cloned an empty repository.
3.进行文件的版本提交系列操作
[zhangsan@k8s gitlab]$ cd it-items/
[zhangsan@k8s it-items]$ git add README.md
fatal: pathspec 'README.md' did not match any files
[zhangsan@k8s it-items]$ touch README.md
[zhangsan@k8s it-items]$ git add README.md
[zhangsan@k8s it-items]$ git commit -m "1.0-zhangsan carte a file for README.md"
[master (root-commit) 9dcfd68] 1.0-zhangsan carte a file for README.md
 1 file changed, 0 insertions(+), 0 deletions(-)
 create mode 100644 README.md
[zhangsan@k8s it-items]$ git log --oneline
9dcfd68 1.0-zhangsan create  a file for README.md
四、本地客户端ssh连接gitlab仓库免密
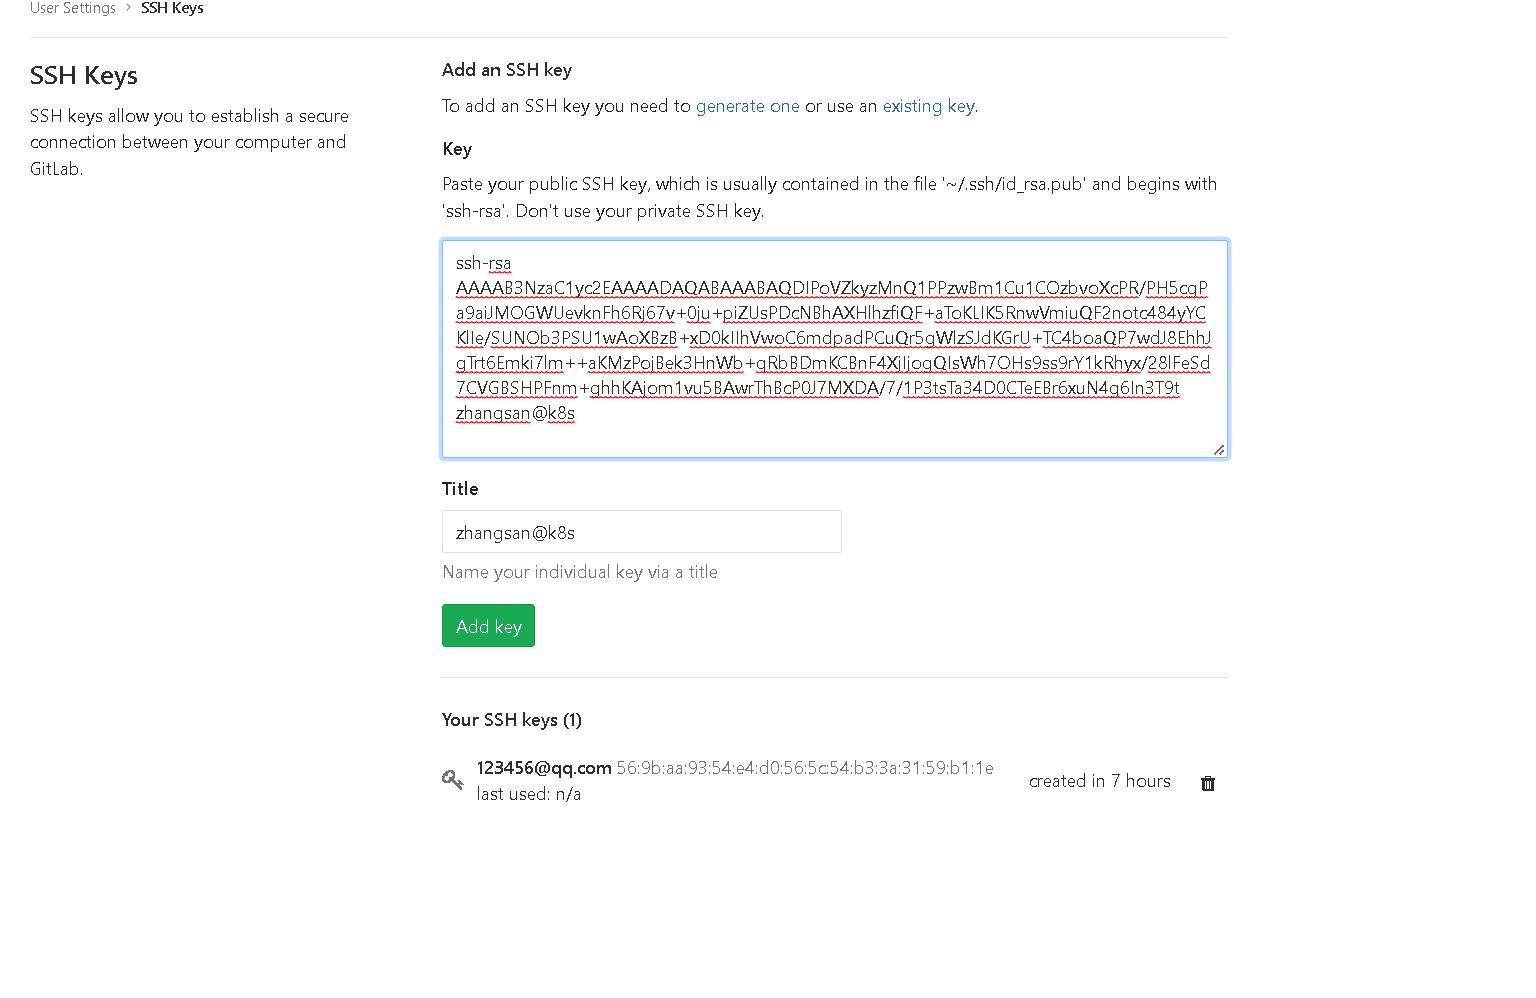
1.本地电脑生成密钥
ssh-key
2.查看公钥信息
ssh-rsa AAAAB3NzaC1yc2EAAAADAQABAAABAQDIPoVZkyzMnQ1PPzwBm1Cu1COzbvoXcPR/PH5cgPa9aiJMOGWUevknFh6Rj67v+0ju+piZUsPDcNBhAXHlhzfiQF+aToKLIK5RnwVmiuQF2notc484yYCKlIe/SUNOb3PSU1wAoXBzB+xD0kIIhVwoC6mdpadPCuQr5gWlzSJdKGrU+TC4boaQP7wdJ8EhhJgTrt6Emki7lm++aKMzPojBek3HnWb+qRbBDmKCBnF4XjIjogQIsWh7OHs9ss9rY1kRhyx/28lFeSd7CVGBSHPFnm+ghhKAjom1vu5BAwrThBcP0J7MXDA/7/1P3tsTa34D0CTeEBr6xuN4g6In3T9t zhangsan@k8s
3.将公钥拷贝到gitlab
五、本地仓库文件同步到远程gitlab仓库
1.切换origin
git remote rename origin old-orign
2.连接到远程仓库
git remote add origin https://192.168.1.8:8443/it-group01/it-items.git
3.上传文件
git push -u origin master
4.查看远程版本仓库信息
git remote -v
5.删除远程仓库信息
git remote remove old-orign
git remote remove origin
以上是关于git本地仓库连接gitlab配置密钥以及实战应用的主要内容,如果未能解决你的问题,请参考以下文章