WPF实现聚光灯效果
Posted 驚鏵
tags:
篇首语:本文由小常识网(cha138.com)小编为大家整理,主要介绍了WPF实现聚光灯效果相关的知识,希望对你有一定的参考价值。
WPF开发者QQ群: 340500857 | 微信群 -> 进入公众号主页 加入组织
前言
效果仿照 CSS聚光灯效果
实现思路:
1. 设置底部Canvas背景色 #222222 。
2. 准备两个 TextBlock 控件在同一位置。
3. 设置底部 TextBlock 字体颜色Foreground="#323232"。
4. 设置上层 TextBlock 字体颜色为渐变色。
5. 设置上层 TextBlock.Clip 针对 EllipseGeometry 做 TranslateTransform 的X轴移动动画。
6. DoubleAnimation的To值为上层或者下层控件的ActualWidth获取此元素的呈现宽度。
7. 故事板初始化 Storyboard RepeatBehavior =RepeatBehavior.Forever,AutoReverse = true。
效果预览(更多效果请下载源码体验)

一、SpotLight.cs 代码如下
using System;
using System.Collections.Generic;
using System.Linq;
using System.Text;
using System.Windows;
using System.Windows.Controls;
using System.Windows.Media;
using System.Windows.Media.Animation;

namespace WPFDevelopers.Controls
{
    [TemplatePart(Name = TextBlockBottomTemplateName, Type = typeof(TextBlock))]
    [TemplatePart(Name = TextBlockTopTemplateName, Type = typeof(TextBlock))]
    [TemplatePart(Name = EllipseGeometryTemplateName, Type = typeof(EllipseGeometry))]
    public class SpotLight : Control
    {
        private const string TextBlockBottomTemplateName = "PART_TextBlockBottom";
        private const string TextBlockTopTemplateName = "PART_TextBlockTop";
        private const string EllipseGeometryTemplateName = "PART_EllipseGeometry";
        private TextBlock _textBlockBottom, _textBlockTop;
        private EllipseGeometry _ellipseGeometry;
        public string Text
        {
            get { return (string)GetValue(TextProperty); }
            set { SetValue(TextProperty, value); }
        }

        public static readonly DependencyProperty TextProperty =
            DependencyProperty.Register("Text", typeof(string), typeof(SpotLight), new PropertyMetadata("WPFDevelopers"));
        static SpotLight()
        {
            DefaultStyleKeyProperty.OverrideMetadata(typeof(SpotLight), new FrameworkPropertyMetadata(typeof(SpotLight)));
        }
        public SpotLight()
        {
            this.Loaded += SpotLight_Loaded;
        }

        private void SpotLight_Loaded(object sender, RoutedEventArgs e)
        {
            Canvas.SetLeft(_textBlockBottom, ActualWidth / 3);
            Canvas.SetTop(_textBlockBottom, ActualHeight / 3);
            Canvas.SetLeft(_textBlockTop, ActualWidth / 3);
            Canvas.SetTop(_textBlockTop, ActualHeight / 3);
        }

        public override void OnApplyTemplate()
        {
            base.OnApplyTemplate();
            _textBlockBottom = GetTemplateChild(TextBlockBottomTemplateName) as TextBlock;
            _textBlockTop = GetTemplateChild(TextBlockTopTemplateName) as TextBlock;

            _ellipseGeometry = GetTemplateChild(EllipseGeometryTemplateName) as EllipseGeometry;
            var center = new Point(FontSize/2, FontSize/2);
            _ellipseGeometry.RadiusX = FontSize;
            _ellipseGeometry.RadiusY = FontSize;
            _ellipseGeometry.Center = center;
            if (_textBlockBottom != null && _textBlockTop != null && _ellipseGeometry != null)
                _textBlockTop.Loaded += _textBlockTop_Loaded;
        }


        private void _textBlockTop_Loaded(object sender, RoutedEventArgs e)
        {
            var doubleAnimation = new DoubleAnimation
            {
                To = _textBlockTop.ActualWidth,
                Duration = TimeSpan.FromSeconds(3)
            };

            Storyboard.SetTarget(doubleAnimation, _textBlockTop);
            Storyboard.SetTargetProperty(doubleAnimation, new PropertyPath("(UIElement.Clip).(EllipseGeometry.Transform).(TranslateTransform.X)"));
            var storyboard = new Storyboard
            {
                RepeatBehavior = RepeatBehavior.Forever,
                AutoReverse = true
            };
            storyboard.Children.Add(doubleAnimation);
            storyboard.Completed += (s, q) =>
            {

            };
            storyboard.Begin();
        }
    }
}
二、SpotLight.xaml 代码如下
<ResourceDictionary xmlns="http://schemas.microsoft.com/winfx/2006/xaml/presentation"
                    xmlns:x="http://schemas.microsoft.com/winfx/2006/xaml"
                    xmlns:controls="clr-namespace:WPFDevelopers.Controls">

    <ResourceDictionary.MergedDictionaries>
        <ResourceDictionary Source="Basic/ControlBasic.xaml"/>
    </ResourceDictionary.MergedDictionaries>

    <Style TargetType="{x:Type controls:SpotLight}" BasedOn="{StaticResource ControlBasicStyle}">
        <Setter Property="Background" Value="#222222"/>
        <Setter Property="FontSize" Value="60"/>
        <Setter Property="Template">
            <Setter.Value>
                <ControlTemplate TargetType="{x:Type controls:SpotLight}">
                    <Canvas x:Name="PART_Canvas" Background="{TemplateBinding Background}">
                        <TextBlock x:Name="PART_TextBlockBottom" Text="{TemplateBinding Text}"
                                   FontSize="{TemplateBinding FontSize}" FontFamily="Arial Black"
                                   FontWeight="Bold" Foreground="#323232"/>
                        <TextBlock x:Name="PART_TextBlockTop" Text="{TemplateBinding Text}"
                                   FontSize="{TemplateBinding FontSize}" FontFamily="Arial Black"
                                   FontWeight="Bold">
                            <TextBlock.Foreground>
                                <LinearGradientBrush EndPoint="1,1" MappingMode="RelativeToBoundingBox" StartPoint="0,0">
                                    <GradientStop Color="#FF9C1031" Offset="0.1"/>
                                    <GradientStop Color="#FFBE0E20" Offset="0.2"/>
                                    <GradientStop Color="#FF9C12AC" Offset="0.7"/>
                                    <GradientStop Color="#FF0A8DC3" Offset="0.8"/>
                                    <GradientStop Color="#FF1AEBCC" Offset="1"/>
                                </LinearGradientBrush>
                            </TextBlock.Foreground>
                            <TextBlock.Clip>
                                <EllipseGeometry x:Name="PART_EllipseGeometry">
                                    <EllipseGeometry.Transform>
                                        <TranslateTransform/>
                                    </EllipseGeometry.Transform>
                                </EllipseGeometry>
                            </TextBlock.Clip>
                        </TextBlock>
                    </Canvas>
                </ControlTemplate>
            </Setter.Value>
        </Setter>
</Style>

</ResourceDictionary>
三、SpotLightExample.Xaml 代码如下
<UserControl x:Class="WPFDevelopers.Samples.ExampleViews.SpotLightExample"
             xmlns="http://schemas.microsoft.com/winfx/2006/xaml/presentation"
             xmlns:x="http://schemas.microsoft.com/winfx/2006/xaml"
             xmlns:mc="http://schemas.openxmlformats.org/markup-compatibility/2006"
             xmlns:d="http://schemas.microsoft.com/expression/blend/2008"
             xmlns:local="clr-namespace:WPFDevelopers.Samples.ExampleViews"
             xmlns:wpfdev="https://github.com/yanjinhuagood/WPFDevelopers"
             mc:Ignorable="d"
             d:DesignHeight="450" d:DesignWidth="800">
    <UniformGrid Rows="2">
        <wpfdev:SpotLight FontSize="50" Text="YanJinHua"/>
        <wpfdev:SpotLight/>
    </UniformGrid>
</UserControl>
更多教程欢迎关注微信公众号:
WPF开发者QQ群: 340500857
blogs: https://www.cnblogs.com/yanjinhua/p/14345136.html
源码Github:https://github.com/yanjinhuagood/WPFDevelopers.git
gitee:https://gitee.com/yanjinhua/WPFDevelopers.git
WPF聚光灯光源学习
聚光灯,Spotlight;其照亮方式与 PointLight 类似,但是它既有位置又有方向; 它们在 InnerConeAngle 和 OuterConeAngle 属性所设置的锥形区域(以度为单位指定)中投射光;
此光源在一个圆锥形区域内照亮物体,圆锥的角度由InnerConeAngle 和 OuterConeAngle指定;
来看一下,此段代码来自msdn的参考;运行如下;
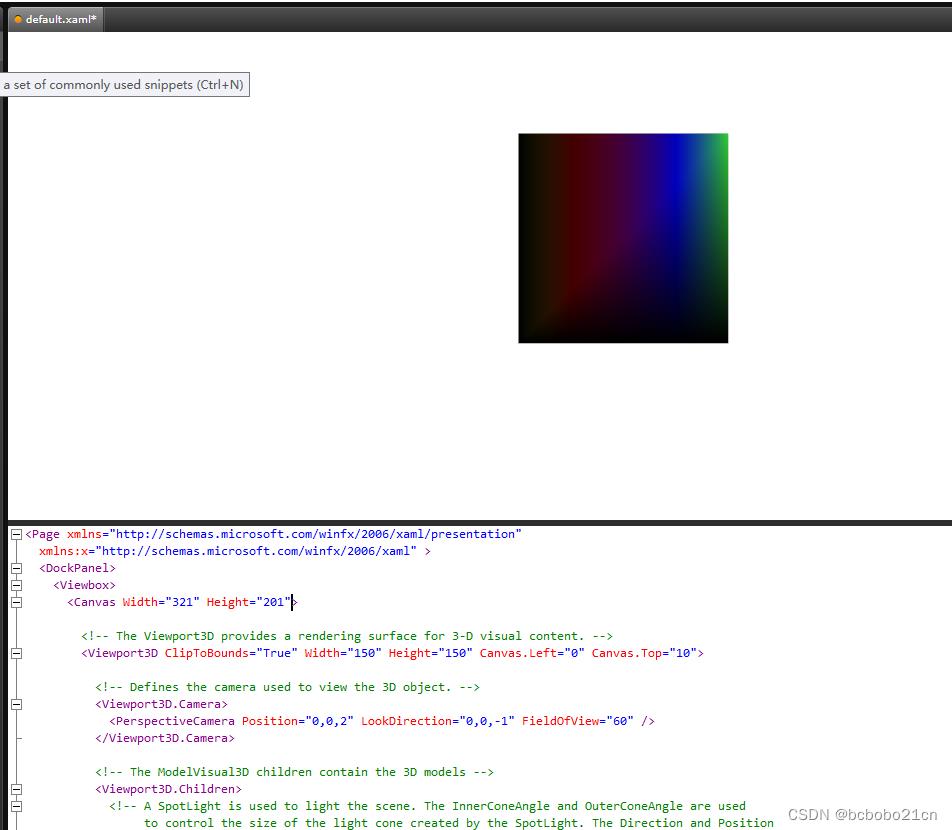
它是把3d的根元素Viewport3D放到了画布Canvas中,又放到布局面板DockPanel中,又设置了Viewport3D在画布中的左边距、顶边距属性,这样的话图形没显示在正中,靠左了一些;
加个背景看一下Canvas的区域如下;
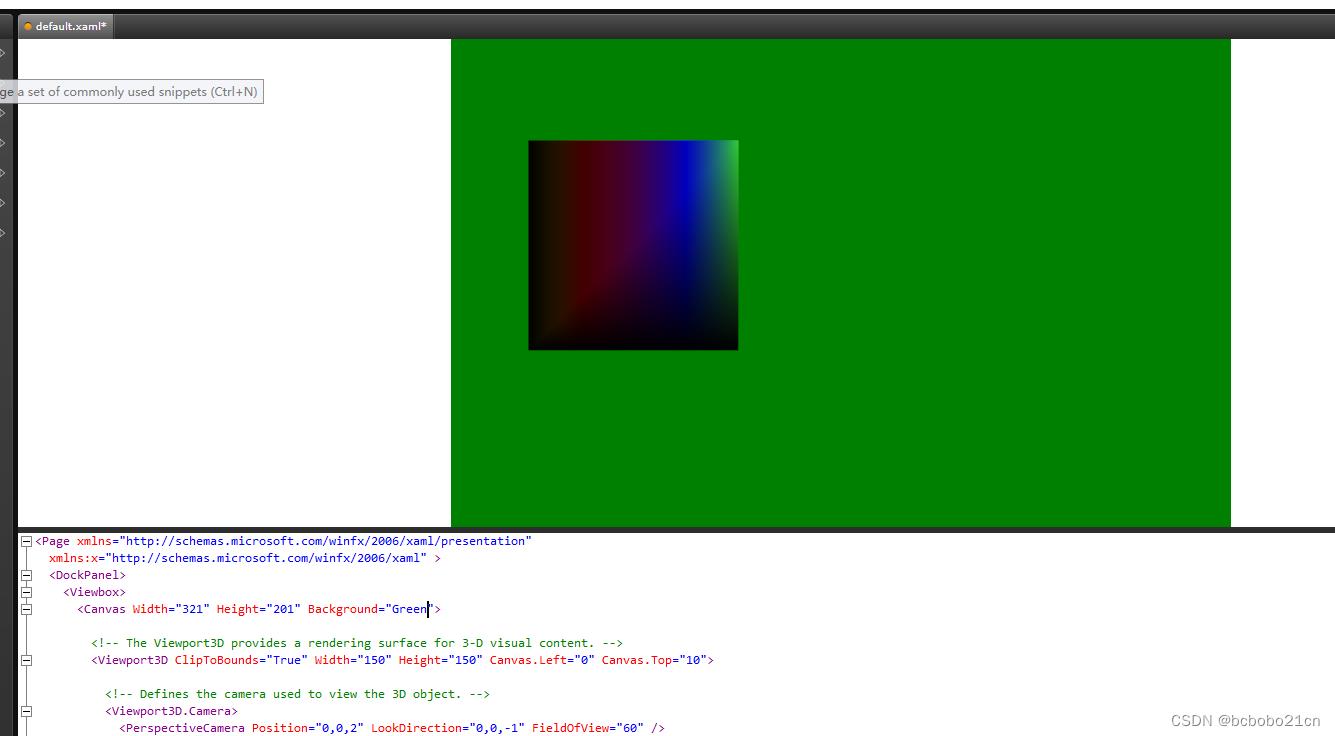
从代码看物体具有纹理坐标TextureCoordinates,物体的材质是一个线性渐变画刷LinearGradientBrush;
把光源改为一个纯白色的点光源看一下,物体本来的颜色如下;
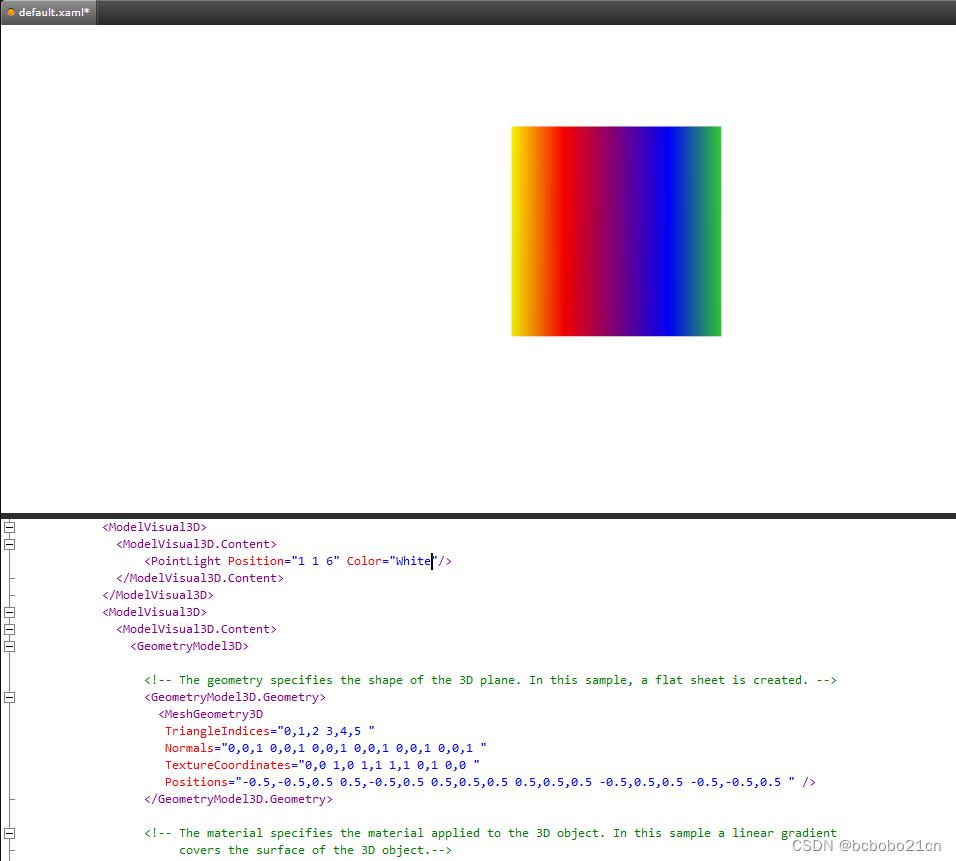
如果去掉纹理坐标,应该是只看到了渐变画刷的终止颜色;

然后再来看聚光灯;
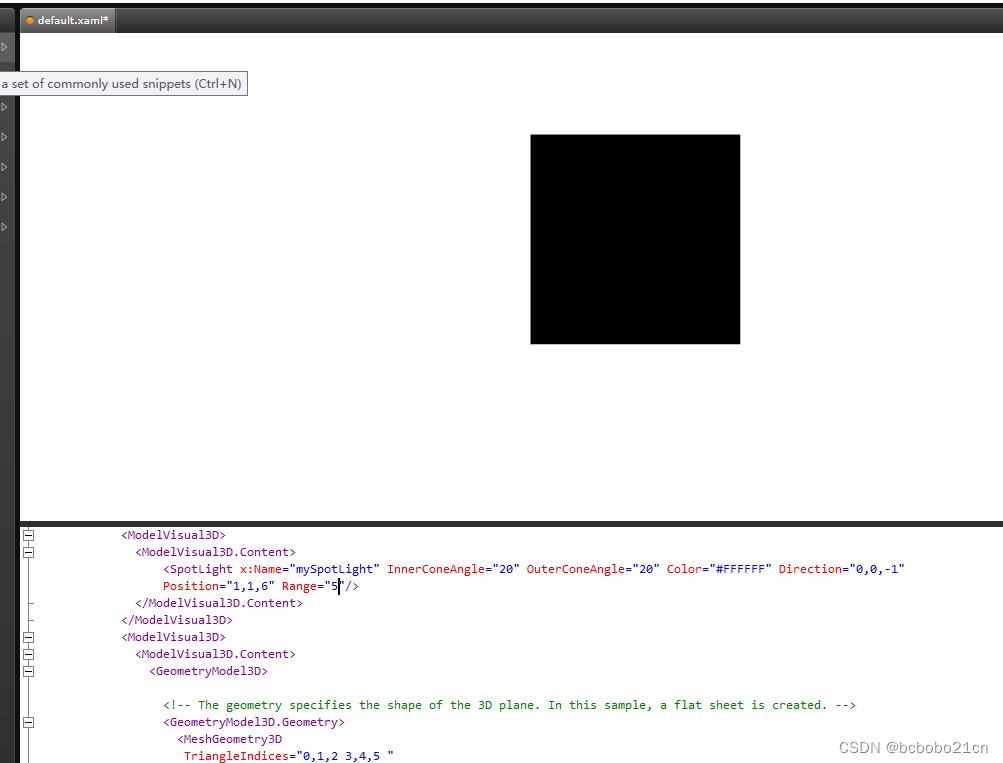
第一图,光源是在屏幕外6个距离,光源的作用范围Range是20;如果把Range改为5,则光源照不到物体;看一下如下是黑的;
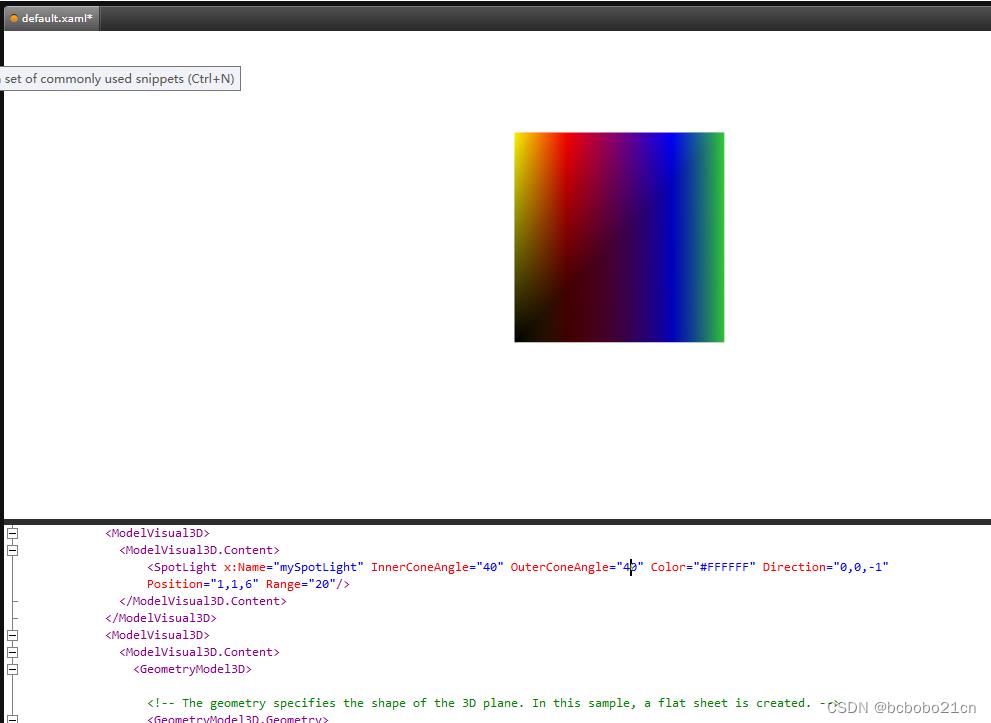
InnerConeAngle 和 OuterConeAngle调整锥体的大小;第一图锥体角度为20;如果把锥体角度调为40,锥体变大,看到如下;
锥体变大,光源白色,照射区域内光线更扩散,物体是不是应更暗;实际是更亮;还没完全理解,下回继续;
<Page xmlns="http://schemas.microsoft.com/winfx/2006/xaml/presentation"
  xmlns:x="http://schemas.microsoft.com/winfx/2006/xaml" >
    <DockPanel>
    <Viewbox>
      <Canvas Width="321" Height="201">

        <!-- The Viewport3D provides a rendering surface for 3-D visual content. -->
        <Viewport3D ClipToBounds="True" Width="150" Height="150" Canvas.Left="0" Canvas.Top="10">

          <!-- Defines the camera used to view the 3D object. -->
          <Viewport3D.Camera>
            <PerspectiveCamera Position="0,0,2" LookDirection="0,0,-1" FieldOfView="60" />
          </Viewport3D.Camera>

          <!-- The ModelVisual3D children contain the 3D models -->
          <Viewport3D.Children>
            <!-- A SpotLight is used to light the scene. The InnerConeAngle and OuterConeAngle are used
                 to control the size of the light cone created by the SpotLight. The Direction and Position
                 properties determine where the SpotLight is pointing in the scene. In this example, the Position
                 of the SpotLight is set so that the SpotLight is only illuminating the upper right-hand corner
                 of the 3D object. -->
            <ModelVisual3D>
              <ModelVisual3D.Content>
                  <SpotLight x:Name="mySpotLight" InnerConeAngle="40" OuterConeAngle="40" Color="#FFFFFF" Direction="0,0,-1"
                  Position="1,1,6" Range="20"/>
              </ModelVisual3D.Content>
            </ModelVisual3D>
            <ModelVisual3D>
              <ModelVisual3D.Content>
                <GeometryModel3D>

                  <!-- The geometry specifies the shape of the 3D plane. In this sample, a flat sheet is created. -->
                  <GeometryModel3D.Geometry>
                    <MeshGeometry3D
                     TriangleIndices="0,1,2 3,4,5 "
                     Normals="0,0,1 0,0,1 0,0,1 0,0,1 0,0,1 0,0,1 "
                     TextureCoordinates="0,0 1,0 1,1 1,1 0,1 0,0 "
                     Positions="-0.5,-0.5,0.5 0.5,-0.5,0.5 0.5,0.5,0.5 0.5,0.5,0.5 -0.5,0.5,0.5 -0.5,-0.5,0.5 " />
                  </GeometryModel3D.Geometry>

                  <!-- The material specifies the material applied to the 3D object. In this sample a linear gradient
                       covers the surface of the 3D object.-->
                  <GeometryModel3D.Material>
                    <MaterialGroup>
                      <DiffuseMaterial>
                        <DiffuseMaterial.Brush>
                          <LinearGradientBrush StartPoint="0,0.5" EndPoint="1,0.5">
                            <LinearGradientBrush.GradientStops>
                              <GradientStop Color="Yellow" Offset="0" />
                              <GradientStop Color="Red" Offset="0.25" />
                              <GradientStop Color="Blue" Offset="0.75" />
                              <GradientStop Color="LimeGreen" Offset="1" />
                            </LinearGradientBrush.GradientStops>
                          </LinearGradientBrush>
                        </DiffuseMaterial.Brush>
                      </DiffuseMaterial>
                    </MaterialGroup>
                  </GeometryModel3D.Material>
                </GeometryModel3D>
              </ModelVisual3D.Content>
            </ModelVisual3D>
          </Viewport3D.Children>

        </Viewport3D>
      </Canvas>
    </Viewbox>
</DockPanel>
</Page>
SpotLight 类
沿指定方向将其效果投射到一个锥形区域的光对象;
SpotLight 是一种 PointLight,因为它具有位置、范围和衰减;
SpotLight 还允许您控制光线效果的圆锥的方向、形状和其他属性;
以上是关于WPF实现聚光灯效果的主要内容,如果未能解决你的问题,请参考以下文章
