140_SpringMVC 文件上传下载
Posted 学习--踏实
tags:
篇首语:本文由小常识网(cha138.com)小编为大家整理,主要介绍了140_SpringMVC 文件上传下载相关的知识,希望对你有一定的参考价值。
目录
准备工作
编写基础
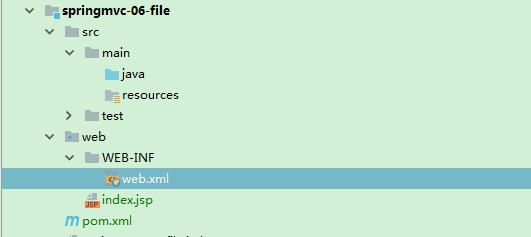
新建web子模块
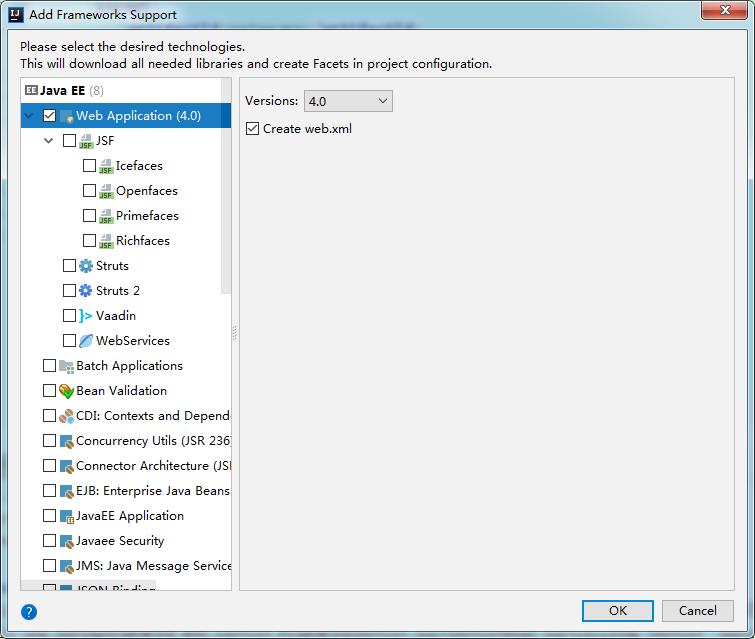
添加web框架支持
编写web.xml
<?xml version="1.0" encoding="UTF-8"?>
<web-app xmlns="http://xmlns.jcp.org/xml/ns/javaee"
         xmlns:xsi="http://www.w3.org/2001/XMLSchema-instance"
         xsi:schemaLocation="http://xmlns.jcp.org/xml/ns/javaee http://xmlns.jcp.org/xml/ns/javaee/web-app_4_0.xsd"
         version="4.0">

    <!--注册DispatcherServlet,这个是SpringMVC的核心:请求分发器,前置控制器-->
    <servlet>
        <servlet-name>springmvc</servlet-name>
        <servlet-class>org.springframework.web.servlet.DispatcherServlet</servlet-class>
        <!--DispatcherServlet要绑定SpringMVC的配置文件-->
        <init-param>
            <param-name>contextConfigLocation</param-name>
            <param-value>classpath:applicationContext.xml</param-value>
        </init-param>
        <!--启动级别设置为1-->
        <load-on-startup>1</load-on-startup>
    </servlet>
    <servlet-mapping>
        <!--
        在SpringMVC中,/ 和 /*
        /:匹配所有的请求,不会匹配jsp页面
        /*:匹配所有的请求,包括jsp页面
        -->
        <servlet-name>springmvc</servlet-name>
        <url-pattern>/</url-pattern>
    </servlet-mapping>

    <!--编码过滤器-->
    <filter>
        <filter-name>encoding</filter-name>
        <filter-class>org.springframework.web.filter.CharacterEncodingFilter</filter-class>
        <init-param>
            <param-name>encoding</param-name>
            <param-value>utf-8</param-value>
        </init-param>
    </filter>
    <filter-mapping>
        <filter-name>encoding</filter-name>
        <url-pattern>/*</url-pattern>
    </filter-mapping>
</web-app>
编写applicationContext.xml
<?xml version="1.0" encoding="UTF-8"?>
<beans xmlns="http://www.springframework.org/schema/beans"
       xmlns:xsi="http://www.w3.org/2001/XMLSchema-instance"
       xmlns:context="http://www.springframework.org/schema/context"
       xmlns:mvc="http://www.springframework.org/schema/mvc"
       xsi:schemaLocation="http://www.springframework.org/schema/beans
        http://www.springframework.org/schema/beans/spring-beans.xsd
        http://www.springframework.org/schema/context
        https://www.springframework.org/schema/context/spring-context.xsd
        http://www.springframework.org/schema/mvc
        https://www.springframework.org/schema/mvc/spring-mvc.xsd">

    <!--自动扫描包,让指定包下的注解生效,由IOC容器统一管理-->
    <context:component-scan base-package="com.qing.controller"/>
    <!--让SpringMVC不处理静态资源,如:.css .js .html .mp3 .mp4-->
    <mvc:default-servlet-handler/>
    <!--
    支持MVC注解驱动
    在spring中一般采用@RequestMapping注解来完成映射关系
    要想使@RequestMapping注解生效,必须向上下文中注册DefaultAnnotationHandlerMapping和一个AnnotationMethodHandlerAdapter实例
    这两个实例分别在类和方法级别处理
    而annotation-driven配置帮助我们自动完成上述两个实例的注入
    -->
    <mvc:annotation-driven>
        <!--配置消息转换,解决乱码问题-->
        <mvc:message-converters register-defaults="true">
            <bean class="org.springframework.http.converter.StringHttpMessageConverter">
                <constructor-arg value="UTF-8"/>
            </bean>
            <bean class="org.springframework.http.converter.json.MappingJackson2HttpMessageConverter">
                <property name="objectMapper">
                    <bean class="org.springframework.http.converter.json.Jackson2ObjectMapperFactoryBean">
                        <property name="failOnEmptyBeans" value="false"/>
                    </bean>
                </property>
            </bean>
        </mvc:message-converters>
    </mvc:annotation-driven>

    <!--视图解析器-->
    <bean class="org.springframework.web.servlet.view.InternalResourceViewResolver" id="internalResourceViewResolver">
        <!--前缀和后缀-->
        <property name="prefix" value="/WEB-INF/jsp/"/>
        <property name="suffix" value=".jsp"/>
    </bean>
</beans>
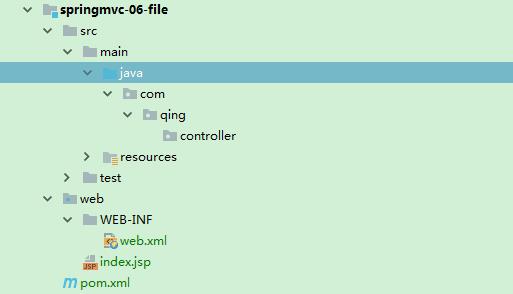
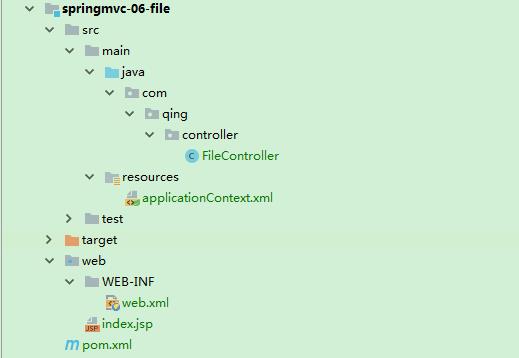
编写com.qing.controller包
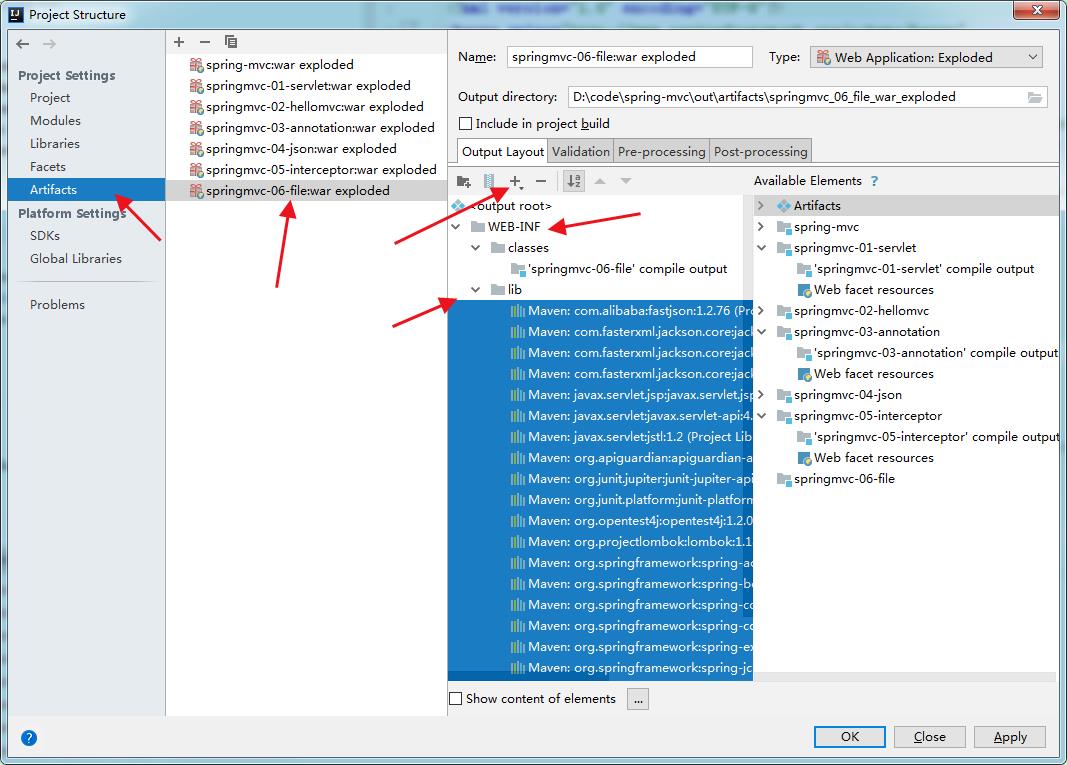
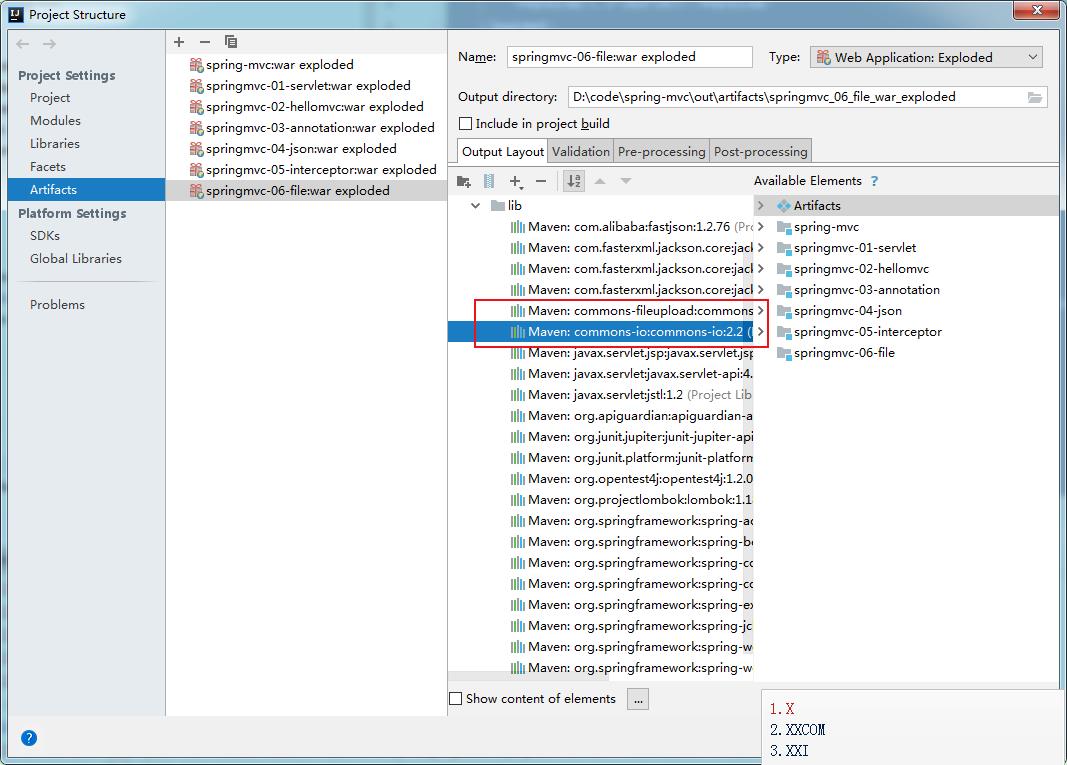
Artifacts创建lib
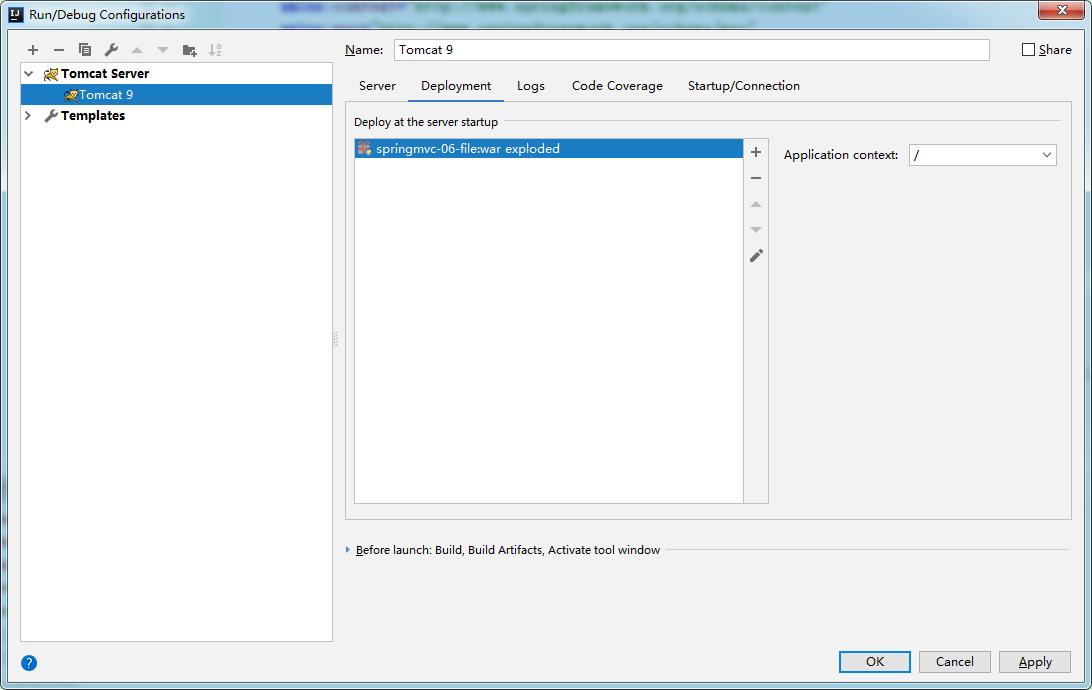
配置Tomcat
测试
文件上传
pom.xml添加文件上传依赖
<?xml version="1.0" encoding="UTF-8"?>
<project xmlns="http://maven.apache.org/POM/4.0.0"
         xmlns:xsi="http://www.w3.org/2001/XMLSchema-instance"
         xsi:schemaLocation="http://maven.apache.org/POM/4.0.0 http://maven.apache.org/xsd/maven-4.0.0.xsd">
    <parent>
        <artifactId>spring-mvc</artifactId>
        <groupId>com.qing</groupId>
        <version>1.0-SNAPSHOT</version>
    </parent>
    <modelVersion>4.0.0</modelVersion>

    <artifactId>springmvc-06-file</artifactId>

    <dependencies>
        <!-- https://mvnrepository.com/artifact/commons-fileupload/commons-fileupload -->
        <dependency>
            <groupId>commons-fileupload</groupId>
            <artifactId>commons-fileupload</artifactId>
            <version>1.4</version>
        </dependency>
        <!-- https://mvnrepository.com/artifact/javax.servlet/javax.servlet-api -->
        <dependency>
            <groupId>javax.servlet</groupId>
            <artifactId>javax.servlet-api</artifactId>
            <version>4.0.1</version>
        </dependency>

    </dependencies>

</project>
Artifacts下lib中添加jar
applicationContext.xml配置文件上传
<?xml version="1.0" encoding="UTF-8"?>
<beans xmlns="http://www.springframework.org/schema/beans"
       xmlns:xsi="http://www.w3.org/2001/XMLSchema-instance"
       xmlns:context="http://www.springframework.org/schema/context"
       xmlns:mvc="http://www.springframework.org/schema/mvc"
       xsi:schemaLocation="http://www.springframework.org/schema/beans
        http://www.springframework.org/schema/beans/spring-beans.xsd
        http://www.springframework.org/schema/context
        https://www.springframework.org/schema/context/spring-context.xsd
        http://www.springframework.org/schema/mvc
        https://www.springframework.org/schema/mvc/spring-mvc.xsd">

    <!--自动扫描包,让指定包下的注解生效,由IOC容器统一管理-->
    <context:component-scan base-package="com.qing.controller"/>
    <!--让SpringMVC不处理静态资源,如:.css .js .html .mp3 .mp4-->
    <mvc:default-servlet-handler/>
    <!--
    支持MVC注解驱动
    在spring中一般采用@RequestMapping注解来完成映射关系
    要想使@RequestMapping注解生效,必须向上下文中注册DefaultAnnotationHandlerMapping和一个AnnotationMethodHandlerAdapter实例
    这两个实例分别在类和方法级别处理
    而annotation-driven配置帮助我们自动完成上述两个实例的注入
    -->
    <mvc:annotation-driven>
        <!--配置消息转换,解决乱码问题-->
        <mvc:message-converters register-defaults="true">
            <bean class="org.springframework.http.converter.StringHttpMessageConverter">
                <constructor-arg value="UTF-8"/>
            </bean>
            <bean class="org.springframework.http.converter.json.MappingJackson2HttpMessageConverter">
                <property name="objectMapper">
                    <bean class="org.springframework.http.converter.json.Jackson2ObjectMapperFactoryBean">
                        <property name="failOnEmptyBeans" value="false"/>
                    </bean>
                </property>
            </bean>
        </mvc:message-converters>
    </mvc:annotation-driven>

    <!--视图解析器-->
    <bean class="org.springframework.web.servlet.view.InternalResourceViewResolver" id="internalResourceViewResolver">
        <!--前缀和后缀-->
        <property name="prefix" value="/WEB-INF/jsp/"/>
        <property name="suffix" value=".jsp"/>
    </bean>

    <!--文件上传配置-->
    <bean id="multipartResolver" class="org.springframework.web.multipart.commons.CommonsMultipartResolver">
        <!--请求的编码格式,必须和jsp的pageEncoding属性一致,以便正确读取表单内容,默认为ISO-8859-1-->
        <property name="defaultEncoding" value="utf-8"/>
        <!--上传文件大小上限,单位为字节(10485760=10M)-->
        <property name="maxUploadSize" value="10485760"/>
        <property name="maxInMemorySize" value="40960"/>
    </bean>
</beans>
编写文件上传页面
<%@ page contentType="text/html;charset=UTF-8" language="java" %>
<html>
  <head>
    <title>$Title$</title>
  </head>
  <body>
  <form action="${pageContext.request.contextPath}/upload" method="post" enctype="multipart/form-data">
    <input type="file" name="file"/>
    <input type="submit" value="upload"/>
  </form>
  </body>
</html>
编写FileController
package com.qing.controller;

import org.springframework.stereotype.Controller;
import org.springframework.web.bind.annotation.RequestMapping;
import org.springframework.web.bind.annotation.RequestParam;
import org.springframework.web.multipart.commons.CommonsMultipartFile;

import javax.servlet.http.HttpServletRequest;
import java.io.File;
import java.io.FileOutputStream;
import java.io.IOException;
import java.io.InputStream;
import java.util.UUID;

@Controller
public class FileController {

    /**
     * @RequestParam("file")将name=file控件得到的文件封装成CommonsMultipartFile对象
     * 批量上传,CommonsMultipartFile则为数组即可
     *
     * @param file
     * @param request
     * @return
     * @throws IOException
     */
    @RequestMapping("/upload")
    public String upload(@RequestParam("file") CommonsMultipartFile file, HttpServletRequest request) throws IOException {
        // 获取文件名
        String originalFilename = file.getOriginalFilename();
        // 如果文件名为空,说明没有上传,直接回到文件上传页
        if ("".equals(originalFilename)) {
            return "redirect:/index.jsp";
        }
        String suffix = originalFilename.substring(originalFilename.lastIndexOf("."));
        System.out.println("上传的文件名:" + originalFilename);
        // 上传文件保存路径
        String path = request.getServletContext().getRealPath("/upload");
        // 如果路径不存在,创建
        File realPath = new File(path);
        if (! realPath.exists()) {
            realPath.mkdir();
        }
        System.out.println("上传文件保存路径:" + realPath);
        // 文件输入流
        InputStream is = file.getInputStream();
        // 文件输出流
        String fileName = UUID.randomUUID().toString() + suffix;
        FileOutputStream os = new FileOutputStream(new File(realPath,fileName));
        // 读取写出
        int len = 0;
        byte[] buffer = new byte[1024];
        while ((len=is.read(buffer)) != -1) {
            os.write(buffer,0,len);
            os.flush();
        }
        os.close();
        is.close();
        System.out.println("文件保存成功,文件名:" + fileName);
        return "redirect:/index.jsp";
    }

    /**
     * 通过CommonsMultipartFile的file.transferTo方法保存上传的文件
     * @param file
     * @param request
     * @return
     * @throws IOException
     */
    @RequestMapping("/upload2")
    public String upload2(@RequestParam("file") CommonsMultipartFile file, HttpServletRequest request) throws IOException {
        String originalFilename = file.getOriginalFilename();
        String suffix = originalFilename.substring(originalFilename.lastIndexOf("."));
        // 上传文件保存路径
        String path = request.getServletContext().getRealPath("/upload");
        // 如果路径不存在,创建
        File realPath = new File(path);
        if (! realPath.exists()) {
            realPath.mkdir();
        }
        System.out.println("上传文件保存路径:" + realPath);
        // 通过CommonsMultipartFile的方法直接写文件
        String fileName = UUID.randomUUID().toString() + suffix;
        file.transferTo(new File(realPath + "/" + fileName));
        System.out.println("文件保存成功,文件名:" + fileName);
        return "redirect:/index.jsp";
    }
}
测试
文件下载
步骤
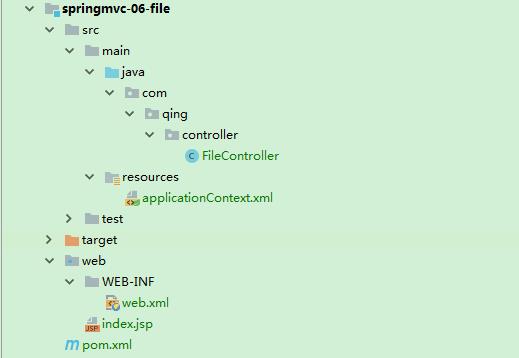
编码
package com.qing.controller;

import org.springframework.stereotype.Controller;
import org.springframework.web.bind.annotation.RequestMapping;
import org.springframework.web.bind.annotation.RequestParam;
import org.springframework.web.multipart.commons.CommonsMultipartFile;

import javax.servlet.ServletOutputStream;
import javax.servlet.http.HttpServletRequest;
import javax.servlet.http.HttpServletResponse;
import java.io.*;
import java.net.URLEncoder;
import java.util.UUID;

@Controller
public class FileController {

    @RequestMapping("/download")
    public String download(HttpServletRequest request, HttpServletResponse response) throws IOException {
        // 要下载的文件地址
        String realPath = request.getServletContext().getRealPath("/upload");
        String fileName = "c83781a5-45d7-43a0-bbcc-e6ab84f7c11f.docx";
        // 设置response响应头
        response.reset(); // 设置页面不缓存,清空buffer
        response.setCharacterEncoding("UTF-8"); // 字符编码
        response.setContentType("multipart/form-data"); // 二进制传输数据
        response.setHeader("Content-Disposition","attachment;fileName=" + URLEncoder.encode(fileName,"UTF-8")); // 响应头
        // 读取文件--输入流
        File file = new File(realPath,fileName);
        FileInputStream is = new FileInputStream(file);
        // 写出文件--输出流
        OutputStream out = response.getOutputStream();
        // 执行写出操作
        int len = 0;
        byte[] buffer = new byte[1024];
        while ((len=is.read(buffer)) != -1) {
            out.write(buffer,0,len);
            out.flush();
        }
        out.close();
        is.close();
        return "OK";
    }
}
测试

以上是关于140_SpringMVC 文件上传下载的主要内容,如果未能解决你的问题,请参考以下文章


