JavaWeb-SpringBoot2-HelloWorld
Posted 之墨_
tags:
篇首语:本文由小常识网(cha138.com)小编为大家整理,主要介绍了JavaWeb-SpringBoot2-HelloWorld相关的知识,希望对你有一定的参考价值。
SpringBoot2—HelloBoot
IDEA配置Maven
maven配置
修改maven目录下的conf文件夹的seethings.xml文件,添加如下代码:
修改镜像网站
<mirrors>
      <mirror>
        <id>nexus-aliyun</id>
        <mirrorOf>central</mirrorOf>
        <name>Nexus aliyun</name>
        <url>http://maven.aliyun.com/nexus/content/groups/public</url>
      </mirror>
  </mirrors>
指定JDK版本
  <profiles>
         <profile>
              <id>jdk-1.8</id>
              <activation>
                <activeByDefault>true</activeByDefault>
                <jdk>1.8</jdk>
              </activation>
              <properties>
                <maven.compiler.source>1.8</maven.compiler.source>
                <maven.compiler.target>1.8</maven.compiler.target>
                <maven.compiler.compilerVersion>1.8</maven.compiler.compilerVersion>
              </properties>
         </profile>
  </profiles>
创建Maven工程
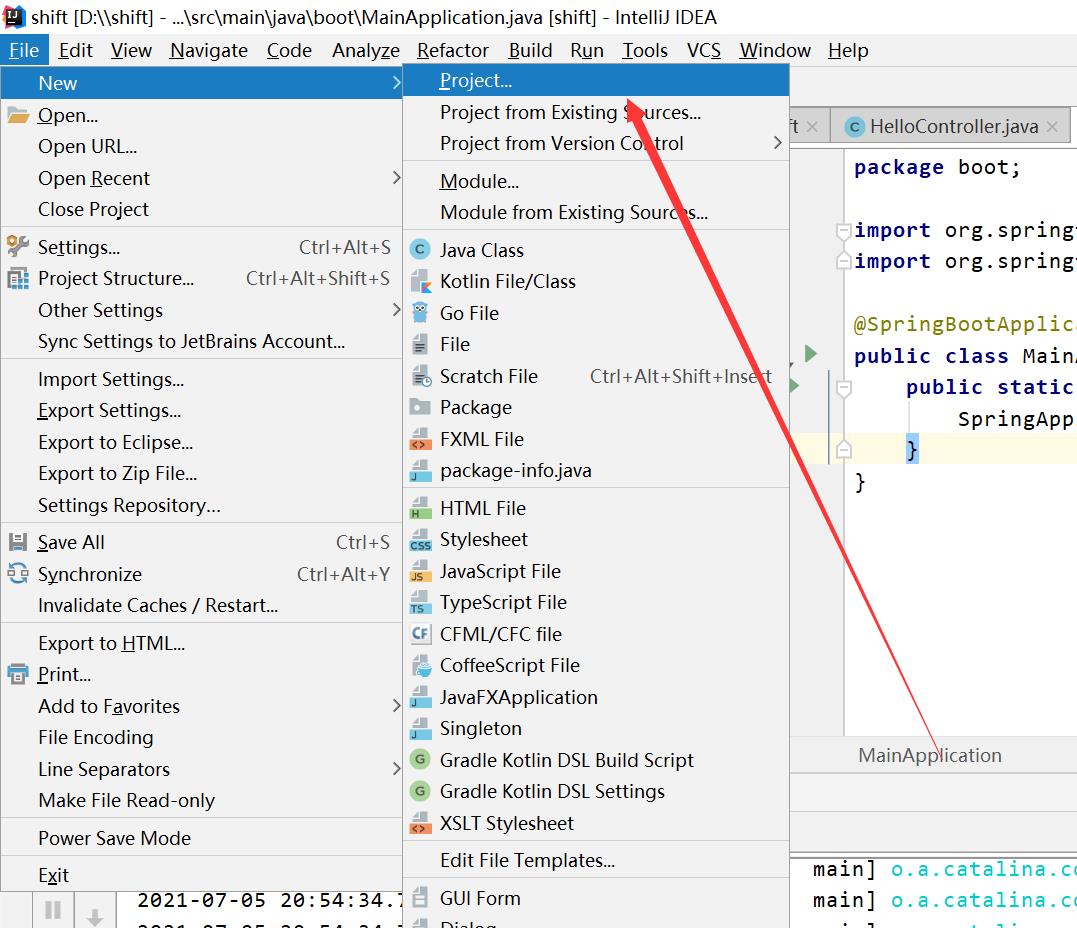

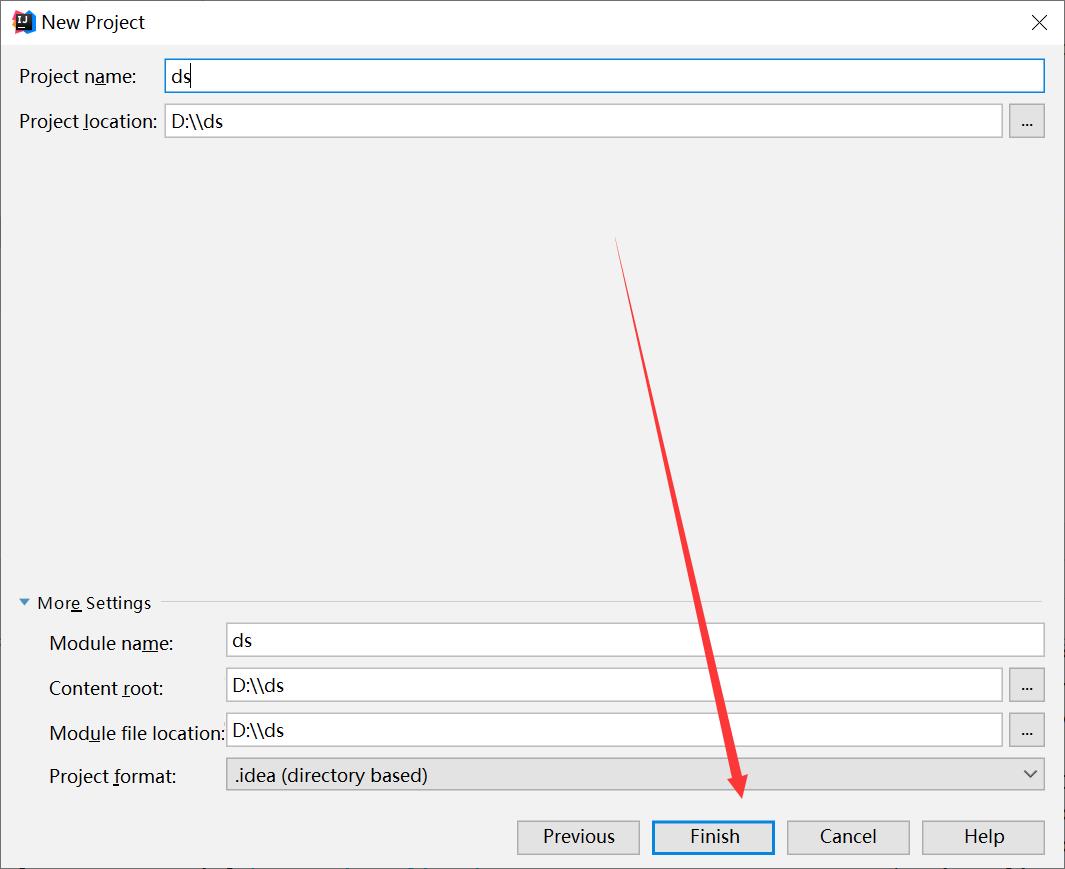
给项目取个好听的名字

到这里就已经创建好了一个Maven工程
Ps:如果settings.xml里面配置好了aliyun下载依赖还是很慢的话可以在pom.xml文件里加上这段代码:
<repositories>
    <repository>
        <id>nexus-aliyun</id>
        <name>nexus-aliyun</name>
        <url>http://maven.aliyun.com/nexus/content/groups/public/</url>
        <releases>
            <enabled>true</enabled>
        </releases>
        <snapshots>
            <enabled>false</enabled>
        </snapshots>
    </repository>
</repositories>
引入依赖
首先必不可少的就是父工程的导入:
<parent>
    <groupId>org.springframework.boot</groupId>
    <artifactId>spring-boot-starter-parent</artifactId>
    <version>2.4.2</version>
</parent>
然后如果我们要开发web的话,那我们只需要给我们的pom导入这段代码:
<dependencies>
    <dependency>
        <groupId>org.springframework.boot</groupId>
        <artifactId>spring-boot-starter-web</artifactId>
    </dependency>
</dependencies>
“
web场景启动器”:spring-boot-starter-web
Ps:我在导入这几个依赖时费了好久,因为第一次要导入的
jar包和plugins实在太多了,所以小伙伴一定要有耐心,同时注意观察自己设置的仓库是否正确下载了所需的jar包
同时要注意在Idea的settings中设置:
使用的
Maven是自己的下载的本机版本,同时注意自己idea版本和Maven的兼容性,我的idea2018可以兼容Maven3.6.1及以前,其他版本自己搜一下都有。还有就是使用的settings配置文件得是你自己配置的存储Maven工程目录下的settings文件,如果是默认的C盘下的那可能也会出现下载速度很慢或者下载不了的问题

在Maven的Import选项中注意要勾选自动导包(一般默认是勾选的)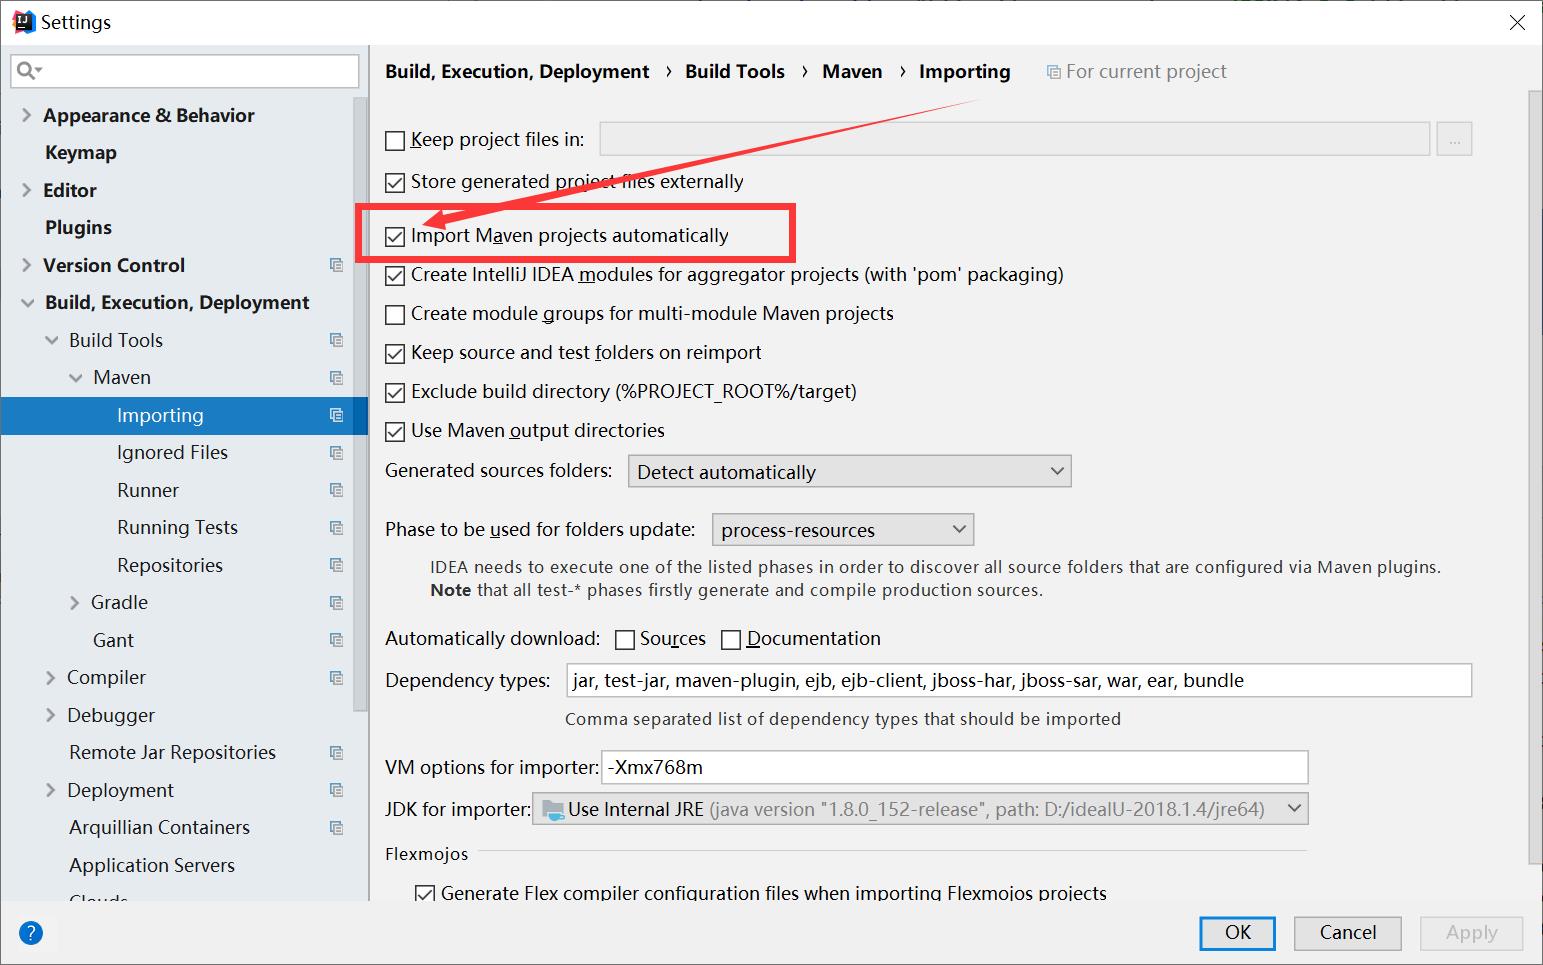
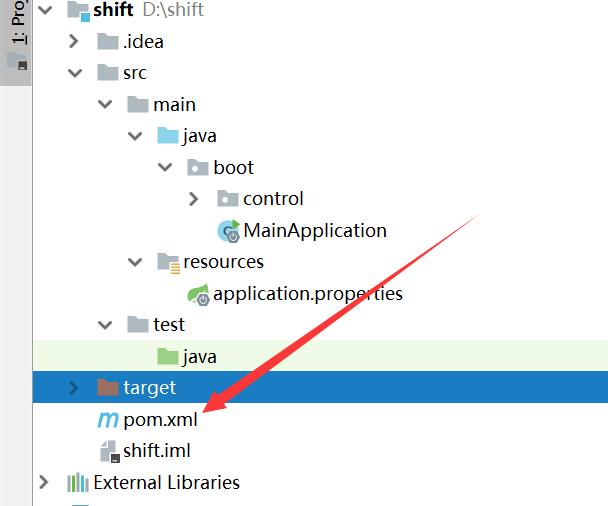
创建主程序
然后创建一个启动程序的主程序MainApplication:
package boot;

import org.springframework.boot.SpringApplication;
import org.springframework.boot.autoconfigure.SpringBootApplication;

@SpringBootApplication
public class MainApplication {
    public static void main(String[] args) {
        SpringApplication.run(MainApplication.class,args);
    }
}
标上注解@SpringBootApplication说明这是一个Spring Boot程序(让系统自动调节)
编写业务
创建Controller类编写功能
package boot.control;

import org.springframework.web.bind.annotation.RequestMapping;
import org.springframework.web.bind.annotation.RestController;

@RestController

public class HelloController {
@RequestMapping("/Hello")
    public String handle01(){
    return "Hello , SpringBoot2";
    }
}
映射请求
@RequestMapping("/Hello"),浏览响应命令Hello处理后返回字符串Hello , SpringBoot2
测试
测试方法很简单,只需要启动主程序即可:

简化配置
Spring Boot 2提供了很方便的修改配置的操作
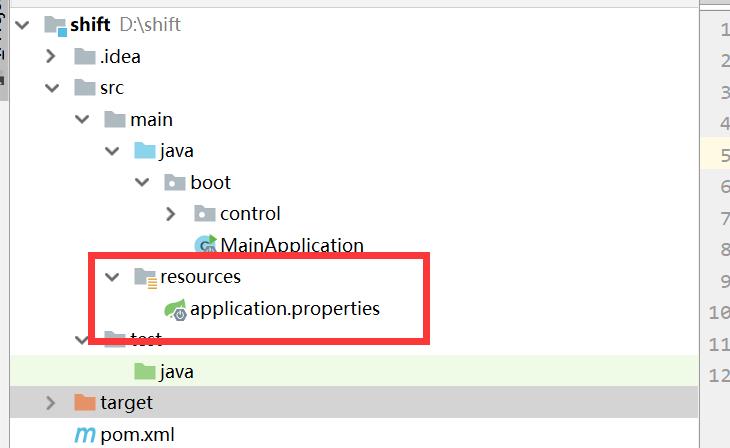
首先在我们的resources目录下创建一个application.properties文件:
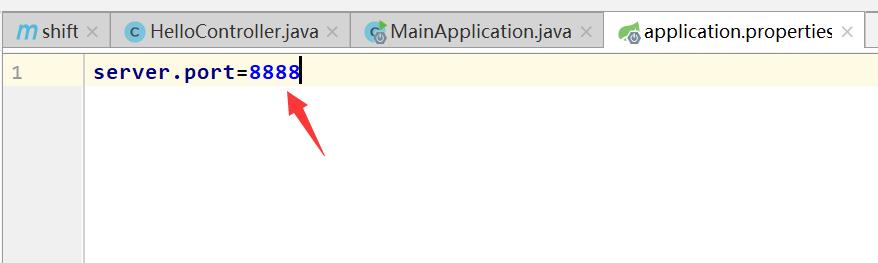
举个例子:
比如我们如果要将默认的本机端口号8080修改为8888只需要在该文件中简单一段代码修改即可
Maven中依赖下载一直失败
如果一直都是lastupdated文件:
输入 mvn -U idea:idea 这行命令, 然后reimport
以上是关于JavaWeb-SpringBoot2-HelloWorld的主要内容,如果未能解决你的问题,请参考以下文章