自定义UI 圆形头像
Posted Notzuonotdied
tags:
篇首语:本文由小常识网(cha138.com)小编为大家整理,主要介绍了自定义UI 圆形头像相关的知识,希望对你有一定的参考价值。
系列文章目录
文章目录
前言
这系列的文章主要是基于扔物线的HenCoderPlus课程的源码来分析学习。
- 扔物线课程源码:AvatarView.java
- android官方文档:自定义绘制
创建绘制对象
我们需要创建一个画笔🖌Paint来绘制我们的头像的边框,也需要提前加载我们的头像到内存(Bitmap)中。
public class AvatarView extends View {
    // 头像的宽度
    private static final float WIDTH = Utils.dp2px(300);
    // 头像距离画布边界的填充量
    private static final float PADDING = Utils.dp2px(50);
    // 头像边框的宽度
    private static final float EDGE_WIDTH = Utils.dp2px(10);

    // 抗锯齿
    Paint paint = new Paint(Paint.ANTI_ALIAS_FLAG);
    // 头像的Bitmap
    Bitmap bitmap;

    public AvatarView(Context context, @Nullable AttributeSet attrs) {
        super(context, attrs);
    }

    {
    	// 代码详见下一章介绍
        bitmap = getAvatar((int) WIDTH);
    }
}
加载头像
为避免出现
java.lang.OutOfMemory异常,请先检查位图的尺寸,然后再对其进行解码,除非您绝对信任该来源可为您提供大小可预测的图片数据,以轻松适应可用的内存。——引用自Android官方文档:高效加载大型位图
下述源码的分析请见官方的说明:将按比例缩小的版本加载到内存中。
/**
 * 获取头像
 *
 * @param width 按照width读取图片
 */
Bitmap getAvatar(int width) {
    BitmapFactory.Options options = new BitmapFactory.Options();
    options.inJustDecodeBounds = true;
    // 这是一个耗时操作,在配置了options.inJustDecodeBounds = true后,仅会从资源中解析出来图片的宽高。
    BitmapFactory.decodeResource(getResources(), R.drawable.avatar_rengwuxian, options);
    // 开始读取Bitmap
    options.inJustDecodeBounds = false;
    options.inDensity = options.outWidth;
    options.inTargetDensity = width;
    return BitmapFactory.decodeResource(getResources(), R.drawable.avatar_rengwuxian, options);
}
自定义绘制内容
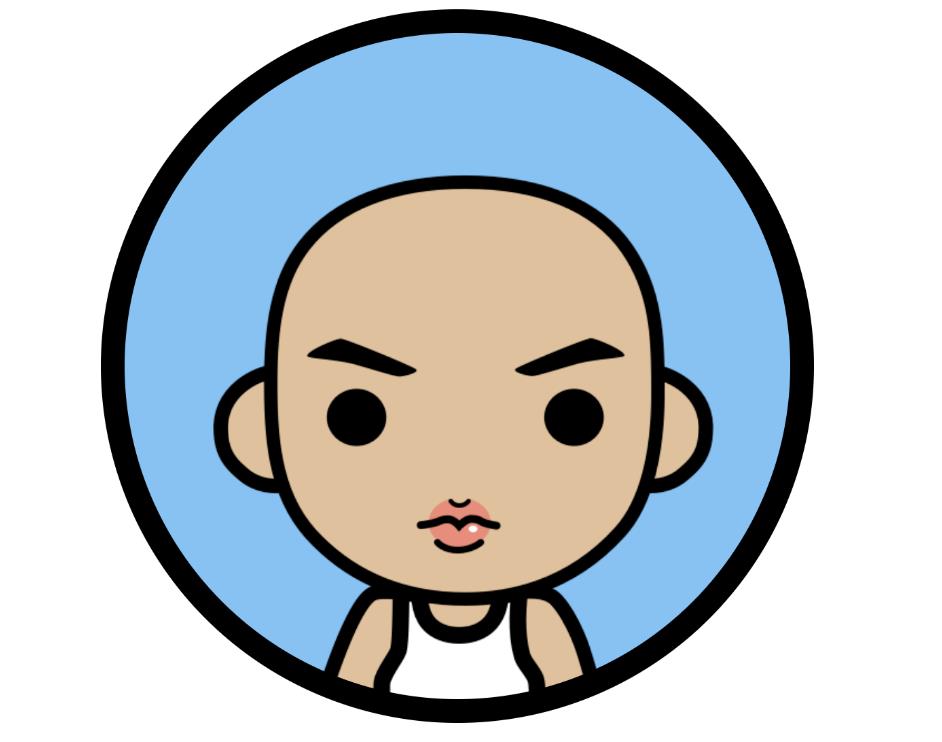
先上一下我们绘制圆形头像的效果图。
绘制头像边框
public class AvatarView extends View {
    // 头像的宽度
    private static final float WIDTH = Utils.dp2px(300);
    // 头像距离画布边界的填充量
    private static final float PADDING = Utils.dp2px(50);
    // 头像边框的宽度
    private static final float EDGE_WIDTH = Utils.dp2px(10);
    // 头像边框的点坐标
    private final float BORDER_UPPER = PADDING;
    private final float BORDER_LOWER = PADDING + WIDTH;
    // 头像圆底的点坐标
    private final float UPPER = BORDER_UPPER + EDGE_WIDTH;
    private final float LOWER = BORDER_LOWER - EDGE_WIDTH;

    // 抗锯齿
    Paint paint = new Paint(Paint.ANTI_ALIAS_FLAG);

    public AvatarView(Context context, @Nullable AttributeSet attrs) {
        super(context, attrs);
    }

    @Override
    protected void onDraw(Canvas canvas) {
        super.onDraw(canvas);
		// 绘制边框
        canvas.drawOval(BORDER_UPPER, BORDER_UPPER, BORDER_LOWER, BORDER_LOWER, paint);
        // 绘制头像的展示区域
        paint.setColor(Color.WHITE);
        canvas.drawOval(UPPER, UPPER, LOWER, LOWER, paint);
    }
}
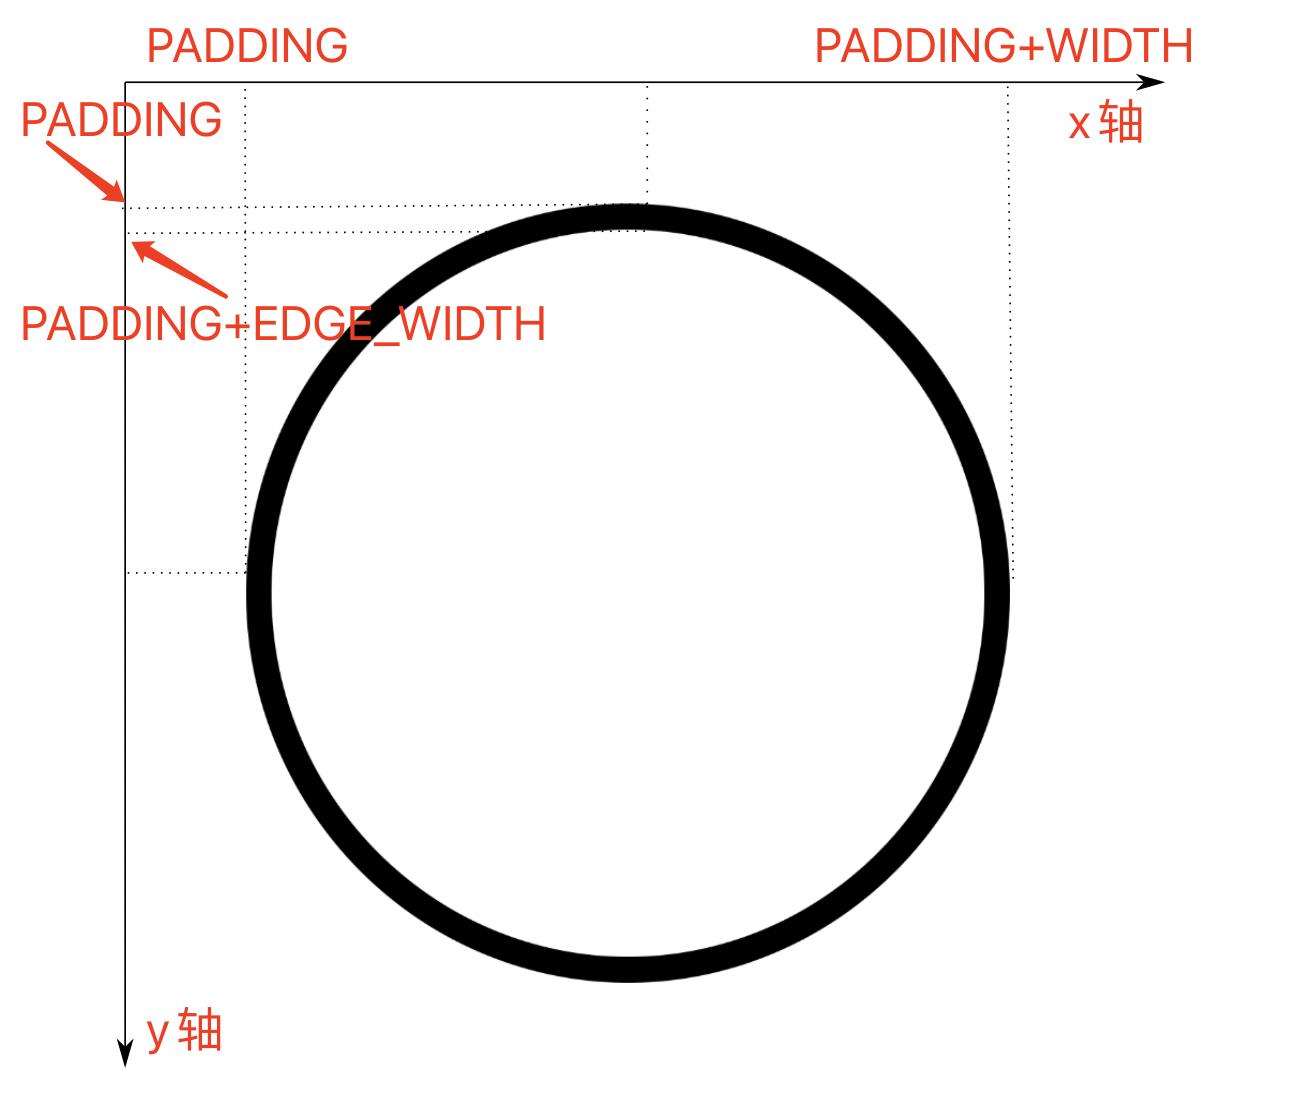
- 圆环的上下边距均为
PADDING; - 圆环的环宽为
EDGE_WIDTH; - 圆环的外圆的直径为
WIDTH。
绘制头像
public class AvatarView extends View {
    // 头像的宽度
    private static final float WIDTH = Utils.dp2px(300);
    // 头像距离画布边界的填充量
    private static final float PADDING = Utils.dp2px(50);
    // 头像边框的宽度
    private static final float EDGE_WIDTH = Utils.dp2px(10);
    // 头像边框的点坐标
    private final float BORDER_UPPER = PADDING;
    private final float BORDER_LOWER = PADDING + WIDTH;
    // 头像圆底的点坐标
    private final float UPPER = BORDER_UPPER + EDGE_WIDTH;
    private final float LOWER = BORDER_LOWER - EDGE_WIDTH;

    // 抗锯齿
    Paint paint = new Paint(Paint.ANTI_ALIAS_FLAG);
    // 头像的Bitmap
    Bitmap bitmap;

    public AvatarView(Context context, @Nullable AttributeSet attrs) {
        super(context, attrs);
    }

    {
        bitmap = getAvatar((int) WIDTH);
    }

    @Override
    protected void onDraw(Canvas canvas) {
        super.onDraw(canvas);

        canvas.drawOval(BORDER_UPPER, BORDER_UPPER, BORDER_LOWER, BORDER_LOWER, paint);
        paint.setColor(Color.WHITE);
        canvas.drawOval(UPPER, UPPER, LOWER, LOWER, paint);
        // 绘制头像
        // paint.setAlpha(120); 下图二
        canvas.drawBitmap(bitmap, PADDING, PADDING, paint);
    }

    /**
     * 获取头像
     *
     * @param width 按照width读取图片
     */
    Bitmap getAvatar(int width) {
        BitmapFactory.Options options = new BitmapFactory.Options();
        options.inJustDecodeBounds = true;
        // 这是一个耗时操作,在配置了options.inJustDecodeBounds = true后,仅会从资源中解析出来图片的宽高。
        BitmapFactory.decodeResource(getResources(), R.drawable.avatar_rengwuxian, options);
        // 开始读取Bitmap
        options.inJustDecodeBounds = false;
        options.inDensity = options.outWidth;
        options.inTargetDensity = width;
        return BitmapFactory.decodeResource(getResources(), R.drawable.avatar_rengwuxian, options);
    }
}
- 为了方便说明问题,第二张图加了
paint.setAlpha(120);。
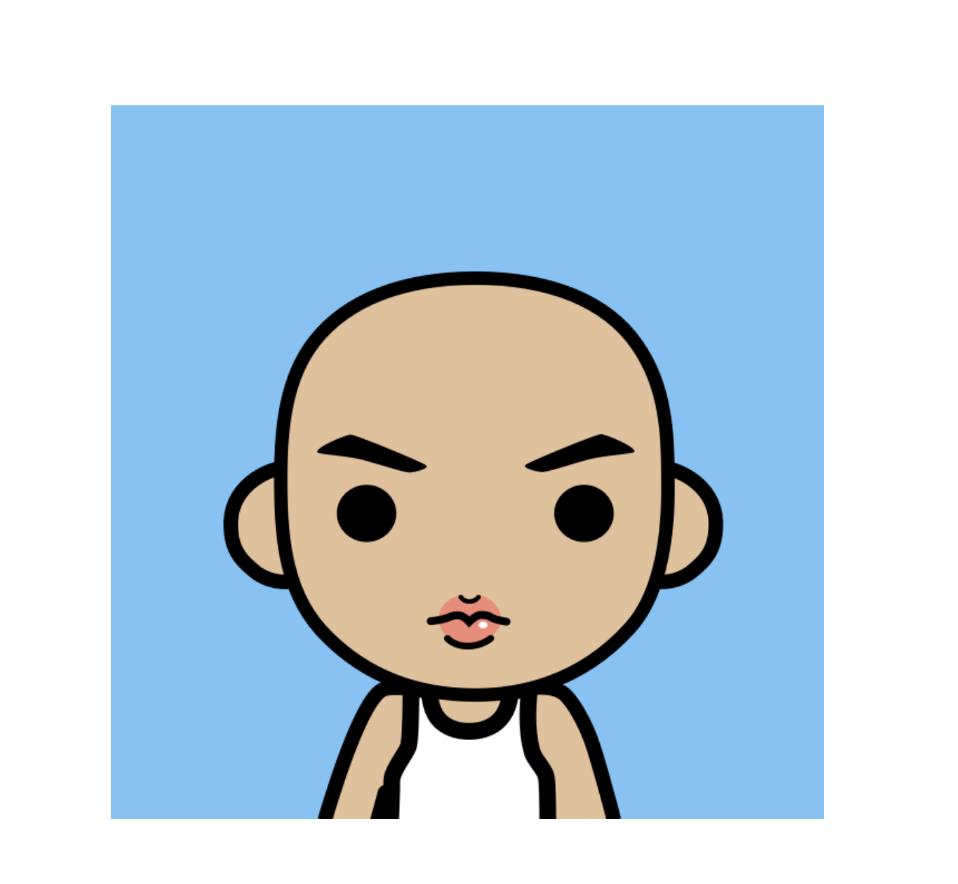
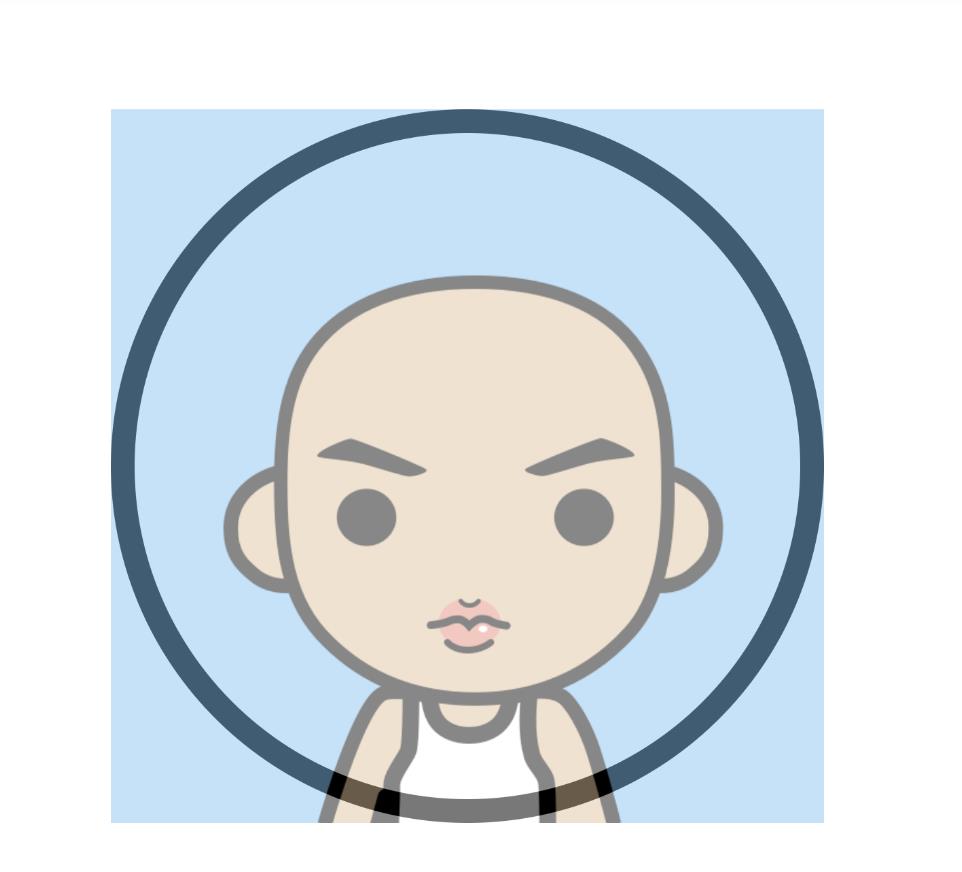
为了达到文章前的效果,我们需要将头像和环的内圆相结合,且仅仅保留内圆区域的头像部分。扔物线的朱凯大佬已经给咱们指了一条明路——Xfermode。
融合图层
这里需要说明下,加载进内存的图片的宽度是WIDTH。
Xfermode
PorterDuff.Mode.SRC_IN:以Destination Image为模,裁剪Source Image(以圆环的内圆为模,裁剪头像)。
 Paint paint = new Paint();
 canvas.drawBitmap(destinationImage, 0, 0, paint);

 PorterDuff.Mode mode = // choose a mode
 paint.setXfermode(new PorterDuffXfermode(mode));

 canvas.drawBitmap(sourceImage, 0, 0, paint);
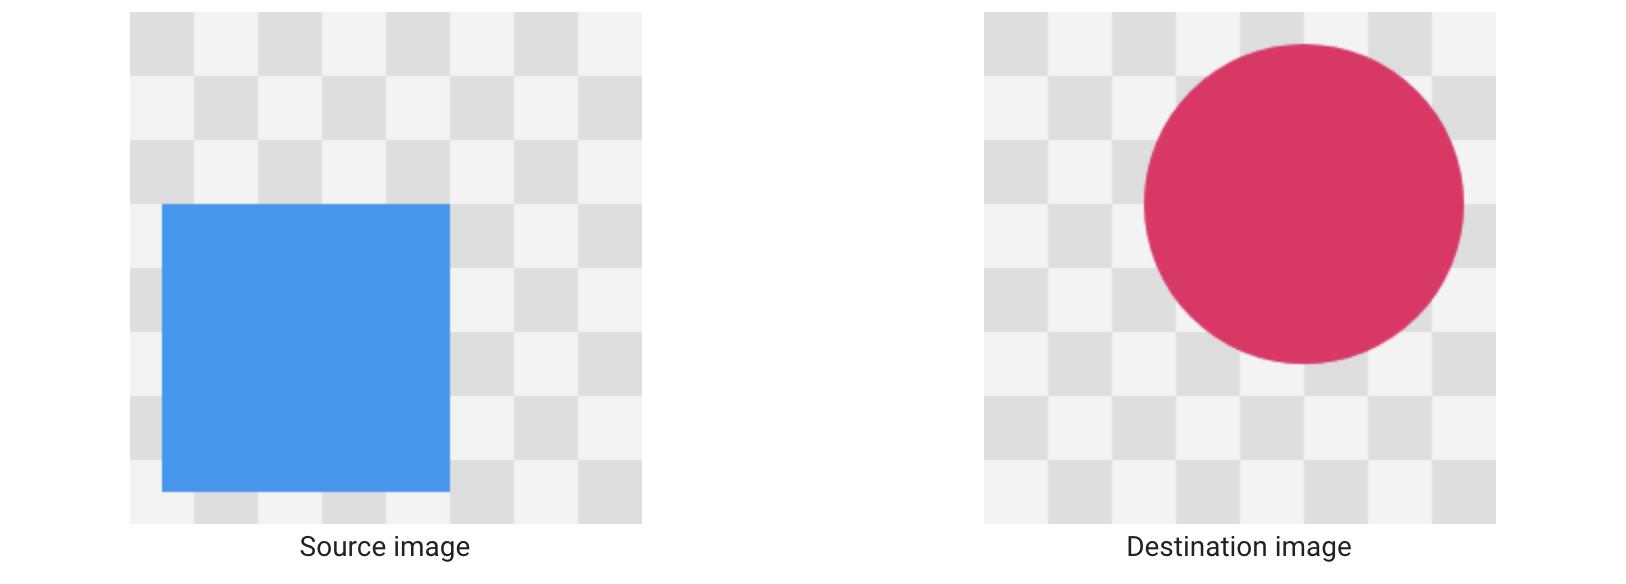
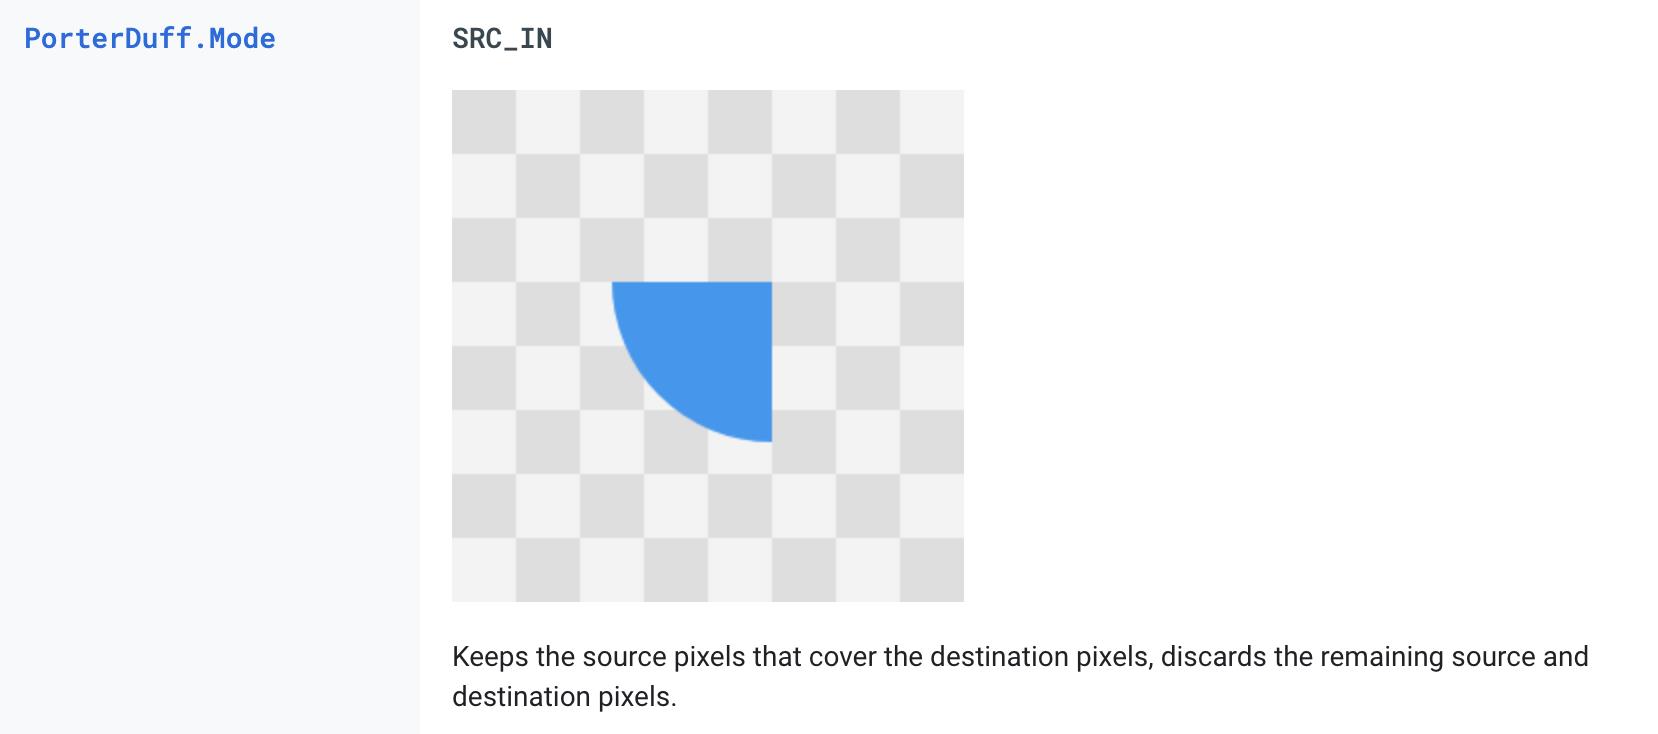
- 详细请参见官方文档 PorterDuff.Mode.SRC_IN 介绍。
融合图片验证1
public class AvatarView extends View {
    // 两个Bitmap融合的方式
    Xfermode xfermode = new PorterDuffXfermode(PorterDuff.Mode.SRC_IN);

    @Override
    protected void onDraw(Canvas canvas) {
        super.onDraw(canvas);

        canvas.drawOval(BORDER_UPPER, BORDER_UPPER, BORDER_LOWER, BORDER_LOWER, paint);
        paint.setColor(Color.WHITE);
        canvas.drawOval(UPPER, UPPER, LOWER, LOWER, paint);
        // 设置图像融合的模式
        paint.setXfermode(xfermode);
        // 图片的宽度和圆环的外圆的直径一样
        canvas.drawBitmap(bitmap, PADDING, PADDING, paint);
        paint.setXfermode(null);
    }
}

╮(╯▽╰)╭,翻车了,并没有想象中融合了。让我们把环放大看看。
public class AvatarView extends View {
    // 两个Bitmap融合的方式
    Xfermode xfermode = new PorterDuffXfermode(PorterDuff.Mode.SRC_IN);

    @Override
    protected void onDraw(Canvas canvas) {
        super.onDraw(canvas);
        canvas.drawOval(0, 0, BORDER_LOWER, BORDER_LOWER, paint);
        paint.setColor(Color.WHITE);
        canvas.drawOval(EDGE_WIDTH, EDGE_WIDTH, LOWER, LOWER, paint);
        paint.setXfermode(xfermode);
        // 图片的宽度和圆环的外圆的直径一样
        canvas.drawBitmap(bitmap, PADDING, PADDING, paint);
        paint.setXfermode(null);
    }
}
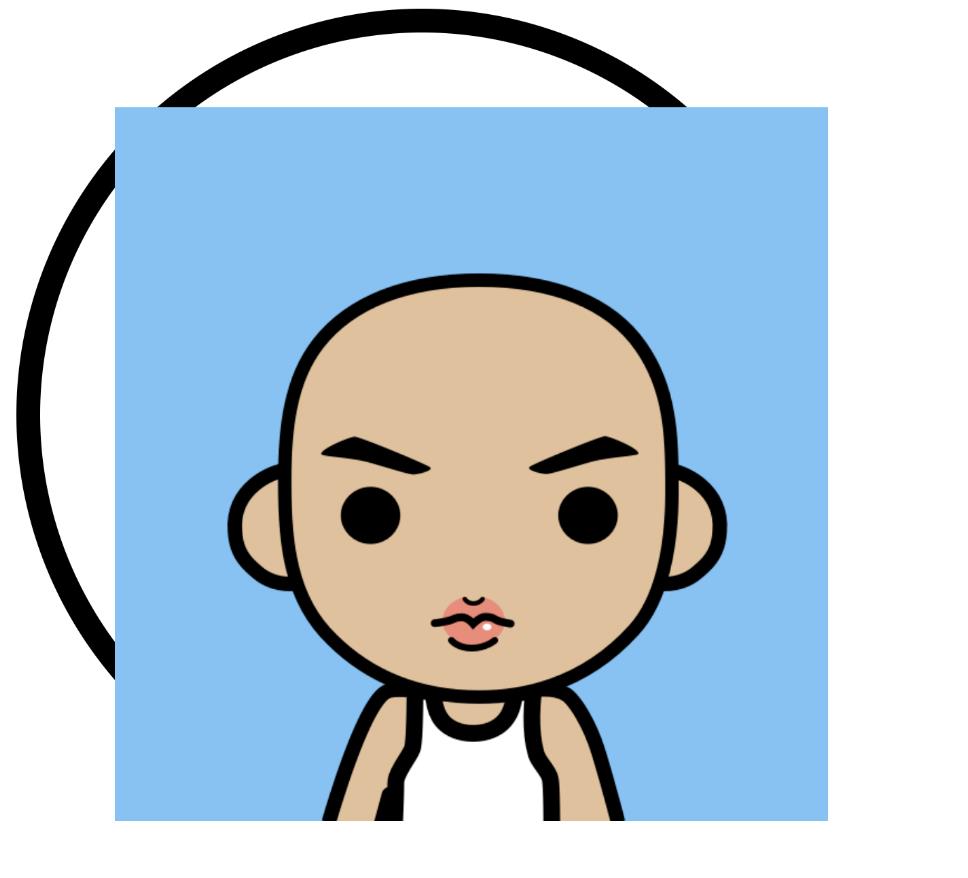
- 具体原因:
- 按照逻辑我们会认为,在第二步画头像的时候,跟它共同计算(setXfermode)的是第一步绘制的内圆。但实际上,却是整个
View的显示区域都在画头像的时候参与计算,导致绘制的是完整的头像内容。——参考自:HenCoder Android 开发进阶: 自定义 View 1-2 Paint 详解的 Xfermode 注意事项。
- 按照逻辑我们会认为,在第二步画头像的时候,跟它共同计算(setXfermode)的是第一步绘制的内圆。但实际上,却是整个
- 解决方案:
- 使用离屏缓冲(an offscreen rendering target):将内环和头像Bitmap在离屏缓冲中融合,最后将融合后的图层贴到屏幕即可。
设置离屏缓冲
public class AvatarView extends View {
    // 两个Bitmap融合的方式
    Xfermode xfermode = new PorterDuffXfermode(PorterDuff.Mode.SRC_IN);
    // 保存的区域
    RectF savedArea = new RectF();

    @Override
    protected void onDraw(Canvas canvas) {
        super.onDraw(canvas);

        canvas.drawOval(BORDER_UPPER, BORDER_UPPER, BORDER_LOWER, BORDER_LOWER, paint);
        paint.setColor(Color.WHITE);
        // 离屏缓冲(Bitmap)
        int saved = canvas.saveLayer(savedArea, paint);
        canvas.drawOval(UPPER, UPPER, LOWER, LOWER, paint);
        paint.setXfermode(xfermode);
        // 图片的宽度和圆环的外圆的直径一样
        canvas.drawBitmap(bitmap, PADDING, PADDING, paint);
        paint.setXfermode(null);
        // 将离屏缓冲数据绘制到屏幕上
        canvas.restoreToCount(saved);
    }
}
canvas.saveLayer(savedArea, paint)为后续的绘制分配了一个离屏缓冲(an offscreen rendering target)。canvas.restoreToCount(saved);前的操作都讲绘制在离屏缓冲(an offscreen rendering target)上。- 执行
canvas.restoreToCount(saved);时,将离屏缓冲(an offscreen rendering target)的内容一起绘制到屏幕上。
canvas#saveLayer
- Android开发者文档:Canvas
/**
 * The Canvas class holds the "draw" calls. To draw something, you need
 * 4 basic components: A Bitmap to hold the pixels, a Canvas to host
 * the draw calls (writing into the bitmap), a drawing primitive (e.g. Rect,
 * Path, text, Bitmap), and a paint (to describe the colors and styles for the
 * drawing).
 */
public class Canvas extends BaseCanvas {
    /**
     * This behaves the same as save(), but in addition it allocates and
     * redirects drawing to an offscreen rendering target.
     * <p class="note"><strong>Note:</strong> this method is very expensive,
     * incurring more than double rendering cost for contained content. Avoid
     * using this method when possible and instead use a
     * {@link android.view.View#LAYER_TYPE_HARDWARE hardware layer} on a View
     * to apply an xfermode, color filter, or alpha, as it will perform much
     * better than this method.
     * <p>
     * All drawing calls are directed to a newly allocated offscreen rendering target.
     * Only when the balancing call to restore() is made, is that offscreen
     * buffer drawn back to the current target of the Canvas (which can potentially be a previous
     * layer if these calls are nested).
     * <p>
     * Attributes of the Paint - {@link Paint#getAlpha() alpha},
     * {@link Paint#getXfermode() Xfermode}, and
     * {@link Paint#getColorFilter() ColorFilter} are applied when the
     * offscreen rendering target is drawn back when restore() is called.
     *
     * @param bounds May be null. The maximum size the offscreen render target
     *               needs to be (in local coordinates)
     * @param paint  This is copied, and is applied to the offscreen when
     *               restore() is called.
     * @return       value to pass to restoreToCount() to balance this save()
     */
    public int saveLayer(@Nullable RectF bounds, @Nullable Paint paint) {
        return saveLayer(bounds, paint, ALL_SAVE_FLAG);
    }
}
canvas#restoreToCount
public class Canvas extends BaseCanvas {
	/**
     * Efficient way to pop any calls to save() that happened after the save
     * count reached saveCount. It is an error for saveCount to be less than 1.
     *
     * Example:
     *    int count = canvas.save();
     *    ... // more calls potentially to save()
     *    canvas.restoreToCount(count);
     *    // now the canvas is back in the same state it was before the initial
     *    // call to save().
     *
     * @param saveCount The save level to restore to.
     */
    public void restoreToCount(int saveCount) {
        if (saveCount < 1) {
            if (!sCompatibilityRestore || !isHardwareAccelerated()) {
                // do nothing and throw without restoring
                throw new IllegalArgumentException(
                        "Underflow in restoreToCount - more restores than saves");
            }
            // compat behavior - restore as far as possible
            saveCount = 1;
        }
        nRestoreToCount(mNativeCanvasWrapper, saveCount);
    }
}
设置离屏缓冲位置
public class AvatarView extends View {
    // 保存的区域
    RectF savedArea = new RectF();

    @Override
    protected void onSizeChanged(int w, int h, int oldw, int oldh) {
        super.onSizeChanged(w, h, oldw, oldh);
        // 设置离屏缓冲的区域
        savedArea.set(PADDING, PADDING, PADDING + WIDTH, PADDING + WIDTH);
    }
}
融合图片验证2
- 大功告成,O(∩_∩)O哈哈~

附录
- 高效加载大型位图
- Android Developer:自定义视图组件
- Compositing Digital Images(图像融合):PorterDuff.Mode
- 扔物线官网:扔物线
- 很感谢大佬提供的教程和源码,才能好好系统学习下自定义UI的内容。
- rengwuxian/HenCoderPlus
- rengwuxian/HenCoderPlus3
- HenCoder Android 开发进阶: 自定义 View 1-2 Paint 详解
源码
public class AvatarView extends View {
// 头像的宽度
private static final float WIDTH = Utils.dp2px(300);
// 头像距离画布边界的填充量
private static final float PADDING = Utils.dp2px(50);
// 头像边框的宽度
private static final float EDGE_WIDTH = Utils.dp2px(10);
// 头像边框的点坐标
private final float BORDER_UPPER = PADDING;
private final float BORDER_LOWER = PADDING + WIDTH;
// 头像圆底的点坐标
private final float UPPER = BORDER_UPPER + EDGE_WIDTH;
private final float LOWER = BORDER_LOWER - EDGE_WIDTH;
// 抗锯齿
Paint paint = new Paint(Paint.ANTI_ALIAS_FLAG);
// 两个Bitmap融合的方式
Xfermode xfermode = new PorterDuffXfermode(PorterDuff.Mode.SRC_IN);
// 头像的Bitmap
Bitmap bitmap;
// 保存的区域
RectF savedArea = new RectF();
public AvatarView(Context context, @Nullable AttributeSet attrs) {
super(context, attrs);
}
{
bitmap = getAvatar((int) WIDTH);
}
@Override
protected void onSizeChanged(int w, int h, int oldw, int oldh) {
super.onSizeChanged(w, h, oldw, oldh);
// 设置离屏缓冲的区域
savedArea.set(PADDING, PADDING, PADDING + WIDTH, PADDING + WIDTH);
}
@Override
protected void onDraw(Canvas canvas) {
super.onDraw(canvas);
canvas.drawOval(BORDER_UPPER, BORDER_UPPER, BORDER_LOWER, BORDER_LOWER, paint);
paint.setColor(Color.WHITE);
// 离屏缓冲(Bitmap)
int saved = canvas.saveLayer(savedArea, paint);
canvas.drawOval(UPPER, UPPER, LOWER, LOWER, paint);
paint.setXfermode(xfermode);
// 图片的宽度和圆环的外圆的直径一样
canvas.drawBitmap(bitmap, PADDING, PADDING, paint);
paint.setXfermode(null);
// 将离屏缓冲数据绘制到屏幕上
canvas.restoreToCount(saved);
}
/**
* 获取头像
*
* @param width 按照width读取图片
*/
Bitmap getAvatar(int width) {
BitmapFactory.Options options = new BitmapFactory.Options(