python ----> pytest 测试框架
Posted CSR-kkk
tags:
篇首语:本文由小常识网(cha138.com)小编为大家整理,主要介绍了python ----> pytest 测试框架相关的知识,希望对你有一定的参考价值。
介绍
pytest 是一个非常成熟的全功能的Python测试框架
- 简单灵活,容易上手
- 支持参数化
- 测试用例的skip和xfail,自动失败重试等处理
- 支持简单的单元测试和复杂的功能测试,支持selenium / appium 等自动化测试,接口测试(pytest+requests)
- pytest具有很多第三方插件,可以自定义扩展,如pytest-allure(测试报告),pytest-xdist(多CPU分发)等
- 很好的与 Jenkins集成
参考:官方文档 https://docs.pytest.org/en/6.2.x/
第三方库:https://pypi.org/search/?q=pytest
测试用例的识别
- 测试文件
- test_*.py
- *_test.py
- 测试用例
- Test*类中包含的所有test_*方法 (测试类不能有__init__方法)
- 不在Test*类中的所有test_*方法
- 也可执行unittest框架写的用例和方法
安装
pip install pytest
升级: pip install -U pytest
查看版本号:pytest --version
执行
pytest: 执行当前目录下所有测试文件中的测试用例
pytest test_*.py:执行指定文件中的测试用例
| 命令行参数 | 说明 | 举例 |
|---|---|---|
| -h | 查看pytest所有选项 | pytest -h |
| -p | 减少冗长 | pytest test_*.py -p |
| -v | 带控制台输出结果,日志 | pytest test_*.py -v |
| -s | 输出打印的信息 | pytest test_*.py -s |
| :: | 执行指定的模块,类或方法 | pytest 文件名.py::类名::方法名 |
| -x | 一旦运行到报错,就停止执行 | pytest test_*.py -x |
| –maxfail= | 允许失败的用例达到num次才停止执行 | pytest test_*.py --maxfail=2 |
| -k | 执行含有某个关键字的方法 | pytest test_*.py -k “case1” |
| -m [标记名] | 运行有这个标记的用例 | @pytest.mark.login , pytest -m “login” |
-vs 可查看详细的输出信息加打印日志
可执行参数查看:命令行输入:pytest --help
框架结构
| 级别 | 说明 |
|---|---|
| setup_module / teardown_module | 在模块的始末执行(优先级最高) |
| setup_class / teardown_class | 在类中前后只执行一次 |
| setup / teardown | 运行在调用方法的前后 |
参数化
@pytest.mark.parametrize(argnames, argvalues)
argnames的类型可以是 string,list,tuple
@pytest.mark.parametrize('a,b', [(1,1),('a','b')])
def test_param(self,a,b):
	assert a == b
数据驱动
数据驱动就是数据的改变从而驱动自动化测试的执行,最终引起测试结果的改变。
应用场景:测试步骤、测试数据、配置 ——数据驱动
yaml数据驱动
# data.yaml
-
    - 10
    - 20
-
	- 50
	- 60
@pytest.mark.parametrize(['a,b'],yaml.safe_load(open("./data.yaml", encoding="UTF-8")))
def test_data(self, a, b):
	print(a+b)
fixture()
fixture是在测试函数运行前后,由pytest执行的外壳函数
功能:
- 定义传入测试中的数据集
- 配置测试前系统的初始状态
- 为批量测试提供数据源等
Fixture是pytest用于将测试前后进行预备,清理工作的代码分离出核心测试逻辑的一种机制
fixture装饰的方法,被其他方法调用时使用方法名来获得返回的数据进行传递(类似于方法的封装与调用)
@pytest.fixture()
def login():
	print("登录")

def test_cart():
	pass
# 将login传递进来
def test_order(login):  # 通过 方法名(login) 进行传递
	print("下订单")
使用:
方法1:直接通过函数名,传递到方法中(如果需要返回值,必须使用这种方式)
方法2:使用 @pytest.mark.usefixtures(‘login’) ,测试用例前加上装饰器(没有返回值)
参数:
@pytest.fixture(scope="")
执行优先级:“session”, “package”, “module”, “class”, “function”
参考:https://docs.pytest.org/en/6.2.x/fixture.html#fixture
yield :
激活 fixture 的 teardown
生成器,相当于return,返回数据,记录执行位置,下次执行从 yield 后面开始执行
fixture 传递参数
在fixture装饰器中用params参数进行传递,在方法中使用request参数进行接收
import pytest
@pytest.fixture(params=[1,2,3])
def data(request):
	return request.param

def test_fixture(data):
	print(f"测试数据:{data}")
@pytest.fixture 与 @pytest.mark.parametrize 结合实现参数化
使用parametrize时,参数indirect=True
pytest 插件
# 安装
pip install pytest-ordering       控制用例的执行顺序
pip install pytest-dependency     控制用例的依赖关系
pip install pytest-xdist          分布式并发执行测试用例
pip install pytest-rerunfailures  失败重跑
pip install pytest-assume         多重较验
pip install pytest-random-order   用例随机执行
pip intall  pytest-html           测试报告
a、pytest-ordering
@pytest.mark.run(order=-1)
def test_a():
	print("test_a 测试用例")

@pytest.mark.run(order=4)
def test_b():
	print("test_b 测试用例")

@pytest.mark.run(order=1)
def test_c():
	print("test_c 测试用例")
执行结果
test_demo.py::test_c PASSED [ 33%]test_c 测试用例
test_demo.py::test_b PASSED [ 66%]test_b 测试用例
test_demo.py::test_a PASSED [100%]test_a 测试用例
order执行顺序为:order=1 order=4 order=-1
b、pytest-xdist
运行:
pytest -n 3,指定3个CPU并发执行
pytest -n auto,自动检测系统的CPU数目
conftest
规则
1、conftest.py文件名固定,不能更换
2、可以放在根目录下全局调用,也可以放在某个包下,就近生效(配置和前期工作)
3、conftest.py与运行用例在同一个包下,且该包中有__init__.py 文件
4、使用不需要导入conftest.py,pytest会自动识别
案例:
某个项目所有用例在执行前,某个步骤只执行一次,例如打开浏览器动作,所有用例执行完后关闭浏览器,可以在该项目中创建conftest.py,添加装饰器 @pytest.fixture(scope=“session”),实现整个项目测试用例对浏览器的复用
Allure测试报告
参考:https://docs.qameta.io/allure/
allure是一个轻量级,灵活的,支持多语言(python,java,ruby等)的测试报告工具。
多平台的(Linux,Mac,Windows),奢华的report框架
可为dev/qa 提供详尽的测试报告、测试步骤、log
可为管理层提供 high level统计报告
Java语言开发,支持pytest,javascript,php,ruby等
可以集成到Jenkins
安装
参考:https://docs.qameta.io/allure/#_installing_a_commandline
1.Linux
sudo apt-add-repository ppa:qameta/allure
sudo apt-get update
sudo apt-get install allure
2.Mac
brew install allure
3.Windows
- 下载zip包:https://repo.maven.apache.org/maven2/io/qameta/allure/allure-commandline/
- 把bin目录配置到path环境变量中
- 命令行输入
allure检查是否安装成功
安装 allure-pytest 插件
pip install allure-pytest
特性:
@feature 功能,
@story 子功能,
@step 步骤,
@attach 需要附加的信息
@title 命名case
@allure.severity 标记用例等级
blocker:阻塞缺陷(功能未实现,无法下一步)
critical:临界缺陷(功能点缺失)
normal: 一般缺陷(数值计算错误)
minor:次要缺陷(界面错误与UI需求不符)
trivial: 轻微缺陷(必须项无提示,或者提示不规范)
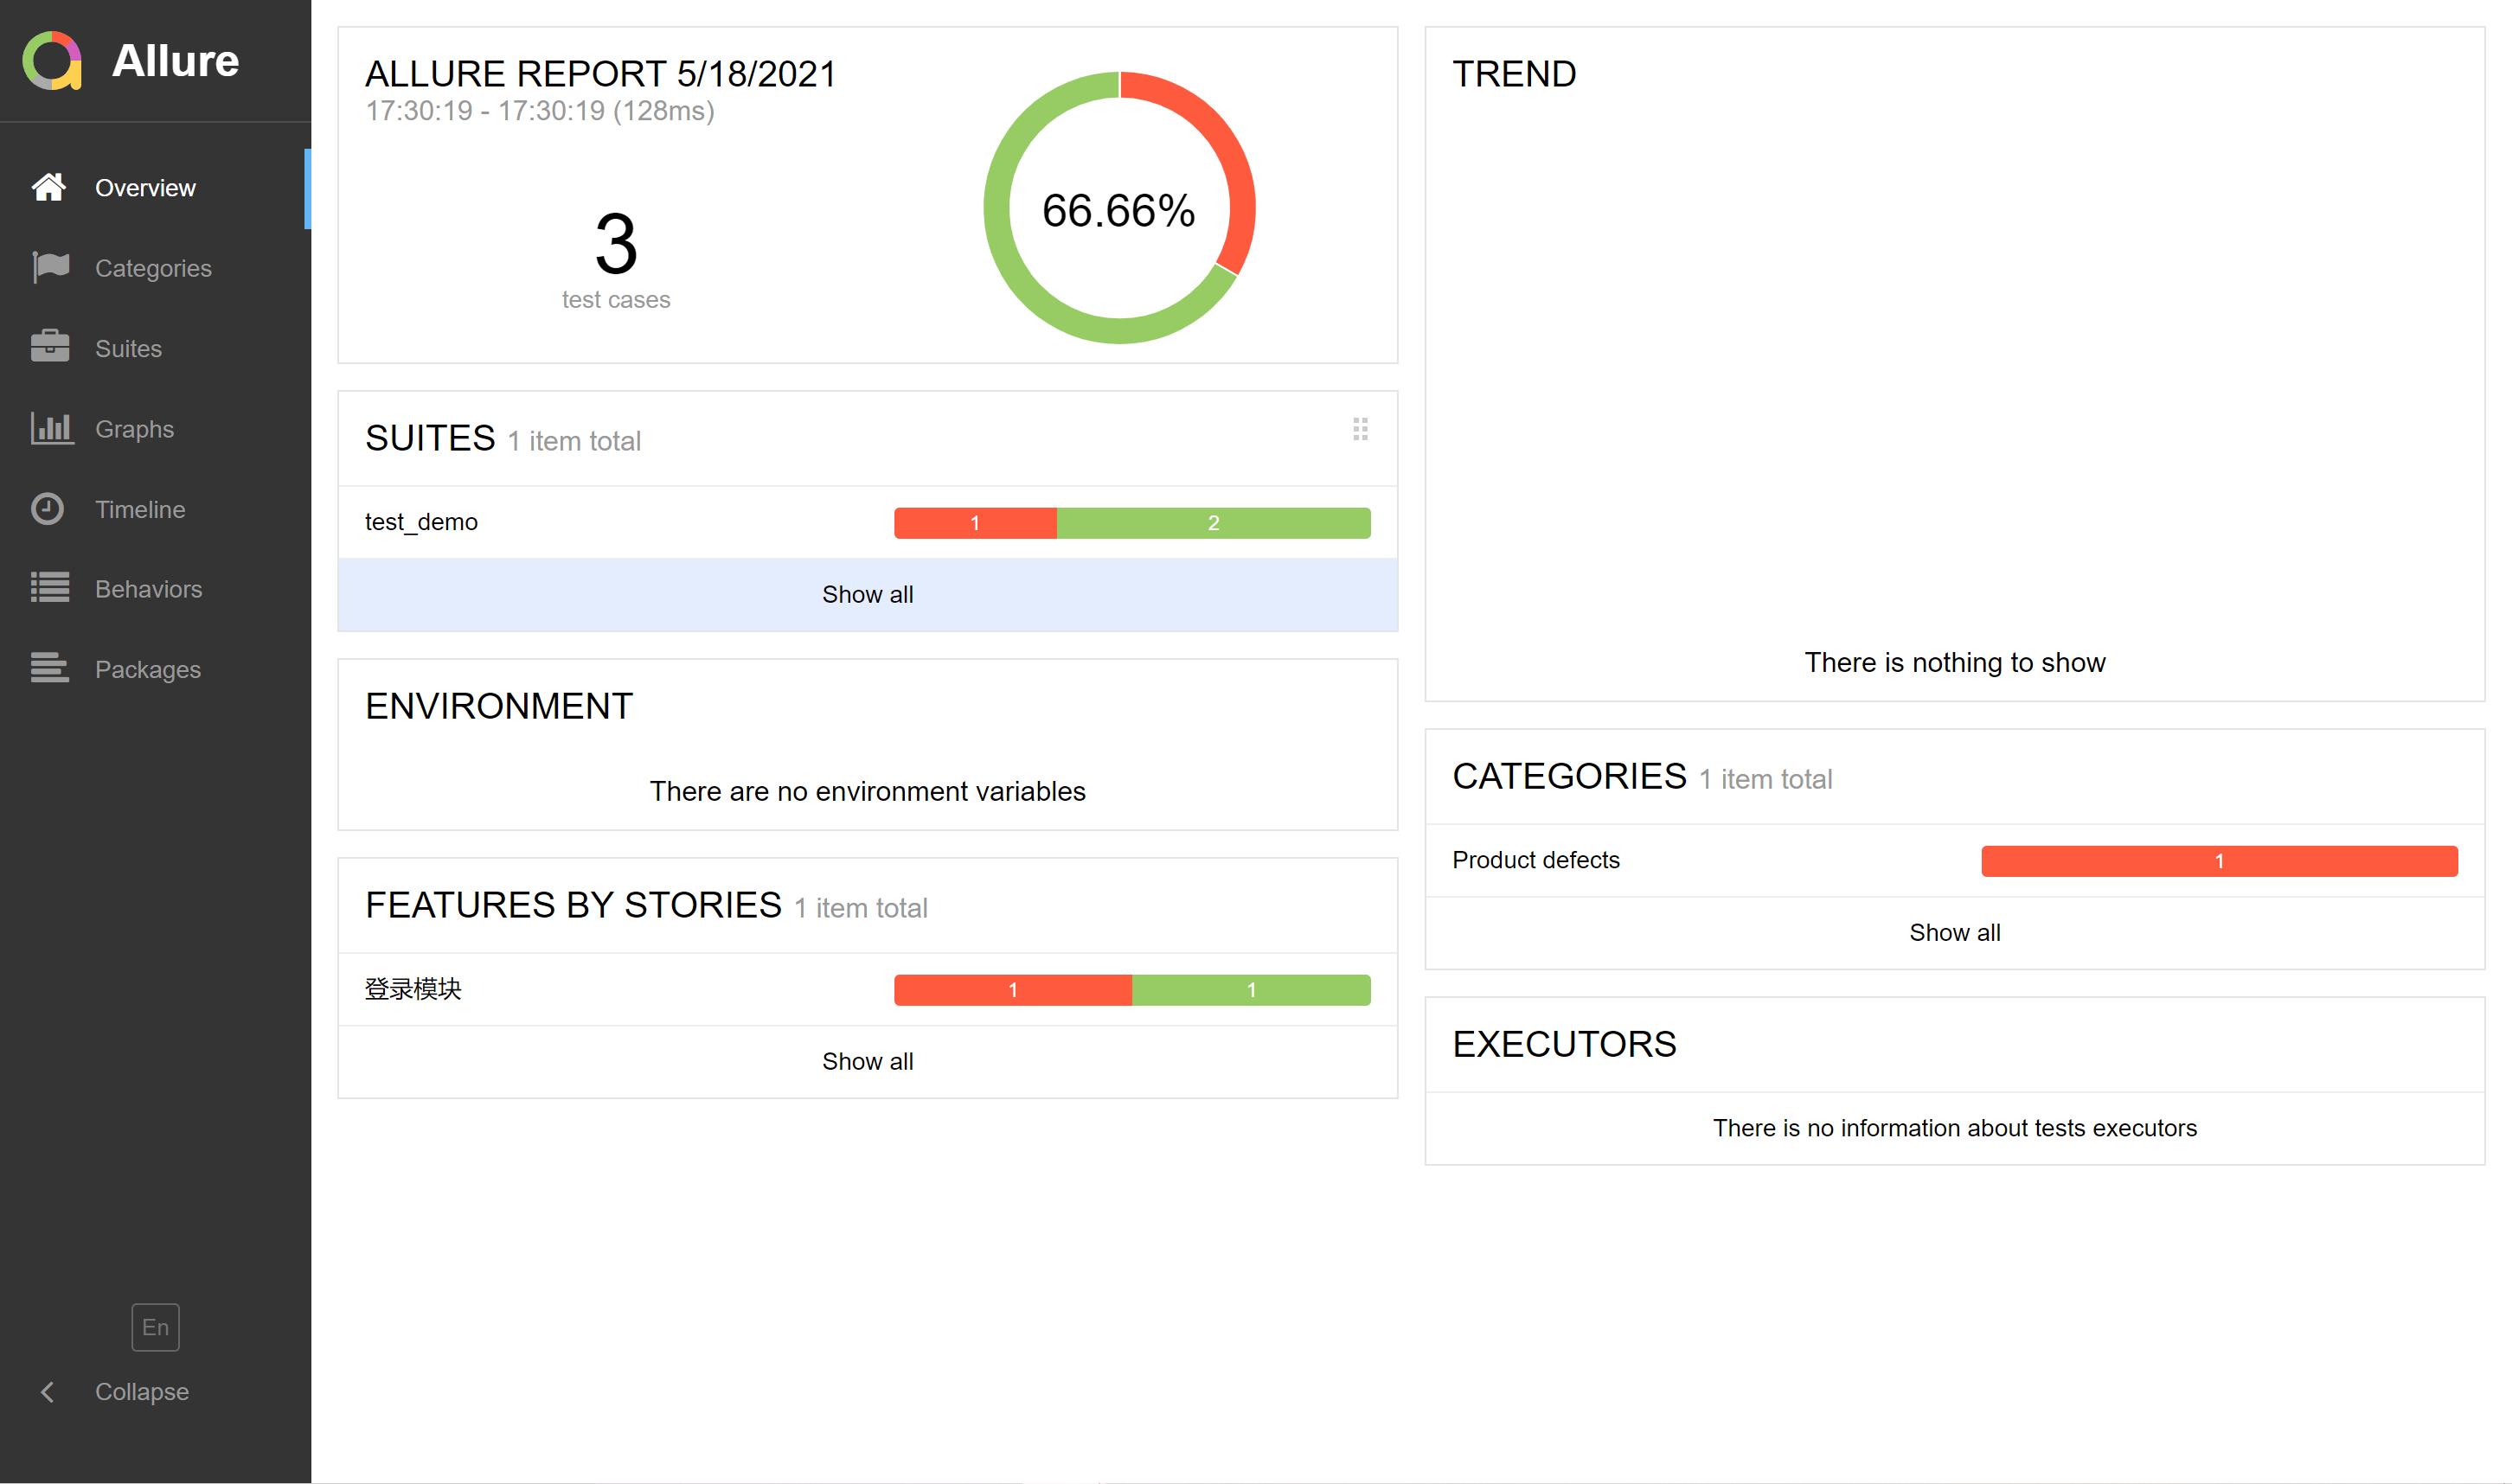
import allure
@allure.feature("登录模块")
class TestLogin():
    @allure.story("登录成功")
    @allure.title("登录成功")
    def test_login_success(self):
        with allure.step("步骤1:打开应用"):
            print("打开应用")

        with allure.step("步骤2:进入登录页面"):
            print("进入登录页面")

        print("login success")

    @allure.story("登录失败")
    def test_login_fail(self):
        print("login fail -- 1")
        assert False

    def test_text(self):
    	allure.attach("这是一个纯文本", attachment_type=allure.attachment_type.TEXT)
pytest --help |grep allure可查看完整的命令
单个命令在命令行输出
pytest test_*.py --allure-features="demo" -vs
				 --allure-stories="" -vs
				 --allure-...
运行:
第一步:执行测试用例,指定参数--alluredir 选项及数据保存的目录
pytest test_demo.py --alluredir=./result
第二步:启动allure服务
allure serve ./result
用例执行之前先清空allure的报告记录
pytest test_demo.py --alluredir ./result --clean-alluredir
allure serve ./result
allure generate 生成 html 格式的测试结果报告
# 报告生成在allure-report文件夹中
allure generate ./result
# 将报告生成在指定目录下
allure generate ./result -o  ./report
# 清理文件在生成报告
allure generate --clean result -o ./report
打开report报告:
a. pycharm中右键.html文件open in --> chrome(or others)
b. allure open ./report
c. 指定IP与端口开启服务 allure open -h 127.0.0.1 -p 8883 ./report

@allure.link,@allure.testcase(TEST_CASE_LINK, ‘Test_case_title’)
@allure.link('http://www.baidu.com')
def test_link():
	pass

TEST_CASE_LINK = 'http://www.baidu.com'
@allure.testcase(TEST_CASE_LINK, 'Test_case_title')
def test_with_testcase_link():
	pass
捕获异常
捕获给定异常类型.
def test_div_error():

	with pytest.raises(Z)
以上是关于python ----> pytest 测试框架的主要内容,如果未能解决你的问题,请参考以下文章