Linux--PXE高效批量网络装机部署!
Posted handsomeboy-东
tags:
篇首语:本文由小常识网(cha138.com)小编为大家整理,主要介绍了Linux--PXE高效批量网络装机部署!相关的知识,希望对你有一定的参考价值。
PXE
一、PXE概述
(Preboot execute environment,预启动执行环境,在操作系统之前运行)是由 Intel 公司开发的网络引导技术,允许客户机通过网络从远程服务器下载引导镜像,并加载安装文件或者整个操作系统
二、PXE高效批量网络装机模拟部署
2.1设备准备:
- 一台linux系统作为服务器,一台linux系统作为客户端
2.2基本步骤:
- 在服务器上设置DHCP服务让其自动分配IP地址,提供tftp服务器IP地址,指引客户端去tftp服务器取得系统所需的引导文件
- 设置tftp服务,提供引导程序的下载,提供内核文件及驱动文件,pxelinux.0(内核文件和驱动文件通过复制dentos7的光盘里的讷河和驱动文件,pxelinux.0通过yum下载)
- 设置ftp服务,提供客户端一些软件包
2.3PXE安装部署
2.3.1设置DHCP
(1)准备一台linux系统作服务器,网络适配器为VMnet8
[root@handsomeboy1 ~]# systemctl stop firewalld.service
[root@handsomeboy1 ~]# setenforce 0
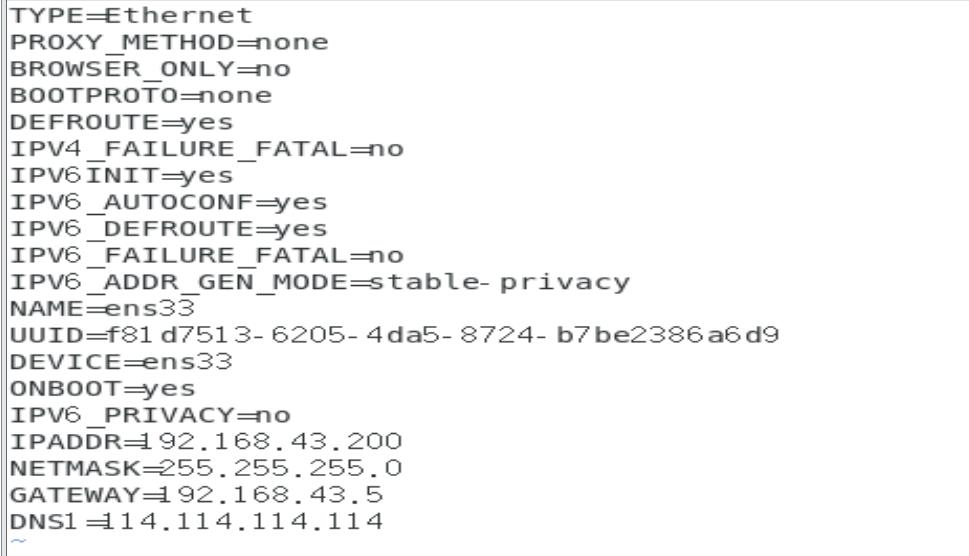
[root@handsomeboy1 ~]# vim /etc/sysconfig/network-scripts/ifcfg-ens33
[root@handsomeboy1 ~]# systemctl restart network
[root@handsomeboy1 ~]# ifconfig ens33
ens33: flags=4163<UP,BROADCAST,RUNNING,MULTICAST>  mtu 1500
        inet 192.168.43.200  netmask 255.255.255.0  broadcast 192.168.43.255
        inet6 fe80::792f:d024:3150:cf1d  prefixlen 64  scopeid 0x20<link>
        ether 00:0c:29:39:c8:59  txqueuelen 1000  (Ethernet)
        RX packets 596057  bytes 853487321 (813.9 MiB)
        RX errors 0  dropped 0  overruns 0  frame 0
        TX packets 284198  bytes 17469492 (16.6 MiB)
        TX errors 0  dropped 0 overruns 0  carrier 0  collisions 0
[root@handsomeboy1 ~]# yum install -y dhcp
[root@handsomeboy1 ~]# cp -p /usr/share/doc/dhcp*/dhcpd.conf.example /etc/dhcp/dhcpd.conf
cp:是否覆盖"/etc/dhcp/dhcpd.conf"? y
[root@handsomeboy1 ~]# vim /etc/dhcp/dhcpd.conf
[root@handsomeboy1 ~]# systemctl start dhcpd

2.3.2设置tftp
[root@handsomeboy1 ~]# yum install -y tftp-server.x86_64    //下载tftp服务
[root@handsomeboy1 ~]# rpm -ql tftp-server
/etc/xinetd.d/tftp                      //配置文件
/usr/lib/systemd/system/tftp.service
/usr/lib/systemd/system/tftp.socket
/usr/sbin/in.tftpd
/usr/share/doc/tftp-server-5.2
/usr/share/doc/tftp-server-5.2/CHANGES
/usr/share/doc/tftp-server-5.2/README
/usr/share/doc/tftp-server-5.2/README.security
/usr/share/man/man8/in.tftpd.8.gz
/usr/share/man/man8/tftpd.8.gz
/var/lib/tftpboot                         //tftp家目录
[root@handsomeboy1 ~]# yum install -y syslinux     //下载pxelinux.0它依赖于syslinux
[root@handsomeboy1 ~]# rpm -ql syslinux | grep pxelinux.0
/usr/share/syslinux/gpxelinux.0
/usr/share/syslinux/pxelinux.0
[root@handsomeboy1 ~]# cp -p /usr/share/syslinux/pxelinux.0 /var/lib/tftpboot
#### 将pxelinux.0放在tftp服务家目录下
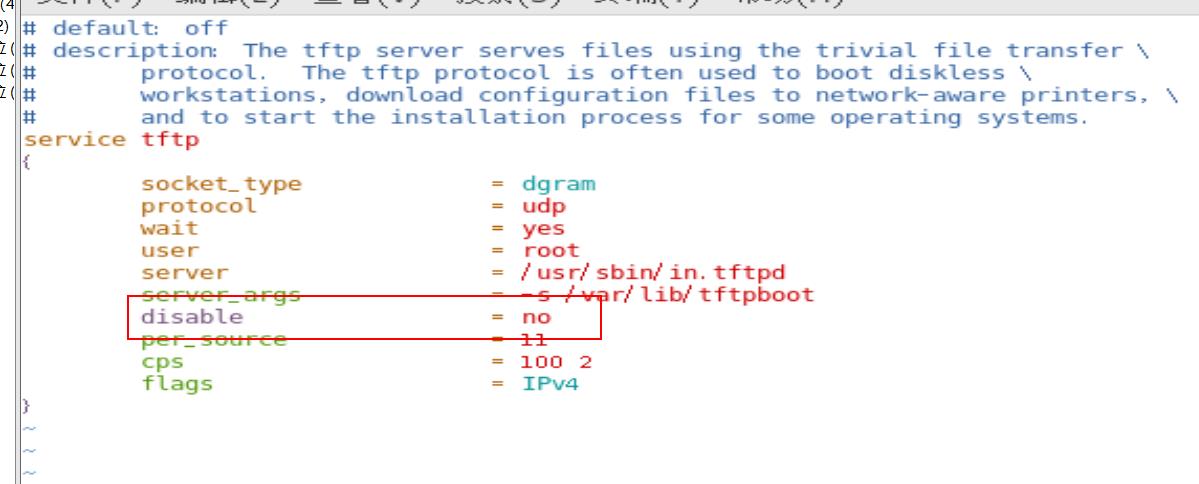
[root@handsomeboy1 ~]# vim /etc/xinetd.d/tftp    //修改配置文件
[root@handsomeboy1 ~]# mount /dev/sr0 /mnt
mount: /dev/sr0 写保护,将以只读方式挂载
[root@handsomeboy1 ~]# cd /mnt
[root@handsomeboy1 mnt]# ls
CentOS_BuildTag  EULA  images    LiveOS    repodata              RPM-GPG-KEY-CentOS-Testing-7
EFI              GPL   isolinux  Packages  RPM-GPG-KEY-CentOS-7  TRANS.TBL
[root@handsomeboy1 mnt]# cd images
[root@handsomeboy1 images]# ls
efiboot.img  pxeboot  TRANS.TBL
[root@handsomeboy1 images]# cd pxeboot
[root@handsomeboy1 pxeboot]# ls
initrd.img  TRANS.TBL  vmlinuz
[root@handsomeboy1 pxeboot]# cp initrd.img vmlinuz /var/lib/tftpboot/
将光盘中的内核文件和驱动文件复制到tftp家目录中
[root@handsomeboy1 pxeboot]# cd /var/lib/tftpboot
[root@handsomeboy1 tftpboot]# ls
initrd.img  pxelinux.0  vmlinuz
[root@handsomeboy1 tftpboot]# yum install -y vsftpd    //下载ftp
[root@handsomeboy1 tftpboot]# mkdir /var/ftp/centos7     //在ftp家目录中创建一个目录用于挂载
[root@handsomeboy1 tftpboot]# cp -rf /mnt/* /var/ftp/centos7/
[root@handsomeboy1 centos7]# umount /mnt
[root@handsomeboy1 centos7]# mount /dev/sr0 /var/ftp/centos7
mount: /dev/sr0 写保护,将以只读方式挂载
[root@handsomeboy1 centos7]# cd /var/lib/tftpboot
[root@handsomeboy1 tftpboot]# mkdir pxelinux.cfg        //创建一个目录来放置开机菜单文件
[root@handsomeboy1 tftpboot]# cd pxelinux.cfg
[root@handsomeboy1 pxelinux.cfg]# vim default          //设置开机菜单文件
#### 这里有两种方式,第一中复制光盘中iso文件到default中,这种方式还要将光盘中isolinux
     底下的splash.png和vesamenu.c32复制到tftp家目录下,第二种方式自己手写default,这里
     先用第一种方式
[root@handsomeboy1 mnt]# cd /var/ftp/centos7
[root@handsomeboy1 centos7]# ls
CentOS_BuildTag  EULA  images    LiveOS    repodata              RPM-GPG-KEY-CentOS-Testing-7
EFI              GPL   isolinux  Packages  RPM-GPG-KEY-CentOS-7  TRANS.TBL
[root@handsomeboy1 centos7]# cd isolinux
[root@handsomeboy1 isolinux]# ls
boot.cat  grub.conf   isolinux.bin  memtest     TRANS.TBL     vmlinuz
boot.msg  initrd.img  isolinux.cfg  splash.png  vesamenu.c32
[root@handsomeboy1 isolinux]# cp -p splash.png vesamenu.c32 /var/lib/tftpboot
[root@handsomeboy1 isolinux]# cp -p isolinux.cfg /var/lib/tftpboot/pxelinux.cfg/default
[root@handsomeboy1 isolinux]# vim /var/lib/tftpboot/pxelinux.cfg/default
[root@handsomeboy1 isolinux]# systemctl start dhcpd
[root@handsomeboy1 isolinux]# systemctl start vsftpd
[root@handsomeboy1 isolinux]# systemctl start tftp

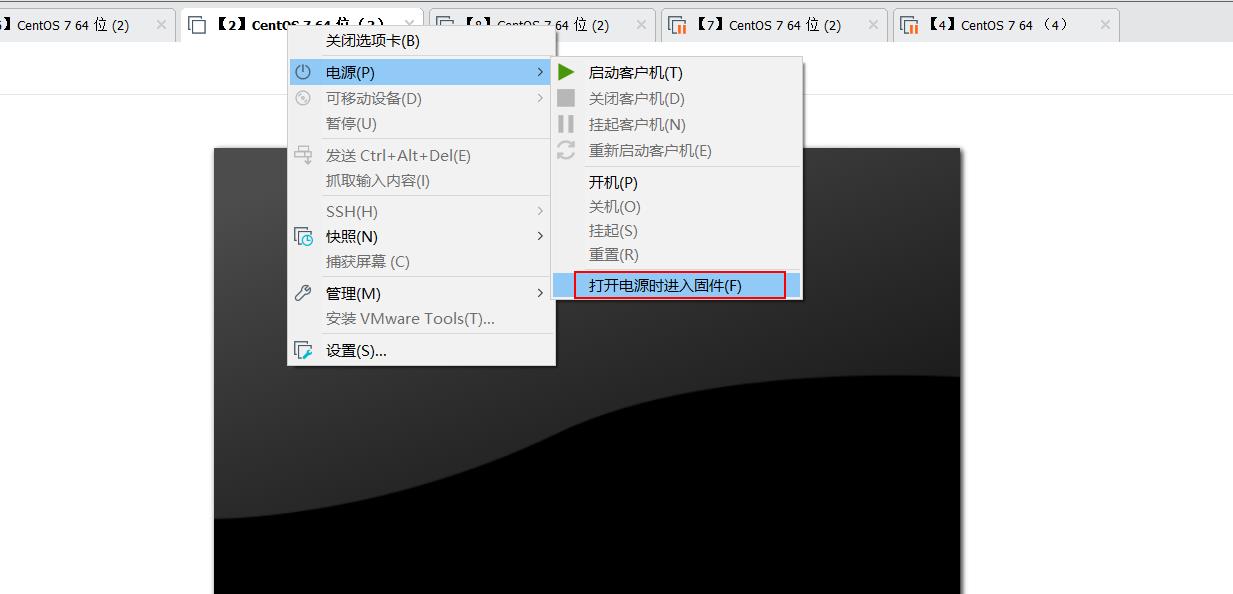
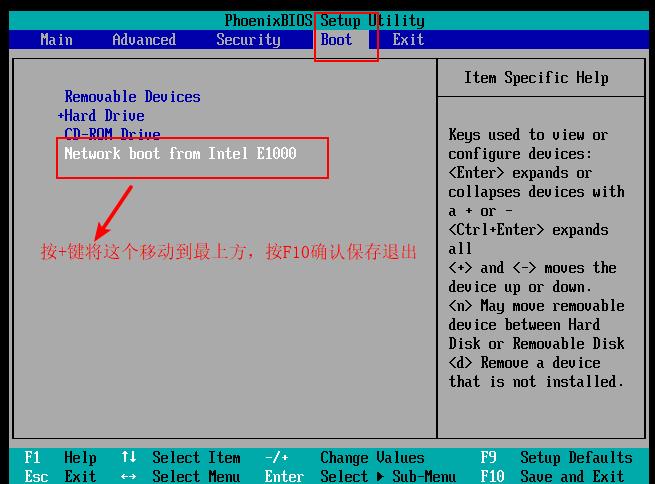
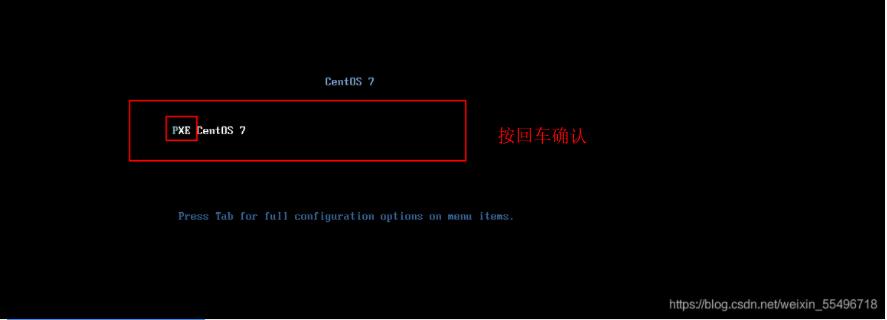
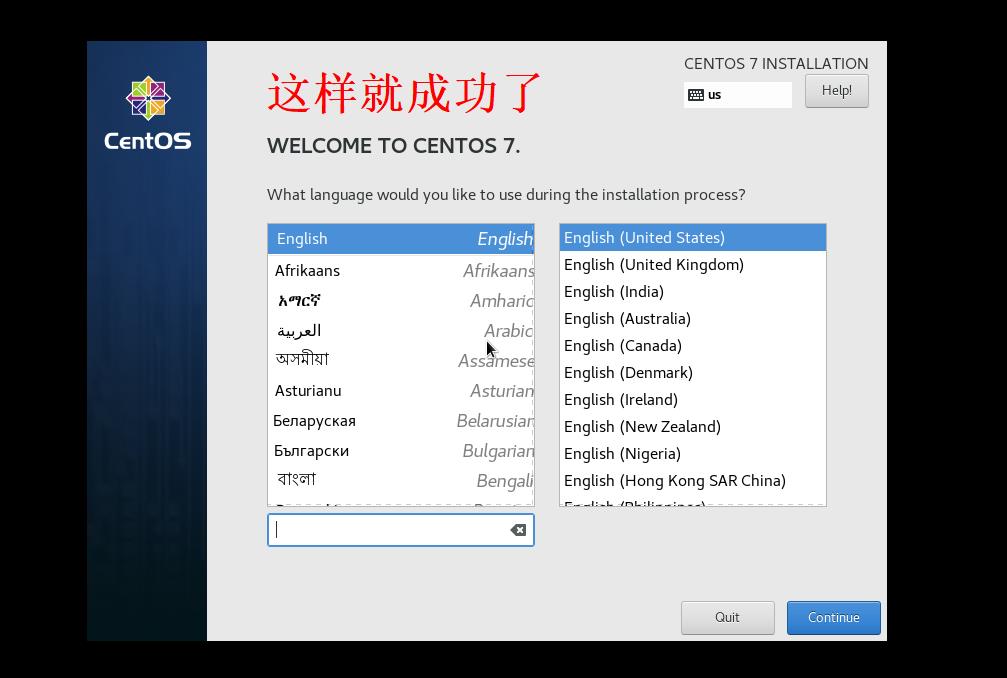
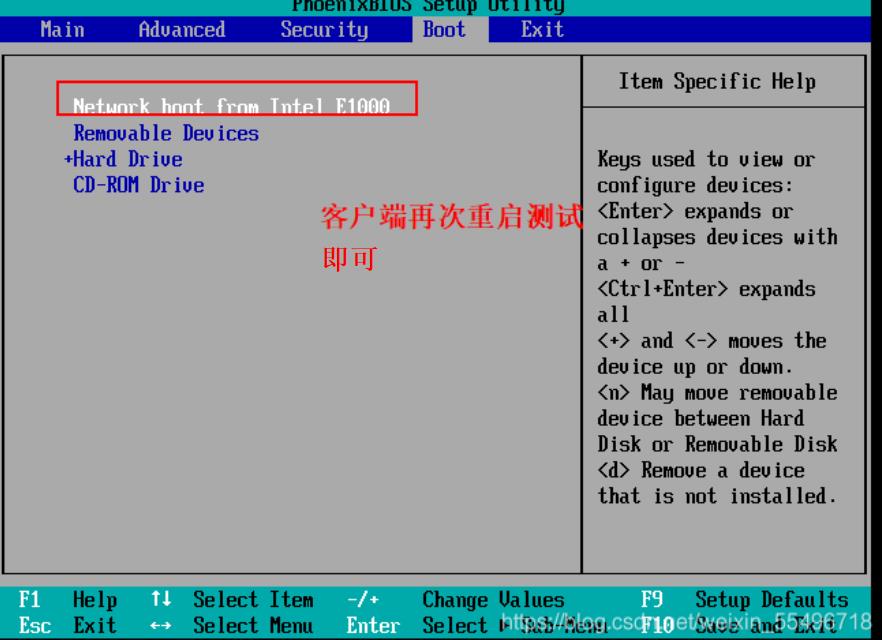
2.3.3新建客户端测试
2.4Kickstart无人值守安装
- 创建好应答文件,预先定义好各自安装设置
- 免去交互设置过程,实现全自动化安装
在服务器上:
[root@handsomeboy1 isolinux]# yum install -y system-config-kickstart.noarch
#### 安装无人装机技术
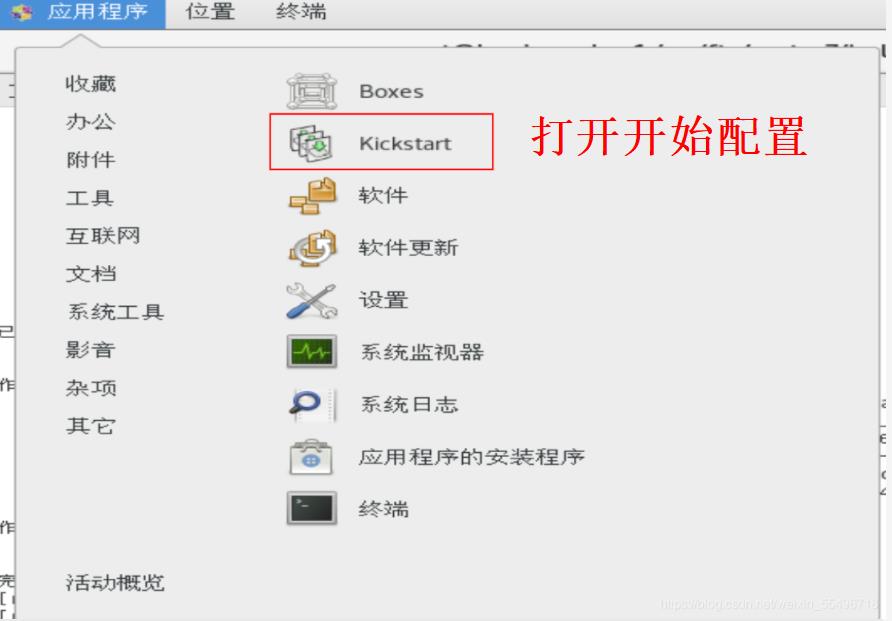
- 第一步
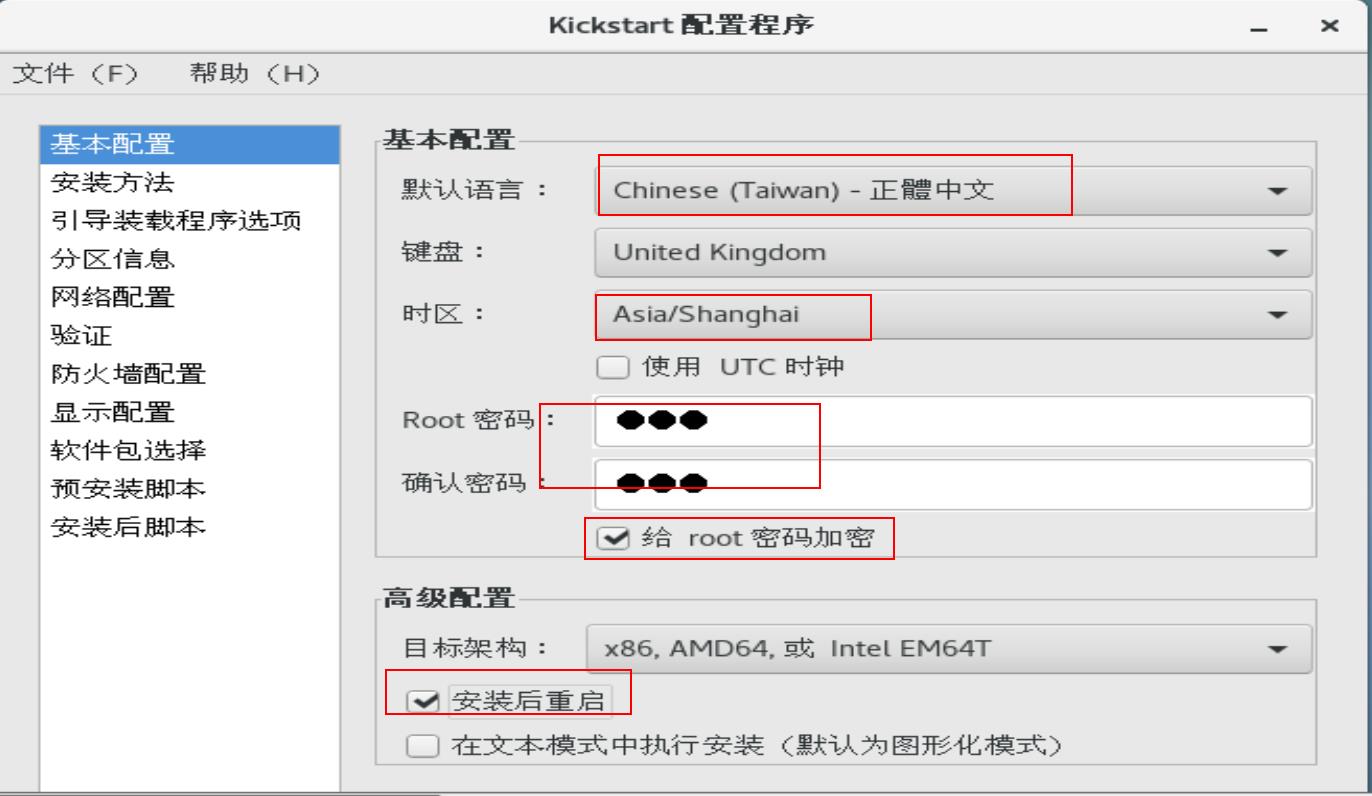
- 第二步
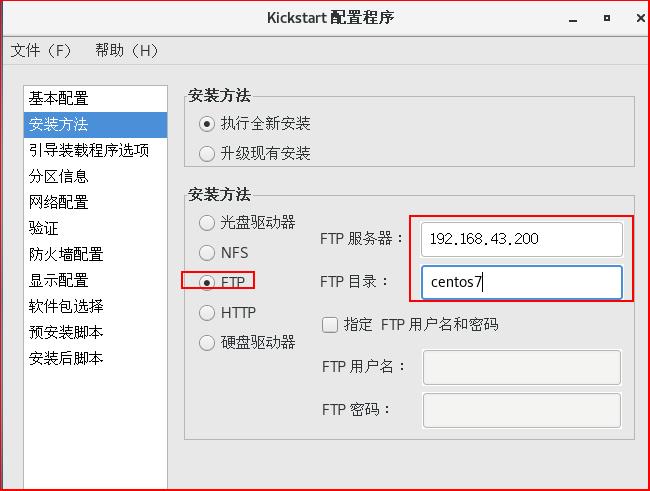
- 第三步
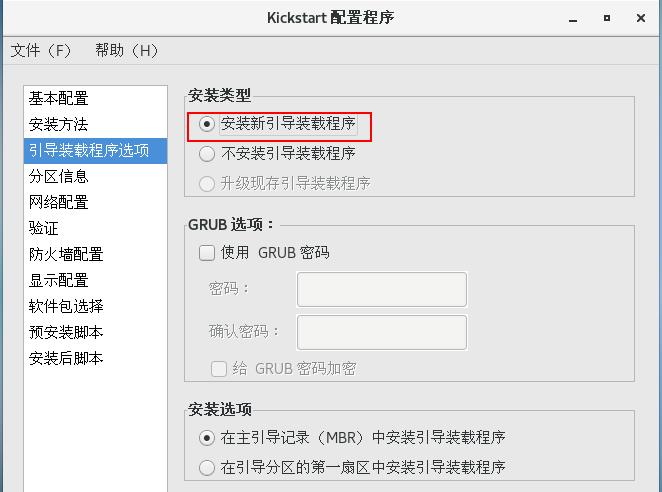
- 第四步
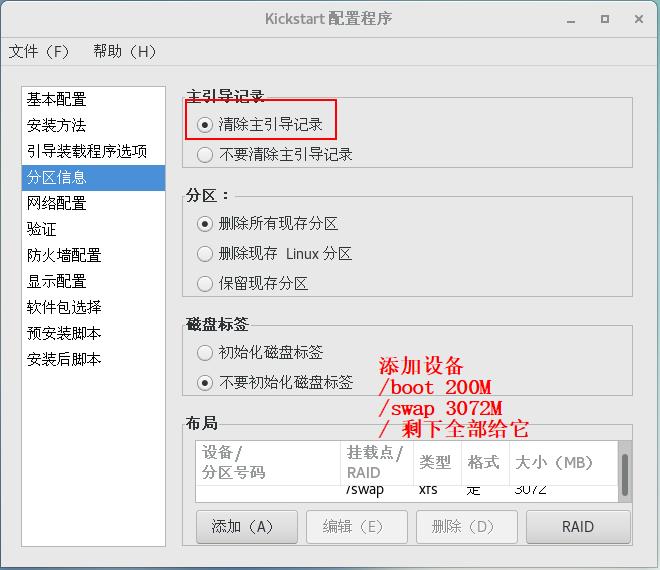
- 第五步

- 第六步

- 第七步
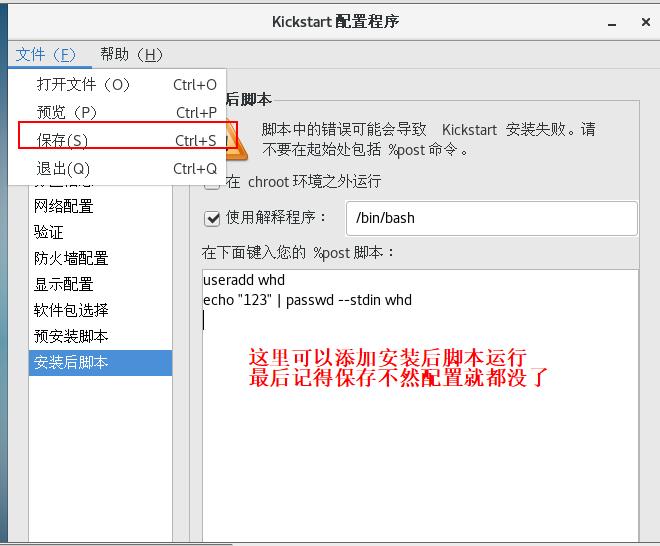
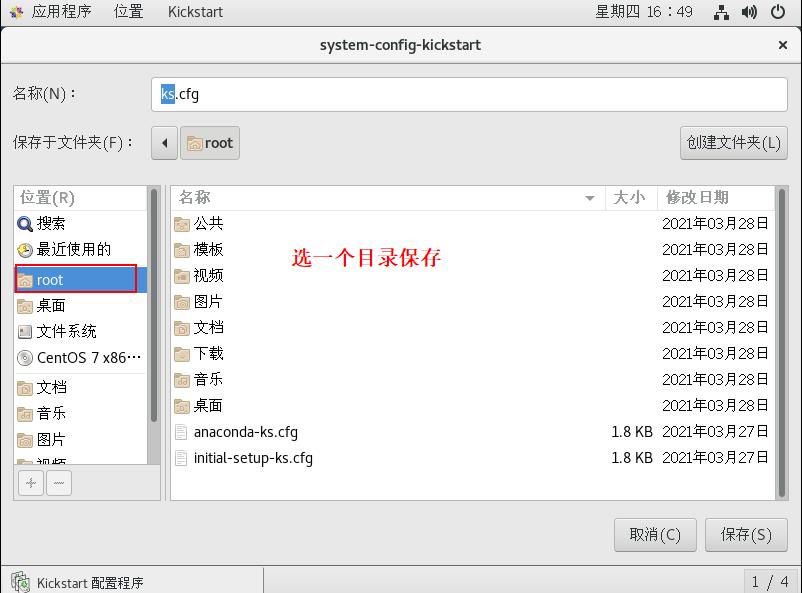

[root@handsomeboy1 ~]# cd /var/ftp
[root@handsomeboy1 ftp]# ls
centos7  pub
[root@handsomeboy1 ftp]# cp ~/ks.cfg ./          //将文件复制到ftp家目录中
[root@handsomeboy1 ftp]# ls
centos7  ks.cfg  pub
[root@handsomeboy1 ftp]# vim ks.cfg
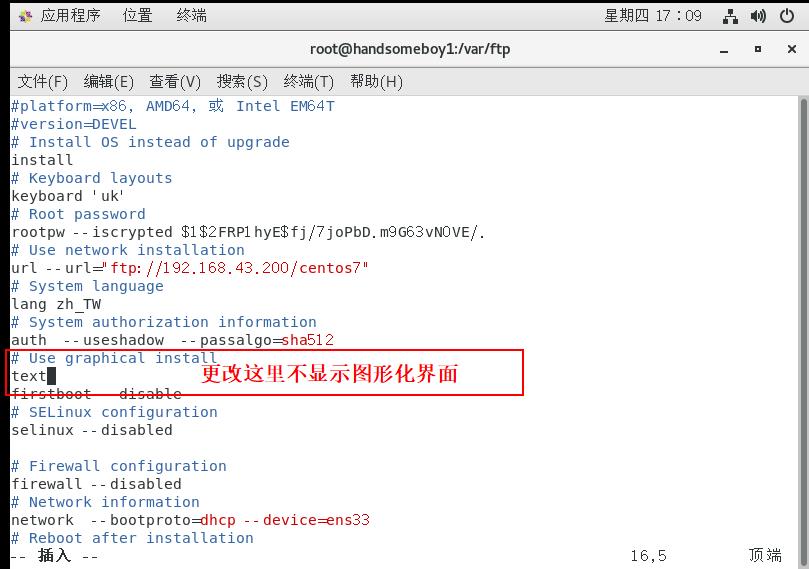
[root@handsomeboy1 centos7]# cd /var/lib/tftpboot/pxelinux.cfg
[root@handsomeboy1 pxelinux.cfg]# vim default

[root@handsomeboy1 ftp]# systemctl restart dhcpd        //重启服务
[root@handsomeboy1 ftp]# systemctl restart vsftpd
[root@handsomeboy1 ftp]# systemctl restart tftp
以上是关于Linux--PXE高效批量网络装机部署!的主要内容,如果未能解决你的问题,请参考以下文章