Apache Commons:CLi的简单的使用(创建mysql的访问器)
Posted 你是小KS
tags:
篇首语:本文由小常识网(cha138.com)小编为大家整理,主要介绍了Apache Commons:CLi的简单的使用(创建mysql的访问器)相关的知识,希望对你有一定的参考价值。
1. 声明
当前内容主要为本人学习和了解Apache Commons Cli这个工具类(创建基于控制台的命令行)
当前内容主要参考:Apache Commons Cli的官方文档
主要内容为:
- 创建基于-u -p -h之类的命令输入来检验mysql是否可以连接
pom文件:(将lib和jar分离开来)
<dependencies>
	<dependency>
		<groupId>commons-cli</groupId>
		<artifactId>commons-cli</artifactId>
		<version>1.4</version>
	</dependency>
	<dependency>
		<groupId>mysql</groupId>
		<artifactId>mysql-connector-java</artifactId>
		<version>5.1.34</version>
	</dependency>
</dependencies>
<build>
	<plugins>
		<plugin>
			<groupId>org.apache.maven.plugins</groupId>
			<artifactId>maven-jar-plugin</artifactId>
			<version>2.6</version>
			<configuration>
				<archive>
					<manifest>
						<addClasspath>true</addClasspath>
						<classpathPrefix>lib/</classpathPrefix>
						<mainClass>com.hy.apache.commons.test.cli.MySQLConnectionCliTest</mainClass>
					</manifest>
				</archive>
			</configuration>
		</plugin>
		<plugin>
			<groupId>org.apache.maven.plugins</groupId>
			<artifactId>maven-dependency-plugin</artifactId>
			<version>2.10</version>
			<executions>
				<execution>
					<id>copy-dependencies</id>
					<phase>package</phase>
					<goals>
						<goal>copy-dependencies</goal>
					</goals>
					<configuration>
						<outputDirectory>${project.build.directory}/lib</outputDirectory>
					</configuration>
				</execution>
			</executions>
		</plugin>
	</plugins>

</build>
2. 基本demo
import java.sql.Connection;
import java.sql.DriverManager;
import java.sql.SQLException;

import org.apache.commons.cli.CommandLine;
import org.apache.commons.cli.CommandLineParser;
import org.apache.commons.cli.DefaultParser;
import org.apache.commons.cli.Options;
import org.apache.commons.cli.ParseException;

/**
 *
 * @author hy
 * @createTime 2021-06-19 07:47:39
 * @description 当前内容主要为测试当前的apache commons这个工具类
 *
 */
public class MySQLConnectionCliTest {

	// 一个简单的jdbc连接操作器,命令行版本的,采用
	// -h 表示连接的ip地址
	// -u 表示用户名
	// -pw 表示密码
	// -p 表示端口
	// -db 表示访问的数据库
	public static void main(String[] args) throws ParseException {
		Options options = new Options();
		// 添加访问mysql需要的各种命令操作
		options.addOption("h", true, "mysql的所在ip地址");
		options.addOption("u", true, "mysql的登录用户名");
		options.addOption("p", true, "mysql的登录密码");
		options.addOption("pw", true, "mysql所在的端口");
		options.addOption("db", true, "mysql所在的端口");

		// 创建命令行解析器
		CommandLineParser parser = new DefaultParser();
		CommandLine commandLine = parser.parse(options, args);
		if (!commandLine.hasOption("h")) {
			System.out.println("必须要要有-h参数来设置访问mysql的ip!");
			return;
		}
		if (!commandLine.hasOption("u")) {
			System.out.println("必须要要有-u参数来设置访问mysql的登录用户名!");
			return;
		}
		if (!commandLine.hasOption("p")) {
			System.out.println("必须要要有-p参数来设置访问mysql的登录用户名登录密码!");
			return;
		}
		if (!commandLine.hasOption("pw")) {
			System.out.println("必须要要有-pw参数来设置访问mysql的访问端口!");
			return;
		}
		if (!commandLine.hasOption("db")) {
			System.out.println("必须要要有-pw参数来设置访问mysql的数据库!");
			return;
		}
		// 加载驱动
		try {
			Class.forName("com.mysql.jdbc.Driver");
			String host = commandLine.getOptionValue("h");
			String port = commandLine.getOptionValue("p");
			String username = commandLine.getOptionValue("u");
			String password = commandLine.getOptionValue("pw");
			String dbName = commandLine.getOptionValue("db");
			String url = "jdbc:mysql://" + host + ":" + port + "/" + dbName;
			Connection conn = null;
			try {
				conn = DriverManager.getConnection(url, username, password);
				System.out.println("打开mysql连接成功!");
			} catch (SQLException e) {
				// TODO Auto-generated catch block
				e.printStackTrace();
			} finally {
				if (conn != null) {
					try {
						conn.close();
					} catch (SQLException e) {
						// TODO Auto-generated catch block
						e.printStackTrace();
					}
				}
			}
		} catch (ClassNotFoundException e) {
			// TODO Auto-generated catch block
			e.printStackTrace();
		}
	}
}
3. 开始打包测试(eclipse)
选择项目,然后右键
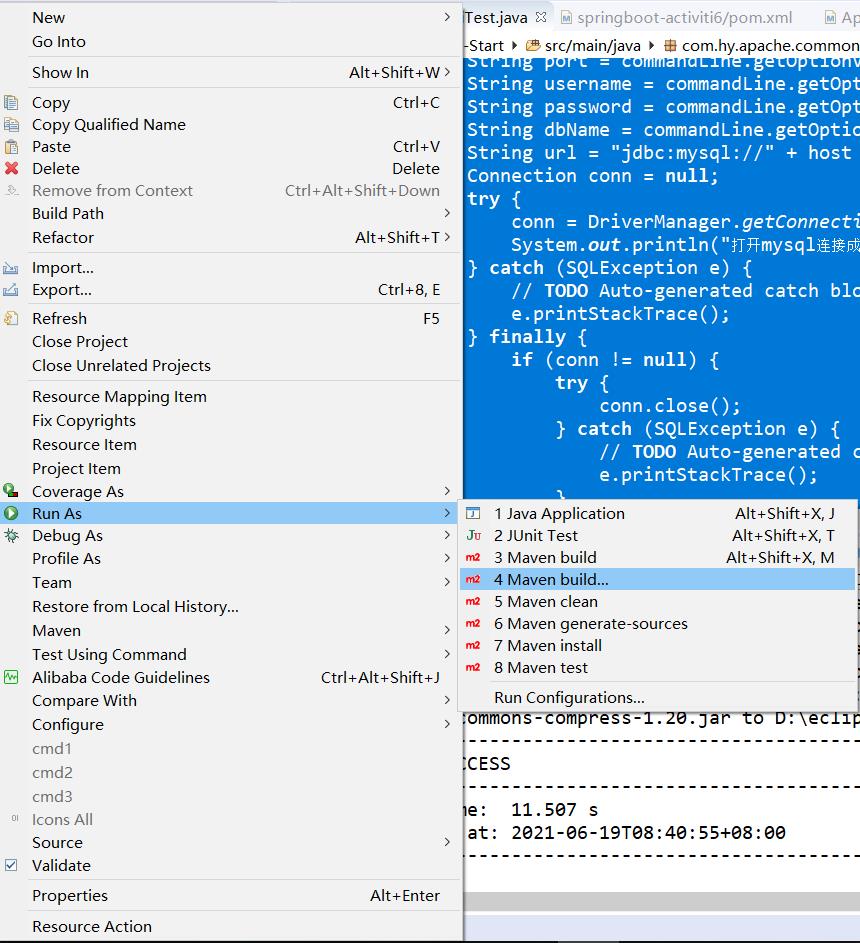
打包后:
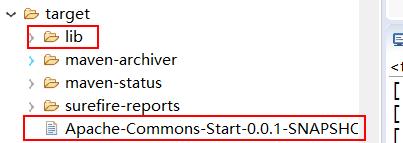
此时将lib这个库复制出来,然后将这个打好的jar包一起复制出来,开始执行
4. 执行结果
jar执行结果

不使用maven打包(即去掉上面的build部分),此时选中需要运行的main方法开始配置运行参数
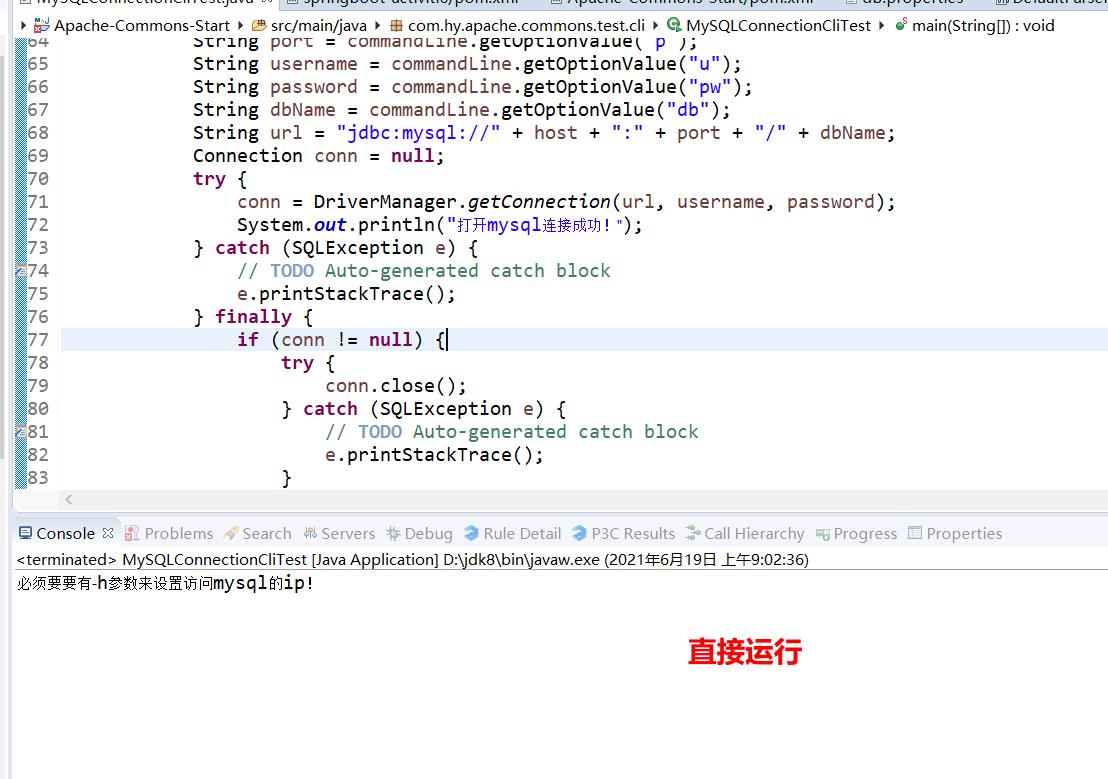
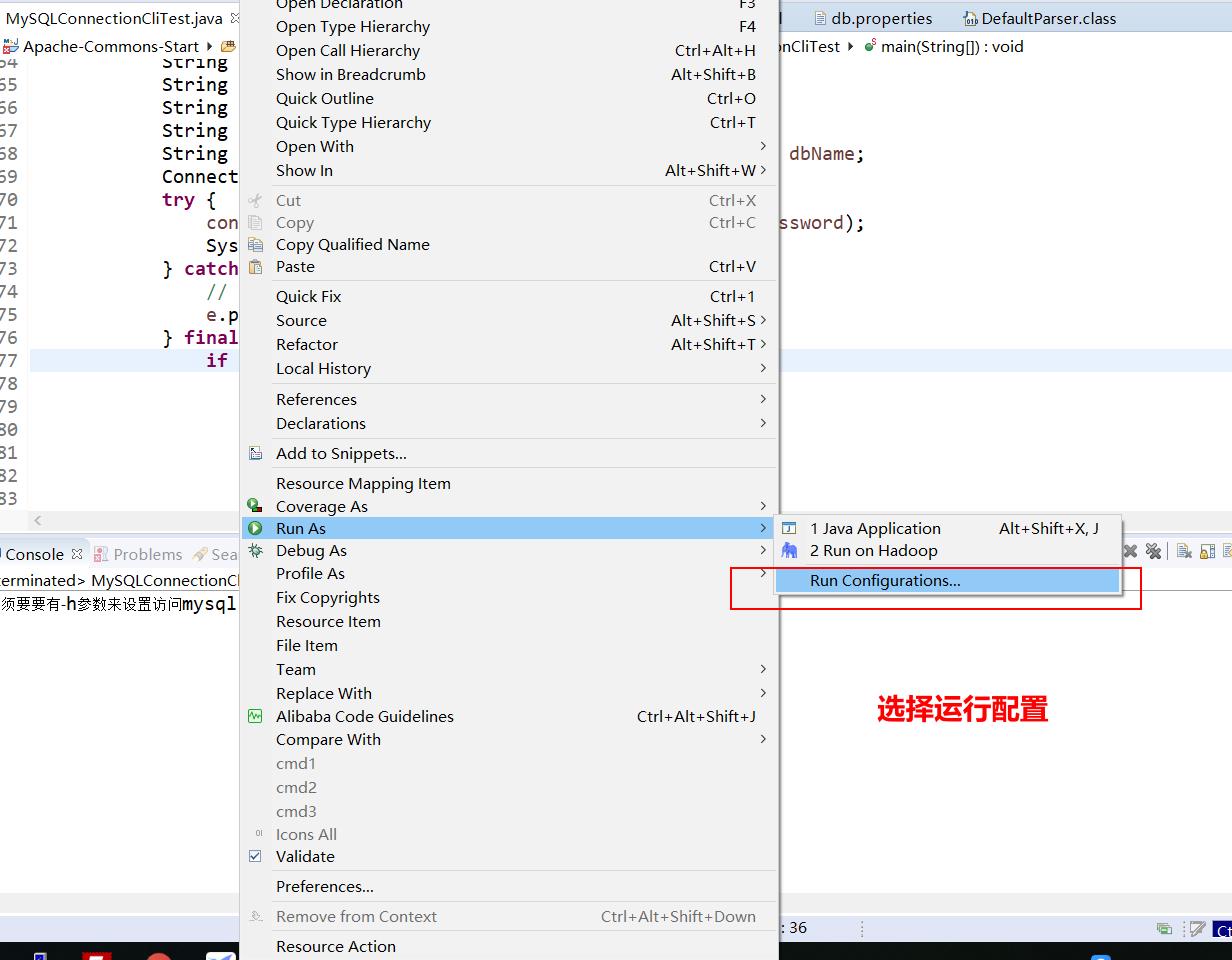
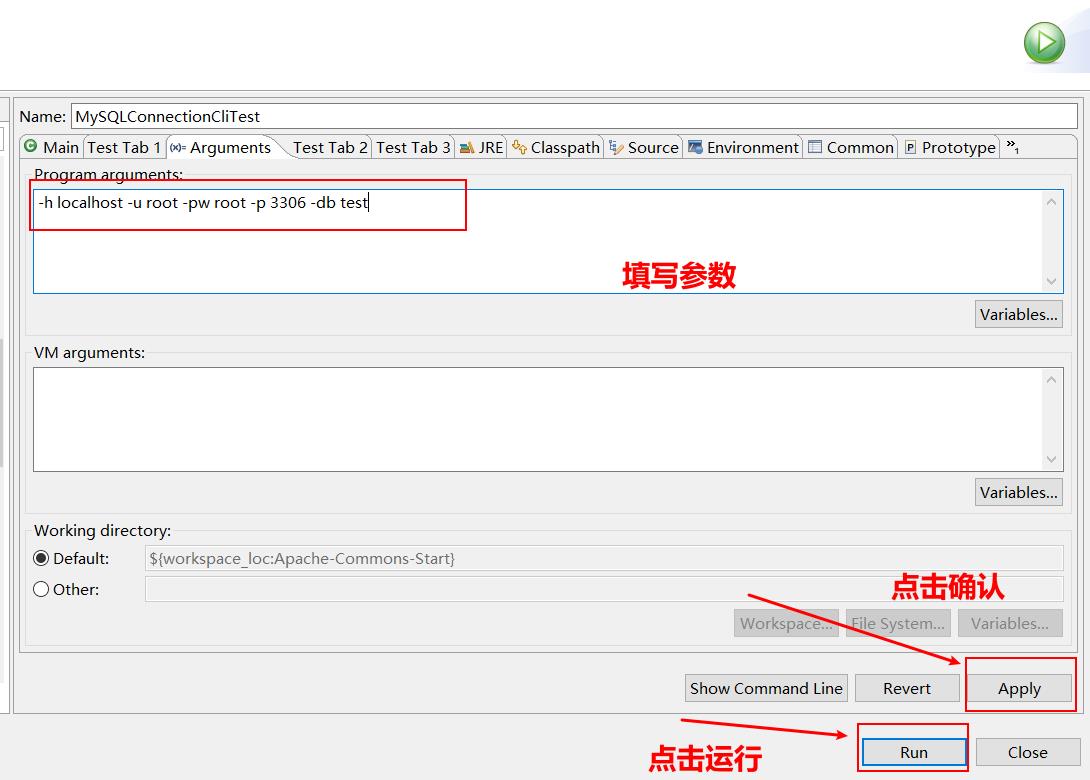
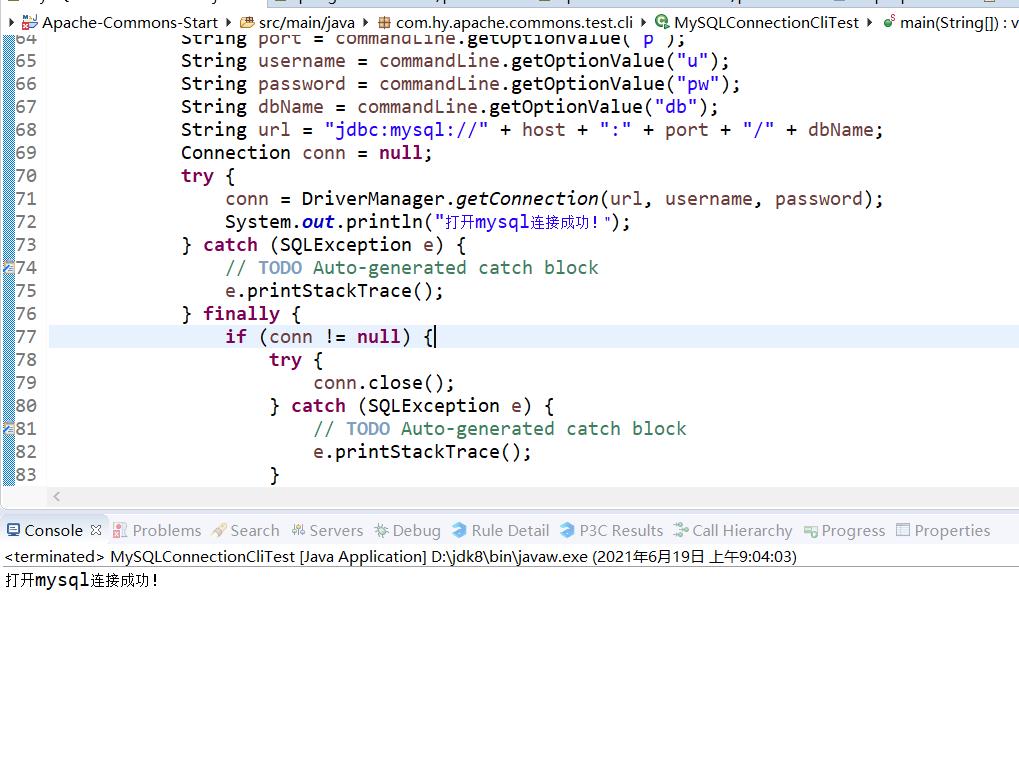
测试同样成功
以上是关于Apache Commons:CLi的简单的使用(创建mysql的访问器)的主要内容,如果未能解决你的问题,请参考以下文章