Docker学习(02)--安装部署1
Posted 剑威
tags:
篇首语:本文由小常识网(cha138.com)小编为大家整理,主要介绍了Docker学习(02)--安装部署1相关的知识,希望对你有一定的参考价值。
1、VirtualBox

VirtualBox号称是最强的免费虚拟机软件,它不仅具有丰富的特色,而且性能也很优异。它简单易用,可虚拟的系统包括Windows(从Windows 3.1到Windows 10、Windows Server 2012,所有的Windows系统都支持)、Mac OS X、Linux、OpenBSD、Solaris、IBM OS2甚至android等操作系统。使用者可以在VirtualBox上安装并且运行上述的这些操作系统。 与同性质的VMware及Virtual PC比较下,VirtualBox独到之处包括远端桌面协定(RDP)、iSCSI及USB的支持,VirtualBox在客户端操作系统上已可以支持USB 3.0的硬件装置,不过要安装 VirtualBox Extension Pack。
主要特点:
- 支持64位客户端操作系统,即使主机使用32位CPU
- 虚拟硬盘快照
- 无缝视窗模式(须安装客户端驱动)
- 能够在主机端与客户端共享剪贴簿(须安装客户端驱动)
- 在主机端与客户端间建立分享文件夹(须安装客户端驱动)
- 内建远端桌面服务器,实现单机多用户 - 支持VMware VMDK磁盘档及Virtual PC VHD磁盘档格式
- 3D虚拟化技术支持OpenGL(2.1版后支持)、Direct3D(3.0版后支持)、WDDM(4.1版后支持)
- 最多虚拟32颗CPU(3.0版后支持)
- 支持VT-x与AMD-V硬件虚拟化技术
- iSCSI支持
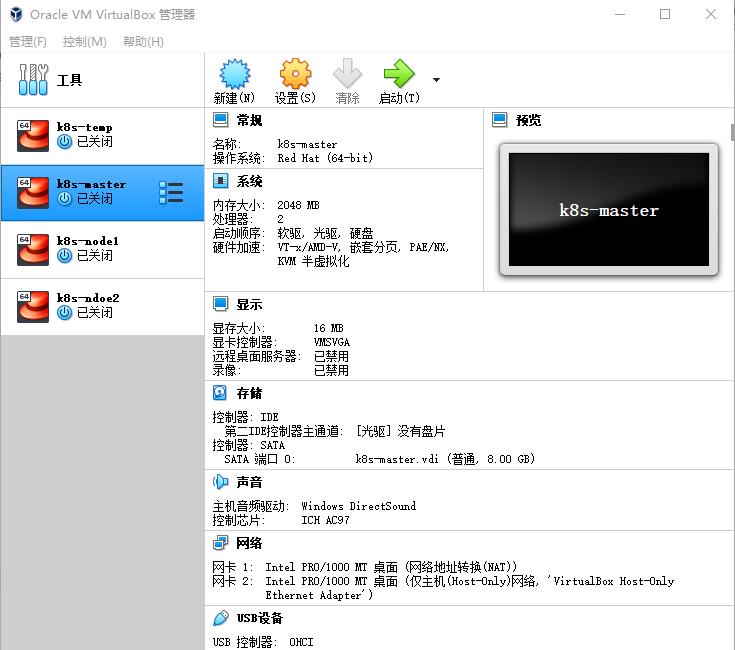
VirtualBox 工作界面:

网络模式:
VirtualBox提供了多种网络接入模式,他们各有优缺点,用户可以根据自己的需要进行选择。
- NAT模式:最简单的实现虚拟机上网的方式,无需配置,默认选择即可接入网络。虚拟机访问网络的所有数据都是由主机提供的,访问速度较慢,和主机之间不能互相访问。
- Bridged Adapter模式:即网桥模式,可以为虚拟机模拟出一个独立的网卡,有独立的IP地址,所有网络功能和主机一样,并且能够互相访问,实现文件的传递和共享。
- Internal模式:即内网模式,虚拟机与外网完全断开,只实现虚拟机于虚拟机之间的内部网络模式,和主机之间不能互相访问,就相当于虚拟机之间架设了一个独立的局域网。
- Host-only Adapter模式:即主机模式,是所有接入模式中最复杂的一种,需要有比较扎实的网络基础知识才行。前面几种模式所实现的功能,通过虚拟机及网卡的设置都可以被实现。
2、使用Vagrant创建虚拟机
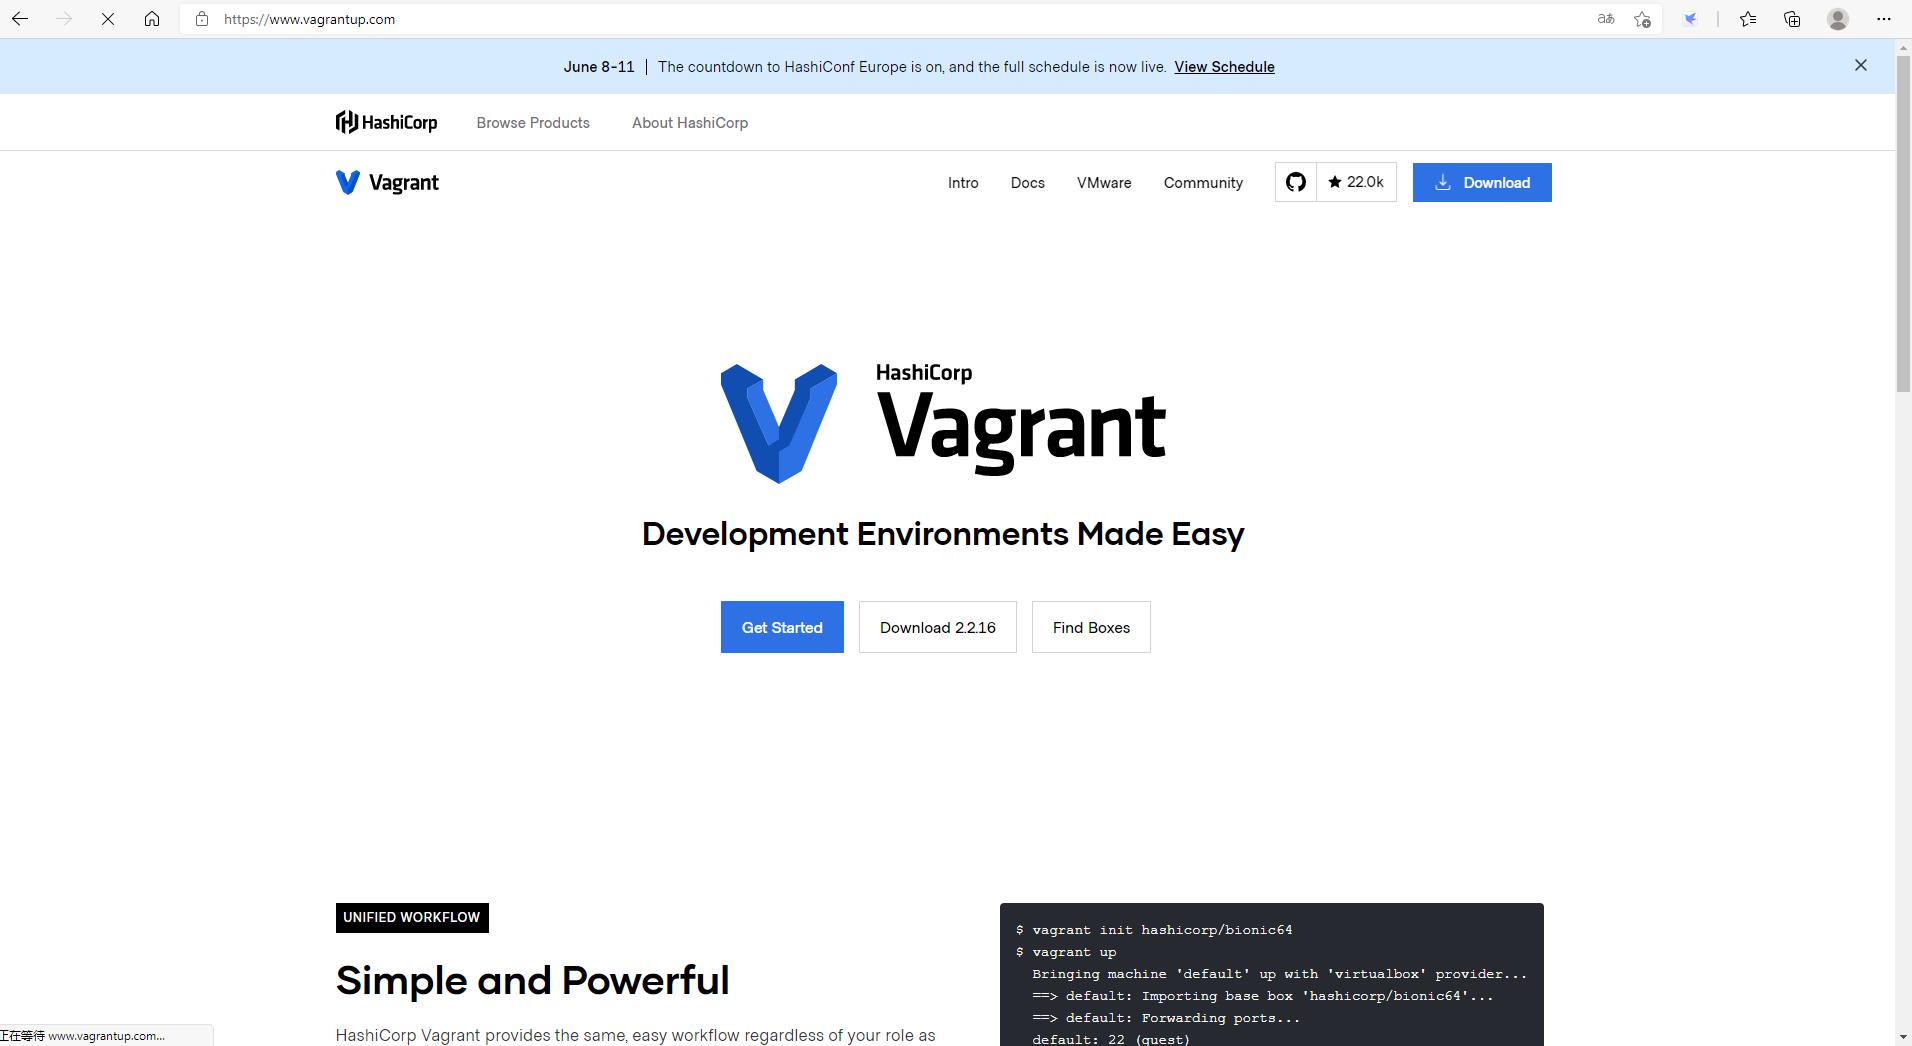
vagrant可以快速帮我们创建好一个虚拟机,vagrant官方已经有好多的做好的镜像,vagrant就可以连接virtualBox 快速的从官方镜像中创建一个虚拟机。

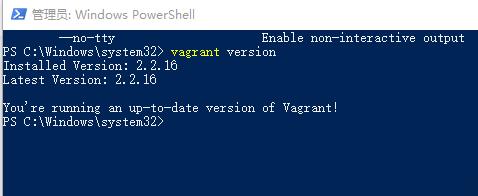
下载完成之后,点击安装即可,安装之后需要重启电脑,重启之后 打开命令行窗口,然后输入
vagrant命令 即可查看是否安装成功。


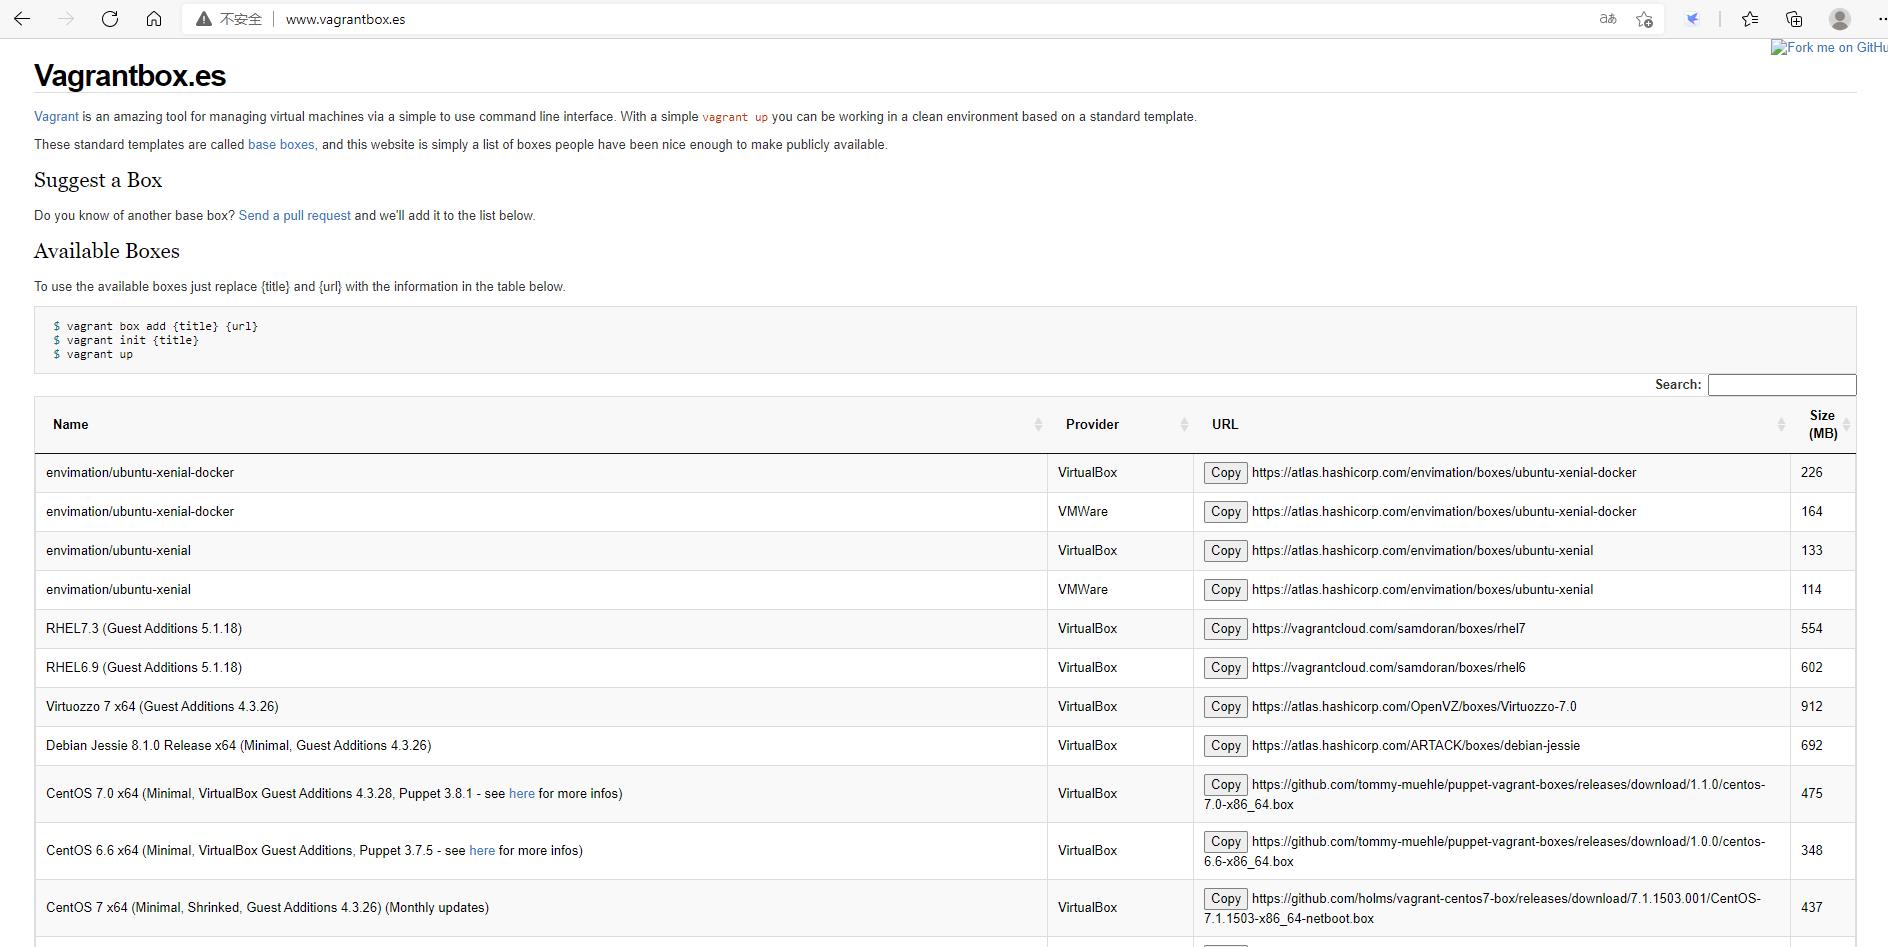
通过网址:http://www.vagrantbox.es/下载指定的镜像。
添加镜像到vagrant:
- 创建一个box
PS D:\\vagrant> vagrant box add centos7 D:\\vagrant\\centos-7.0-x86_64.box
==> box: Box file was not detected as metadata. Adding it directly...
==> box: Adding box 'centos7' (v0) for provider:
    box: Unpacking necessary files from: file:///D:/vagrant/centos-7.0-x86_64.box
    box:
==> box: Successfully added box 'centos7' (v0) for 'virtualbox'!- 初始化环境
PS D:\\vagrant> vagrant init centos7
A `Vagrantfile` has been placed in this directory. You are now
ready to `vagrant up` your first virtual environment! Please read
the comments in the Vagrantfile as well as documentation on
`vagrantup.com` for more information on using Vagrant.- 修改vagrantfile文件:
# -*- mode: ruby -*-
# vi: set ft=ruby :

# All Vagrant configuration is done below. The "2" in Vagrant.configure
# configures the configuration version (we support older styles for
# backwards compatibility). Please don't change it unless you know what
# you're doing.
Vagrant.configure("2") do |config|
  # The most common configuration options are documented and commented below.
  # For a complete reference, please see the online documentation at
  # https://docs.vagrantup.com.

  # Every Vagrant development environment requires a box. You can search for
  # boxes at https://vagrantcloud.com/search.
  config.vm.box = "centos7"

  # Disable automatic box update checking. If you disable this, then
  # boxes will only be checked for updates when the user runs
  # `vagrant box outdated`. This is not recommended.
  # config.vm.box_check_update = false

  # Create a forwarded port mapping which allows access to a specific port
  # within the machine from a port on the host machine. In the example below,
  # accessing "localhost:8080" will access port 80 on the guest machine.
  # NOTE: This will enable public access to the opened port
  # config.vm.network "forwarded_port", guest: 80, host: 8080

  # Create a forwarded port mapping which allows access to a specific port
  # within the machine from a port on the host machine and only allow access
  # via 127.0.0.1 to disable public access
  config.vm.network "forwarded_port", guest: 80, host: 8080, host_ip: "127.0.0.1"

  # Create a private network, which allows host-only access to the machine
  # using a specific IP.
  config.vm.network "private_network", ip: "192.168.33.10"

  # Create a public network, which generally matched to bridged network.
  # Bridged networks make the machine appear as another physical device on
  # your network.
  # config.vm.network "public_network"

  # Share an additional folder to the guest VM. The first argument is
  # the path on the host to the actual folder. The second argument is
  # the path on the guest to mount the folder. And the optional third
  # argument is a set of non-required options.
  config.vm.synced_folder "D:/workplace/code", "/home/www/"

  # Provider-specific configuration so you can fine-tune various
  # backing providers for Vagrant. These expose provider-specific options.
  # Example for VirtualBox:
  #
  # config.vm.provider "virtualbox" do |vb|
  #   # Display the VirtualBox GUI when booting the machine
  #   vb.gui = true
  #
  #   # Customize the amount of memory on the VM:
  #   vb.memory = "1024"
  # end
  #
  # View the documentation for the provider you are using for more
  # information on available options.

  # Enable provisioning with a shell script. Additional provisioners such as
  # Ansible, Chef, Docker, Puppet and Salt are also available. Please see the
  # documentation for more information about their specific syntax and use.
  # config.vm.provision "shell", inline: <<-SHELL
  #   apt-get update
  #   apt-get install -y apache2
  # SHELL
end- 在windows上管理和添加对NFS的支持
PS D:\\vagrant> vagrant plugin install vagrant-vbguest
Installing the 'vagrant-vbguest' plugin. This can take a few minutes...
Fetching micromachine-3.0.0.gem
Fetching vagrant-vbguest-0.30.0.gem
Installed the plugin 'vagrant-vbguest (0.30.0)'!- 启动虚拟机
PS D:\\vagrant> vagrant up
Bringing machine 'default' up with 'virtualbox' provider...
==> default: Importing base box 'centos7'...
==> default: Matching MAC address for NAT networking...
==> default: Setting the name of the VM: vagrant_default_1623199247930_80877
==> default: Clearing any previously set forwarded ports...
Vagrant is currently configured to create VirtualBox synced folders with
the `SharedFoldersEnableSymlinksCreate` option enabled. If the Vagrant
guest is not trusted, you may want to disable this option. For more
information on this option, please refer to the VirtualBox manual:

  https://www.virtualbox.org/manual/ch04.html#sharedfolders

This option can be disabled globally with an environment variable:

  VAGRANT_DISABLE_VBOXSYMLINKCREATE=1

or on a per folder basis within the Vagrantfile:

  config.vm.synced_folder '/host/path', '/guest/path', SharedFoldersEnableSymlinksCreate: false
==> default: Clearing any previously set network interfaces...
==> default: Preparing network interfaces based on configuration...
    default: Adapter 1: nat
==> default: Forwarding ports...
    default: 22 (guest) => 2222 (host) (adapter 1)
==> default: Booting VM...
==> default: Waiting for machine to boot. This may take a few minutes...
    default: SSH address: 127.0.0.1:2222
    default: SSH username: vagrant
    default: SSH auth method: private key
    default:
    default: Vagrant insecure key detected. Vagrant will automatically replace
    default: this with a newly generated keypair for better security.
    default:
    default: Inserting generated public key within guest...
    default: Removing insecure key from the guest if it's present...
    default: Key inserted! Disconnecting and reconnecting using new SSH key...
==> default: Machine booted and ready!
[default] GuestAdditions versions on your host (6.1.22) and guest (4.3.28) do not match.
Geladene Plugins: fastestmirror
Loading mirror speeds from cached hostfile
 * base: mirrors.aliyun.com
 * extras: mirrors.aliyun.com
 * updates: mirrors.163.com
Abhängigkeiten werden aufgelöst
--> Transaktionsprüfung wird ausgeführt
---> Paket binutils.x86_64 0:2.23.52.0.1-30.el7 markiert, um aktualisiert zu werden
---> Paket binutils.x86_64 0:2.27-44.base.el7 markiert, um eine Aktualisierung zu werden
---> Paket bzip2.x86_64 0:1.0.6-12.el7 markiert, um aktualisiert zu werden
---> Paket bzip2.x86_64 0:1.0.6-13.el7 markiert, um eine Aktualisierung zu werden
--> Abhängigkeit bzip2-libs = 1.0.6-13.el7 wird für Paket bzip2-1.0.6-13.el7.x86_64 verarbeitet
---> Paket elfutils-libelf-devel.x86_64 0:0.176-5.el7 markiert, um installiert zu werden
--> Abhängigkeit elfutils-libelf(x86-64) = 0.176-5.el7 wird für Paket elfutils-libelf-devel-0.176-5.el7.x86_64 verarbeitet
---> Paket gcc.x86_64 0:4.8.3-9.el7 markiert, um aktualisiert zu werden
--> Abhängigkeit gcc = 4.8.3-9.el7 wird für Paket gcc-c++-4.8.3-9.el7.x86_64 verarbeitet
---> Paket gcc.x86_64 0:4.8.5-44.el7 markiert, um eine Aktualisierung zu werden
--> Abhängigkeit libgomp = 4.8.5-44.el7 wird für Paket gcc-4.8.5-44.el7.x86_64 verarbeitet
--> Abhängigkeit cpp = 4.8.5-44.el7 wird für Paket gcc-4.8.5-44.el7.x86_64 verarbeitet
--> Abhängigkeit libgcc >= 4.8.5-44.el7 wird für Paket gcc-4.8.5-44.el7.x86_64 verarbeitet
---> Paket kernel-devel.x86_64 0:3.10.0-1160.25.1.el7 markiert, um installiert zu werden
---> Paket make.x86_64 1:3.82-21.el7 markiert, um aktualisiert zu werden
---> Paket make.x86_64 1:3.82-24.el7 markiert, um eine Aktualisierung zu werden
---> Paket perl.x86_64 4:5.16.3-285.el7 markiert, um aktualisiert zu werden
---> Paket perl.x86_64 4:5.16.3-299.el7_9 markiert, um eine Aktualisierung zu werden
--> Abhängigkeit perl-libs = 4:5.16.3-299.el7_9 wird für Paket 4:perl-5.16.3-299.el7_9.x86_64 verarbeitet
--> Transaktionsprüfung wird ausgeführt
---> Paket bzip2-libs.x86_64 0:1.0.6-12.el7 markiert, um aktualisiert zu werden
---> Paket bzip2-libs.x86_64 0:1.0.6-13.el7 markiert, um eine Aktualisierung zu werden
---> Paket cpp.x86_64 0:4.8.3-9.el7 markiert, um aktualisiert zu werden
---> Paket cpp.x86_64 0:4.8.5-44.el7 markiert, um eine Aktualisierung zu werden
---> Paket elfutils-libelf.x86_64 0:0.160-1.el7 markiert, um aktualisiert zu werden
--> Abhängigkeit elfutils-libelf(x86-64) = 0.160-1.el7 wird für Paket elfutils-libs-0.160-1.el7.x86_64 verarbeitet
---> Paket elfutils-libelf.x86_64 0:0.176-5.el7 markiert, um eine Aktualisierung zu werden
---> Paket gcc-c++.x86_64 0:4.8.3-9.el7 markiert, um aktualisiert zu werden
---> Paket gcc-c++.x86_64 0:4.8.5-44.el7 markiert, um eine Aktualisierung zu werden
--> Abhängigkeit libstdc++-devel = 4.8.5-44.el7 wird für Paket gcc-c++-4.8.5-44.el7.x86_64 verarbeitet
--> Abhängigkeit libstdc++ = 4.8.5-44.el7 wird für Paket gcc-c++-4.8.5-44.el7.x86_64 verarbeitet
---> Paket libgcc.x86_64 0:4.8.3-9.el7 markiert, um aktualisiert zu werden
---> Paket libgcc.x86_64 0:4.8.5-44.el7 markiert, um eine Aktualisierung zu werden
---> Paket libgomp.x86_64 0:4.8.3-9.el7 markiert, um aktualisiert zu werden
---> Paket libgomp.x86_64 0:4.8.5-44.el7 markiert, um eine Aktualisierung zu werden
---> Paket perl-libs.x86_64 4:5.16.3-285.el7 markiert, um aktualisiert zu werden
---> Paket perl-libs.x86_64 4:5.16.3-299.el7_9 markiert, um eine Aktualisierung zu werden
--> Transaktionsprüfung wird ausgeführt
---> Paket elfutils-libs.x86_64 0:0.160-1.el7 markiert, um aktualisiert zu werden
---> Paket elfutils-libs.x86_64 0:0.176-5.el7 markiert, um eine Aktualisierung zu werden
--> Abhängigkeit default-yama-scope wird für Paket elfutils-libs-0.176-5.el7.x86_64 verarbeitet
---> Paket libstdc++.x86_64 0:4.8.3-9.el7 markiert, um aktualisiert zu werden
---> Paket libstdc++.x86_64 0:4.8.5-44.el7 markiert, um eine Aktualisierung zu werden
---> Paket libstdc++-devel.x86_64 0:4.8.3-9.el7 markiert, um aktualisiert zu werden
---> Paket libstdc++-devel.x86_64 0:4.8.5-44.el7 markiert, um eine Aktualisierung zu werden
--> Transaktionsprüfung wird ausgeführt
---> Paket elfutils-default-yama-scope.noarch 0:0.176-5.el7 markiert, um installiert zu werden
--> Abhängigkeitsauflösung beendet

Abhängigkeiten aufgelöst

================================================================================
 Package                       Arch     Version                 Paketquelle
                                                                          Größe
================================================================================
Installieren:
 elfutils-libelf-devel         x86_64   0.176-5.el7             base       40 k
 kernel-devel                  x86_64   3.10.0-1160.25.1.el7    updates    18 M
Aktualisieren:
 binutils                      x86_64   2.27-44.base.el7        base      5.9 M
 bzip2                         x86_64   1.0.6-13.el7            base       52 k
 gcc                           x86_64   4.8.5-44.el7            base       16 M
 make                          x86_64   1:3.82-24.el7           base      421 k
 perl                          x86_64   4:5.16.3-299.el7_9      updates   8.0 M
Als Abhängigkeiten installiert:
 elfutils-default-yama-scope   noarch   0.176-5.el7             base       33 k
Aktualisiert für Abhängigkeiten:
 bzip2-libs                    x86_64   1.0.6-13.el7            base       40 k
 cpp                           x86_64   4.8.5-44.el7            base      5.9 M
 elfutils-libelf               x86_64   0.176-5.el7             base      195 k
 elfutils-libs                 x86_64   0.176-5.el7             base      291 k
 gcc-c++                       x86_64   4.8.5-44.el7            base      7.2 M
 libgcc                        x86_64   4.8.5-44.el7            base      103 k
 libgomp                       x86_64   4.8.5-44.el7            base      159 k
 libstdc++                     x86_64   4.8.5-44.el7            base      306 k
 libstdc++-devel               x86_64   4.8.5-44.el7            base      1.5 M
 perl-libs                     x86_64   4:5.16.3-299.el7_9      updates   690 k

Transaktionsübersicht
================================================================================
Installieren   2 Pakete (+ 1 Abhängiges Paket)
Aktualisieren  5 Pakete (+10 Abhängige Pakete)

Gesamte Downloadgröße: 65 M
Downloading packages:
Delta RPMs disabled because /usr/bin/applydeltarpm not installed.
--------------------------------------------------------------------------------
Gesamt                                             1.6 MB/s |  65 MB  00:40
Running transaction check
Running transaction test
Transaction test succeeded
Running transaction
  Aktualisieren    : 4:perl-libs-5.16.3-299.el7_9.x86_64                   1/33
  Aktualisieren    : 4:perl-5.16.3-299.el7_9.x86_64                        2/33
  Aktualisieren    : libgcc-4.8.5-44.el7.x86_64                            3/33
  Aktualisieren    : libstdc++-4.8.5-44.el7.x86_64                         4/33
  Aktualisieren    : elfutils-libelf-0.176-5.el7.x86_64                    5/33
  Aktualisieren    : bzip2-libs-1.0.6-13.el7.x86_64                        6/33
  Aktualisieren    : libstdc++-devel-4.8.5-44.el7.x86_64                   7/33
  Installieren     : elfutils-default-yama-scope-0.176-5.el7.noarch        8/33
  Aktualisieren    : libgomp-4.8.5-44.el7.x86_64                           9/33
  Aktualisieren    : cpp-4.8.5-44.el7.x86_64                              10/33
  Aktualisieren    : binutils-2.27-44.base.el7.x86_64                     11/33
  Aktualisieren    : gcc-4.8.5-44.el7.x86_64                              12/33
  Aktualisieren    : gcc-c++-4.8.5-44.el7.x86_64                          13/33
  Aktualisieren    : elfutils-libs-0.176-5.el7.x86_64                     14/33
  Aktualisieren    : bzip2-1.0.6-13.el7.x86_64                            15/33
  Installieren     : elfutils-libelf-devel-0.176-5.el7.x86_64             16/33
  Installieren     : kernel-devel-3.10.0-1160.25.1.el7.x86_64             17/33
  Aktualisieren    : 1:make-3.82-24.el7.x86_64                            18/33
  Aufräumen        : elfutils-libs-0.160-1.el7.x86_64                     19/33
  Aufräumen        : gcc-c++-4.8.3-9.el7.x86_64                           20/33
  Aufräumen        : libstdc++-devel-4.8.3-9.el7.x86_64                   21/33
  Aufräumen        : gcc-4.8.3-9.el7.x86_64                               22/33
  Aufräumen        : libstdc++-4.8.3-9.el7.x86_64                         23/33
  Aufräumen        : 4:perl-libs-5.16.3-285.el7.x86_64                    24/33
  Aufräumen        : 4:perl-5.16.3-285.el7.x86_64                         25/33
  Aufräumen        : bzip2-1.0.6-12.el7.x86_64                            26/33
  Aufräumen        : bzip2-libs-1.0.6-12.el7.x86_64                       27/33
  Aufräumen        : libgcc-4.8.3-9.el7.x86_64                            28/33
  Aufräumen        : binutils-2.23.52.0.1-30.el7.x86_64                   29/33
  Aufräumen        : cpp-4.8.3-9.el7.x86_64                               30/33
  Aufräumen        : libgomp-4.8.3-9.el7.x86_64                           31/33
  Aufräumen        : elfutils-libelf-0.160-1.el7.x86_64                   32/33
  Aufräumen        : 1:make-3.82-21.el7.x86_64                            33/33
  Überprüfung läuft: gcc-c++-4.8.5-44.el7.x86_64                           1/33
  Überprüfung läuft: binutils-2.27-44.base.el7.x86_64                      2/33
  Überprüfung läuft: bzip2-1.0.6-13.el7.x86_64                             3/33
  Überprüfung läuft: cpp-4.8.5-44.el7.x86_64                               4/33
  Überprüfung läuft: 1:make-3.82-24.el7.x86_64                             5/33
  Überprüfung läuft: bzip2-libs-1.0.6-13.el7.x86_64                        6/33
  Überprüfung läuft: gcc-4.8.5-44.el7.x86_64                               7/33
  Überprüfung läuft: elfutils-libelf-0.176-5.el7.x86_64                    8/33
  Überprüfung läuft: elfutils-libelf-devel-0.176-5.el7.x86_64              9/33
  Überprüfung läuft: kernel-devel-3.10.0-1160.25.1.el7.x86_64             10/33
  Überprüfung läuft: libstdc++-4.8.5-44.el7.x86_64                        11/33
  Überprüfung läuft: 4:perl-5.16.3-299.el7_9.x86_64                       12/33
  Überprüfung läuft: libstdc++-devel-4.8.5-44.el7.x86_64                  13/33
  Überprüfung läuft: 4:perl-libs-5.16.3-299.el7_9.x86_64                  14/33
  Überprüfung läuft: libgcc-4.8.5-44.el7.x86_64                           15/33
  Überprüfung läuft: libgomp-4.8.5-44.el7.x86_64                          16/33
  Überprüfung läuft: elfutils-libs-0.176-5.el7.x86_64                     17/33
  Überprüfung läuft: elfutils-default-yama-scope-0.176-5.el7.noarch       18/33
  Überprüfung läuft: bzip2-libs-1.0.6-12.el7.x86_64                       19/33
  Überprüfung läuft: libgcc-4.8.3-9.el7.x86_64                            20/33
  Überprüfung läuft: elfutils-libs-0.160-1.el7.x86_64                     21/33
  Überprüfung läuft: libgomp-4.8.3-9.el7.x86_64                           22/33
  Überprüfung läuft: binutils-2.23.52.0.1-30.el7.x86_64                   23/33
  Überprüfung läuft: cpp-4.8.3-9.el7.x86_64                               24/33
  Überprüfung läuft: libstdc++-devel-4.8.3-9.el7.x86_64                   25/33
  Überprüfung läuft: elfutils-libelf-0.160-1.el7.x86_64                   26/33
  Überprüfung läuft: bzip2-1.0.6-12.el7.x86_64                            27/33
  Überprüfung läuft: gcc-c++-4.8.3-9.el7.x86_64                           28/33
  Überprüfung läuft: gcc-4.8.3-9.el7.x86_64                               29/33
  Überprüfung läuft: 4:perl-5.16.3-285.el7.x86_64                         30/33
  Überprüfung läuft: libstdc++-4.8.3-9.el7.x86_64                         31/33
  Überprüfung läuft: 1:make-3.82-21.el7.x86_64                            32/33
  Überprüfung läuft: 4:perl-libs-5.16.3-285.el7.x86_64                    33/33

Installiert:
  elfutils-libelf-devel.x86_64 0:0.176-5.el7
  kernel-devel.x86_64 0:3.10.0-1160.25.1.el7

Abhängigkeit installiert:
  elfutils-default-yama-scope.noarch 0:0.176-5.el7

Aktualisiert:
  binutils.x86_64 0:2.27-44.base.el7         bzip2.x86_64 0:1.0.6-13.el7
  gcc.x86_64 0:4.8.5-44.el7                  make.x86_64 1:3.82-24.el7
  perl.x86_64 4:5.16.3-299.el7_9

Abhängigkeit aktualisiert:
  bzip2-libs.x86_64 0:1.0.6-13.el7        cpp.x86_64 0:4.8.5-44.el7
  elfutils-libelf.x86_64 0:0.176-5.el7    elfutils-libs.x86_64 0:0.176-5.el7
  gcc-c++.x86_64 0:4.8.5-44.el7           libgcc.x86_64 0:4.8.5-44.el7
  libgomp.x86_64 0:4.8.5-44.el7           libstdc++.x86_64 0:4.8.5-44.el7
  libstdc++-devel.x86_64 0:4.8.5-44.el7   perl-libs.x86_64 4:5.16.3-299.el7_9

Komplett!
Copy iso file C:\\Program Files\\Oracle\\VirtualBox\\VBoxGuestAdditions.iso into the box /tmp/VBoxGuestAdditions.iso
Mounting Virtualbox Guest Additions ISO to: /mnt
mount: /dev/loop0 is write-protected, mounting read-only
Installing Virtualbox Guest Additions 6.1.22 - guest version is 4.3.28
Verifying archive integrity... All good.
Uncompressing VirtualBox 6.1.22 Guest Additions for Linux........
VirtualBox Guest Additions installer
Removing installed version 4.3.28 of VirtualBox Guest Additions...
Copying additional installer modules ...
Installing additional modules ...
VirtualBox Guest Additions: Starting.
VirtualBox Guest Additions: Building the VirtualBox Guest Additions kernel
modules.  This may take a while.
VirtualBox Guest Additions: To build modules for other installed kernels, run
VirtualBox Guest Additions:   /sbin/rcvboxadd quicksetup <version>
VirtualBox Guest Additions: or
VirtualBox Guest Additions:   /sbin/rcvboxadd quicksetup all
VirtualBox Guest Additions: Building the modules for kernel
3.10.0-229.el7.x86_64.
VirtualBox Guest Additions: Running kernel modules will not be replaced until
the system is restarted
An error occurred during installation of VirtualBox Guest Additions 6.1.22. Some functionality may not work as intended.
In most cases it is OK that the "Window System drivers" installation failed.
Redirecting to /bin/systemctl start  vboxadd.service
Unmounting Virtualbox Guest Additions ISO from: /mnt
Got different reports about installed GuestAdditions version:
Virtualbox on your host claims:   4.3.28
VBoxService inside the vm claims: 6.1.22
Going on, assuming VBoxService is correct...
Got different reports about installed GuestAdditions version:
Virtualbox on your host claims:   4.3.28
VBoxService inside the vm claims: 6.1.22
Going on, assuming VBoxService is correct...
Got different reports about installed GuestAdditions version:
Virtualbox on your host claims:   4.3.28
VBoxService inside the vm claims: 6.1.22
Going on, assuming VBoxService is correct...
Restarting VM to apply changes...
==> default: Attempting graceful shutdown of VM...
==> default: Booting VM...
==> default: Waiting for machine to boot. This may take a few minutes...
==> default: Machine booted and ready!
==> default: Checking for guest additions in VM...
==> default: Mounting shared folders...
    default: /vagrant => D:/vagrant
- 通过ssh登录虚拟机
PS D:\\vagrant> vagrant ssh
Last login: Wed Jun  9 02:48:00 2021 from 10.0.2.2
Welcome to your Vagrant-built virtual machine.
[vagrant@localhost ~]$ ip
Usage: ip [ OPTIONS ] OBJECT { COMMAND | help }
       ip [ -force ] -batch filename
where  OBJECT := { link | addr | addrlabel | route | rule | neigh | ntable |
                   tunnel | tuntap | maddr | mroute | mrule | monitor | xfrm |
                   netns | l2tp | tcp_metrics | token }
       OPTIONS := { -V[ersion] | -s[tatistics] | -d[etails] | -r[esolve] |
                    -f[amily] { inet | inet6 | ipx | dnet | bridge | link } |
                    -4 | -6 | -I | -D | -B | -0 |
                    -l[oops] { maximum-addr-flush-attempts } |
                    -o[neline] | -t[imestamp] | -b[atch] [filename] |
                    -rc[vbuf] [size]}
[vagrant@localhost ~]$ ip a
1: lo: <LOOPBACK,UP,LOWER_UP> mtu 65536 qdisc noqueue state UNKNOWN
    link/loopback 00:00:00:00:00:00 brd 00:00:00:00:00:00
    inet 127.0.0.1/8 scope host lo
       valid_lft forever preferred_lft forever
    inet6 ::1/128 scope host
       valid_lft forever preferred_lft forever
2: enp0s3: <BROADCAST,MULTICAST,UP,LOWER_UP> mtu 1500 qdisc pfifo_fast state UP qlen 1000
    link/ether 08:00:27:de:0e:0e brd ff:ff:ff:ff:ff:ff
    inet 10.0.2.15/24 brd 10.0.2.255 scope global dynamic enp0s3
       valid_lft 85823sec preferred_lft 85823sec
    inet6 fe80::a00:27ff:fede:e0e/64 scope link
       valid_lft forever preferred_lft forever
[vagrant@localhost ~]$
以上是关于Docker学习(02)--安装部署1的主要内容,如果未能解决你的问题,请参考以下文章