鸿蒙系统中的TableLayout网格布局
Posted 前进道路上的程序猿
tags:
篇首语:本文由小常识网(cha138.com)小编为大家整理,主要介绍了鸿蒙系统中的TableLayout网格布局相关的知识,希望对你有一定的参考价值。
前言
TableLayout是使用表格的方式划分子组件
TableLayout的自有XML属性见下表
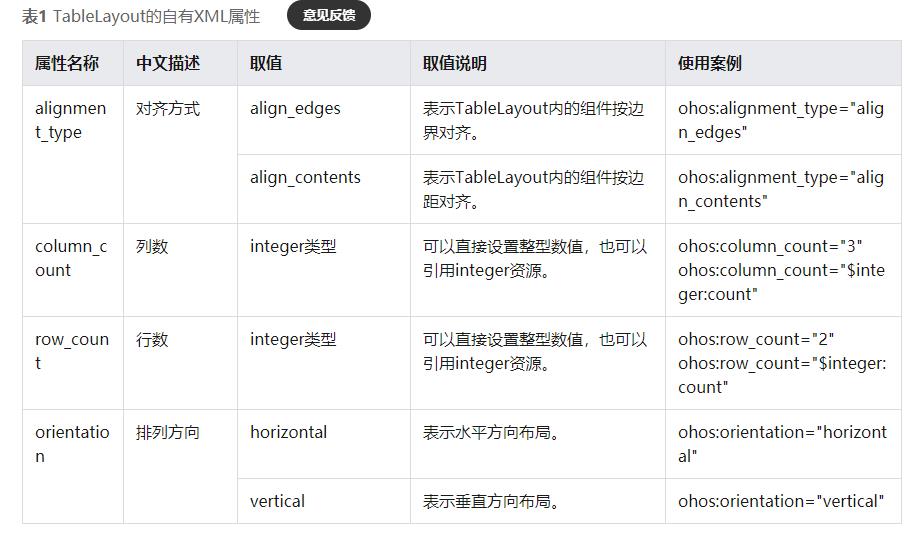
参考文档:https://developer.harmonyos.com/cn/docs/documentation/doc-guides/ui-java-layout-tablelayout-0000001060379893
下面我们就以案例来展示其应用
前期准备
我们还是使用上一篇文章中使用到的demo2项目来进行测试
创建页面
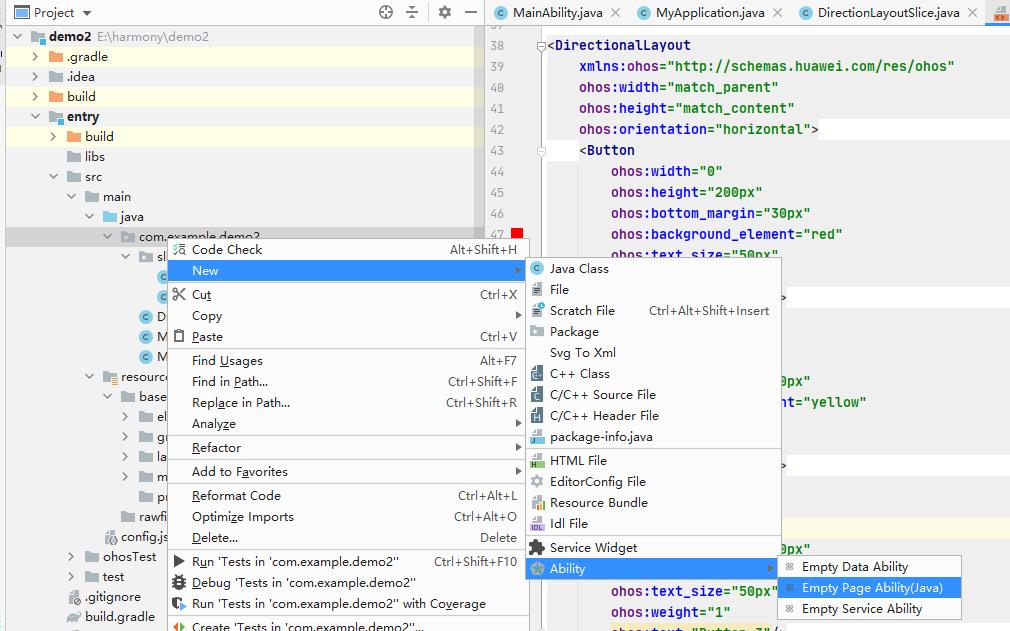
我们在右键点击新建线性布局页面的文件夹,然后new->Ability->Empty Page Ability(java)
弹出页面填写相应的页面名称等信息,点击finish
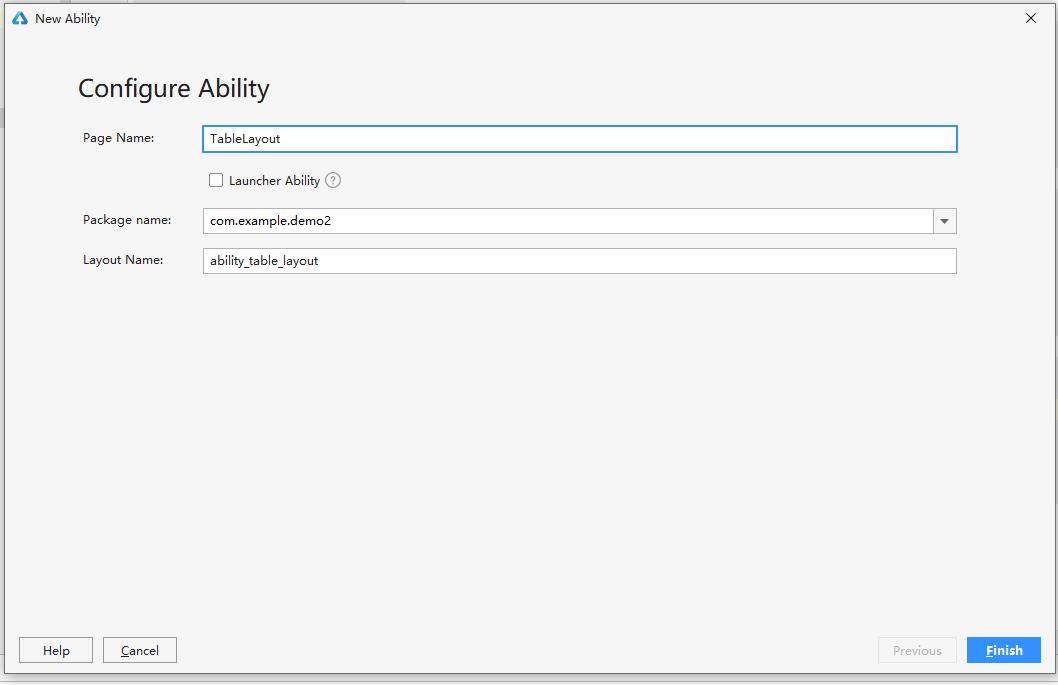
TableLayoutSlice中引入样式文件如下:
TableLayoutSlice.java:
@Override
    public void onStart(Intent intent) {
        super.onStart(intent);
        super.setUIContent(ResourceTable.Layout_ability_table_layout);
    }
MainAbility中使用这个slice
MainAbility.java:
public class MainAbility extends Ability {
    @Override
    public void onStart(Intent intent) {
        super.onStart(intent);
        super.setMainRoute(TableLayoutSlice.class.getName());
    }
}
tableLayout的使用
定义布局
首先我们在TableLayoutSlice的布局文件ability_table_layout中声明布局用TableLayout

ability_table_layout.xml:
<?xml version="1.0" encoding="utf-8"?>
<TableLayout
    xmlns:ohos="http://schemas.huawei.com/res/ohos"
    ohos:height="match_parent"
    ohos:width="match_parent"
    ohos:background_element="#87CEEB"
    ohos:padding="8px">
</TableLayout>
该布局组件长宽为父组件的长宽,颜色为#87CEEB,外间距8px
定义text组件的样式
我们在graphic文件夹下新建text组件的样式文件table_text_bg_element.xml.xml
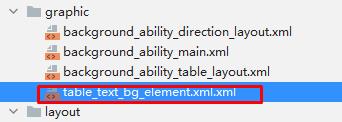
代码如下
table_text_bg_element.xml
<?xml version="1.0" encoding="utf-8"?>
<shape xmlns:ohos="http://schemas.huawei.com/res/ohos"
       ohos:shape="rectangle">
    <corners
        ohos:radius="5px"/>
    <stroke
        ohos:width="1px"
        ohos:color="gray"/>
    <solid
        ohos:color="#00BFFF"/>
</shape>
定义text组件
我们在布局文件中,定义四个text组件,代码如下:

ability_table_layout.xml:
<?xml version="1.0" encoding="utf-8"?>
<TableLayout
    xmlns:ohos="http://schemas.huawei.com/res/ohos"
    ohos:height="match_parent"
    ohos:width="match_parent"
    ohos:background_element="#87CEEB"
    ohos:padding="40px">
    <Text
        ohos:height="300px"
        ohos:width="300px"
        ohos:background_element="$graphic:table_text_bg_element"
        ohos:margin="40px"
        ohos:text="5"
        ohos:text_alignment="center"
        ohos:text_size="100px"/>

    <Text
        ohos:height="300px"
        ohos:width="300px"
        ohos:background_element="$graphic:table_text_bg_element"
        ohos:margin="40px"
        ohos:text="10"
        ohos:text_alignment="center"
        ohos:text_size="100px"/>

    <Text
        ohos:height="300px"
        ohos:width="300px"
        ohos:background_element="$graphic:table_text_bg_element"
        ohos:margin="40px"
        ohos:text="20"
        ohos:text_alignment="center"
        ohos:text_size="100px"/>

    <Text
        ohos:height="300px"
        ohos:width="300px"
        ohos:background_element="$graphic:table_text_bg_element"
        ohos:margin="40px"
        ohos:text="30"
        ohos:text_alignment="center"
        ohos:text_size="100px"/>
</TableLayout>
代码中,我们使用ohos:background_element="$graphic:table_text_bg_element"来引入table_text_bg_element.xml中定义的组件样式,然后属性分别是:
ohos:height:高
ohos:width:宽
ohos:margin:内边距
ohos:text:字内容
ohos:text_alignment:字对其方式
ohos:text_size:字大小
模拟器显示如下:
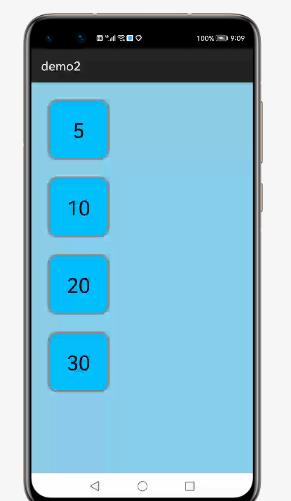
这样显示一列多行的布局,如果我们想要实现多行多列可以使用ohos:row_count和ohos:column_count
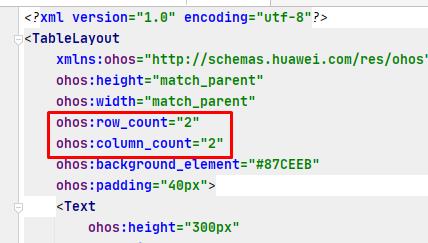
设置行数和列数
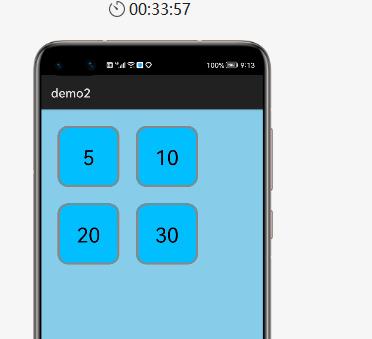
我们在布局文件中使用ohos:row_count和ohos:column_count
ability_table_layout.xml:
模拟器显示如下:
以上是关于鸿蒙系统中的TableLayout网格布局的主要内容,如果未能解决你的问题,请参考以下文章