嵌入式实验 (实验一)GPIO 口控制 LED 实验
Posted 孤注一掷 、
tags:
篇首语:本文由小常识网(cha138.com)小编为大家整理,主要介绍了嵌入式实验 (实验一)GPIO 口控制 LED 实验相关的知识,希望对你有一定的参考价值。
1.新建工程,具体见嵌入式新建工程那篇博客
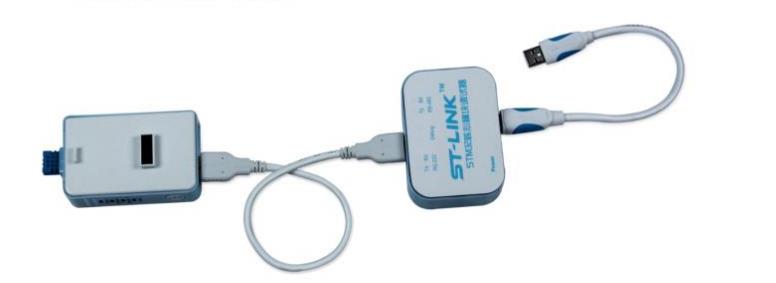
2.连接开发板,设置连接
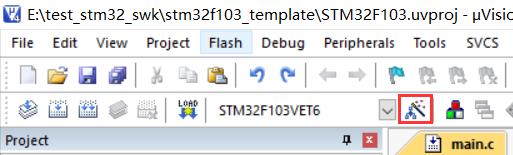
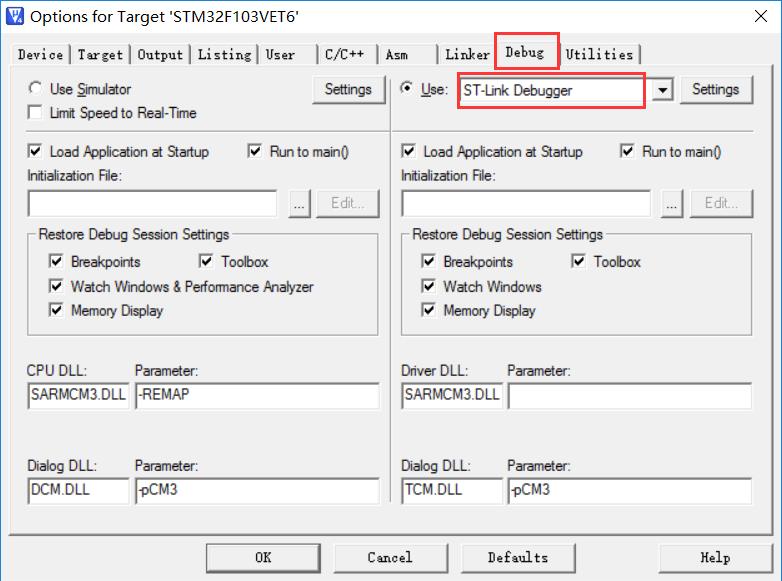
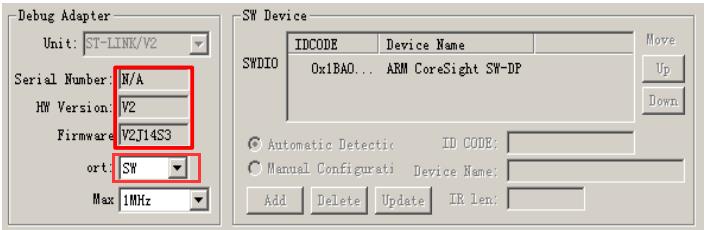
然后点击setting
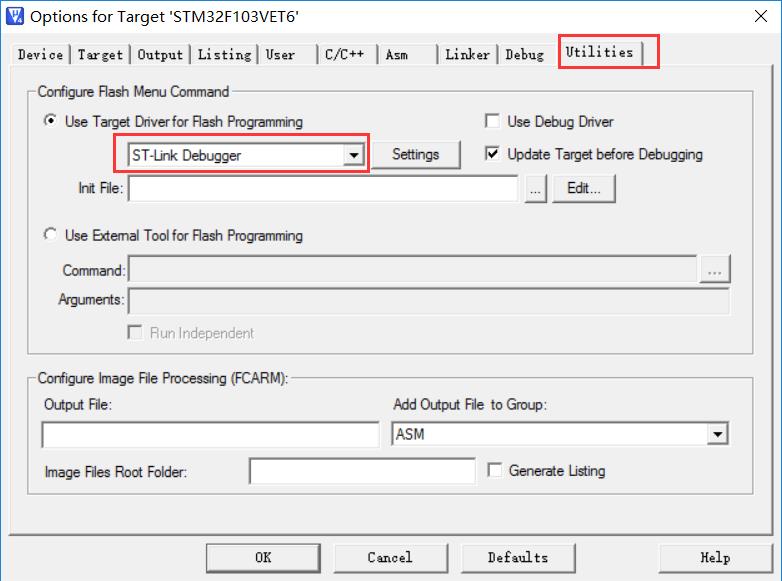
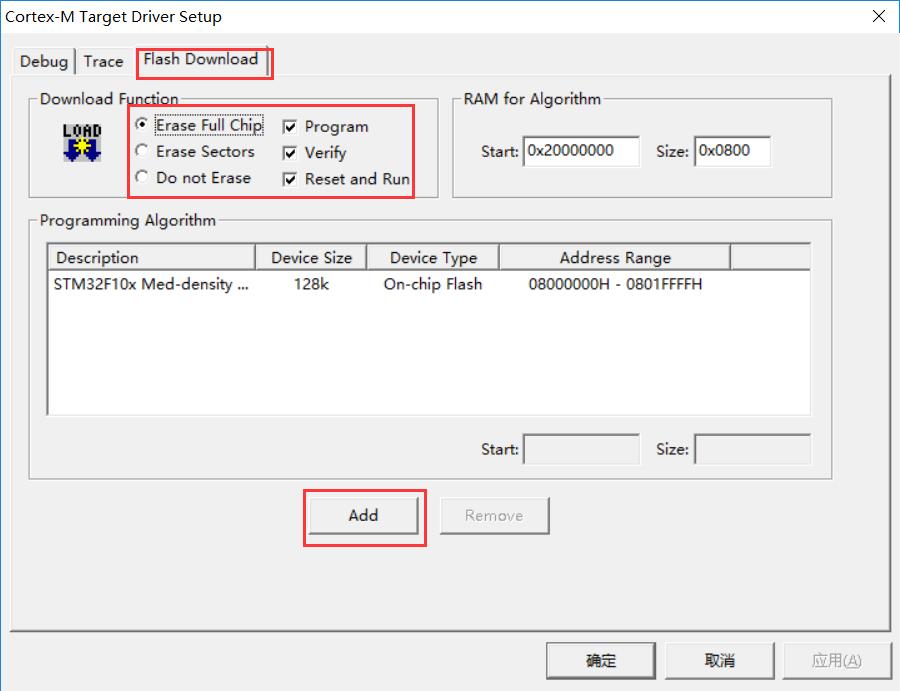
然后点击add
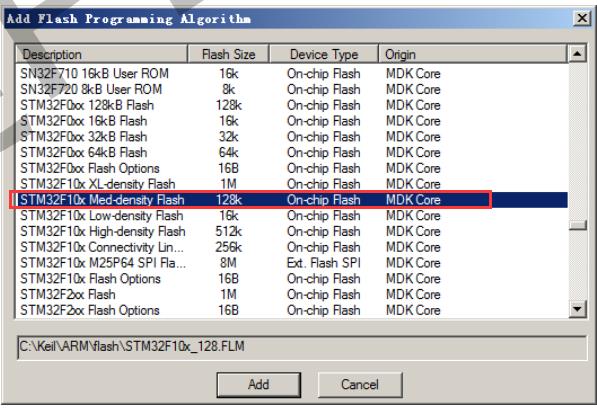
add,然后确定即可
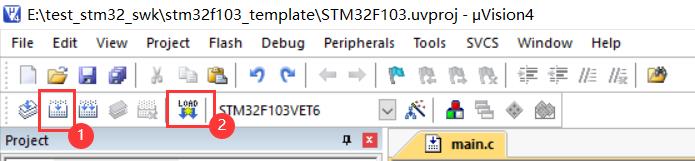
3.先编写代码,再编译,再下载
#include "stm32f10x.h"
void GPIO_Configuration(void){
GPIO_InitTypeDef GPIO_InitStructure;
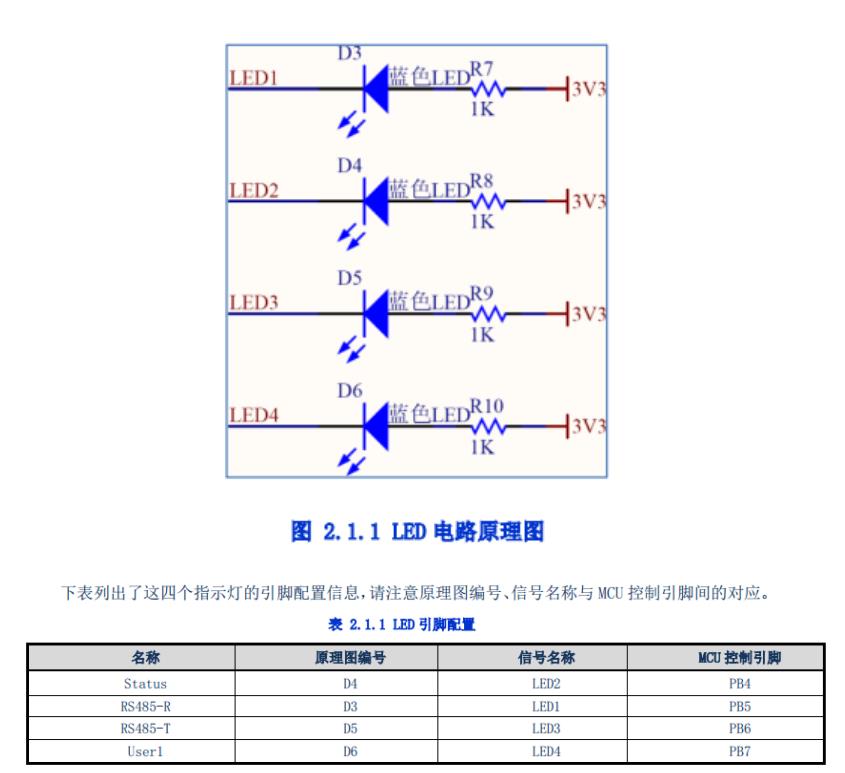
GPIO_InitStructure.GPIO_Pin = GPIO_Pin_4|GPIO_Pin_5|GPIO_Pin_6|GPIO_Pin_7;
GPIO_InitStructure.GPIO_Speed = GPIO_Speed_50MHz;
GPIO_InitStructure.GPIO_Mode = GPIO_Mode_Out_PP;
GPIO_Init(GPIOB,&GPIO_InitStructure);
}
void Delay(unsigned int i)
{
unsigned int j,k;
for(j = 0 ; j < i ; j++)
for(k = 0 ; k < 10000; k++);
}
int main(void)
{
SystemInit();
RCC_APB2PeriphClockCmd(RCC_APB2Periph_GPIOB | RCC_APB2Periph_AFIO , ENABLE);
GPIO_PinRemapConfig(GPIO_Remap_SWJ_JTAGDisable, ENABLE);
GPIO_Configuration();
while(1){
GPIO_WriteBit(GPIOB,GPIO_Pin_4,(BitAction)0x00);
Delay(200);
GPIO_WriteBit(GPIOB,GPIO_Pin_4,(BitAction)0x01);
Delay(200);
GPIO_WriteBit(GPIOB,GPIO_Pin_5,(BitAction)0x00);
Delay(200);
GPIO_WriteBit(GPIOB,GPIO_Pin_5,(BitAction)0x01);
Delay(200);
GPIO_WriteBit(GPIOB,GPIO_Pin_6,(BitAction)0x00);
Delay(200);
GPIO_WriteBit(GPIOB,GPIO_Pin_6,(BitAction)0x01);
Delay(200);
GPIO_WriteBit(GPIOB,GPIO_Pin_7,(BitAction)0x00);
Delay(200);
GPIO_WriteBit(GPIOB,GPIO_Pin_7,(BitAction)0x01);
Delay(200);
GPIO_WriteBit(GPIOB,GPIO_Pin_8,(BitAction)0x00);
Delay(200);
GPIO_WriteBit(GPIOB,GPIO_Pin_8,(BitAction)0x01);
Delay(200);
}
return 0;
}
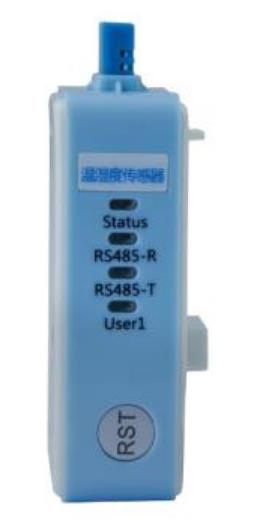
4.结果:
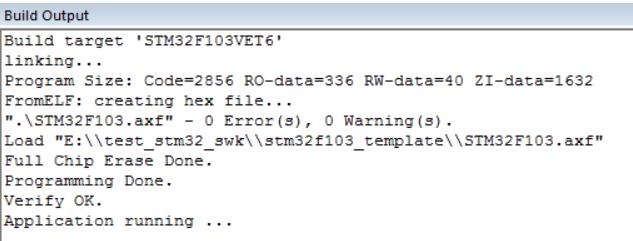
可观察到四个LED灯循环亮灭
以上是关于嵌入式实验 (实验一)GPIO 口控制 LED 实验的主要内容,如果未能解决你的问题,请参考以下文章