Web服务器群集——LNMP动态网站部署
Posted Pakho`
tags:
篇首语:本文由小常识网(cha138.com)小编为大家整理,主要介绍了Web服务器群集——LNMP动态网站部署相关的知识,希望对你有一定的参考价值。
LNMP动态网站部署
一、前言
1.1 LNMP概述
LNMP是指一组通常一起使用来运行动态网站或者服务器的自由软件名称首字母缩写。L指Linux,N指nginx,M一般指mysql,也可以指MariaDB,P一般指php,也可以指Perl或Python。
1.2 LNMP简介
- LNMP代表的就是:Linux系统下Nginx+MySQL+PHP这种网站服务器架构。
- Linux是一类Unix计算机操作系统的统称,是目前最流行的免费操作系统。代表版本有:debian、centos、ubuntu、fedora、gentoo等。
- Nginx是一个高性能的HTTP和反向代理服务器,也是一个IMAP/POP3/SMTP代理服务器。
- Mysql是一个小型关系型数据库管理系统。
- PHP是一种在服务器端执行的嵌入html文档的脚本语言。
- 这四种软件均为免费开源软件,组合到一起,成为一个免费、高效、扩展性强的网站服务系统。

1.3 Nginx特点
- Nginx是一个小巧而高效的Linux下的Web服务器软件,是由 Igor Sysoev 为俄罗斯访问量第二的 Rambler
站点开发的,已经在一些俄罗斯的大型网站上运行多年,相当的稳定。 - Nginx 性能稳定 、 功能丰富 、运维简单、处理静态文件速度快且消耗系统资源极少
1.4 Nginx优点
- 作为 Web 服务器:相比 Apache,Nginx 使用更少的资源,支持更多的并发连接,体现更高的效率。
- 作为负载均衡服务器:Nginx 既可以在内部直接支持Rails和PHP,也可以支持作为 HTTP代理服务器对外进行服务。Nginx
用C编写,不论是系统资源开销还是CPU使用效率都比Perlbal要好的多。 - 作为邮件代理服务器:Nginx同时也是一个非常优秀的邮件代理服务器(最早开发这个产品的目的之一也是作为邮件代理服务器),Last/fm描述了成功并且美妙的使用经验。
- Nginx安装非常的简单,配置文件非常简洁(还能够支持perl语法)。Nginx 支持平滑加载新的配置 ,还能够在不间断服务的情况下进行软件版本的升级。
二、部署流程详解
本实验nginx版本基于1.16.1
2.1 Nginx部署
nginx版本基于 nginx 1.16.1
[root@lnmp ~]# yum install https://dl.fedoraproject.org/pub/epel/epel-release-latest-7.noarch.rpm
[root@lnmp ~]# yum -y install nginx
[root@lnmp ~]# systemctl start nginx
http://192.168.100.10/                           #浏览器输入IP进行检测Nginx是否安装完成
2.2 php-fpm部署
[root@lnmp ~]# yum -y install php-fpm php-mysql php-gd
#php-fpm:php接受动态请求的程序
#php-mysql:php连接mysql的程序
#php-gd:图形库程序(GD库可以处理图片,或者生成图片)
[root@lnmp ~]# systemctl restart php-fpm
[root@lnmp ~]# systemctl enable php-fpm
[root@lnmp ~]# netstat -anpt | grep 9000
2.2.1 php安装完成后的配置
[root@lnmp ~]# vim /usr/share/nginx/html/index.php
<?php
phpinfo();
?>                                                 #调用函数php的版本信息
注意:1.16.1 版本server位于 主配置文件
[root@lnmp ~]# vim /etc/nginx/nginx.conf
location / {
        index index.php index.html;
        }                                          #在location中添加php及html 首页优先级访问顺序

#启动nginx_fastcgi功能
#在server中添加如下配置
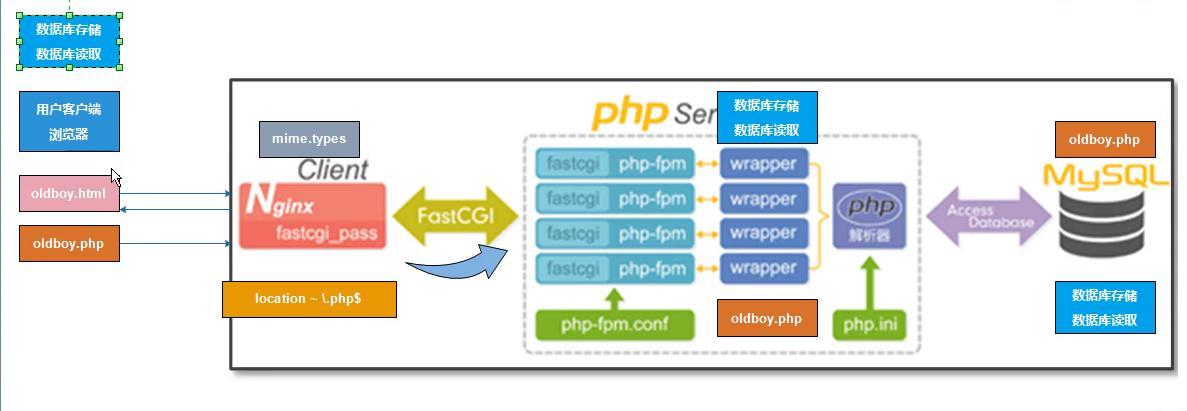
        location ~ \\.php$ {
        root           /usr/share/nginx/html;
        fastcgi_pass   127.0.0.1:9000;
        fastcgi_index  index.php;
        fastcgi_param  SCRIPT_FILENAME  $document_root$fastcgi_script_name;
        include        fastcgi_params;
        }
[root@lnmp ~]# systemctl restart nginx
2.2.1 php配置完成后的验证
http://192.168.100.10/ #浏览器访问

2.3 MySQL部署
[root@lnmp ~]# yum -y install mariadb-server mariadb   #安装MySQL服务器程序和客户机程序
[root@lnmp ~]# systemctl start mariadb
[root@lnmp ~]# systemctl enable  mariadb
[root@lnmp ~]# mysqladmin password '123456'           #修改数据库密码为123456
[root@lnmp ~]# mysql -uroot -p123456                  #登陆数据库
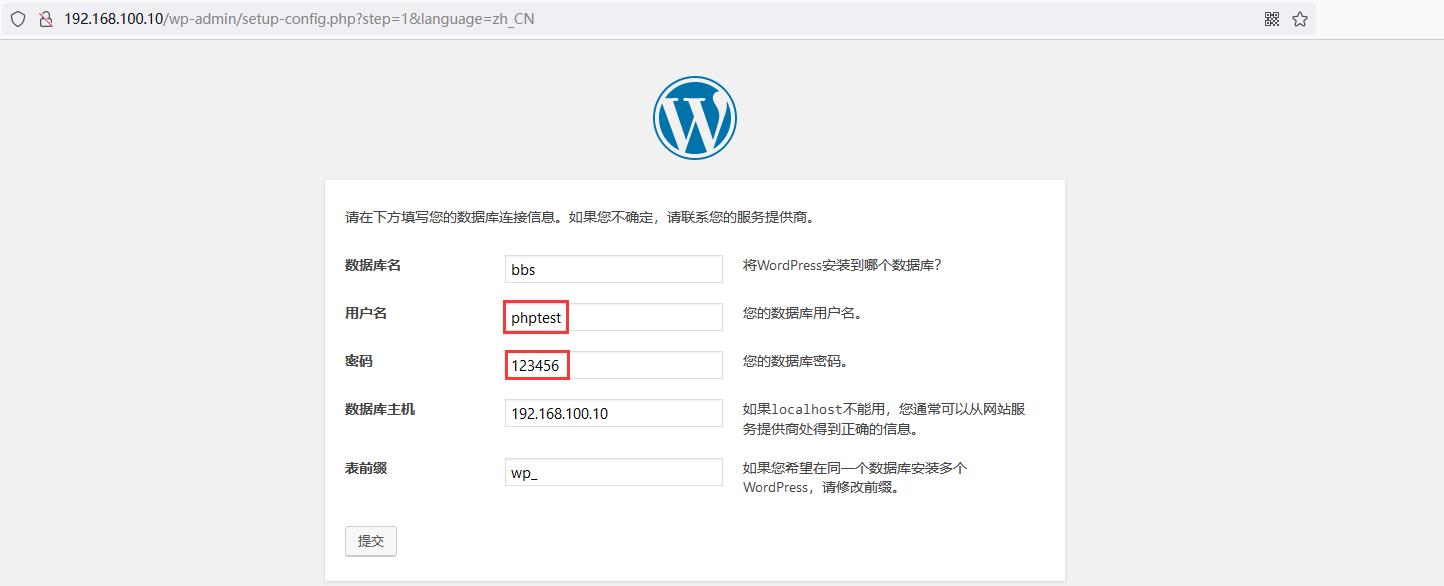
MariaDB [(none)]> create database bbs;                #准备数据库
MariaDB [(none)]> grant all on bbs.* to phptest@'192.168.100.10' identified by '123456'; #授权测试账号
MariaDB [(none)]> flush privileges;                   #刷新数据库
2.3.1 测试php与MySQL连通性
实际生产环境中,不管怎样部署一定记得检测 不管是分离部署还是融合部署
当前为融合部署
[root@lnmp ~]# vim /usr/share/nginx/html/index.php        #修改测试页
<?php
$link=mysql_connect('192.168.100.10','phptest','123456'); #mysql_connect:php语言 与数据库的联通():传参
if($link)
        echo "Successfuly";
else
        echo "Faile";
mysql_close();
?>

2.4 业务上线—WordPress
[root@lnmp ~]# wget https://cn.wordpress.org/wordpress-4.9.1-zh_CN.zip
[root@lnmp ~]# unzip wordpress-4.9.1-zh_CN.zip
[root@lnmp ~]# rm -rf /usr/share/nginx/html/index.php                   #删除测试界面
[root@lnmp ~]# cp -rf /root/wordpress/* /usr/share/nginx/html
[root@lnmp ~]# chown -R nginx.nginx /usr/share/nginx/html/*
[root@lnmp ~]# chmod 777 /usr/share/nginx/html/                         #提权当然也可以不给
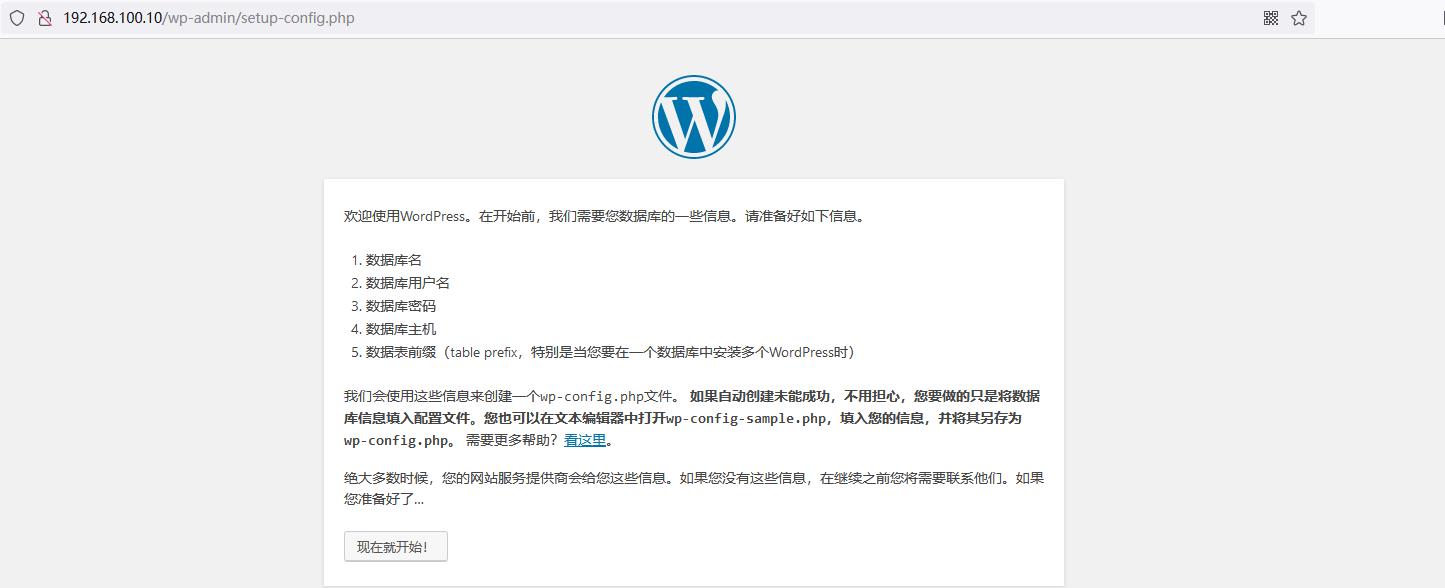
http://192.168.100.10/

2.4.1 网站登陆配置

2.4.2 网站后台配置

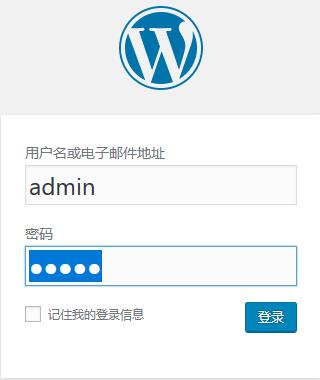
2.4.3 配置完成后的登陆


三、总结一下
- Nginx配置文件大体相同只是版本问题存在于不同的位置,需要举一反三
- 关于数据库授权账户的问题,一开始使用的192.168.100.%,测试php报错,修改为具体IP地址,发现测试成功
以上是关于Web服务器群集——LNMP动态网站部署的主要内容,如果未能解决你的问题,请参考以下文章