控件Button
Posted 一只小阿大嗷
tags:
篇首语:本文由小常识网(cha138.com)小编为大家整理,主要介绍了控件Button相关的知识,希望对你有一定的参考价值。
StateListDrawable
StateListDrawable是Drawable资源的一种,可以根据不同的状态,设置不同的图片效果,关键节点,我们只需要将Button的background属性设置为该drawable资源即可轻松实现,按下按钮时不同的按钮颜色或背景
1.drawable:引用的Drawable位图
2.state_focused:是否获得焦点
3.state_pressed:控件是否被按下
4.state_enabled:控件是否可用
5.state_selected:控件是否被选择,针对有滚轮的情况
6.state_checked:控件是否被勾选
7.state_checkable:控件可否被勾选,eg:checkbox
8.state_window_focused:是否获得窗口焦点
9.state_active:控件是否处于活动状态,eg:slidingTab
10.state_single:控件包含多个子控件时,确定是否只显示一个子控件
11.state_first:控件包含多个子控件时,确定第一个子控件是否处于显示状态
12.state_middle:控件包含多个子控件时,确定中间一个子控件是否处于显示状态
13.state_last:控件包含多个子控件时,确定最后一个子控件是否处于显示状态
更改了按钮背景颜色为白色,但是颜色没变,就需要去themes.xml文件中添加.Bridge
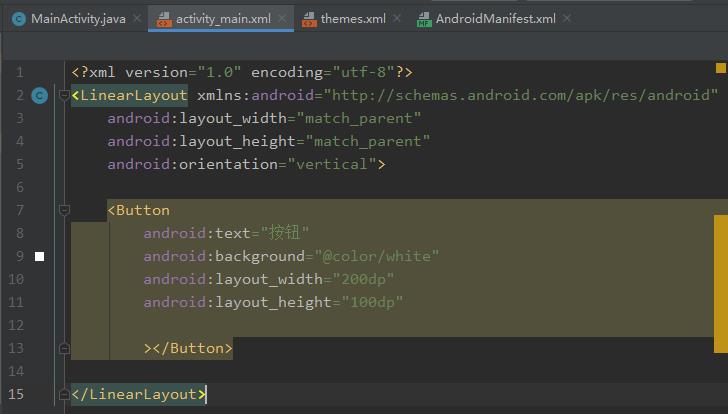
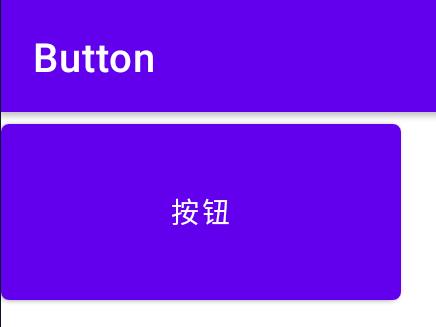
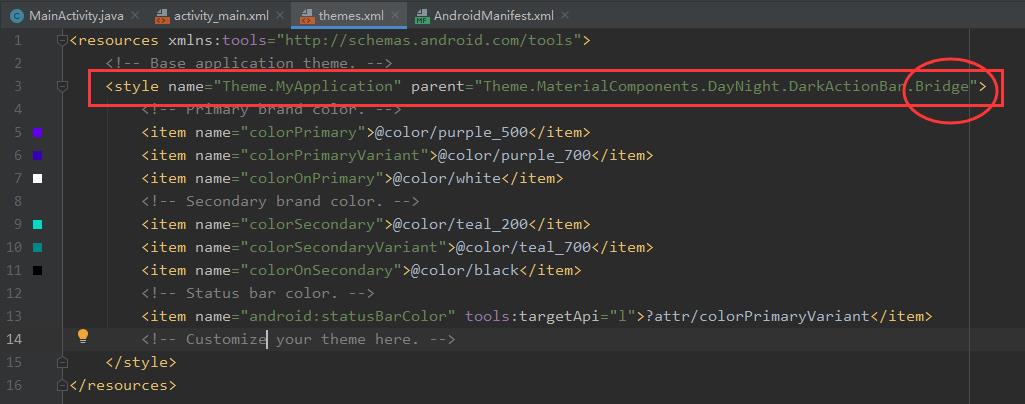
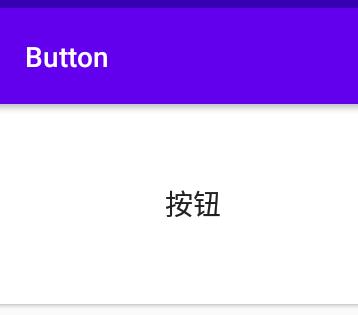
想要按下去有效果就需要创建一个图片选择器
res->drawable右键New Drawable Resource File,名字自己取,我创建的名字:btn_selector(图片选择器)
创建好后在selector里面写,通过item写
activity_main.xml
<?xml version="1.0" encoding="utf-8"?>
<LinearLayout xmlns:android="http://schemas.android.com/apk/res/android"
    android:layout_width="match_parent"
    android:layout_height="match_parent"
    android:orientation="vertical">

    <Button
        android:text="按钮"
        android:background="@drawable/btn_selector"
        android:layout_width="200dp"
        android:layout_height="100dp"

        ></Button>

</LinearLayout>
btn_selector.xml
其中的图片是我新建的
res->drawable右键new->Vector Asset
<?xml version="1.0" encoding="utf-8"?>
<selector xmlns:android="http://schemas.android.com/apk/res/android">

    //状态为按下显示
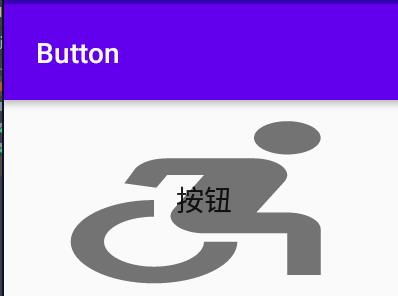
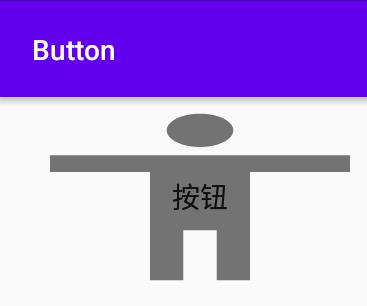
    <item android:drawable="@drawable/ic_baseline_accessibility_24" android:state_pressed="true"/>
    //没有写状态就是默认状态
    <item android:drawable="@drawable/ic_baseline_accessible_forward_24"/>

</selector>
没按下去的效果
按下去的效果
设置颜色随着点击状态改变,就需要创建一个颜色选择器
res右键new->Directory,我取名color
res->color右键New Drawable Resource File,我取名btn_color_selector
activity_main.xml
<?xml version="1.0" encoding="utf-8"?>
<LinearLayout xmlns:android="http://schemas.android.com/apk/res/android"
    android:layout_width="match_parent"
    android:layout_height="match_parent"
    android:orientation="vertical">

    <Button
        android:text="按钮"
        android:background="@drawable/btn_selector"
        android:backgroundTint="@color/btn_color_selector"
        android:layout_width="200dp"
        android:layout_height="100dp"

        ></Button>

</LinearLayout>
btn_color_selector.xml
<?xml version="1.0" encoding="utf-8"?>
<selector xmlns:android="http://schemas.android.com/apk/res/android">

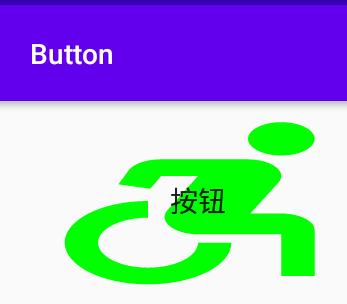
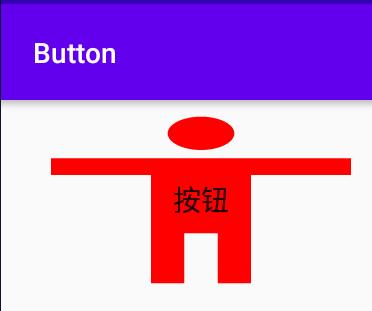
    <item android:color="#ffff0000" android:state_pressed="true"/>
    <item android:color="#ff00ff00"/>

</selector>
btn_selector.xml
<?xml version="1.0" encoding="utf-8"?>
<selector xmlns:android="http://schemas.android.com/apk/res/android">

    //状态为按下显示
    <item android:drawable="@drawable/ic_baseline_accessibility_24" android:state_pressed="true"/>
    //没有写状态就是默认状态
    <item android:drawable="@drawable/ic_baseline_accessible_forward_24"/>

</selector>
没点击按钮
点击按钮
也可设置前景色foreground,但会遮挡文字
button可以看成三层,前景色->文字->背景色
Button事件处理
1.点击事件
2.长按事件
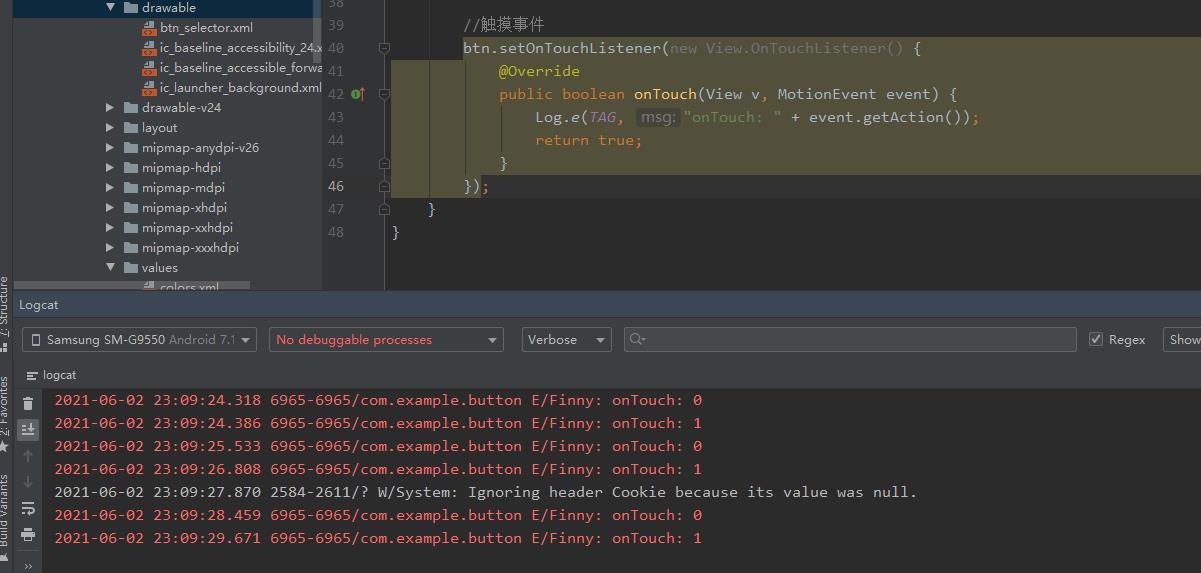
3.触摸事件
当触摸事件为true,长按按钮并松开,其他事件不执行
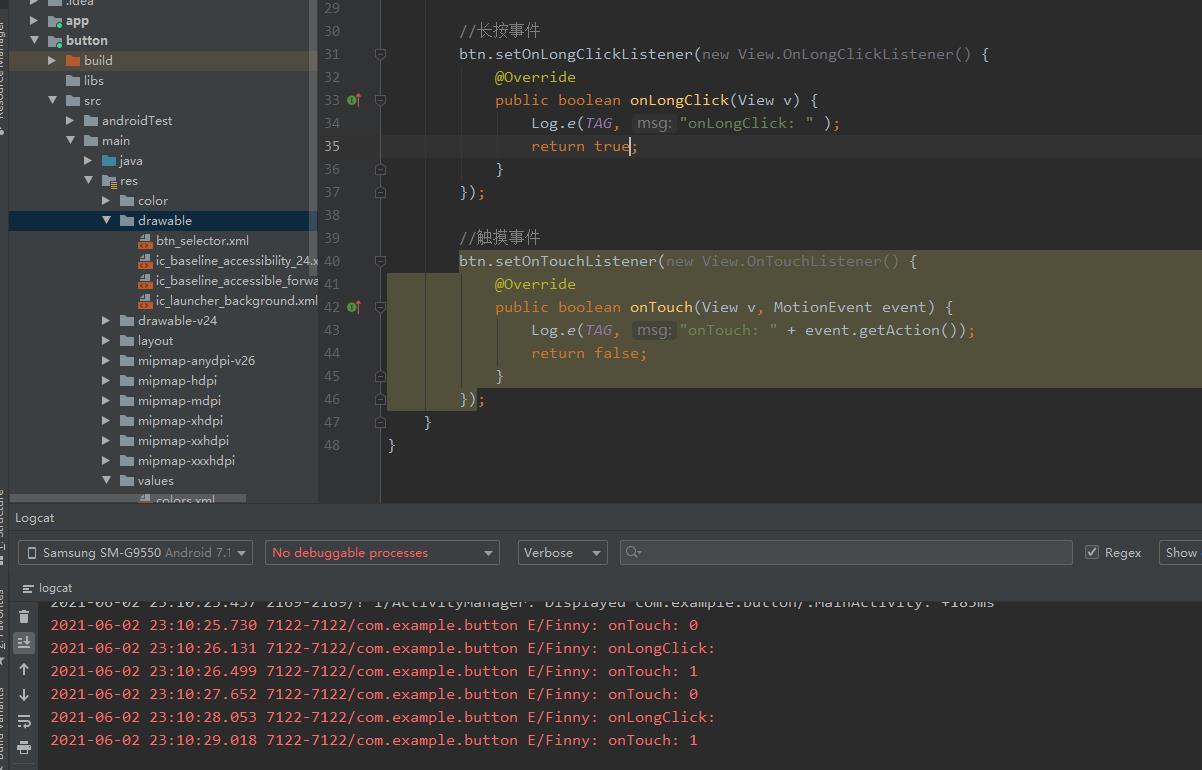
当长按事件为true,长按按钮并松开,会先执行触摸事件,再执行长按事件,不会执行点击事件
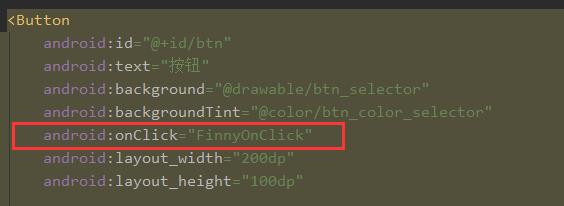
可以创建一个onClick
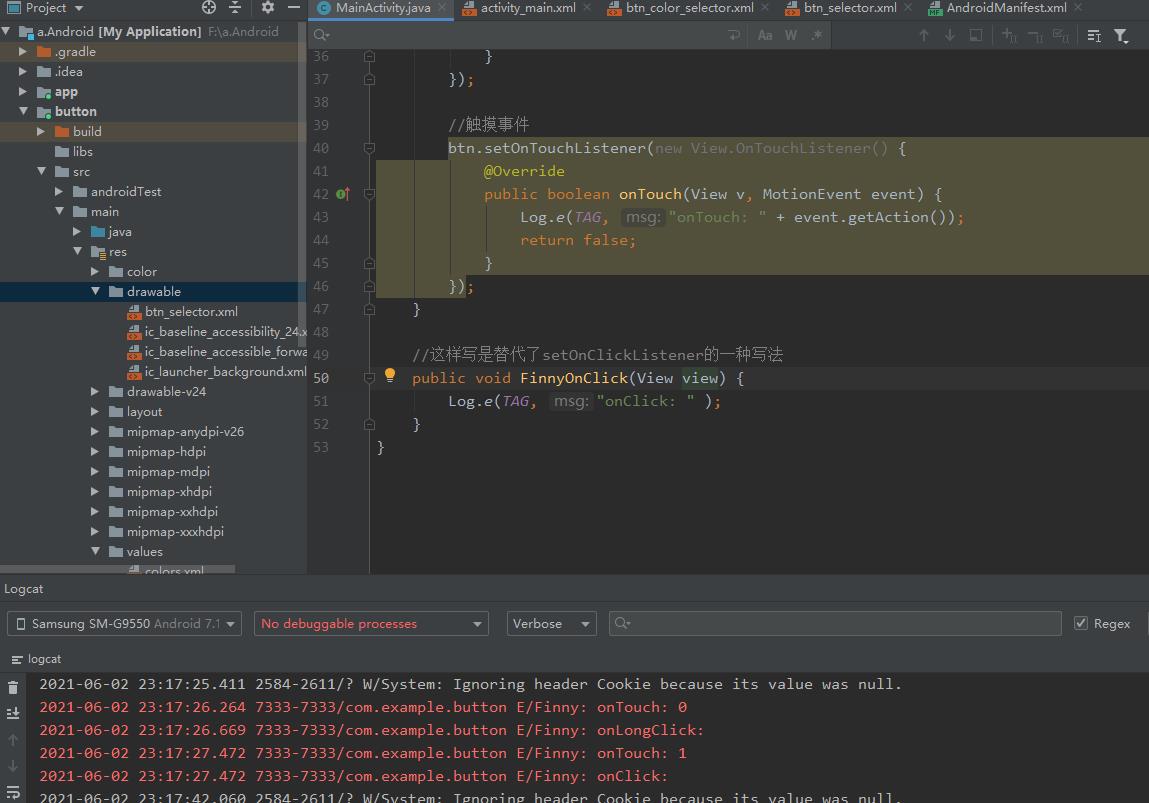
这样写是替代了setOnClickListener的一种写法
MainActivity.java
package com.example.button;

import androidx.appcompat.app.AppCompatActivity;

import android.os.Bundle;
import android.util.Log;
import android.view.MotionEvent;
import android.view.View;
import android.widget.Button;

public class MainActivity extends AppCompatActivity {

    private static final String TAG = "Finny";

    @Override
    protected void onCreate(Bundle savedInstanceState) {
        super.onCreate(savedInstanceState);
        setContentView(R.layout.activity_main);

        Button btn = findViewById(R.id.btn);

        //点击事件
//        btn.setOnClickListener(new View.OnClickListener() {
//            @Override
//            public void onClick(View v) {
//                Log.e(TAG, "onClick: " );
//            }
//        });

        //长按事件
        btn.setOnLongClickListener(new View.OnLongClickListener() {
            @Override
            public boolean onLongClick(View v) {
                Log.e(TAG, "onLongClick: " );
                return false;
            }
        });

        //触摸事件
        btn.setOnTouchListener(new View.OnTouchListener() {
            @Override
            public boolean onTouch(View v, MotionEvent event) {
                Log.e(TAG, "onTouch: " + event.getAction());
                return false;
            }
        });
    }

    //这样写是替代了setOnClickListener的一种写法
    public void FinnyOnClick(View view) {
        Log.e(TAG, "onClick: " );
    }
}
activity_main.xml
<?xml version="1.0" encoding="utf-8"?>
<LinearLayout xmlns:android="http://schemas.android.com/apk/res/android"
    android:layout_width="match_parent"
    android:layout_height="match_parent"
    android:orientation="vertical">

    <Button
        android:id="@+id/btn"
        android:text="按钮"
        android:background="@drawable/btn_selector"
        android:backgroundTint="@color/btn_color_selector"
        android:onClick="FinnyOnClick"
        android:layout_width="200dp"
        android:layout_height="100dp"

        ></Button>

</LinearLayout>
btn_color_selector.xml
<?xml version="1.0" encoding="utf-8"?>
<selector xmlns:android="http://schemas.android.com/apk/res/android">

    <item android:color="#ffff0000" android:state_pressed="true"/>
    <item android:color="#ff00ff00"/>

</selector>
btn_selector.xml
<?xml version="1.0" encoding="utf-8"?>
<selector xmlns:android="http://schemas.android.com/apk/res/android">

    //状态为按下显示
    <item android:drawable="@drawable/ic_baseline_accessibility_24" android:state_pressed="true"/>
    //没有写状态就是默认状态
    <item android:drawable="@drawable/ic_baseline_accessible_forward_24"/>

</selector>
以上是关于控件Button的主要内容,如果未能解决你的问题,请参考以下文章