Android和Unity互调
Posted 大不懂
tags:
篇首语:本文由小常识网(cha138.com)小编为大家整理,主要介绍了Android和Unity互调相关的知识,希望对你有一定的参考价值。
目录
1.工具
androidStudio:
Android Gradle Plugin Version 3.5.2
Gradle Version 5.4.1
Unity 3D:
2018.4.30f1
2.流程 见下图
2.1 android 加载unity包
2.2 android 点击原生按钮调用unity方法,更新UnityUI
/**
     * // objectName: Unity 对象的名称
     * // methodName: Unity 对象绑定的脚本方法名
     * // message: 自定义消息
     *
     */
UnityPlayer.UnitySendMessage("Canvas/Button_Show", "ShowText", "Android 数据");
2.3 Unity 点击unity内部按钮调用android方法更新AndroidUI,Android响应被调回应数据,unity回去数据更新UnityUi
AndroidJavaClass jc = new AndroidJavaClass("com.unity3d.player.UnityPlayer");
AndroidJavaObject jo = jc.GetStatic<AndroidJavaObject>("currentActivity");
//传入方法名 参数
string v = jo.Call<string>("CallAndroidShow","Unity 数据");

//如果没有返回
jo.Call("CallAndroidShow");
3.具体过程
3.1 unity程序编写
3.1.1 创建Unity项目
创建一个3D项目 版本是2018.4.30f1

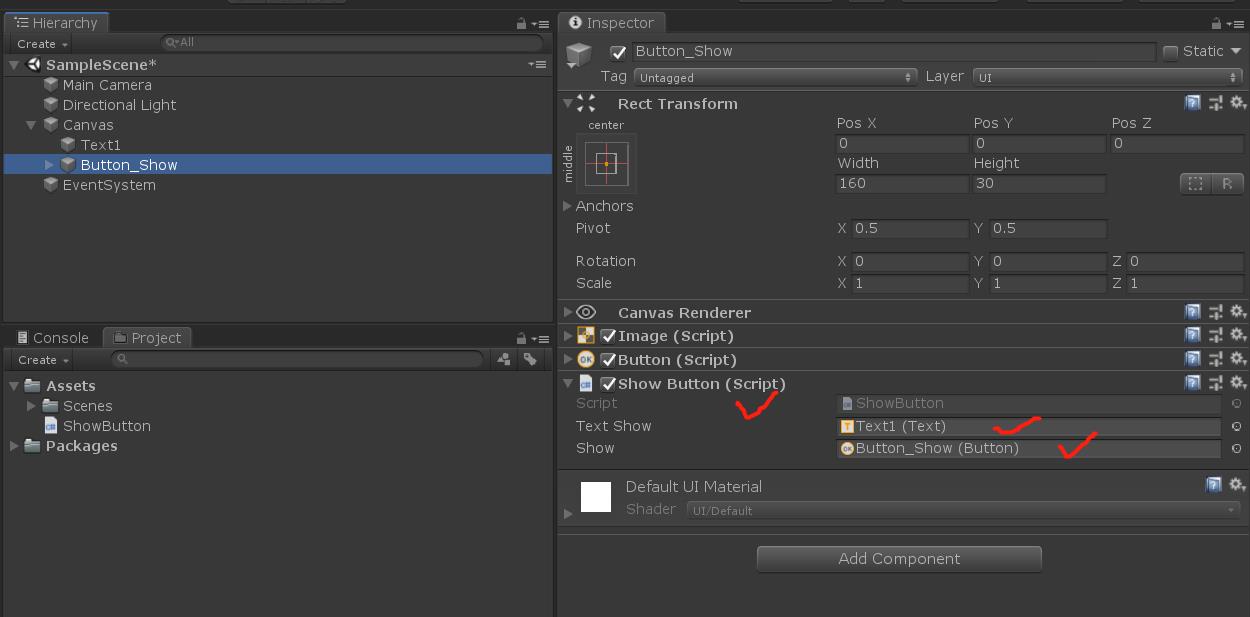
3.1.2 制作相关控件
添加两个控件:
1.text name:Text1
2.button name:Button_Show

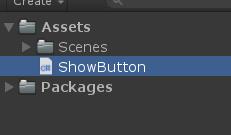
3.1.3 编写脚本
编写一个脚本:ShowButton.cs。并挂载在Button_Show控件上
脚本内容:
using System.Collections;
using System.Collections.Generic;
using UnityEngine;
using UnityEngine.UI;

public class ShowButton : MonoBehaviour
{
    public Text textShow;
    public Button show;
   //Start is called before the first frame update
	 //点击unity按钮后调用android方法
    public void CallAndroidShowAa()
    {

	 // 不知道为啥不行
        //AndroidJavaClass jo =  new AndroidJavaClass("com.unity2android.unityplugin.AndroidActivity");
        //jo.Call("CallAndroidShow");


        show.transform.Find("Text").GetComponent<Text>().text = "调取Android数据";

        AndroidJavaClass jc = new AndroidJavaClass("com.unity3d.player.UnityPlayer");
        AndroidJavaObject jo = jc.GetStatic<AndroidJavaObject>("currentActivity");
		//传入方法名 参数
        string v = jo.Call<string>("CallAndroidShow","Unity 数据");
        textShow.text = v;
    }
	//提供一个android调用的方法 android调用传入数据unity更新UI
    public void ShowText(string message)
    {
        textShow.text = "" + message;
    }


    // Start is called before the first frame update
    void Start()
    {
	    //点击事件
        show.onClick.AddListener(CallAndroidShowAa);
    }


    // Update is called once per frame
    void Update()
    {

    }
}
挂在后将控件传入脚本:
3.2 unity 项目导出
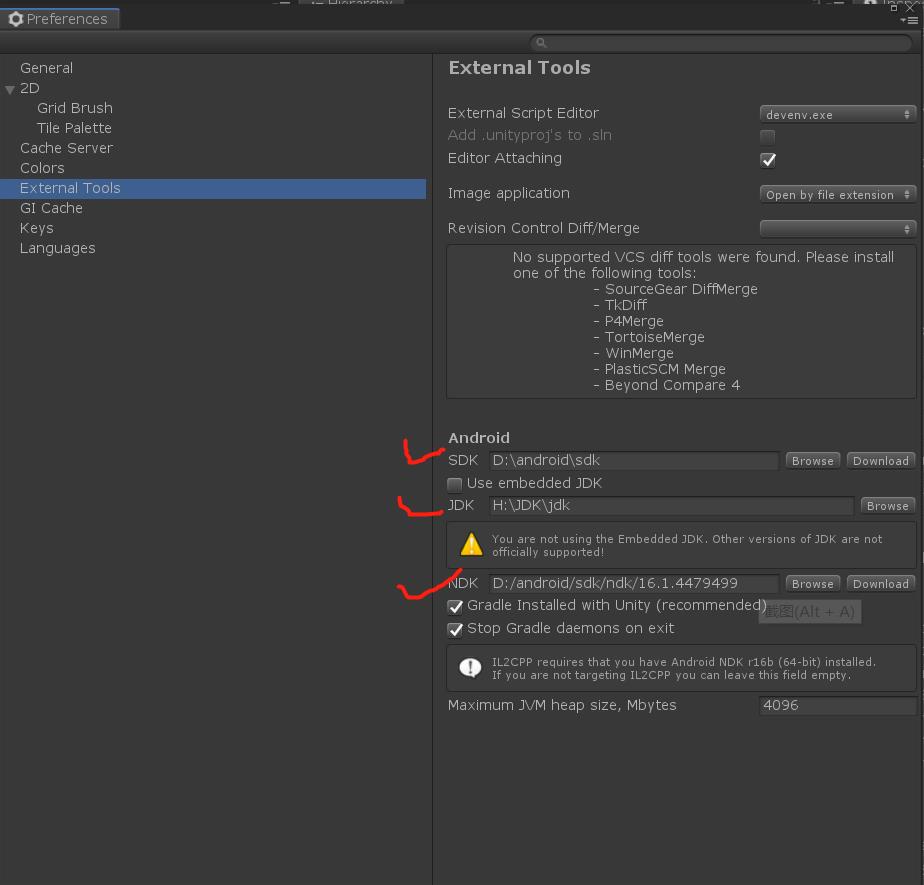
3.2.1 External Tools 的设置
路径:Edit->Preferences->External Tools
SDK、JDK、NDK 都需要勾选如果本地有用本地的比较快,
3.2.2 Player Settings的设置
路径:File->BuildSettings->Player Settings
1.修改Company name和Product Name 涉及后面的包名
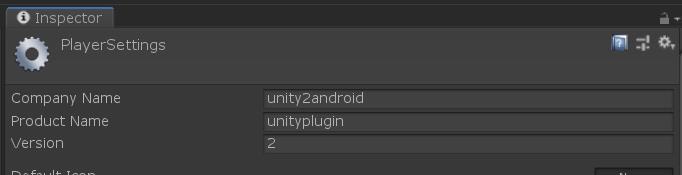
2.版本修改
package name 是和 Company name、Product Name关联的
version和bundle version Code我猜一个是真正的版本号一个是显示的版本号,这个可以不改,但是继承的时候如果有更改unity不改再集成会报错,不知道为啥。
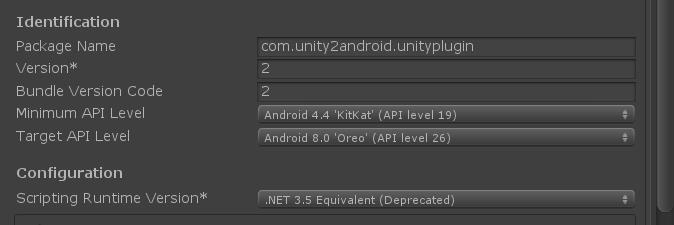
3.cpu架构的选择
如果不选择X86就不用Scriptiong Backend选择IL2CPP。

3.2.3 导出
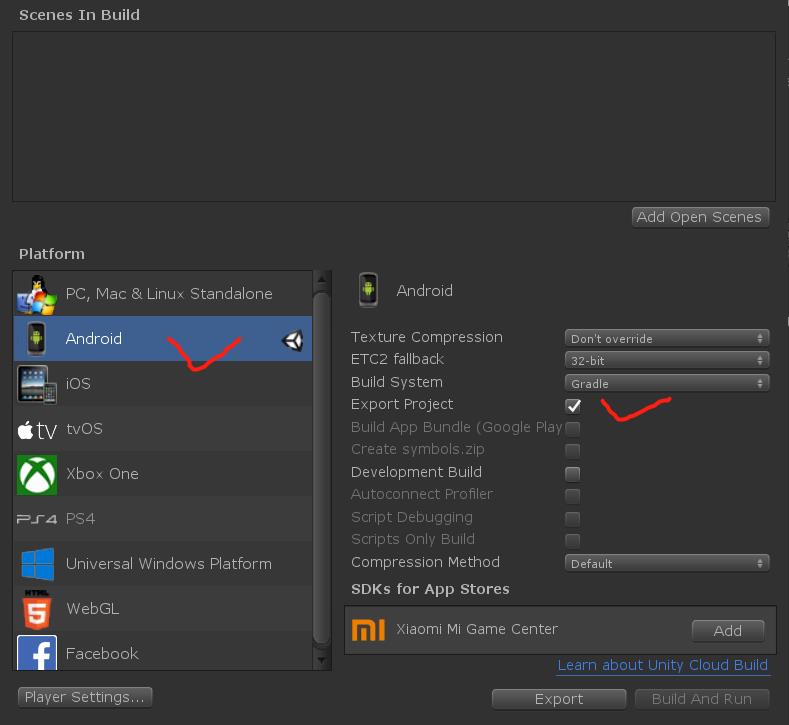
漫长的等待。
3.3 Android项目集成
3.3.1 创建项目
这个包名要和unity导出的一致

3.3.2 集成unity
3.3.2.1 查看unity 导出的结构
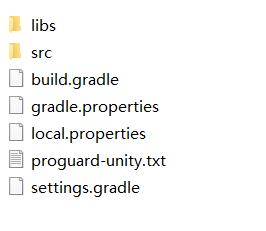
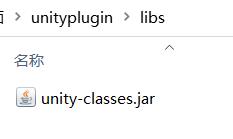
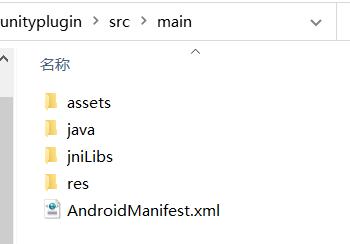
3.3.2.2 集成jar
将unity 3D导出的jar复制到android项目下,
Project->unityplugin->app->libs
右键 add As Library

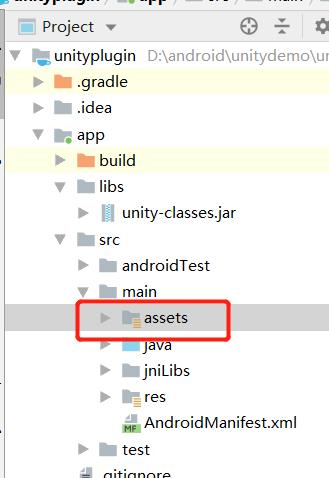
3.3.2.3 集成assets
将unity包中的assets复制到APP->src->main下
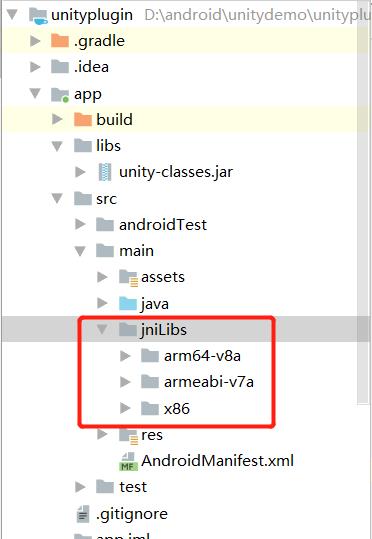
3.3.2.4 集成jniLibs
将unity 导出包中的jinLibs全部复制到APP->src->main下
3.3.2.5 修改清单文件
将unity包中的清单文件打开,把android项目中清单文件不包含的全部粘贴过去其中
<activity android:name="com.unity2android.unityplugin.UnityPlayerActivity">修改为自己项目路径,里面的
<intent-filter> <action android:name="android.intent.action.MAIN" /> <category android:name="android.intent.category.LAUNCHER" /> <category android:name="android.intent.category.LEANBACK_LAUNCHER" /> </intent-filter>
需要屏蔽掉
<?xml version="1.0" encoding="utf-8"?>
<manifest xmlns:android="http://schemas.android.com/apk/res/android"
    xmlns:tools="http://schemas.android.com/tools"
    package="com.unity2android.unityplugin"
    android:installLocation="preferExternal">

    <supports-screens
        android:anyDensity="true"
        android:largeScreens="true"
        android:normalScreens="true"
        android:smallScreens="true"
        android:xlargeScreens="true" />
    <application
        android:banner="@drawable/app_banner"
        android:icon="@mipmap/app_icon"
        android:isGame="true"
        android:label="@string/app_name"
        android:theme="@style/UnityThemeSelector">
<!--  修改为       android:name="com.unity3d.player.UnityPlayerActivity">-->
        <activity

            android:name="com.unity2android.unityplugin.UnityPlayerActivity">
            android:configChanges="mcc|mnc|locale|touchscreen|keyboard|keyboardHidden|navigation|orientation|screenLayout|uiMode|screenSize|smallestScreenSize|fontScale|layoutDirection|density"
            android:hardwareAccelerated="false"
            android:label="@string/app_name"
            android:launchMode="singleTask"
            android:screenOrientation="fullSensor">
<!--            屏蔽掉-->
            <intent-filter>
                <action android:name="android.intent.action.MAIN" />

                <category android:name="android.intent.category.LAUNCHER" />
                <category android:name="android.intent.category.LEANBACK_LAUNCHER" />
            </intent-filter>
            <meta-data
                android:name="unityplayer.UnityActivity"
                android:value="true" />
        </activity>

        <meta-data
            android:name="unity.build-id"
            android:value="487dc281-c378-4b43-9120-9f3bb7741898" />
        <meta-data
            android:name="unity.splash-mode"
            android:value="0" />
        <meta-data
            android:name="unity.splash-enable"
            android:value="True" />
        <meta-data
            android:name="unity.builder"
            android:value="\\12369984484064" />
    </application>
    <uses-feature android:glEsVersion="0x00020000" />
    <uses-permission android:name="android.permission.INTERNET" />

    <uses-feature
        android:name="android.hardware.touchscreen"
        android:required="false" />
    <uses-feature
        android:name="android.hardware.touchscreen.multitouch"
        android:required="false" />
    <uses-feature
        android:name="android.hardware.touchscreen.multitouch.distinct"
        android:required="false" />

    <uses-permission android:name="android.permission.ACCESS_NETWORK_STATE" />
</manifest>
3.3.2.6修改相关配置文件
将unity 中build.gradle文件下的补全到android项目中的build.gradle中

Android项目的Project
// Top-level build file where you can add configuration options common to all sub-projects/modules.

buildscript {
    repositories {
        mavenCentral()
        google()
        jcenter()

    }
    dependencies {
        classpath 'com.android.tools.build:gradle:3.5.2'

        // NOTE: Do not place your application dependencies here; they belong
        // in the individual module build.gradle files
    }
}

allprojects {
    repositories {
        mavenCentral()
        google()
        jcenter()
        flatDir {
            dirs 'libs'
        }


    }
}

task clean(type: Delete) {
    delete rootProject.buildDir
}
Andorid 项目的mode
apply plugin: 'com.android.application'

android {
    compileSdkVersion 30
    buildToolsVersion "30.0.0"
    defaultConfig {
        applicationId "com.unity2android.unityplugin"
        minSdkVersion 19
        targetSdkVersion 30
        versionCode 1
        versionName "1.0"
        ndk {
            abiFilters 'armeabi-v7a', 'arm64-v8a', 'x86'
        }
        testInstrumentationRunner "androidx.test.runner.AndroidJUnitRunner"
    }
    lintOptions {
        abortOnError false
    }

    aaptOptions {
        noCompress = ['.unity3d', '.ress', '.resource', '.obb']
    }

    compileOptions {
        sourceCompatibility JavaVersion.VERSION_1_8
        targetCompatibility JavaVersion.VERSION_1_8
    }
    buildTypes {
        debug {
            minifyEnabled false
            useProguard false
            proguardFiles getDefaultProguardFile('proguard-android.txt'), 'proguard-unity.txt'
            jniDebuggable true
        }
        release {
            minifyEnabled false
            useProguard false
            proguardFiles getDefaultProguardFile('proguard-android.txt'), 'proguard-unity.txt'
            signingConfig signingConfigs.debug
        }
    }
    packagingOptions {
        doNotStrip '*/armeabi-v7a/*.so'
        doNotStrip '*/arm64-v8a/*.so'
        doNotStrip '*/x86/*.so'
    }

    bundle {
        language {
            enableSplit = false
        }
        density {
            enableSplit = false
        }
        abi {
            enableSplit = true
        }
    }

}

dependencies {
    implementation fileTree(include: ['*.jar'], dir: 'libs')
    implementation 'androidx.appcompat:appcompat:1.0.2'
    implementation 'androidx.constraintlayout:constraintlayout:1.1.3'
    testImplementation 'junit:junit:4.12'
    androidTestImplementation 'androidx.test.ext:junit:1.1.0'
    androidTestImplementation 'androidx.test.espresso:espresso-core:3.1.1'
    implementation files('libs/unity-classes.jar')
}
没有啥补啥
3.4 Android项目调用
新建一个AndroidActivity
package com.unity2android.unityplugin;

import android.app.Activity;
import android.content.Intent;
import android.os.Bundle;
import android.util.Log;
import android.view.KeyEvent;
import android.view.MotionEvent;
import android.view.View;
import android.widget.Button;
import android.widget.LinearLayout;
import android.widget.TextView;

import com.unity2android.unityplugin.R;
import com.unity3d.player.UnityPlayer;
import com.unity3d.player.UnityPlayerActivity;

import static android.content.ContentValues.TAG;

public class AndroidActivity extends UnityPlayerActivity {

    private TextView tv;
    private LinearLayout ll;

    @Override
    protected void onCreate(Bundle savedInstanceState) {
        super.onCreate(savedInstanceState);
        setContentView(R.layout.activity_android);
        ll = findViewById(R.id.ll);
        ll.addView(mUnityPlayer);

        Button switch_ = findViewById(R.id.switch_);
        Button clear = findViewById(R.id.clear);
        tv = findViewById(R.id.tv);
        switch_.setOnClickListener(new View.OnClickListener() {
            @Override
            public void onClick(View v) {

                CallUnityShow("Canvas/Button_Show", "ShowText", "Android 数据");
            }
        });
        clear.setOnClickListener(new View.OnClickListener() {
            @Override
            public void onClick(View v) {
                CallUnityShow("Canvas/Button_Show", "ShowText", "");
                tv.setText("");
            }
        });
        ll.setOnClickListener(new View.OnClickListener() {
            @Override
            public void onClick(View v) {
                Log.d(TAG, "onClick: lll");
            }
        });
    }


    /**
     * // objectName: Unity 对象的名称
     * // methodName: Unity 对象绑定的脚本方法名
     * // message: 自定义消息
     *
     * @param s1
     * @param s2
     * @param s3
     */
    public void CallUnityShow(String s1, String s2, String s3) {
        UnityPlayer.UnitySendMessage(s1, s2, s3);
        Log.d(TAG, "CallUnityShow: 456");
    }

    public String CallAndroidShow(final String s) {
        Log.d(TAG, "CallAndroidShow: 123");
        runOnUiThread(new Runnable() {
            @Override
            public void run() {
                tv.setText(s);
            }
        });

        return "Android 返回";

    }

    @Override
    protected void onDestroy() {
        super.onDestroy();
        // UnityPlayer.UnitySendMessage("Manager", "Unload", "");
        mUnityPlayer.quit();
    }

    // Pause Unity
    @Override
    protected void onPause() {
        super.onPause();
        mUnityPlayer.pause();
    }

    // Resume Unity
    @Override
    protected void onResume() {
        super.onResume();
        mUnityPlayer.resume();
    }

    /**
     * 按键点击事件
     */
    @Override
    public boolean onKeyDown(int keyCode, KeyEvent event) {
        if (keyCode == KeyEvent.KEYCODE_BACK) {
            onDestroy();
        }
        return true;
    }
}
对应的xml:
<?xml version="1.0" encoding="utf-8"?>
<LinearLayout xmlns:android="http://schemas.android.com/apk/res/android"
    xmlns:app="http://schemas.android.com/apk/res-auto"
    xmlns:tools="http://schemas.android.com/tools"
    android:layout_width="match_parent"
    android:layout_height="match_parent"
    android:orientation="vertical">


    <LinearLayout
        android:id="@+id/ll"
        android:layout_width="match_parent"
        android:layout_height="400dp"
        android:orientation="vertical"></LinearLayout>
    <LinearLayout
        android:layout_width="wrap_content"
        android:orientation="horizontal"
        android:layout_height="wrap_content">
        <Button
            android:id="@+id/switch_"
            android:layout_width="wrap_content"
            android:layout_height="wrap_content"
            android:text="text"/>
        <Button
            android:id="@+id/clear"
            android:layout_width="wrap_content"
            android:layout_height="wrap_content"
            android:text="clear"/>
    </LinearLayout>
    <TextView
        android:id="@+id/tv"
        android:layout_width="wrap_content"
        android:layout_height="wrap_content"
        android:text="unity"/>


</LinearLayout>
Android项目源码:https://download.csdn.net/download/qq_35698774/19990943
Unity 导出的jar:https://download.csdn.net/download/qq_35698774/19990999
Unity 项目:https://download.csdn.net/download/qq_35698774/19991018
以上是关于Android和Unity互调的主要内容,如果未能解决你的问题,请参考以下文章