Unity3d---遥感-自适应-动态位置
Posted 穿迷彩服的鲨鱼
tags:
篇首语:本文由小常识网(cha138.com)小编为大家整理,主要介绍了Unity3d---遥感-自适应-动态位置相关的知识,希望对你有一定的参考价值。
提示:素材来源网络
前言
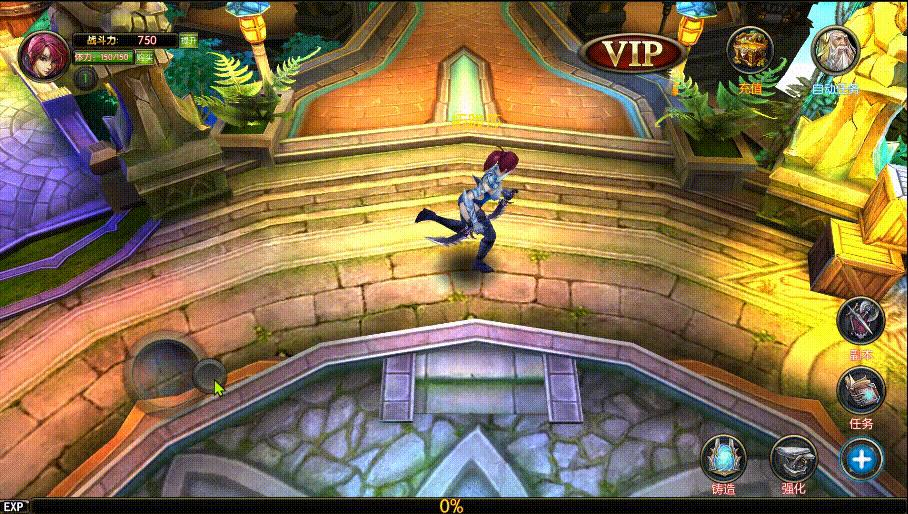
遥感效果:
开始原位置,点击范围位置后显示在点击位置,拖拽也在点击位置,点击结束后回到原位置;
实现遥感范围自适应,不会因为屏幕分辨率大小不一而操作不一

提示:以下是本篇文章正文内容,下面案例可供参考
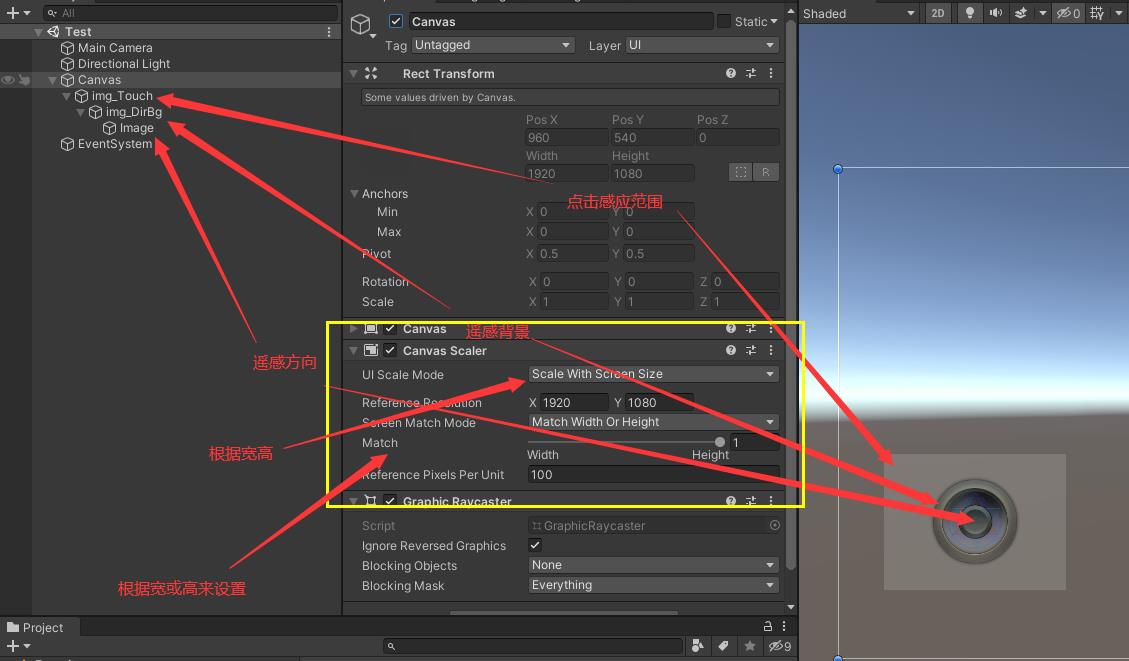
一、新建Test场景
如图

二、创建脚本
1.PEListener脚本
代码如下(示例):
using System;
using UnityEngine;
using UnityEngine.EventSystems;

namespace HKZ
{
    public class PEListener : MonoBehaviour, IPointerDownHandler, IPointerUpHandler, IDragHandler
    {
        public Action<PointerEventData> onClickDown;
        public Action<PointerEventData> onClickUp;
        public Action<PointerEventData> onDrag;
        /// <summary>
        /// 拖拽
        /// </summary>
        /// <param name="eventData"></param>
        public void OnDrag(PointerEventData eventData)
        {
            if (onDrag != null)
            {
                onDrag(eventData);
            }
        }
        /// <summary>
        /// 按下
        /// </summary>
        /// <param name="eventData"></param>
        public void OnPointerDown(PointerEventData eventData)
        {
            if (onClickDown != null)
            {
                onClickDown(eventData);
            }
        }
        /// <summary>
        /// 抬起
        /// </summary>
        /// <param name="eventData"></param>
        public void OnPointerUp(PointerEventData eventData)
        {
            if (onClickUp != null)
            {
                onClickUp(eventData);
            }
        }
    }
}
2.Test脚本挂在场景中就行
代码如下(示例):
using System;
using UnityEngine;
using UnityEngine.EventSystems;
using UnityEngine.UI;

namespace HKZ
{
    public class Test : MonoBehaviour
    {
        /// <summary>
        /// 摇杆
        /// </summary>
        //屏幕标准宽高
        public const int ScreenStandardWidth = 1920;
        public const int ScreenStandardHeight = 1080;
        //遥感点标准距离
        public const int ScreenOPDis = 90;

        public Image imgTouch;//感应范围
        public Image imgDirBg;//遥感背景
        public Image imgDirPoint;//遥感方向点
        private Vector2 startPos = Vector2.zero;//开始位置
        private Vector2 defaultPos = Vector2.zero;//默认位置
        private float pointDis;//最大距离

        private void Awake()
        {
            pointDis = Screen.height * 1.0f / Constants.ScreenStandardHeight * Constants.ScreenOPDis;//自适应屏幕分辨率的最大距离
            defaultPos = imgDirBg.transform.position;
            imgDirPoint.gameObject.SetActive(false);
            Init();
        }

        private void Init()
        {
            OnclickDown(imgTouch.gameObject, (PointerEventData evt) =>
            {
                startPos = evt.position;
                imgDirPoint.gameObject.SetActive(true);
                imgDirBg.transform.position = evt.position;
            });
            OnclickUp(imgTouch.gameObject, (PointerEventData evt) =>
            {
                imgDirBg.transform.position = defaultPos;
                imgDirPoint.gameObject.SetActive(false);
                imgDirPoint.transform.localPosition = Vector2.zero;
                //TODO 方向信息传递
                Debug.Log(Vector2.zero);
            });
            OnDrag(imgTouch.gameObject, (PointerEventData evt) =>
            {
                Vector2 dir = evt.position - startPos;
                float len = dir.magnitude;
                if (len > pointDis)
                {
                    Vector2 clamDir = Vector2.ClampMagnitude(dir, pointDis);
                    imgDirPoint.transform.position = startPos + clamDir;
                }
                else
                {
                    imgDirPoint.transform.position = evt.position;
                }
                //TODO方向信息传递
                Debug.Log(dir.normalized);
            });

        }

        #region 点击事件封装
        private T GetOrAddComponent<T>(GameObject go)
            where T : Component
        {
            T t = go.GetComponent<T>();
            if (t == null)
            {
                t = go.AddComponent<T>();
            }
            return t;
        }
        private void OnclickDown(GameObject go, Action<PointerEventData> cb)
        {
            PEListener listener = GetOrAddComponent<PEListener>(go);
            listener.onClickDown = cb;
        }
        private void OnclickUp(GameObject go, Action<PointerEventData> cb)
        {
            PEListener listener = GetOrAddComponent<PEListener>(go);
            listener.onClickUp = cb;
        }
        private void OnDrag(GameObject go, Action<PointerEventData> cb)
        {
            PEListener listener = GetOrAddComponent<PEListener>(go);
            listener.onDrag = cb;
        }
        #endregion

    }
}
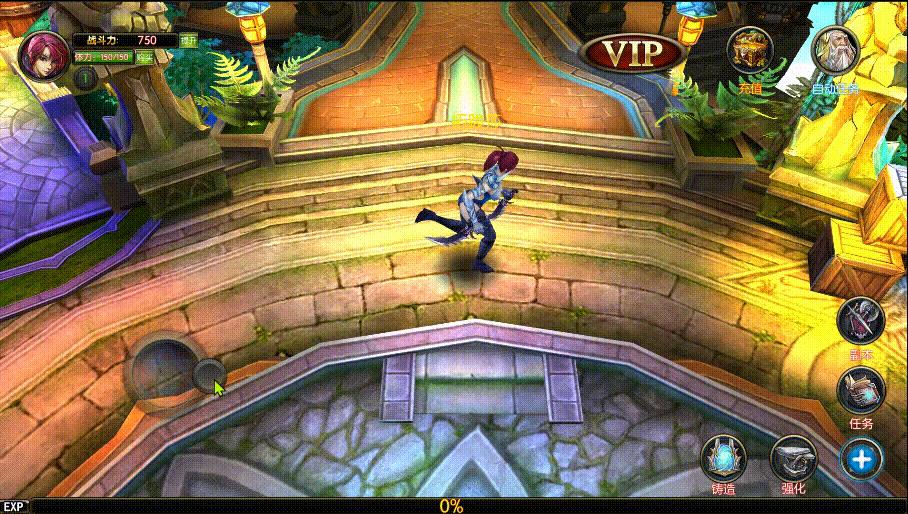
3.效果图
跟着步骤即可自己看到完美效果,

总结

以上是关于Unity3d---遥感-自适应-动态位置的主要内容,如果未能解决你的问题,请参考以下文章