自定义View组件之drawBitmap(Bitmap bitmap, Rect src, RectF dst,Paint paint)方法正确理解
Posted LQS_Android
tags:
篇首语:本文由小常识网(cha138.com)小编为大家整理,主要介绍了自定义View组件之drawBitmap(Bitmap bitmap, Rect src, RectF dst,Paint paint)方法正确理解相关的知识,希望对你有一定的参考价值。
Canvas的drawBitmap有两个构造方法
(1) public void drawBitmap(Bitmap bitmap, float left, float top, Paint paint)
第一个参数为要绘制的bitmap对象,第二个参数为图片左上角的x坐标值,第三个参数为图片左上角的y坐标的值,第三个参数为Paint对象。
(2) public void drawBitmap(Bitmap bitmap, Rect src, RectF dst,Paint paint):
重点来说第二个方法,为什么传参要传两个Rect对象?
 /**
     * Draw the specified bitmap, scaling/translating automatically to fill the destination
     * rectangle. If the source rectangle is not null, it specifies the subset of the bitmap to
     * draw.
     * <p>
     * Note: if the paint contains a maskfilter that generates a mask which extends beyond the
     * bitmap's original width/height (e.g. BlurMaskFilter), then the bitmap will be drawn as if it
     * were in a Shader with CLAMP mode. Thus the color outside of the original width/height will be
     * the edge color replicated.
     * <p>
     * This function <em>ignores the density associated with the bitmap</em>. This is because the
     * source and destination rectangle coordinate spaces are in their respective densities, so must
     * already have the appropriate scaling factor applied.
     *
     * @param bitmap The bitmap to be drawn
     * @param src May be null. The subset of the bitmap to be drawn
     * @param dst The rectangle that the bitmap will be scaled/translated to fit into
     * @param paint May be null. The paint used to draw the bitmap
     */
    public void drawBitmap(@NonNull Bitmap bitmap, @Nullable Rect src, @NonNull Rect dst,
            @Nullable Paint paint) {
        super.drawBitmap(bitmap, src, dst, paint);
    }
第一个参数为要绘制的bitmap对象;
第二个参数为要绘制的Bitmap对象的矩形区域,也有可能为图片的一部分;
第三个参数为要将bitmap绘制在屏幕的什么地方;
第四个参数为Paint对象;
下面,通过实例观察参数中这两个Rect对象参数设置的效果,我们来话下面带边界效果的小狗图片:

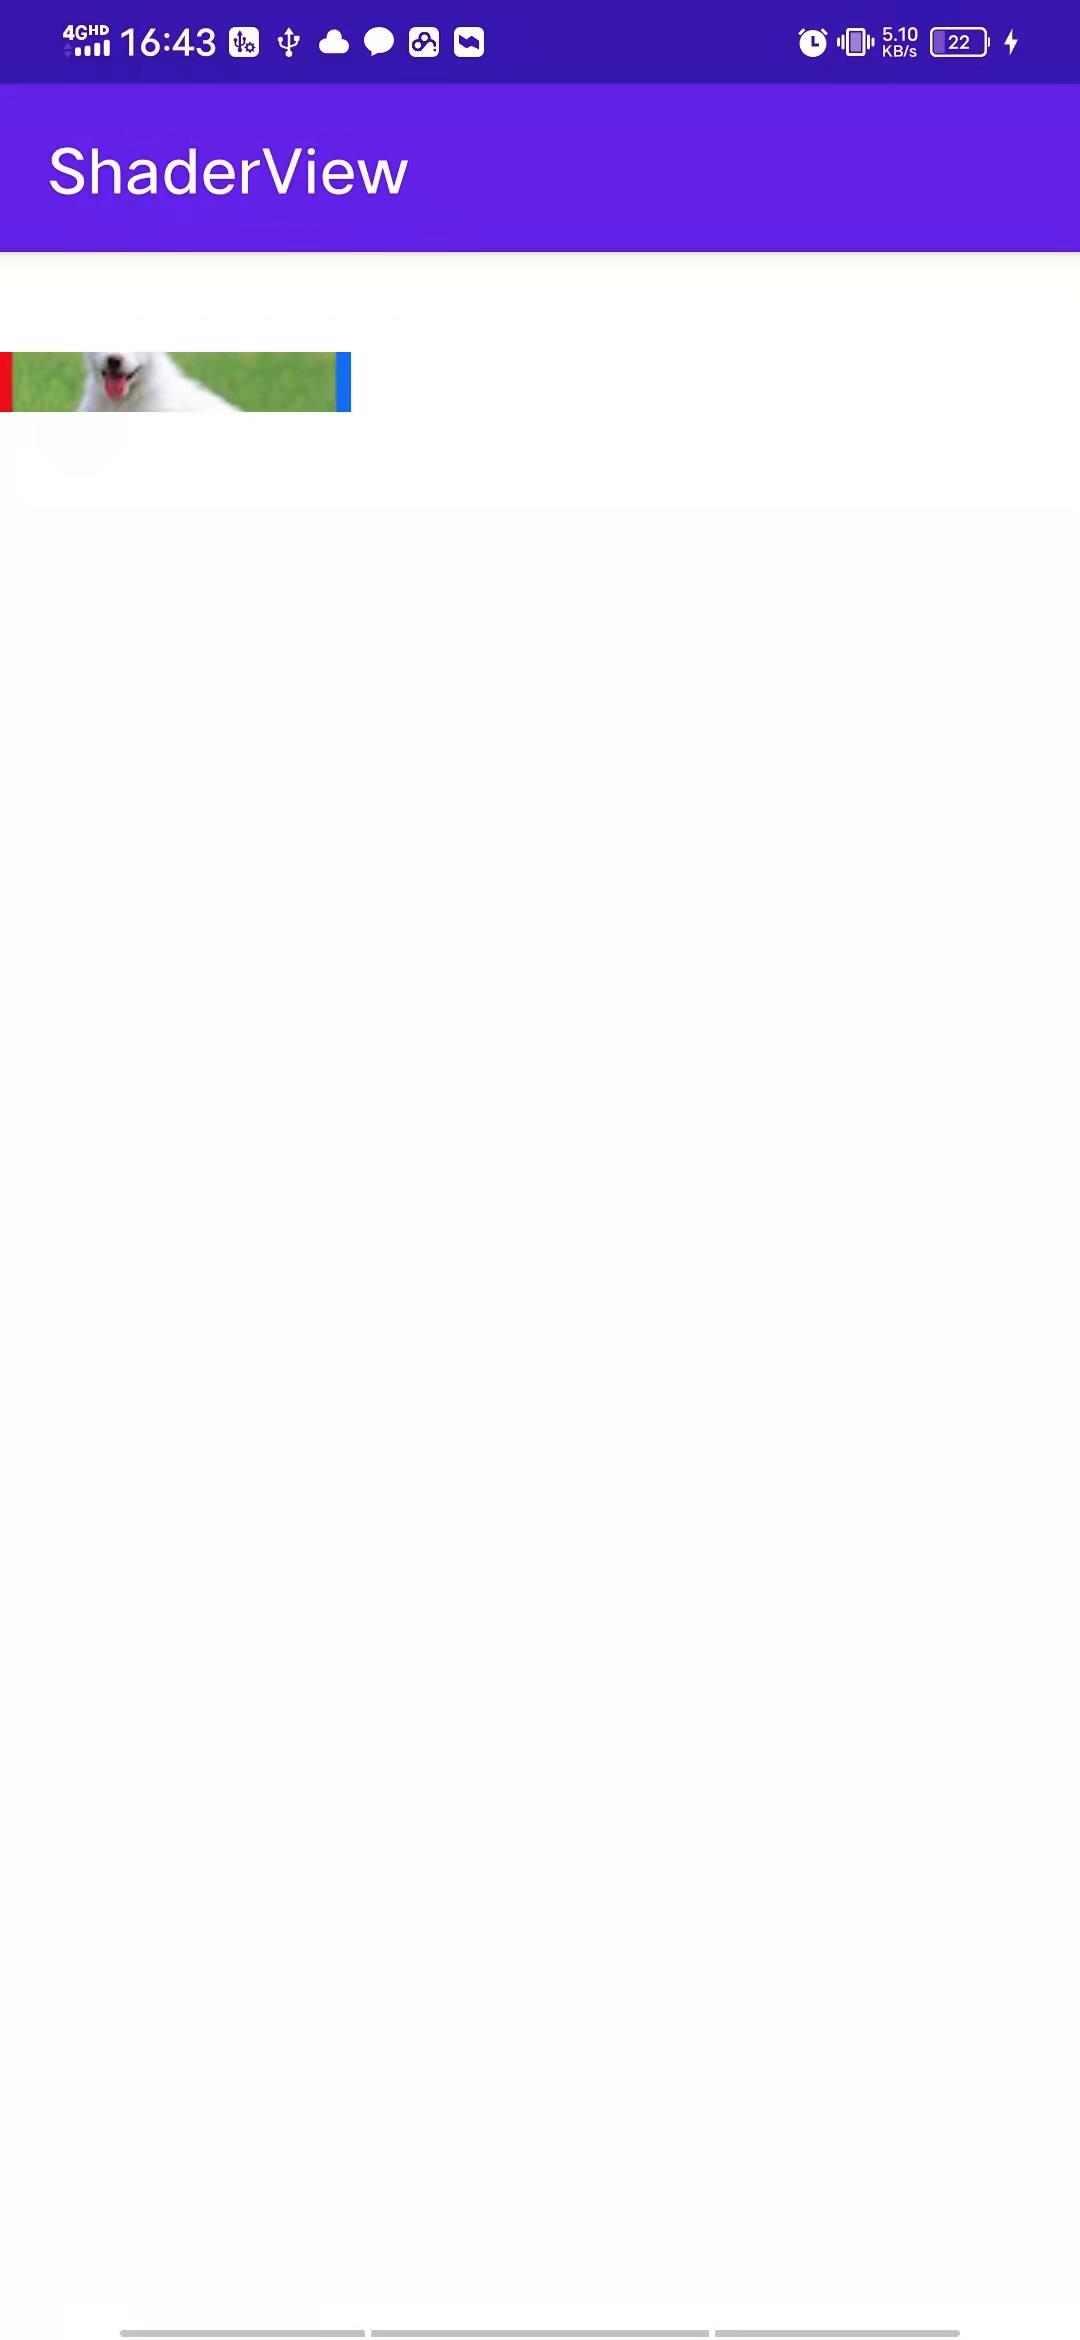
绘制上图宽度使用图片自身的宽度,但是高度我们只绘制bottom-top=160-100=60的高度
package com.xw.shaderview.view;
......

import com.xw.shaderview.R;

/**
 * Copyright (c)2021 科技有限公司
 *
 * @author: LQS
 * @date: 2021/6/25
 * @description:  com.xw.shaderview.view.DrawBitmapView
 */
public class DrawBitmapView extends View {

    private Paint mPaint = new Paint();
    private Bitmap mBitmap = BitmapFactory.decodeResource(this.getResources(), R.drawable.dog_edge);

    public DrawBitmapView(Context context, @Nullable AttributeSet attrs) {
        super(context, attrs);
    }

    @Override
    protected void onDraw(Canvas canvas) {
        super.onDraw(canvas);
        //宽度使用图片自身的宽度,但是高度我们只绘制bottom-top=160-100=60的高度
        Rect srcRect=new Rect(0,100,mBitmap.getWidth(),160);
        Rect dstRect=new Rect(0,100,mBitmap.getWidth(),160);

        canvas.drawBitmap(mBitmap,srcRect,destRect,mPaint);
    }
}
代码中,我们将要绘制的Bitmap对象的srcRect矩形区域和在屏幕的什么地方绘制bitmap的dstRect矩形区域大小设置一致;
        Rect srcRect=new Rect(0,100,mBitmap.getWidth(),160);
        Rect dstRect=new Rect(0,100,mBitmap.getWidth(),160);
效果图如下:

下面我们修改用于指定在屏幕的什么地方绘制bitmap的dstRect,让左侧的起始点left为100,绘制bitmap矩形区域的参数不变。
Rect destRect=new Rect(100,100,mBitmap.getWidth(),160);完整代码如下:
package com.xw.shaderview.view;

......

import com.xw.shaderview.R;

/**
 * Copyright (c)2021 科技有限公司
 *
 * @author: LQS
 * @date: 2021/6/25
 * @description:  com.xw.shaderview.view.DrawBitmapView
 */
public class DrawBitmapView extends View {

    private Paint mPaint = new Paint();
    private Bitmap mBitmap = BitmapFactory.decodeResource(this.getResources(), R.drawable.dog_edge);

    public DrawBitmapView(Context context, @Nullable AttributeSet attrs) {
        super(context, attrs);
    }

    @Override
    protected void onDraw(Canvas canvas) {
        super.onDraw(canvas);
        //宽度使用图片自身的宽度,但是高度我们只绘制bottom-top=160-100=60的高度
        Rect srcRect=new Rect(0,100,mBitmap.getWidth(),160);
        //left偏移100
        Rect destRect=new Rect(100,100,mBitmap.getWidth(),160);

        canvas.drawBitmap(mBitmap,srcRect,destRect,mPaint);
    }
}
运行效果如下:仔细看这个细条在宽度上变窄了。也就是说第三个参数即决定了bitmap在屏幕的什么地方绘制,也对第二参数srcRect指定的图片大小区域有影响,第三个参数划定的区域大就放大,区域小就压缩,就像上面这个例子的宽度。

总结:
第二个参数是指定要绘制的Bitmap图片区域的完整性,是绘制整个Bitmap图像,还是图像的一部分;
第三个参数指定的是将第二个参数划定的图像的绘制到屏幕的什么位置,最终展示的图片是否被放大、压缩是由第三个参数决定的。
下面来验证上面的结论:
代码如下:
/**
 * Copyright (c)2021 网络科技有限公司
 *
 * @author: LQS
 * @date: 2021/6/25
 * @description:  com.xw.shaderview.view.DrawBitmapView
 */
public class DrawBitmapView extends View {

    private Paint mPaint = new Paint();
    private Bitmap mBitmap = BitmapFactory.decodeResource(this.getResources(), R.drawable.dog_edge);

    public DrawBitmapView(Context context, @Nullable AttributeSet attrs) {
        super(context, attrs);
    }

    @Override
    protected void onDraw(Canvas canvas) {
        super.onDraw(canvas);
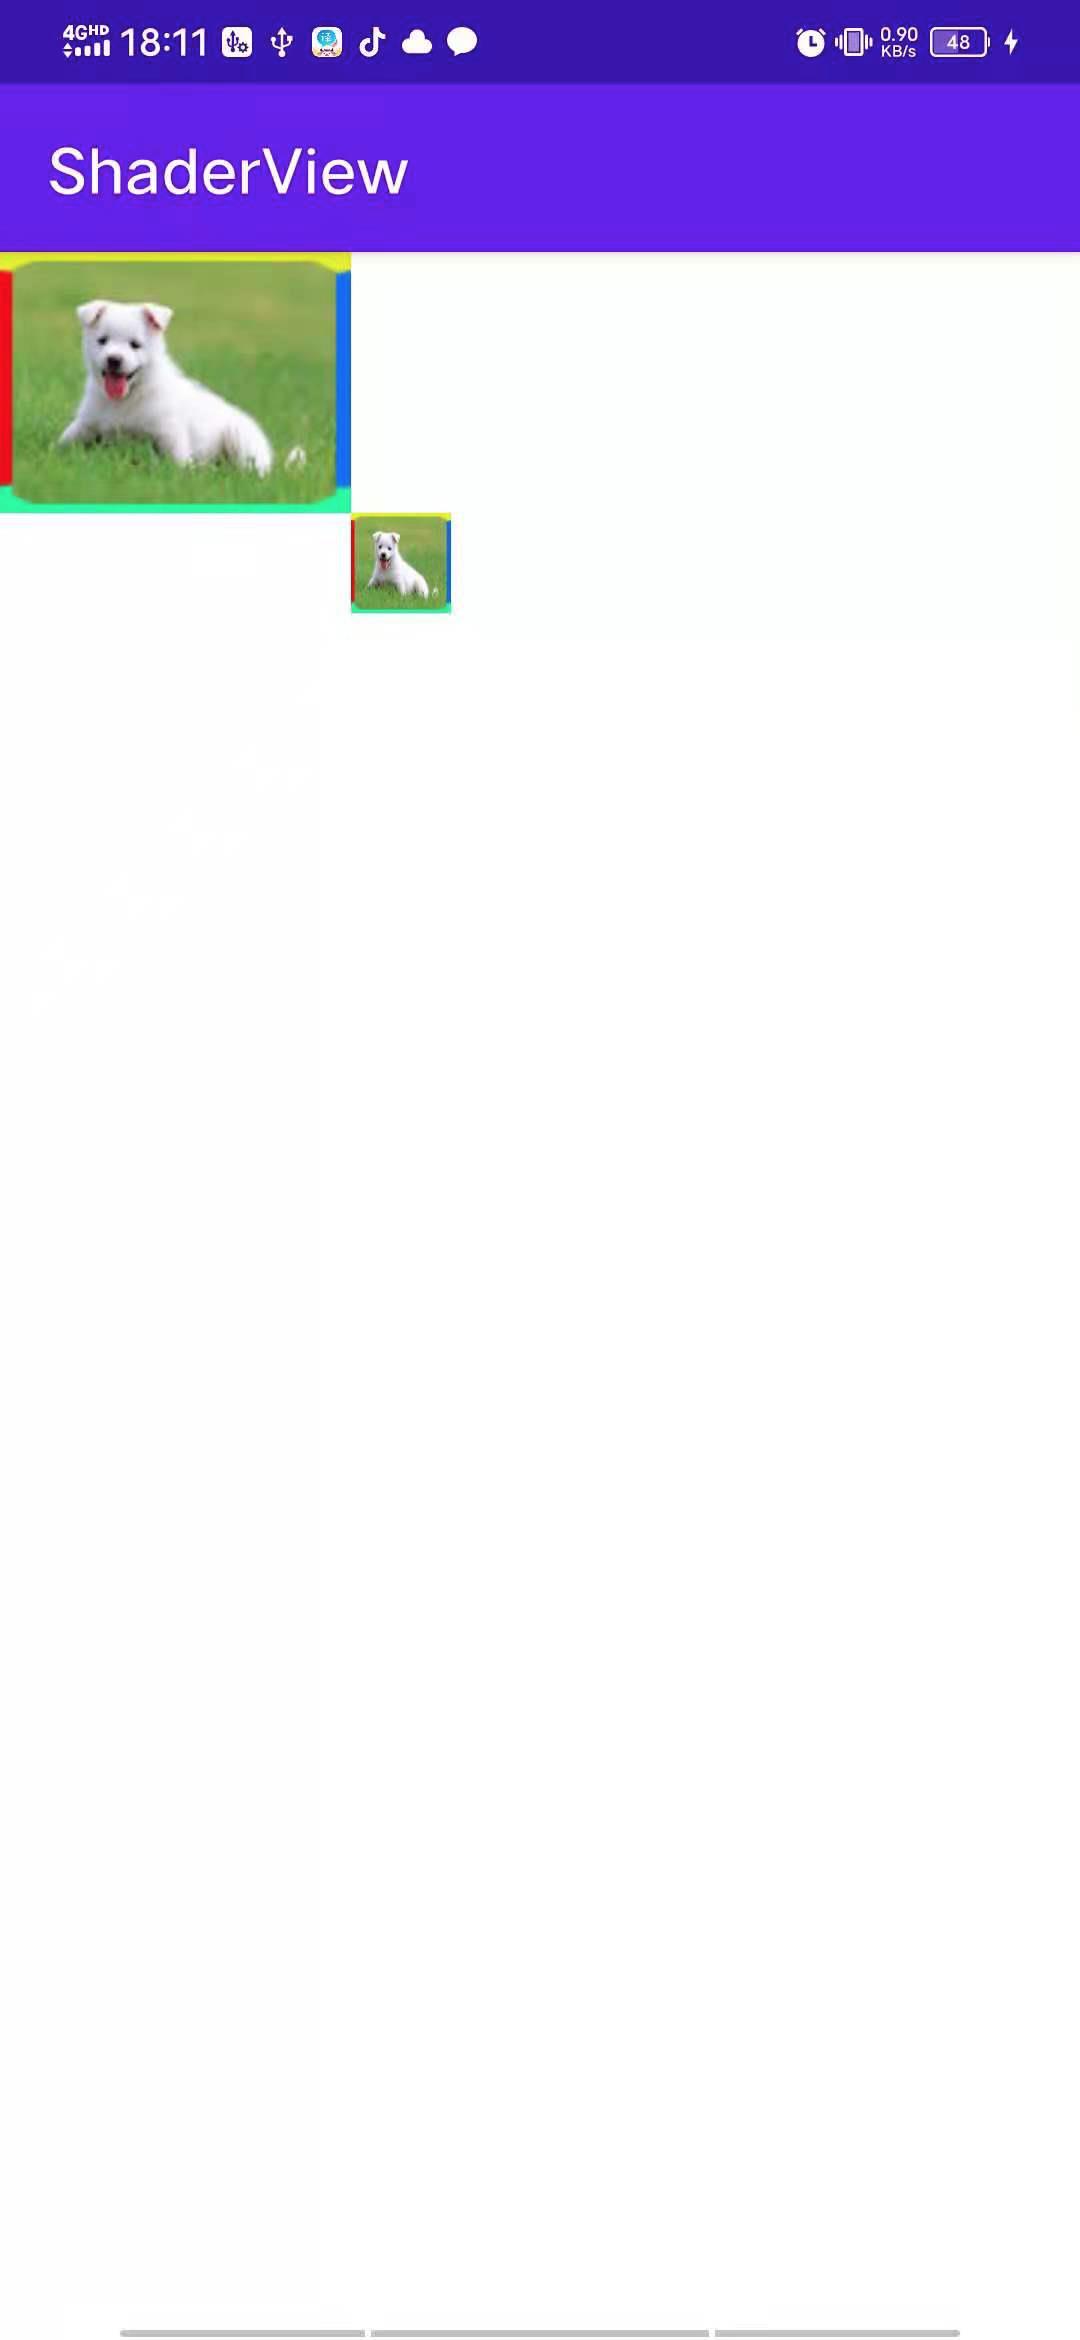
        //将带边缘的小狗图像完整的绘制在屏幕的起始位置 注意这里是原图,将会与下面的小图对比,注销下面一行,再看效果
        canvas.drawBitmap(mBitmap,0,0,mPaint);
        //将完整的带边缘的小狗图像大小作为srcRect区域的大小
        Rect srcRect=new Rect(0,0,mBitmap.getWidth(),mBitmap.getHeight());
        //指定在屏幕的坐标位置(mBitmap.getWidth(),mBitmap.getHeight())处,绘制100*100大小的矩形
        Rect destRect=new Rect(mBitmap.getWidth(),mBitmap.getHeight(),mBitmap.getWidth()+100,mBitmap.getHeight()+100);
        canvas.drawBitmap(mBitmap,srcRect,destRect,mPaint);
    }
}
运行效果如下:

所有说明都在代码中,验证的结论也是符合的,到这里完结!
以上是关于自定义View组件之drawBitmap(Bitmap bitmap, Rect src, RectF dst,Paint paint)方法正确理解的主要内容,如果未能解决你的问题,请参考以下文章