CSS3 flex弹性布局重点
Posted Z && Y
tags:
篇首语:本文由小常识网(cha138.com)小编为大家整理,主要介绍了CSS3 flex弹性布局重点相关的知识,希望对你有一定的参考价值。
01: 弹性盒子模型介绍 & 游览器调试样式(简单介绍)
02: 弹性布局和传统布局响应对比
03: 使用弹性盒子模型布局微信客户端
04: 声明弹性盒子 & 容器的属性
05: flex项目的属性
06: 实例篇-骰子布局
07: 实例篇-网格布局
08: 实例篇-圣杯布局
09: 实例篇-输入框的布局 & 悬挂式布局
10: 实例篇-固定的底栏 & 流式布局
11: CSS3 flex弹性布局重点
1. CSS3 flex弹性布局重点
1.1 开启flex布局
开启flex布局 只需在最外层容器设置dispaly:flex 即可

整个网页可以看成是一个flex容器

采用flex布局称之为flex容器,所有子容器自动生成容器成员称为flex项目
html代码:
<body>
    <!-- flex项目 -->
    <div class="box">a</div>
    <div class="box">b</div>
    <div class="box">c</div>
</body>
css代码:
        body {
            /* 设置高度为整个网页的高度 */
            height: 100vh;
            display: flex;
        }
1.2 flex布局的原则
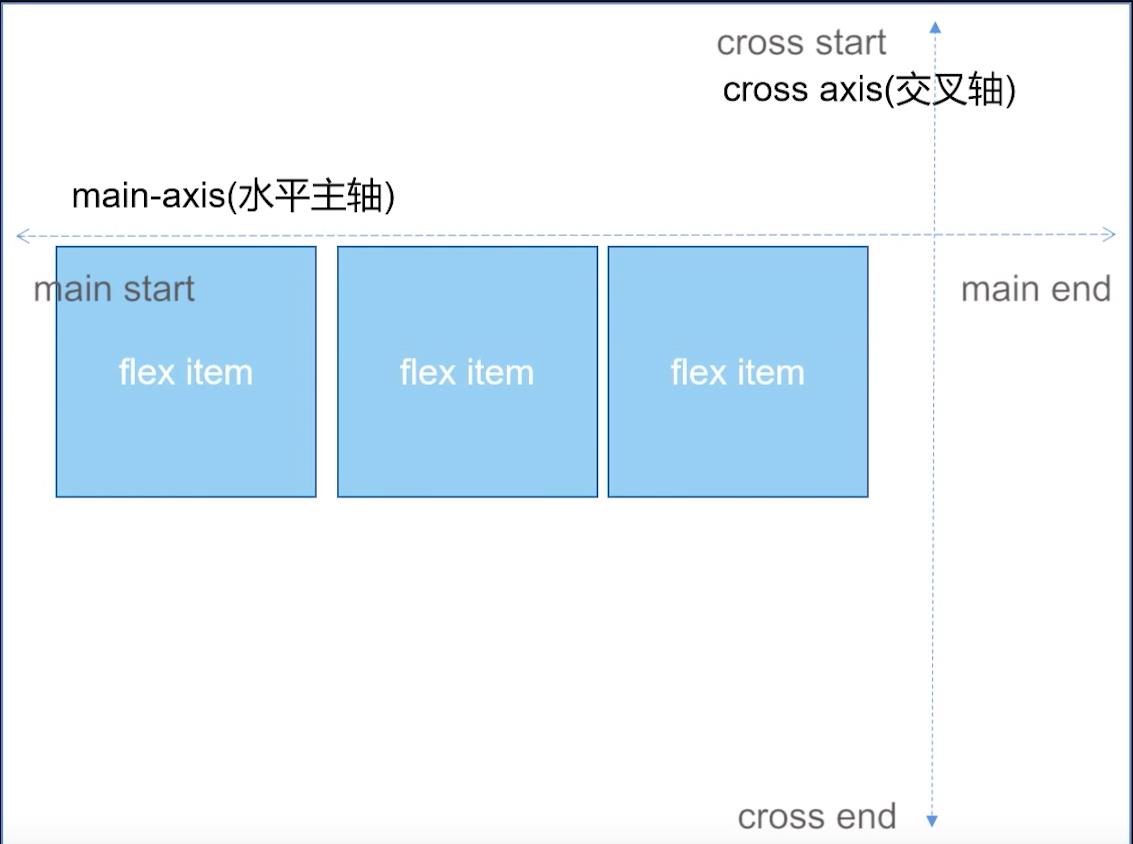
容器默认存在2根轴:水平的主轴(main axis)和垂直的交叉轴(cross axis)。
主轴的开始位置(与边框的交叉点) 叫做 main start ,结束位置叫做  main end;
交叉轴的开始位置叫做cross start,结束位置叫做cross end。

flex项目会沿着主轴方向排列
1.3 容器属性 justify-content & align-items
我们来看两个容器属性
justify-content
align-items

默认情况下 块级容器会竖着排列,开启flex布局后,块级容器自左向右排成一行
html代码:
<body>
    <!-- flex项目 -->
    <div class="box">a</div>
    <div class="box">b</div>
    <div class="box">c</div>
</body>
css代码:
        body {
            /* 设置高度为整个网页的高度 */
            height: 100vh;
            display: flex;
        }
       .box {
            width: 300px;
            height: 300px;
            background-color: skyblue;
            border: 1px solid black;
        }
运行结果:

1.3.1 justify-content: center
让flex项目沿着主轴居中排列
html代码:
<body>
    <!-- flex项目 -->
    <div class="box">a</div>
    <div class="box">b</div>
    <div class="box">c</div>
</body>
css代码
        body {
            /* 设置高度为整个网页的高度 */
            height: 100vh;
            display: flex;
            /* 让flex项目沿着主轴居中排列 */
            justify-content: center;
        }

        .box {
            width: 300px;
            height: 300px;
            background-color: skyblue;
            border: 1px solid black;
        }

1.3.2 flex-direction: row-reverse
让flex项目 横轴反转
html代码:
<body>
    <!-- flex项目 -->
    <div class="box">a</div>
    <div class="box">b</div>
    <div class="box">c</div>
</body>
css代码
        body {
            /* 设置高度为整个网页的高度 */
            height: 100vh;
            display: flex;
            /* 设置容器左浮动 */
            float: left;
            /* 让flex项目 横轴反转 */
            flex-direction: row-reverse;
        }

        .box {
            width: 300px;
            height: 300px;
            background-color: skyblue;
            border: 1px solid black;

        }

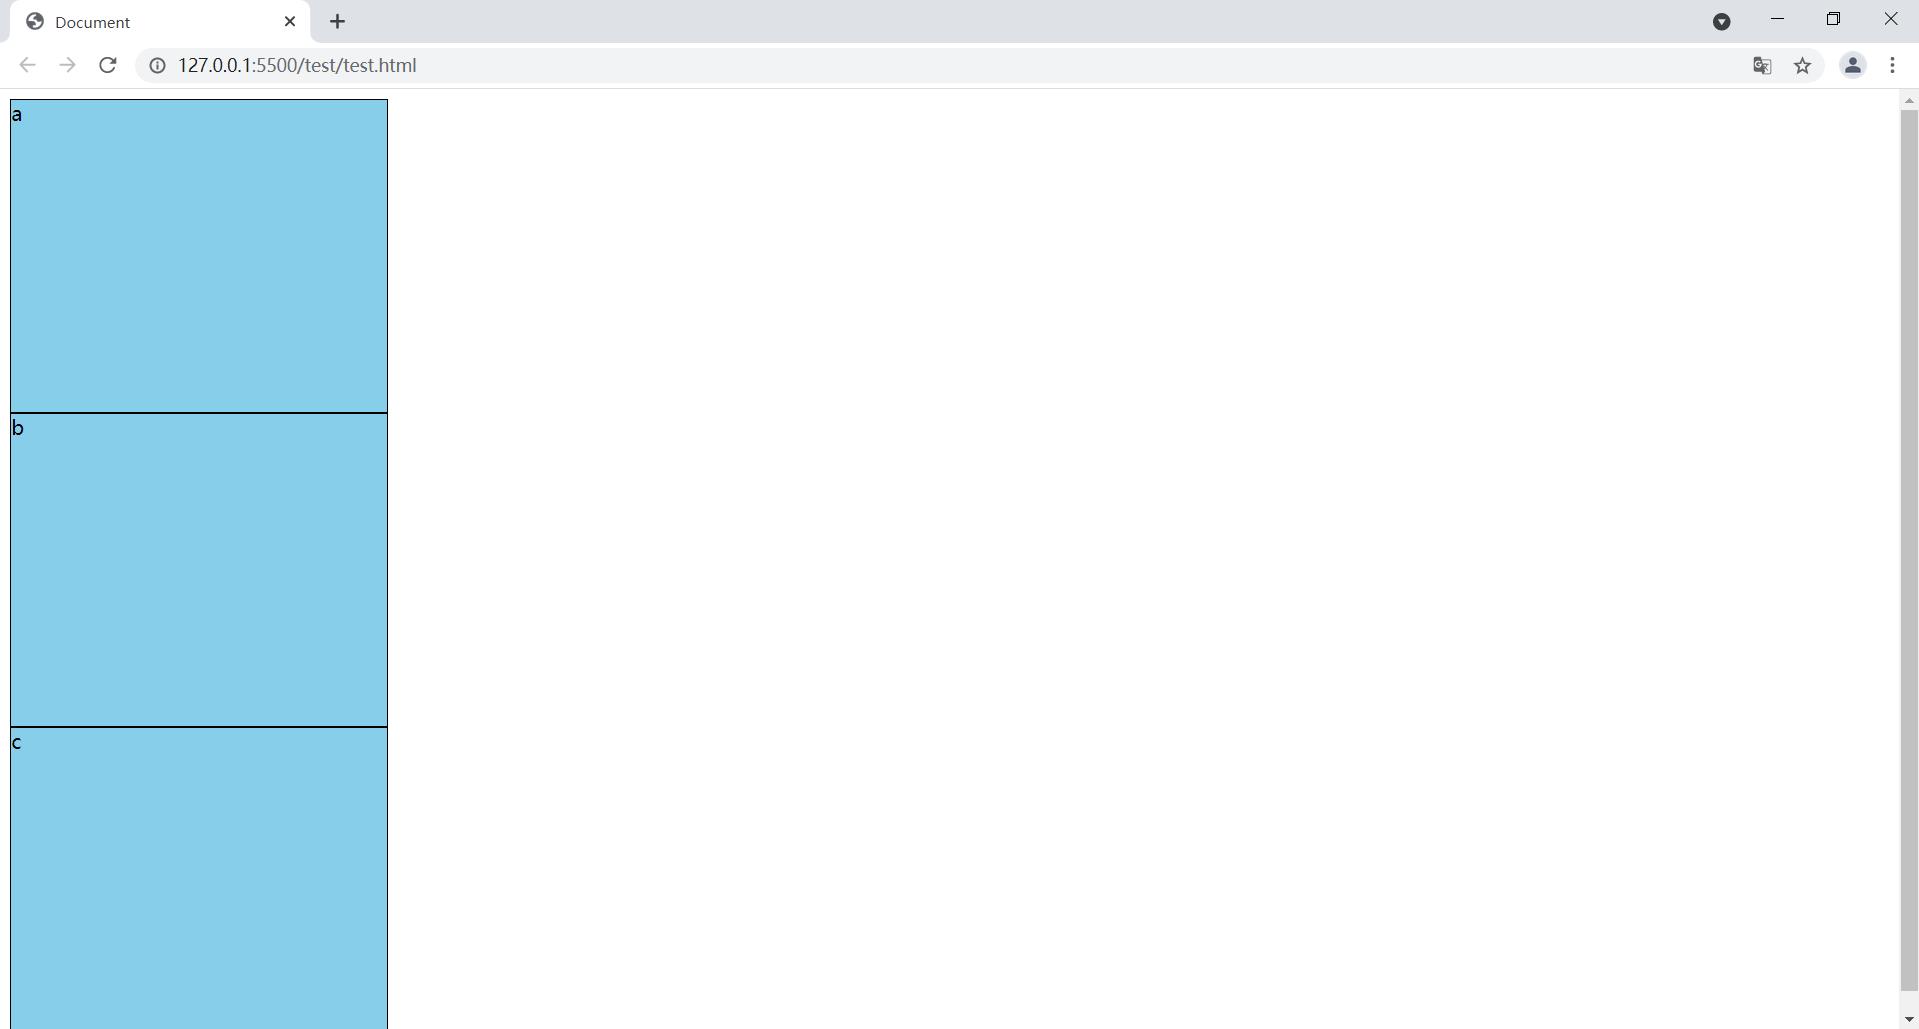
1.3.3 flex-direction: column
让flex项目 沿着y轴排列
html代码:
<body>
    <!-- flex项目 -->
    <div class="box">a</div>
    <div class="box">b</div>
    <div class="box">c</div>
</body>
css代码
        body {
            /* 设置高度为整个网页的高度 */
            height: 100vh;
            display: flex;
            /* 让flex项目 沿着y轴排列 */
            flex-direction: column;
        }

        .box {
            width: 300px;
            height: 300px;
            background-color: skyblue;
            border: 1px solid black;

        }
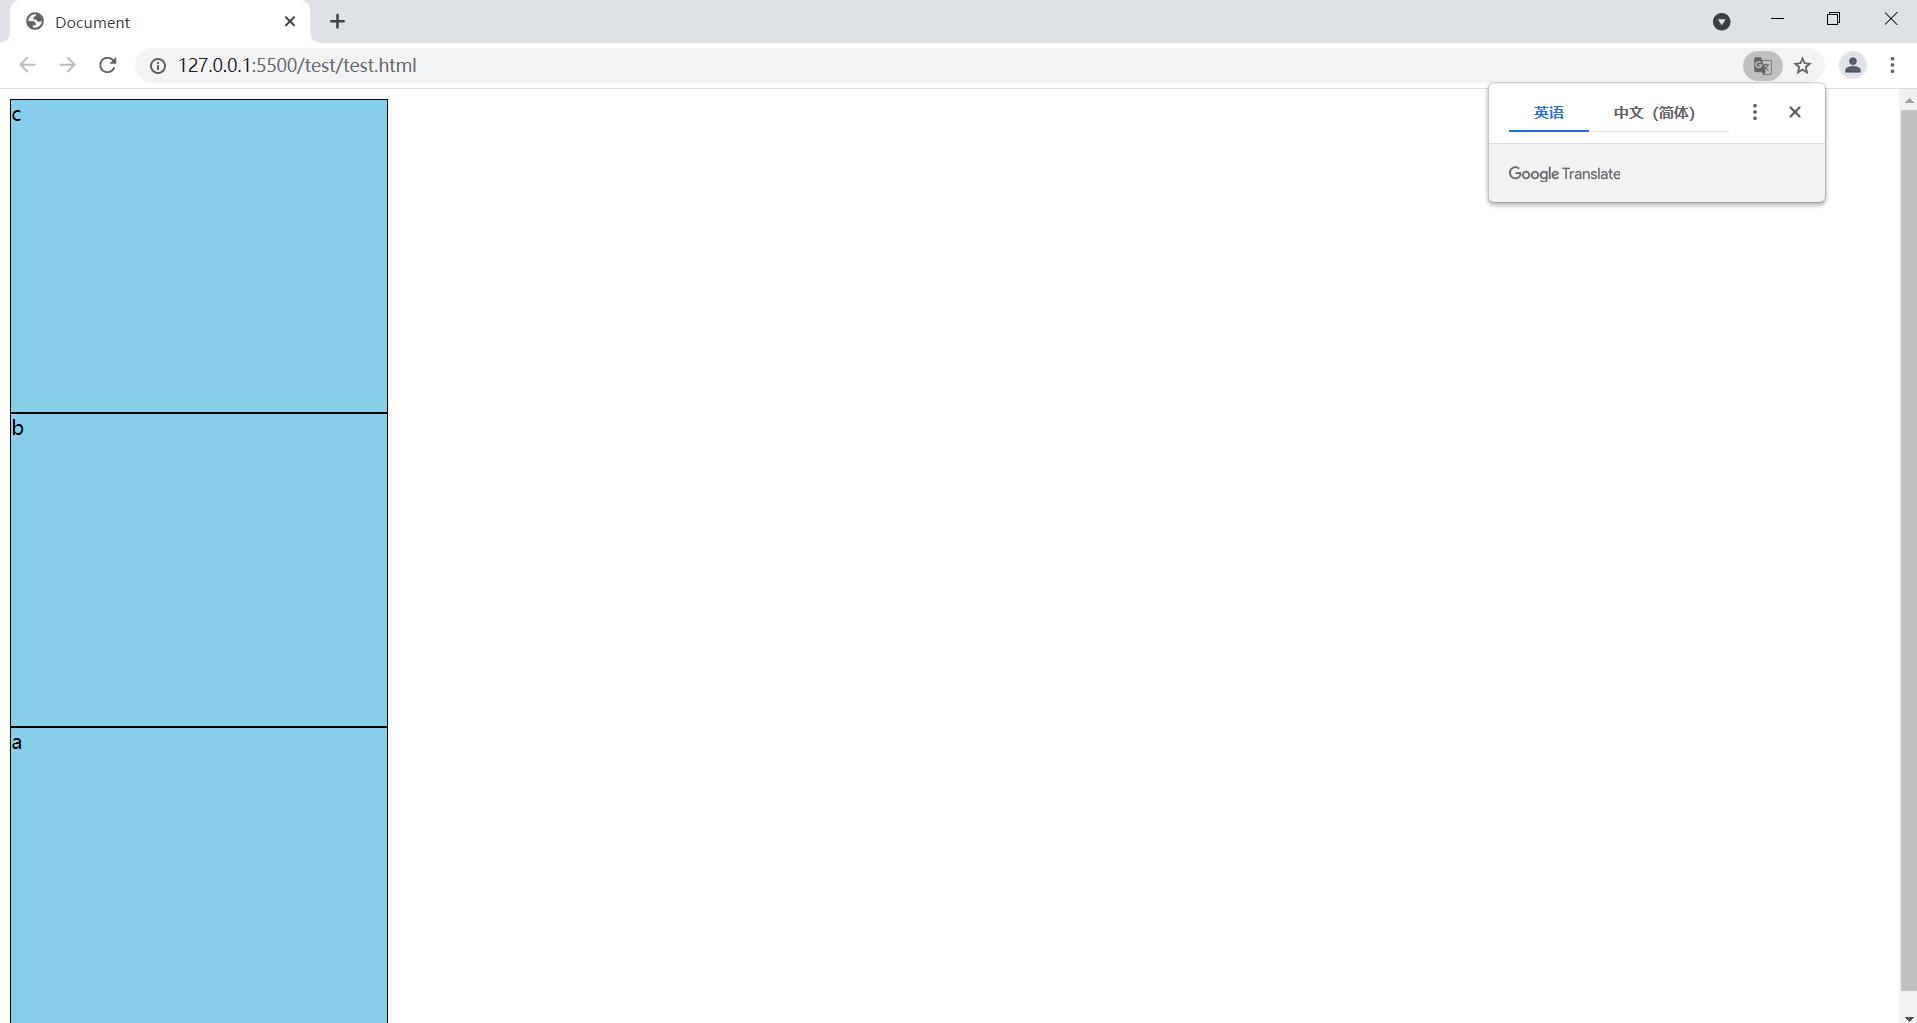
1.3.4 flex-direction: column-reverse
让flex项目 沿着y轴反转排列
html代码:
<body>
    <!-- flex项目 -->
    <div class="box">a</div>
    <div class="box">b</div>
    <div class="box">c</div>
</body>
        body {
            /* 设置高度为整个网页的高度 */
            height: 100vh;
            display: flex;
            /* 让flex项目 沿着y轴反转排列 */
            flex-direction: column-reverse;
        }

        .box {
            width: 300px;
            height: 300px;
            background-color: skyblue;
            border: 1px solid black;
        }
1.3.5 flex-warp: nowrap
很明显6个盒子的总宽度是要大于300的,在浮动布局情况下它会掉下去,
但是设置了flex-warp: nowrap;后项目会强行等分容器宽度且不换行
html代码:
<body>
    <!-- flex项目 -->
    <div class="box">a</div>
    <div class="box">b</div>
    <div class="box">c</div>
    <div class="box">d</div>
    <div class="box">e</div>
    <div class="box">f</div>
</body>
css代码
        body {
            /* 设置高度为整个网页的高度 */
            width: 300px;
            height: 100vh;
            display: flex;
            /* 默认是nowrap */
            flex-wrap: nowrap;
        }

        .box {
            width: 300px;
            height: 300px;
            background-color: skyblue;
            border: 1px solid black;
        }

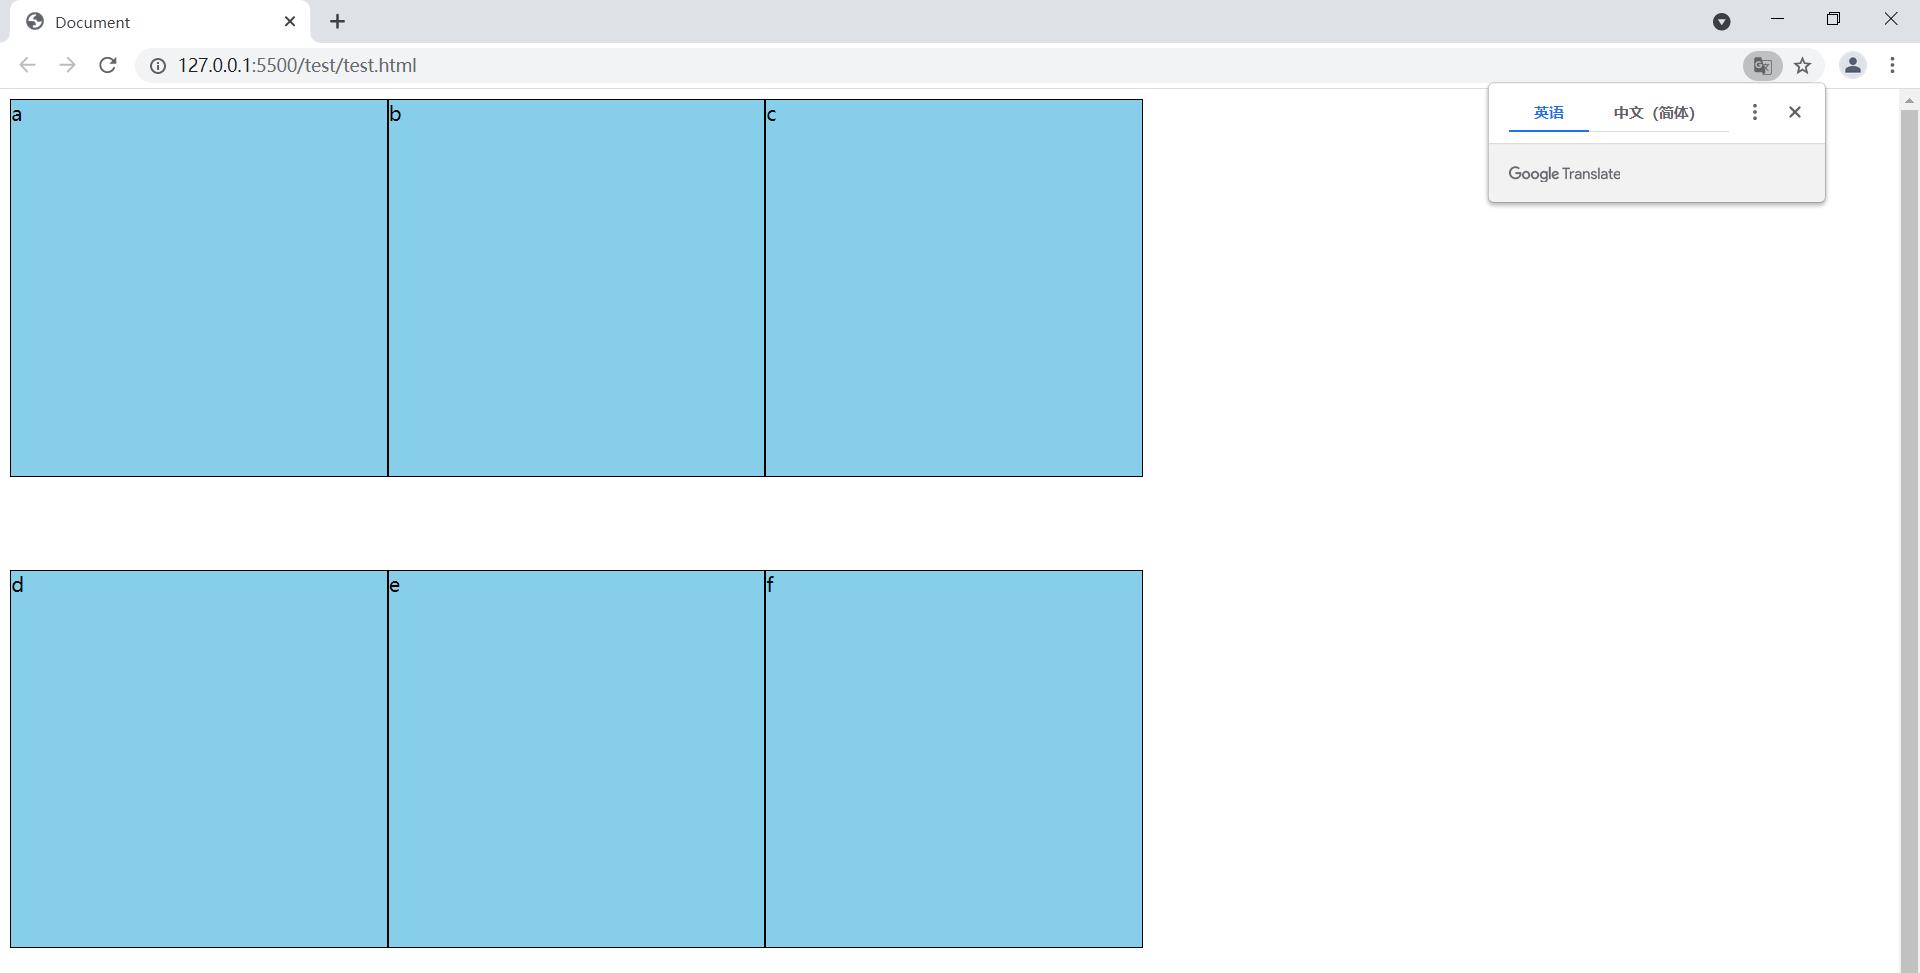
1.3.6 flex-warp: wrap
此时我们设置了flex-wrap:wrap; wrap表示换行即项目不会等分容器宽度,而是根据自身宽度
进行排列,如果超出父容器宽度则自然换行。
html代码:
<body>
    <!-- flex项目 -->
    <div class="box">a</div>
    <div class="box">b</div>
    <div class="box">c</div>
    <div class="box">d</div>
    <div class="box">e</div>
    <div class="box">f</div>
</body>
css代码
        body {
            /* 设置高度为整个网页的高度 */
            width: 910px;
            height: 100vh;
            display: flex;
            /* 设置为warp 会换行 */
            flex-wrap: wrap;
        }

        .box {
            width: 300px;
            height: 300px;
            background-color: skyblue;
            border: 1px solid black;
        }
1.4 容器项目属性
1.4.1 order属性
order属性可以改变容器项目的排列顺序,order越大排在越后面
html代码:
<body>
    <!-- flex项目 -->
    <div class="box" style="order: 6;">a</div>
    <div class="box" style="order: 5;">b</div>
    <div class="box" style="order: 4;">c</div>
    <div class="box" style="order: 3;">d</div>
    <div class="box" style="order: 2;">e</div>
    <div class="box" style="order: 1;">f</div>
</body>
css代码
        body {
            /* 设置高度为整个网页的高度 */
            width: 700px;
            height: 100vh;
            display: flex;
        }

        .box {
            width: 100px;
            height: 100px;
            background-color: skyblue;
            border: 1px solid black;
        }

1.4.2 align-self
1.4.2.1 align-self:flex-start
当前flex项目的y轴排列在 当前的flex容器的顶部
html代码:
<body>
    <!-- flex项目 -->
    <div class="box" style="order: 6;">a</div>
    <div class="box" style="order: 5;">b</div>
    <div class="box" style="order: 4;">c</div>
    <!-- align-self:flex-start 当前flex项目的y轴排列在 当前的flex容器的顶部  -->
    <div class="box" style="order: 3;align-self:flex-start;">d</div>
    <div class="box" style="order: 2;">e</div>
    <div class="box" style="order: 1;">f</div>
</body>
css代码
        body {
            /* 设置高度为整个网页的高度 */
            width: 700px;
            height: 100vh;
            display: flex;
        }

        .box {
            width: 100px;
            height: 100px;
            background-color: skyblue;
            border: 1px solid black;
        }

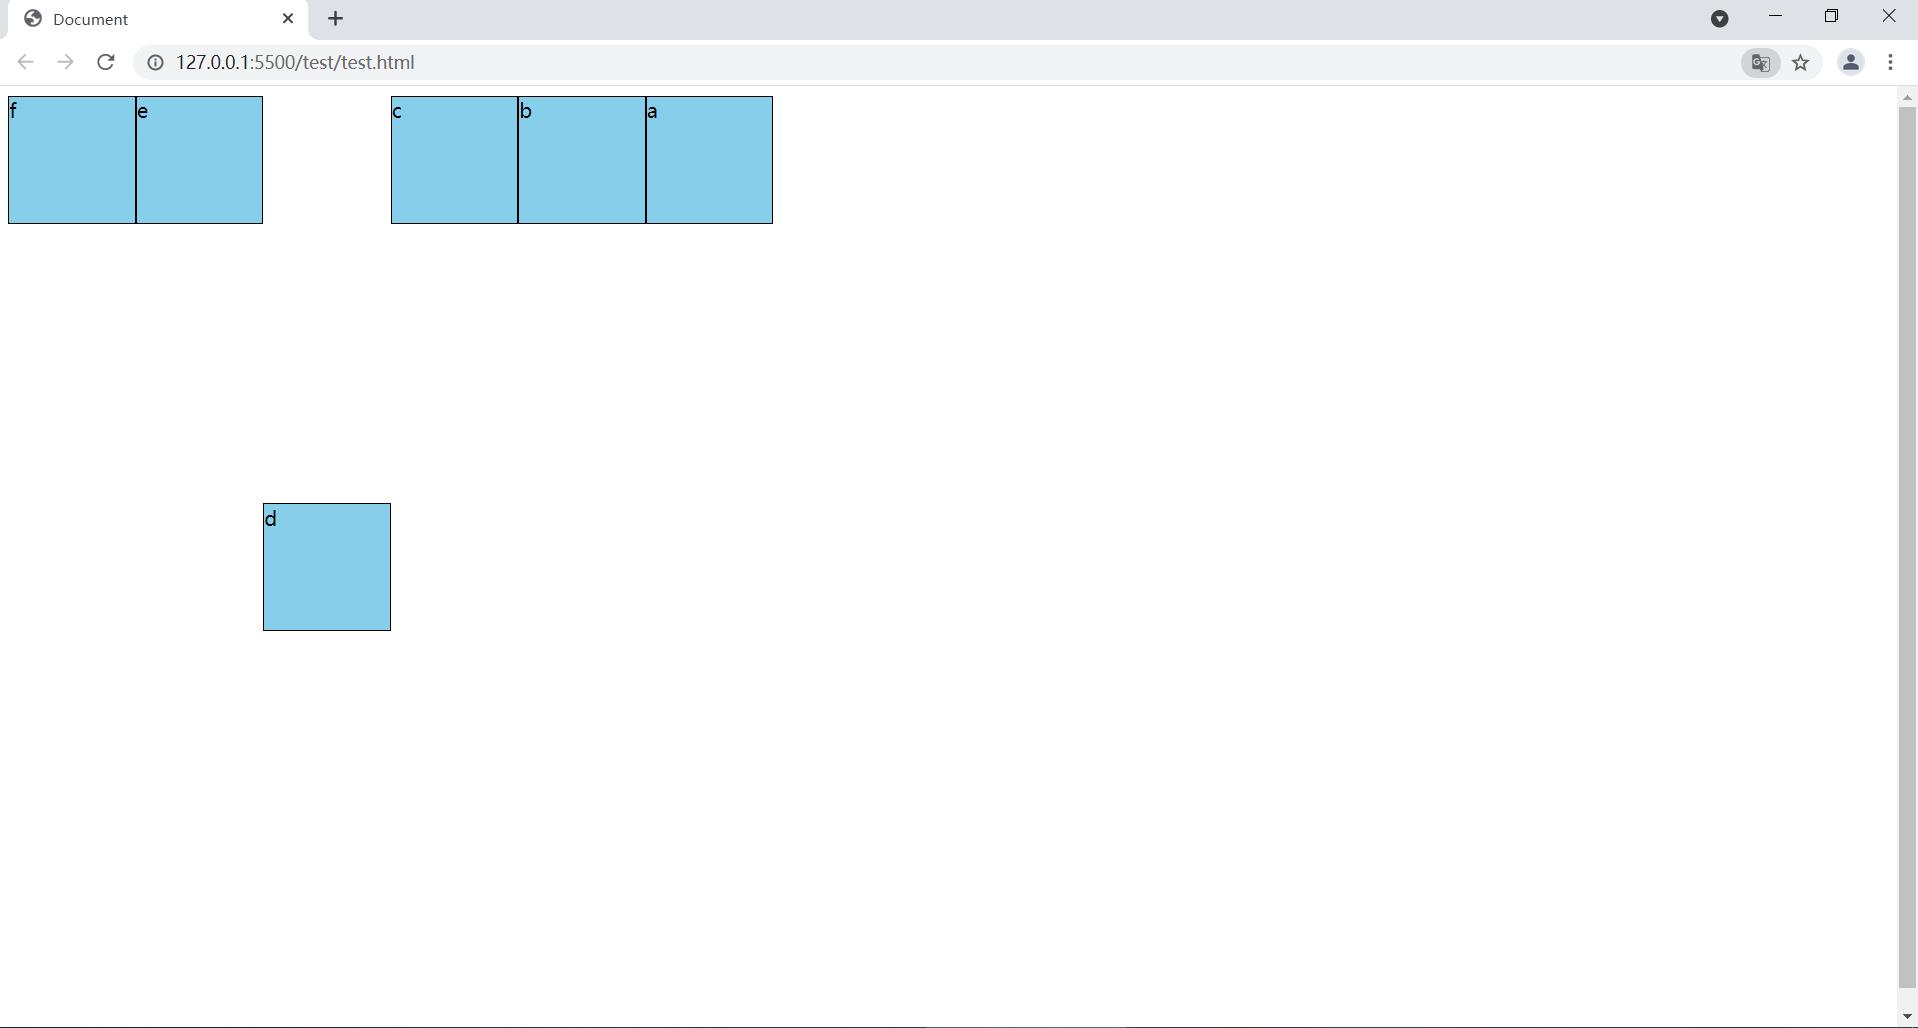
1.4.2.2 align-self:center
当前flex项目的y轴排列在 当前的flex容器的中间
html代码:
<body>
    <!-- flex项目 -->
    <div class="box" style="order: 6;">a</div>
    <div class="box" style="order: 5;">b</div>
    <div class="box" style="order: 4;">c</div>
    <!-- align-self:flex-start 当前flex项目的y轴排列在 当前的flex容器的顶部  -->
    <div class="box" style="order: 3;align-self:center;">d</div>
    <div class="box" style="order: 2;">e</div>
    <div class="box" style="order: 1;">f</div>
</body>
css代码
        body {
            /* 设置高度为整个网页的高度 */
            width: 700px;
            height: 100vh;
            display: flex;
        }

        .box {
            width: 100px;
            height: 100px;
            background-color: skyblue;
            border: 1px solid black;
        }
1.4.2.3 align-self:flex-end
当前flex项目的y轴排列在 当前的flex容器的底部
html代码:
<body>
<!-- flex项目 -->
<div class="box" style="order: 6;">a</div>
<div class="box" style="order: 5;">b</div>
<div class="box" style="order: 4;">c</div>
<!-- align-self:flex-start 当前flex项目的y轴排列在 当前的flex容器的底部 -->
<div class="box" style="order: 3;align-self