透彻掌握Spring整合MyBatis的原理彻底征服面试官,建议收藏
Posted 波波烤鸭
tags:
篇首语:本文由小常识网(cha138.com)小编为大家整理,主要介绍了透彻掌握Spring整合MyBatis的原理彻底征服面试官,建议收藏相关的知识,希望对你有一定的参考价值。
在MyBatis篇内容的最后我们来给大家详细介绍下Spring是如何整合MyBatis的。让大家彻底掌握MyBatis的底层设计原理及实现。
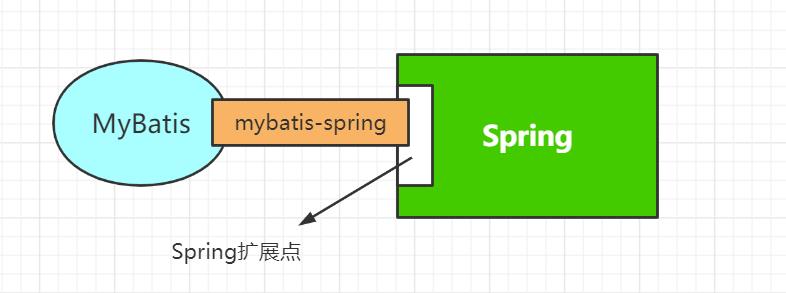
MyBatis整合Spring原理
把MyBatis集成到Spring里面,是为了进一步简化MyBatis的使用,所以只是对MyBatis做了一些封装,并没有替换MyBatis的核心对象。也就是说:MyBatis jar包中的SqlSessionFactory、SqlSession、MapperProxy这些类都会用到。mybatis-spring.jar里面的类只是做了一些包装或者桥梁的工作。
只要我们弄明白了这三个对象是怎么创建的,也就理解了Spring继承MyBatis的原理。我们把它分成三步:
- SqlSessionFactory在哪创建的。
- SqlSession在哪创建的。
- 代理类在哪创建的。
1 SqlSessionFactory
首先我们来看下在MyBatis整合Spring中SqlSessionFactory的创建过程,查看这步的入口在Spring的配置文件中配置整合的标签中
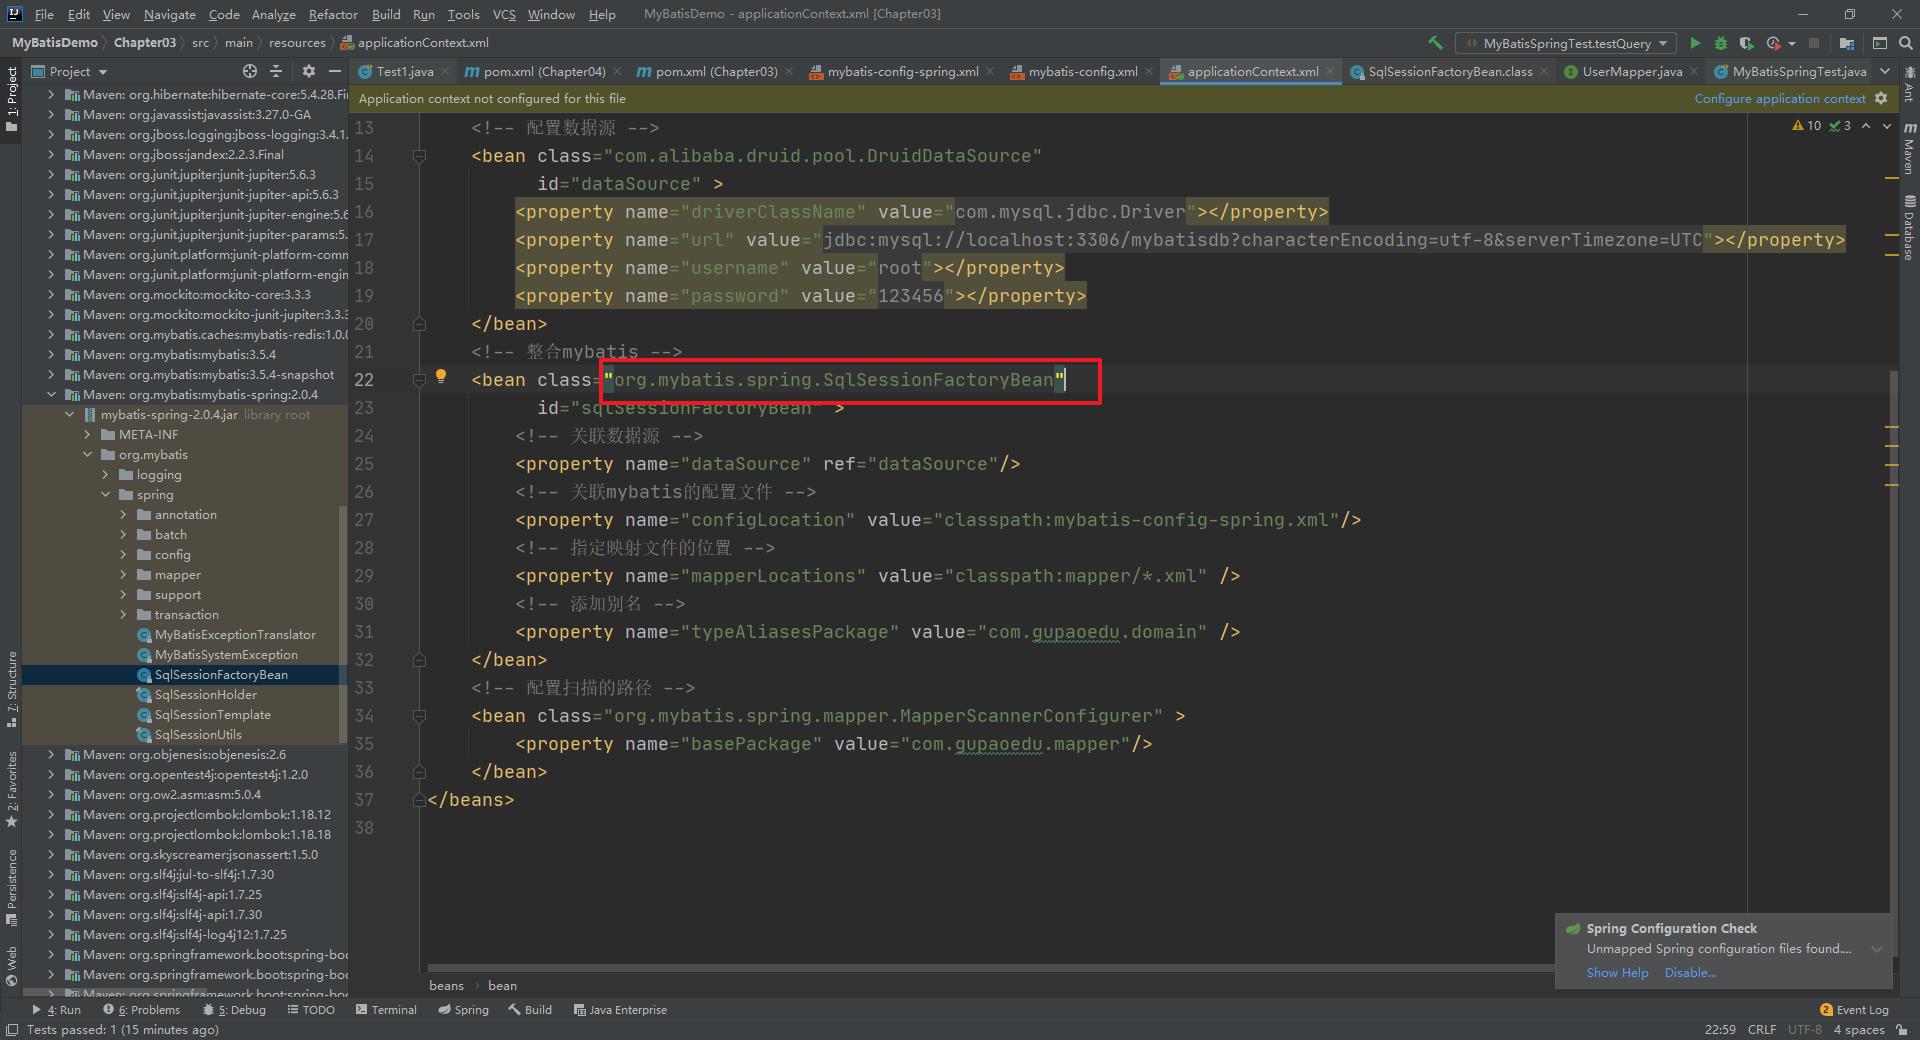
我们进入SqlSessionFactoryBean中查看源码发现,其实现了InitializingBean 、FactoryBean、ApplicationListener 三个接口
| 接口 | 方法 | 作用 |
|---|---|---|
| FactoryBean | getObject() | 返回由FactoryBean创建的Bean实例 |
| InitializingBean | afterPropertiesSet() | bean属性初始化完成后添加操作 |
| ApplicationListener | onApplicationEvent() | 对应用的时间进行监听 |
1.1 afterPropertiesSet
我们首先来看下 afterPropertiesSet 方法中的逻辑
public void afterPropertiesSet() throws Exception {
    Assert.notNull(this.dataSource, "Property 'dataSource' is required");
    Assert.notNull(this.sqlSessionFactoryBuilder, "Property 'sqlSessionFactoryBuilder' is required");
    Assert.state(this.configuration == null && this.configLocation == null || this.configuration == null || this.configLocation == null, "Property 'configuration' and 'configLocation' can not specified with together");
    this.sqlSessionFactory = this.buildSqlSessionFactory();
}
可以发现在afterPropertiesSet中直接调用了buildSqlSessionFactory方法来实现 sqlSessionFactory 对象的创建
    protected SqlSessionFactory buildSqlSessionFactory() throws Exception {
        // 解析全局配置文件的 XMLConfigBuilder 对象
        XMLConfigBuilder xmlConfigBuilder = null;
        // Configuration 对象
        Configuration targetConfiguration;
        Optional var10000;
        if (this.configuration != null) { // 判断是否存在 configuration对象,如果存在说明已经解析过了
            targetConfiguration = this.configuration;
            // 覆盖属性
            if (targetConfiguration.getVariables() == null) {
                targetConfiguration.setVariables(this.configurationProperties);
            } else if (this.configurationProperties != null) {
                targetConfiguration.getVariables().putAll(this.configurationProperties);
            }
            // 如果configuration对象不存在,但是存在configLocation属性,就根据mybatis-config.xml的文件路径来构建 xmlConfigBuilder对象
        } else if (this.configLocation != null) {
            xmlConfigBuilder = new XMLConfigBuilder(this.configLocation.getInputStream(), (String)null, this.configurationProperties);
            targetConfiguration = xmlConfigBuilder.getConfiguration();
        } else {
            // 属性'configuration'或'configLocation'未指定,使用默认MyBatis配置
            LOGGER.debug(() -> {
                return "Property 'configuration' or 'configLocation' not specified, using default MyBatis Configuration";
            });
            targetConfiguration = new Configuration();
            var10000 = Optional.ofNullable(this.configurationProperties);
            Objects.requireNonNull(targetConfiguration);
            var10000.ifPresent(targetConfiguration::setVariables);
        }
		// 设置 Configuration 中的属性  即我们可以在Mybatis和Spring的整合文件中来设置 MyBatis的全局配置文件中的设置
        var10000 = Optional.ofNullable(this.objectFactory);
        Objects.requireNonNull(targetConfiguration);
        var10000.ifPresent(targetConfiguration::setObjectFactory);
        var10000 = Optional.ofNullable(this.objectWrapperFactory);
        Objects.requireNonNull(targetConfiguration);
        var10000.ifPresent(targetConfiguration::setObjectWrapperFactory);
        var10000 = Optional.ofNullable(this.vfs);
        Objects.requireNonNull(targetConfiguration);
        var10000.ifPresent(targetConfiguration::setVfsImpl);
        Stream var24;
        if (StringUtils.hasLength(this.typeAliasesPackage)) {
            var24 = this.scanClasses(this.typeAliasesPackage, this.typeAliasesSuperType).stream().filter((clazz) -> {
                return !clazz.isAnonymousClass();
            }).filter((clazz) -> {
                return !clazz.isInterface();
            }).filter((clazz) -> {
                return !clazz.isMemberClass();
            });
            TypeAliasRegistry var10001 = targetConfiguration.getTypeAliasRegistry();
            Objects.requireNonNull(var10001);
            var24.forEach(var10001::registerAlias);
        }

        if (!ObjectUtils.isEmpty(this.typeAliases)) {
            Stream.of(this.typeAliases).forEach((typeAlias) -> {
                targetConfiguration.getTypeAliasRegistry().registerAlias(typeAlias);
                LOGGER.debug(() -> {
                    return "Registered type alias: '" + typeAlias + "'";
                });
            });
        }

        if (!ObjectUtils.isEmpty(this.plugins)) {
            Stream.of(this.plugins).forEach((plugin) -> {
                targetConfiguration.addInterceptor(plugin);
                LOGGER.debug(() -> {
                    return "Registered plugin: '" + plugin + "'";
                });
            });
        }

        if (StringUtils.hasLength(this.typeHandlersPackage)) {
            var24 = this.scanClasses(this.typeHandlersPackage, TypeHandler.class).stream().filter((clazz) -> {
                return !clazz.isAnonymousClass();
            }).filter((clazz) -> {
                return !clazz.isInterface();
            }).filter((clazz) -> {
                return !Modifier.isAbstract(clazz.getModifiers());
            });
            TypeHandlerRegistry var25 = targetConfiguration.getTypeHandlerRegistry();
            Objects.requireNonNull(var25);
            var24.forEach(var25::register);
        }

        if (!ObjectUtils.isEmpty(this.typeHandlers)) {
            Stream.of(this.typeHandlers).forEach((typeHandler) -> {
                targetConfiguration.getTypeHandlerRegistry().register(typeHandler);
                LOGGER.debug(() -> {
                    return "Registered type handler: '" + typeHandler + "'";
                });
            });
        }

        if (!ObjectUtils.isEmpty(this.scriptingLanguageDrivers)) {
            Stream.of(this.scriptingLanguageDrivers).forEach((languageDriver) -> {
                targetConfiguration.getLanguageRegistry().register(languageDriver);
                LOGGER.debug(() -> {
                    return "Registered scripting language driver: '" + languageDriver + "'";
                });
            });
        }

        var10000 = Optional.ofNullable(this.defaultScriptingLanguageDriver);
        Objects.requireNonNull(targetConfiguration);
        var10000.ifPresent(targetConfiguration::setDefaultScriptingLanguage);
        if (this.databaseIdProvider != null) {
            try {
                targetConfiguration.setDatabaseId(this.databaseIdProvider.getDatabaseId(this.dataSource));
            } catch (SQLException var23) {
                throw new NestedIOException("Failed getting a databaseId", var23);
            }
        }

        var10000 = Optional.ofNullable(this.cache);
        Objects.requireNonNull(targetConfiguration);
        var10000.ifPresent(targetConfiguration::addCache); // 如果cache不为空就把cache 添加到 configuration对象中
        if (xmlConfigBuilder != null) {
            try {
                xmlConfigBuilder.parse(); // 解析全局配置文件
                LOGGER.debug(() -> {
                    return "Parsed configuration file: '" + this.configLocation + "'";
                });
            } catch (Exception var21) {
                throw new NestedIOException("Failed to parse config resource: " + this.configLocation, var21);
            } finally {
                ErrorContext.instance().reset();
            }
        }

        targetConfiguration.setEnvironment(new Environment(this.environment, (TransactionFactory)(this.transactionFactory == null ? new SpringManagedTransactionFactory() : this.transactionFactory), this.dataSource));
        if (this.mapperLocations != null) {
            if (this.mapperLocations.length == 0) {
                LOGGER.warn(() -> {
                    return "Property 'mapperLocations' was specified but matching resources are not found.";
                });
            } else {
                Resource[] var3 = this.mapperLocations;
                int var4 = var3.length;

                for(int var5 = 0; var5 < var4; ++var5) {
                    Resource mapperLocation = var3[var5];
                    if (mapperLocation != null) {
                        try {
                            //创建了一个用来解析Mapper.xml的XMLMapperBuilder,调用了它的parse()方法。这个步骤我们之前了解过了,
                            //主要做了两件事情,一个是把增删改查标签注册成MappedStatement对象。
                            // 第二个是把接口和对应的MapperProxyFactory工厂类注册到MapperRegistry中
                            XMLMapperBuilder xmlMapperBuilder = new XMLMapperBuilder(mapperLocation.getInputStream(), targetConfiguration, mapperLocation.toString(), targetConfiguration.getSqlFragments());
                            xmlMapperBuilder.parse();
                        } catch (Exception var19) {
                            throw new NestedIOException("Failed to parse mapping resource: '" + mapperLocation + "'", var19);
                        } finally {
                            ErrorContext.instance().reset();
                        }

                        LOGGER.debug(() -> {
                            return "Parsed mapper file: '" + mapperLocation + "'";
                        });
                    }
                }
            }
        } else {
            LOGGER.debug(() -> {
                return "Property 'mapperLocations' was not specified.";
            });
        }
      // 最后调用sqlSessionFactoryBuilder.build()返回了一个DefaultSqlSessionFactory。
        return this.sqlSessionFactoryBuilder.build(targetConfiguration);
    }
在afterPropertiesSet方法中完成了SqlSessionFactory对象的创建,已经相关配置文件和映射文件的解析操作。
方法小结一下:通过定义一个实现了InitializingBean接口的SqlSessionFactoryBean类,里面有一个afterPropertiesSet()方法会在bean的属性值设置完的时候被调用。Spring在启动初始化这个Bean的时候,完成了解析和工厂类的创建工作。
1.2 getObject
另外SqlSessionFactoryBean实现了FactoryBean接口。
FactoryBean的作用是让用户可以自定义实例化Bean的逻辑。如果从BeanFactory中根据Bean的ID获取一个Bean,它获取的其实是FactoryBean的getObject()返回的对象。
也就是说,我们获取SqlSessionFactoryBean的时候,就会调用它的getObject()方法。
    public SqlSessionFactory getObject() throws Exception {
        if (this.sqlSessionFactory == null) {
            this.afterPropertiesSet();
        }

        return this.sqlSessionFactory;
    }
getObject方法中的逻辑就非常简单,返回SqlSessionFactory对象,如果SqlSessionFactory对象为空的话就又调用一次afterPropertiesSet来解析和创建一次。
1.3 onApplicationEvent
实现ApplicationListener接口让SqlSessionFactoryBean有能力监控应用发出的一些事件通知。比如这里监听了ContextRefreshedEvent(上下文刷新事件),会在Spring容器加载完之后执行。这里做的事情是检查ms是否加载完毕。
public void onApplicationEvent(ApplicationEvent event) {
    if (this.failFast && event instanceof ContextRefreshedEvent) {
        this.sqlSessionFactory.getConfiguration().getMappedStatementNames();
    }
}
2 SqlSession
2.1 DefaultSqlSession的问题
在前面介绍MyBatis的使用的时候,通过SqlSessionFactory的open方法获取的是DefaultSqlSession,但是在Spring中我们不能直接使用DefaultSqlSession,因为DefaultSqlSession是线程不安全的。所以直接使用会存在数据安全问题,针对这个问题的,在整合的MyBatis-Spring的插件包中给我们提供了一个对应的工具SqlSessionTemplate。
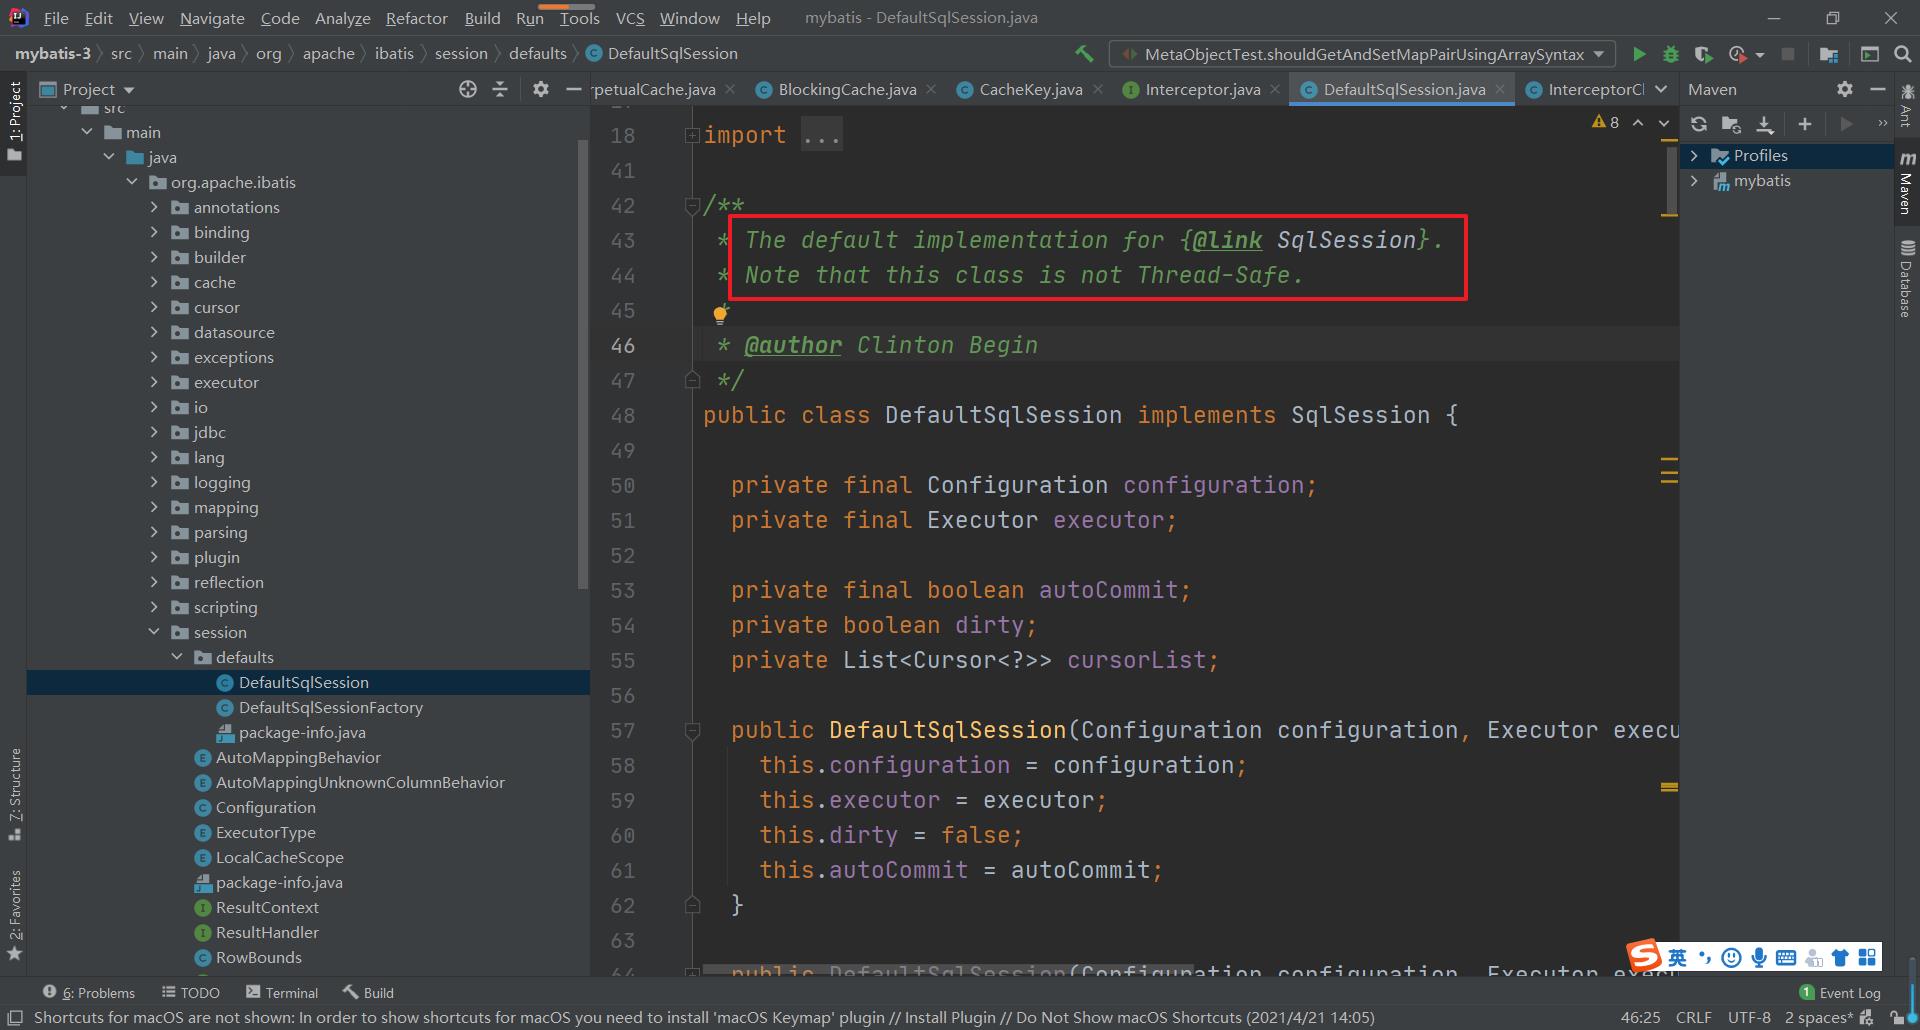
https://mybatis.org/mybatis-3/zh/getting-started.html
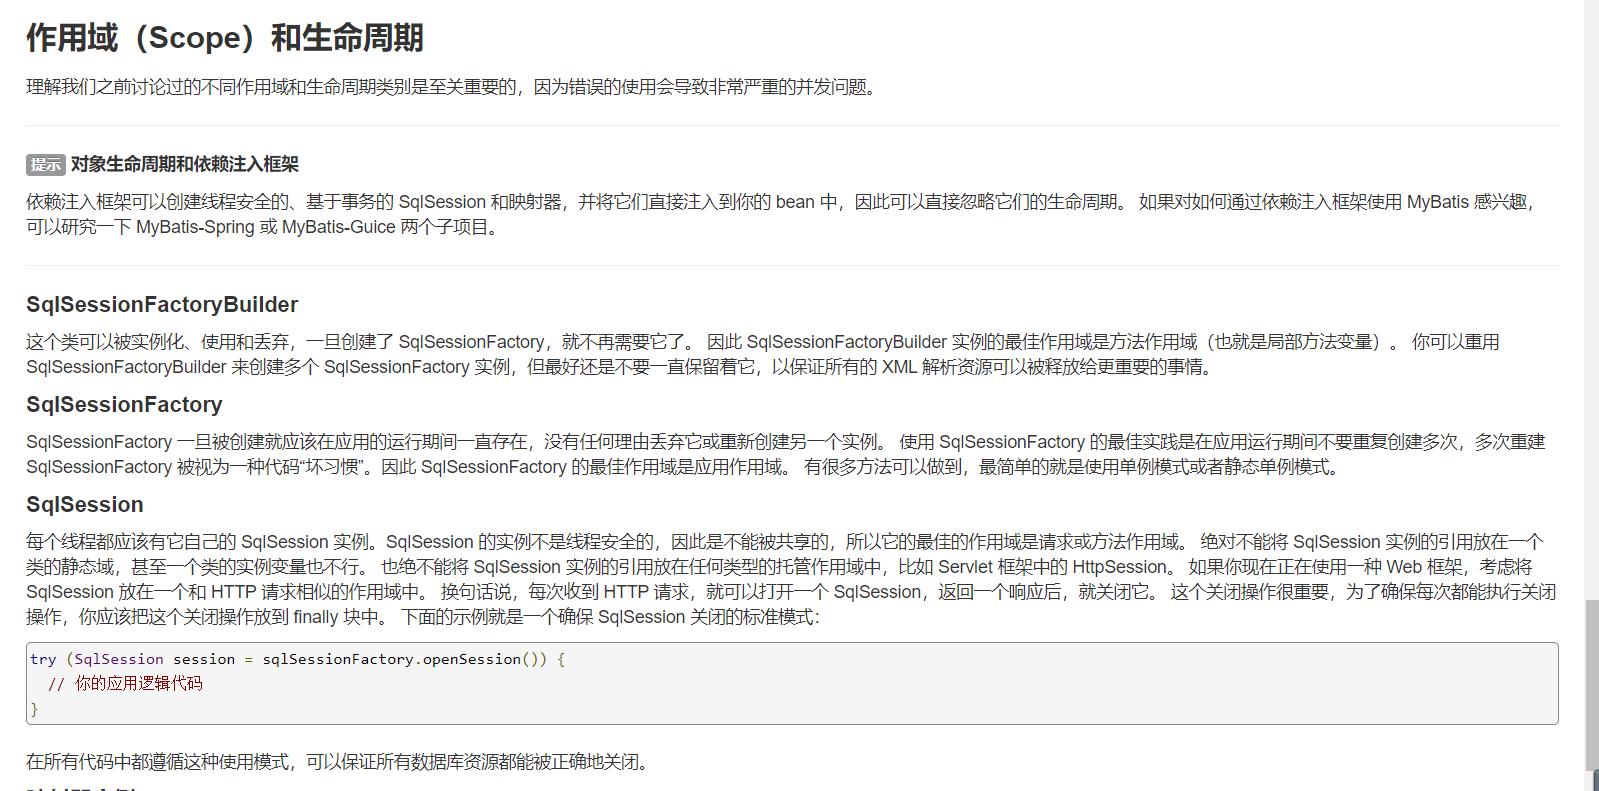
也就是在我们使用SqlSession的时候都需要使用try catch 块来处理
try (SqlSession session = sqlSessionFactory.openSession()) {
  // 你的应用逻辑代码
}
// 或者
SqlSession session = null;
try {
   session = sqlSessionFactory.openSession();
  // 你的应用逻辑代码
}finally{
    session.close();
}
在整合Spring中通过提供的SqlSessionTemplate来简化了操作,提供了安全处理。
2.2 SqlSessionTemplate
在mybatis-spring的包中,提供了一个线程安全的SqlSession的包装类,用来替代SqlSession,这个类就是SqlSessionTemplate。因为它是线程安全的,所以可以在所有的DAO层共享一个实例(默认是单例的)。
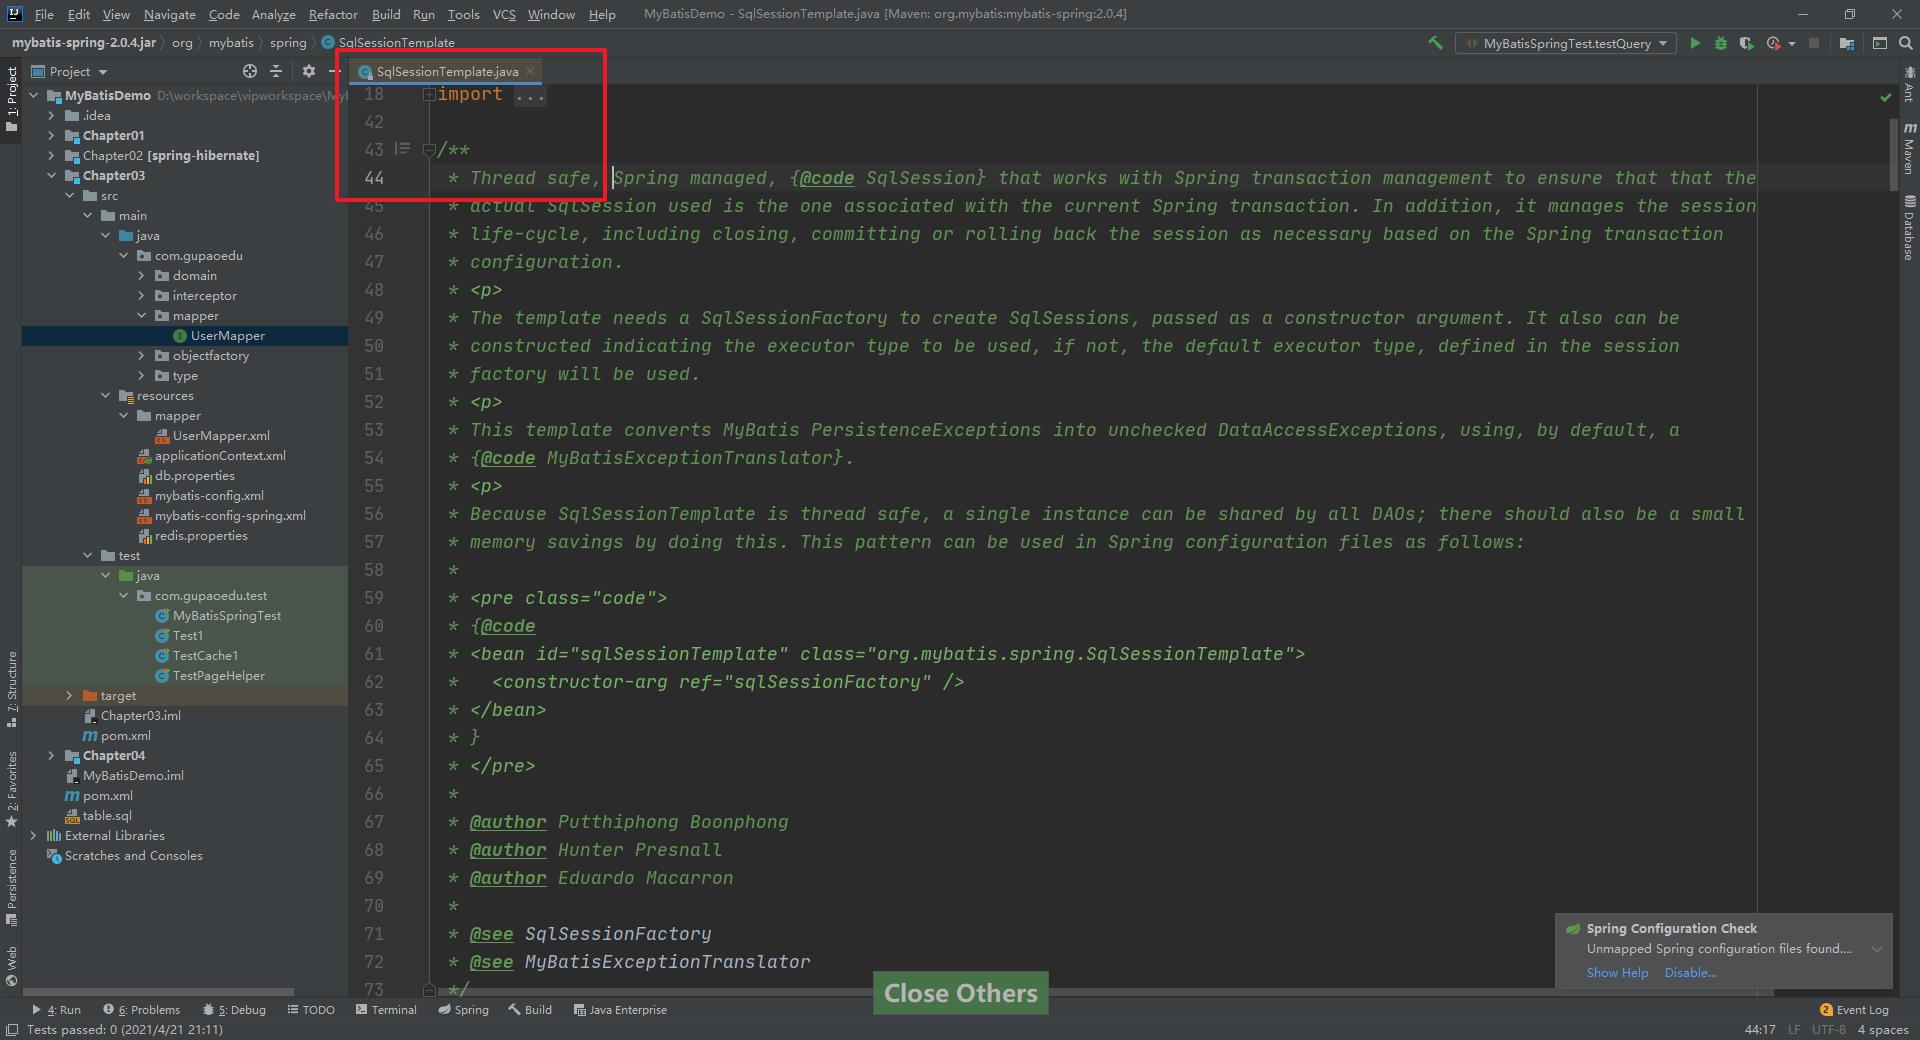
SqlSessionTemplate虽然跟DefaultSqlSession一样定义了操作数据的selectOne()、selectList()、insert()、update()、delete()等所有方法,但是没有自己的实现,全部调用了一个代理对象的方法。
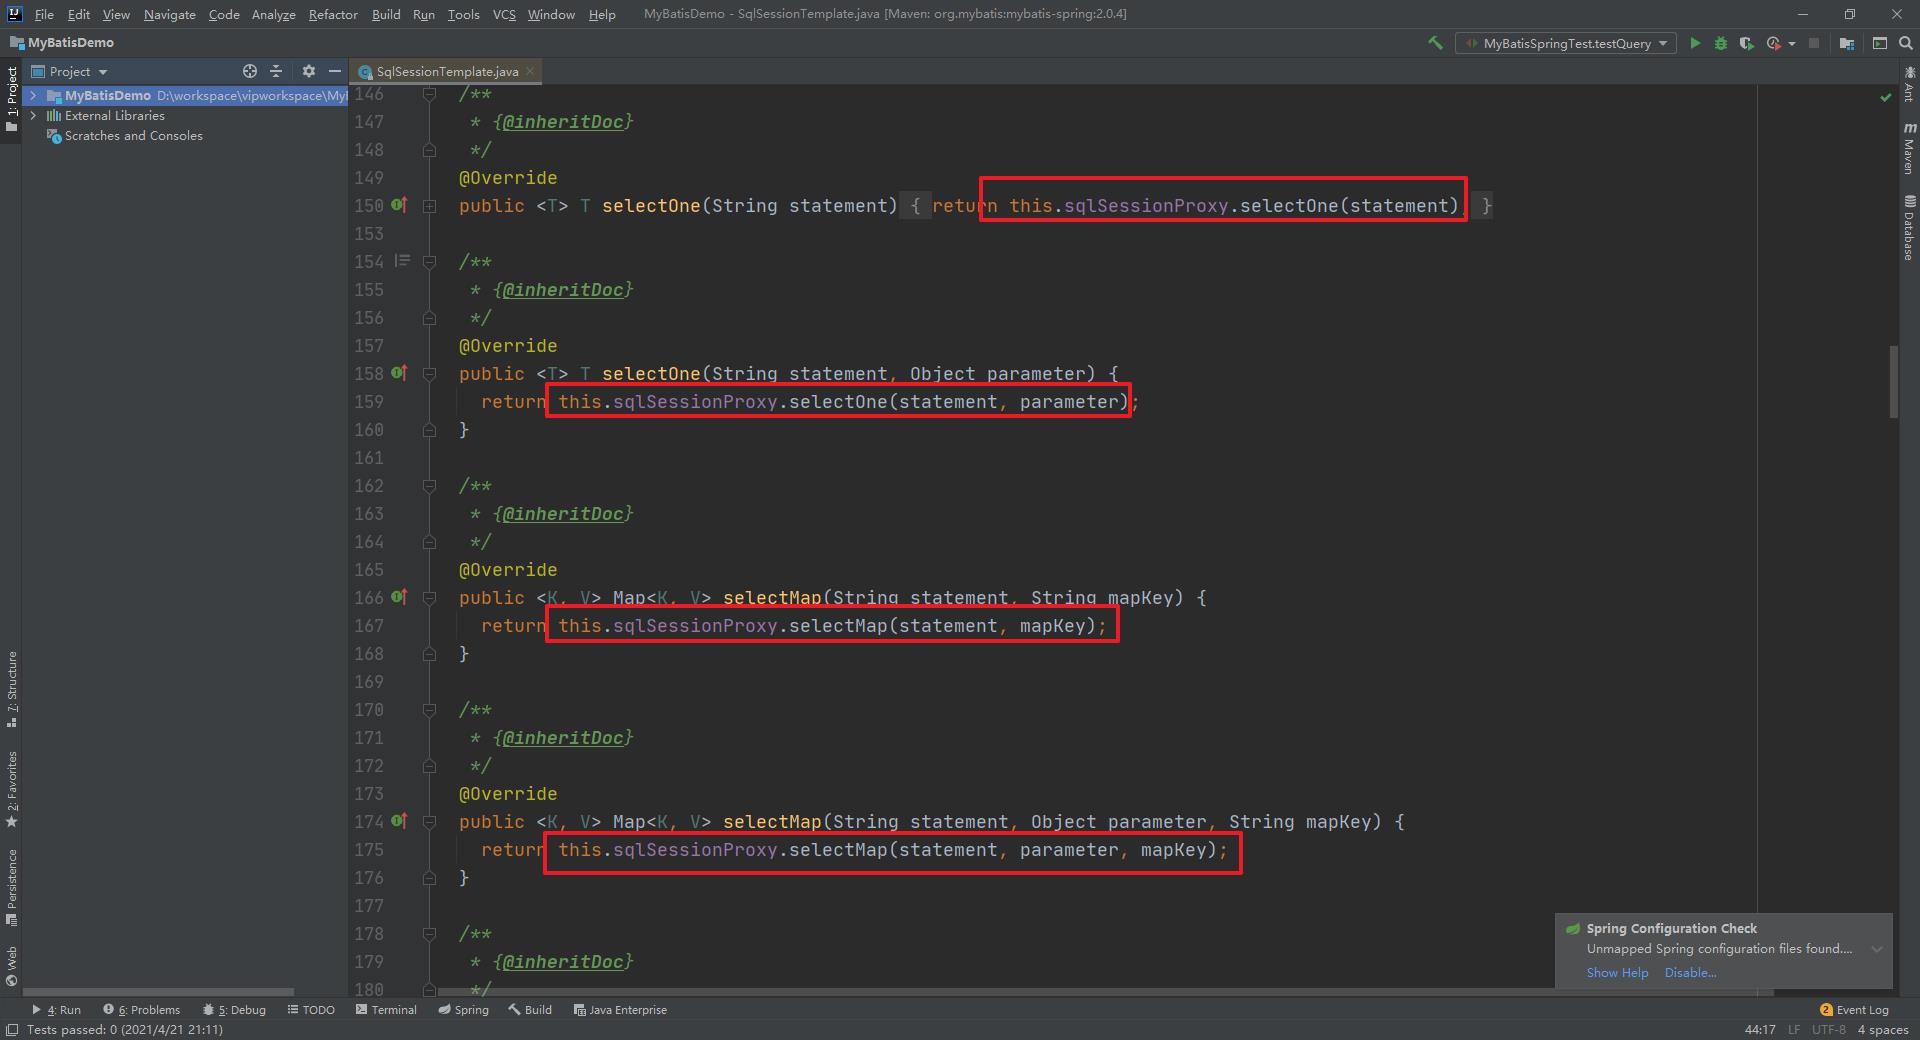
那么SqlSessionProxy是怎么来的呢?在SqlSessionTemplate的构造方法中有答案
  public SqlSessionTemplate(SqlSessionFactory sqlSessionFactory, ExecutorType executorType,
      PersistenceExceptionTranslator exceptionTranslator) {

    notNull(sqlSessionFactory, "Property 'sqlSessionFactory' is required");
    notNull(executorType, "Property 'executorType' is required");

    this.sqlSessionFactory = sqlSessionFactory;
    this.executorType = executorType;
    this.exceptionTranslator = exceptionTranslator;
      // 创建了一个 SqlSession 接口的代理对象, 调用SqlSessionTemplate中的 selectOne() 方法,其实就是调用
      // SqlSessionProxy的 selectOne() 方法,然后执行的是 SqlSessionInterceptor里面的 invoke方法
    this.sqlSessionProxy = (SqlSession) newProxyInstance(SqlSessionFactory.class.getClassLoader(),
        new Class[] { SqlSession.class }, new SqlSessionInterceptor());
  }
通过上面的介绍那么我们应该进入到 SqlSessionInterceptor 的 invoke 方法中。
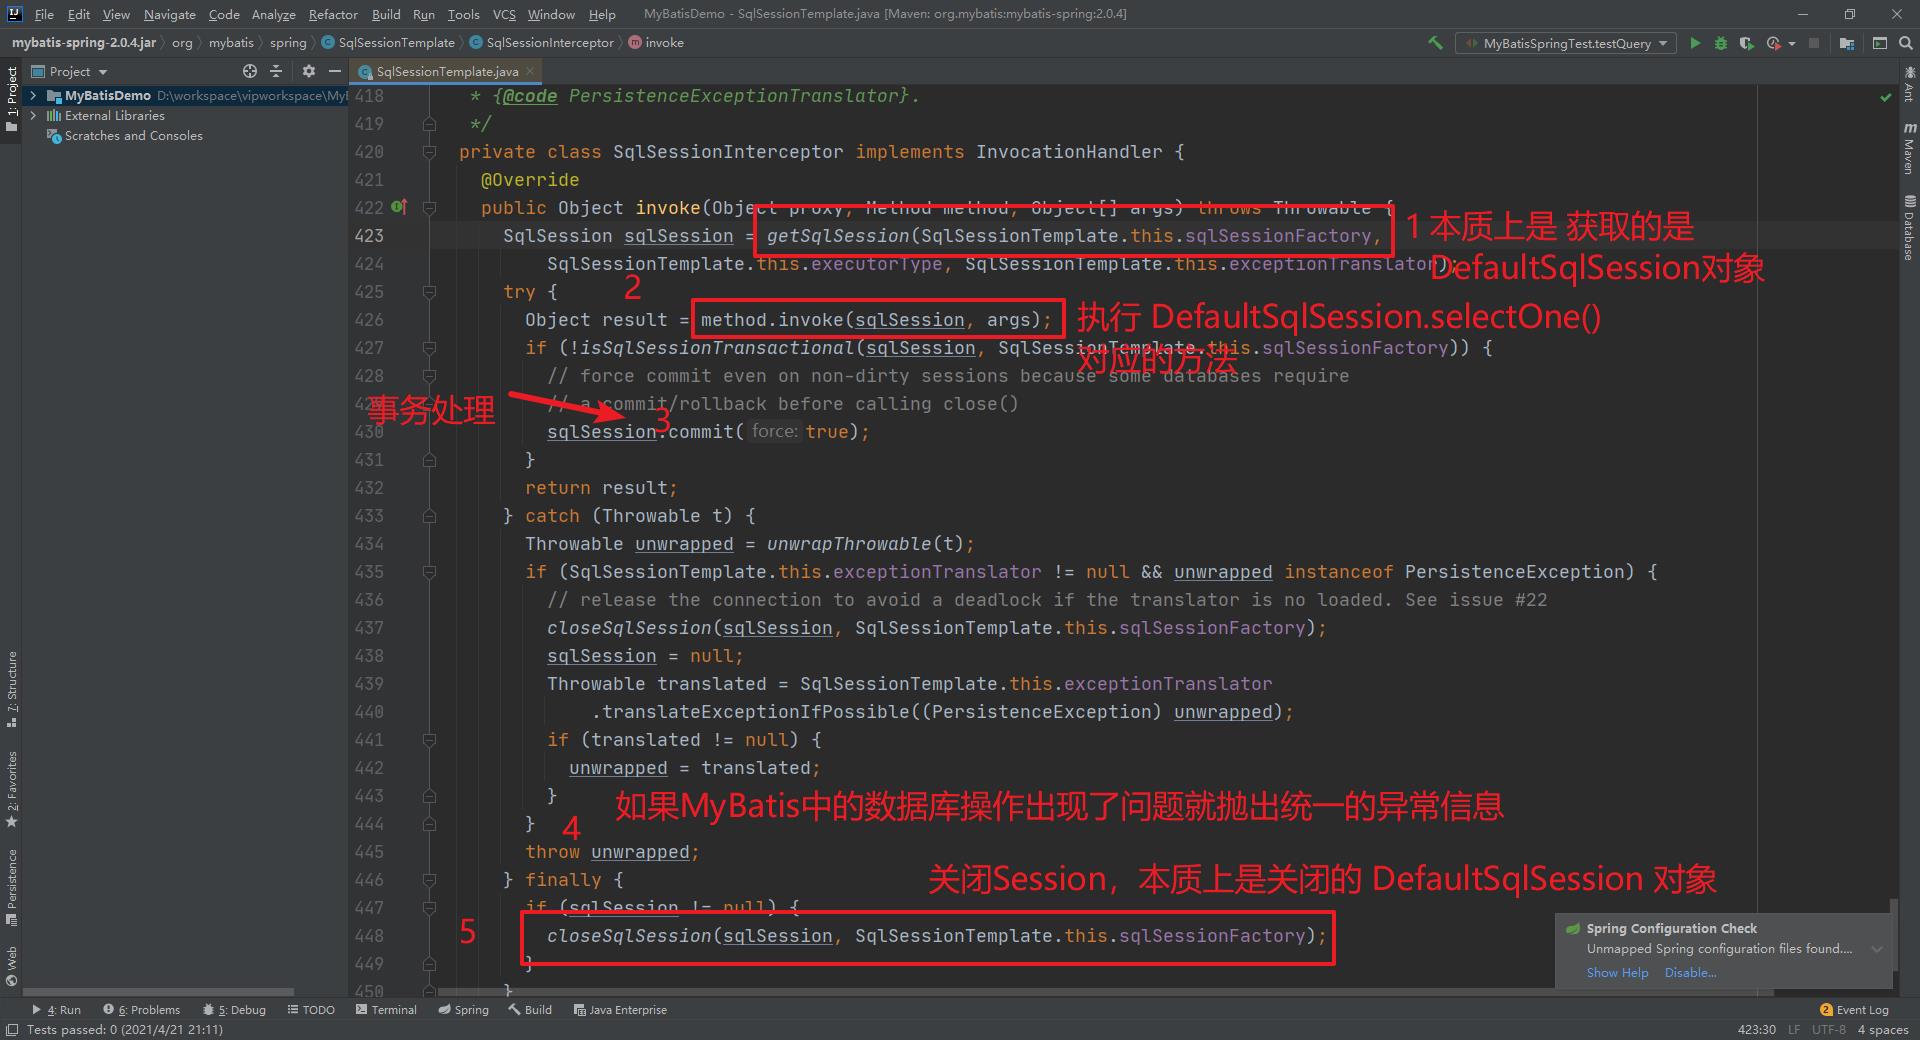
上面的代码虽然看着比较复杂,但是本质上就是下面的操作
SqlSession session 以上是关于透彻掌握Spring整合MyBatis的原理彻底征服面试官,建议收藏的主要内容,如果未能解决你的问题,请参考以下文章