Flutter学习日记之PageView+Indicator指示器实现引导页
Posted Android_小黑
tags:
篇首语:本文由小常识网(cha138.com)小编为大家整理,主要介绍了Flutter学习日记之PageView+Indicator指示器实现引导页相关的知识,希望对你有一定的参考价值。
本文地址:https://blog.csdn.net/qq_40785165/article/details/118400571,转载需附上此地址
大家好,我是小黑,一个还没秃头的程序员~~~
天下事以难而废者十之一,以惰而废者十之九
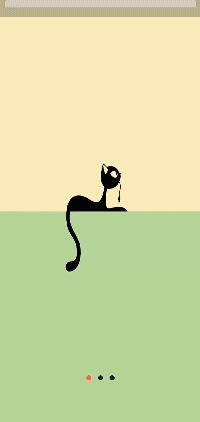
本次给大家分享的是如何用Flutter中的PageView组件配合Indicator指示器实现常见的App引导页,源码地址:https://gitee.com/fjjxxy/flutter-study.git,效果如下:

(一)PageView介绍
PageView用来实现一个可以显示的逐页滑动的列表,基本参数如下:
| 参数 | 说明 |
|---|---|
| scrollDirection | 滑动的方向 |
| reverse | children是否反过来 |
| controller | 控制器,可以定义初始索引、是否沾满屏幕等 |
| onPageChanged | 页面变化的监听 |
| children | 页面集合 |
| pageSnapping | 页面是否会自动返回上一页/翻页等效果,设置为false便不会有这些效果 |
代码如下:
          PageView(
            scrollDirection: Axis.horizontal,
            reverse: false,
            onPageChanged: (index) {
              setState(() {
                _index = index;
              });
            },
            controller: PageController(
                initialPage: 0, keepPage: false, viewportFraction: 1),
            pageSnapping: true,
            physics: ClampingScrollPhysics(),
            children: [
              Container(
                width: double.infinity,
                height: double.infinity,
                decoration: BoxDecoration(
                    image: DecorationImage(
                        image: AssetImage(
                            "assets/images/image_guide_2.jpg"),
                        fit: BoxFit.fill)),
              ),
              Container(
                width: double.infinity,
                height: double.infinity,
                decoration: BoxDecoration(
                    image: DecorationImage(
                        image: AssetImage(
                            "assets/images/image_guide_1.jpg"),
                        fit: BoxFit.fill)),
              ),
              Container(
                width: double.infinity,
                height: double.infinity,
                decoration: BoxDecoration(
                    image: DecorationImage(
                        image: AssetImage(
                            "assets/images/image_guide_3.jpg"),
                        fit: BoxFit.fill)),
                child: Stack(
                  alignment: Alignment.bottomCenter,
                  children: [
                    Positioned(
                        bottom: 100,
                        child: ElevatedButton(
                            onPressed: () {
                              Navigator.pushNamed(context, "/main");
                            },
                            style: ButtonStyle(
                                backgroundColor:
                                    MaterialStateProperty.all(Colors.white),
                                foregroundColor:
                                    MaterialStateProperty.all(Colors.black),
                                shape: MaterialStateProperty.all(
                                    RoundedRectangleBorder(
                                        borderRadius:
                                            BorderRadius.circular(10))),
                                side: MaterialStateProperty.all(
                                    BorderSide(color: Colors.white))),
                            child: Text("开启Flutter学习之旅")))
                  ],
                ),
              )
            ],
          )
(二)指示器
Demo中用到的指示器插件是dots_indicator
添加依赖:
dots_indicator: ^2.0.0
引入:
import 'package:dots_indicator/dots_indicator.dart';
基本参数如下:
| 参数 | 说明 |
|---|---|
| dotsCount | 指示器数量 |
| position | 当前的位置 |
| decorator | 指示器的样式 |
| reversed | 是否反过来 |
| mainAxisAlignment | 对齐方式 |
代码如下:
 DotsIndicator(
                  mainAxisAlignment: MainAxisAlignment.center,
                  reversed: false,
                  dotsCount: 3,
                  position: _index.toDouble(),
                  decorator: DotsDecorator(
                    color: Colors.black87, // Inactive color
                    activeColor: Colors.redAccent,
                  ))
使用Stack+Positioned就可以完成布局中组件的摆放了,很简单的一个页面需求,因为很经常被使用,所以记录下来,本次PageView组件配合Indicator指示器实现App引导页的内容就介绍完了,感兴趣的小伙伴可以下载源码看一下,希望大家可以点个Star,支持一下小白的flutter学习经历,最后,希望喜欢我文章的朋友们可以帮忙点赞、收藏,也可以关注一下,如果有问题可以在评论区提出,后面我会持续更新Flutter的学习记录,与大家分享,谢谢大家的支持与阅读!
以上是关于Flutter学习日记之PageView+Indicator指示器实现引导页的主要内容,如果未能解决你的问题,请参考以下文章