mysql 8.0.21在windows10上安装
Posted 幽反丶叛冥
tags:
篇首语:本文由小常识网(cha138.com)小编为大家整理,主要介绍了mysql 8.0.21在windows10上安装相关的知识,希望对你有一定的参考价值。
摘要:对 mysql 8.0.21 免安装版本在win10 上进行记录一下,或对遇到的问题进行记录
一、mysql 安装配置
目前自己了解的有两种方式
- 通过免安装直接进行配置
- 通过安装程序进行安装
1.1 下载地址
Mysql 官网
https://www.mysql.com/
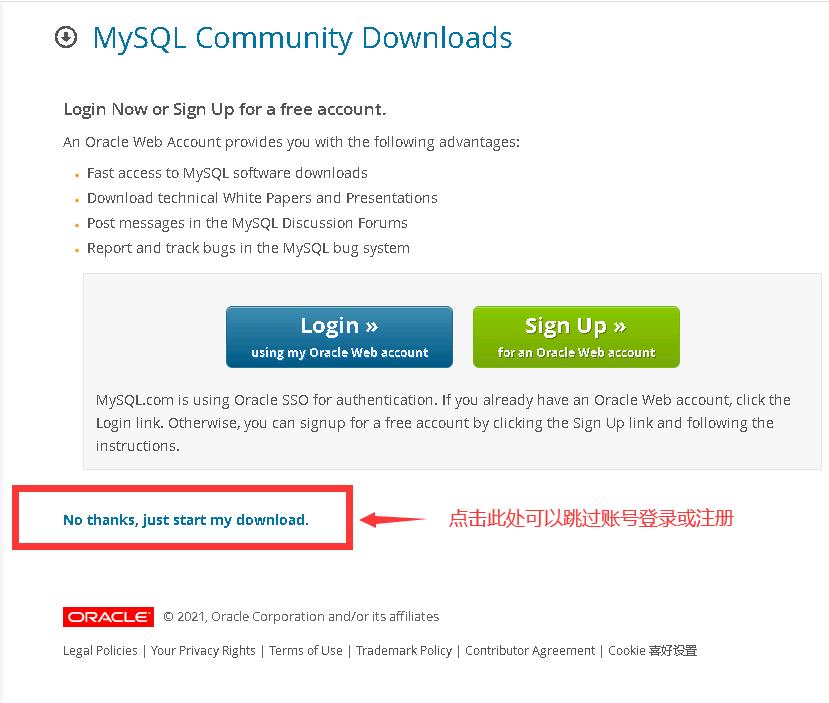
在下载的时候,点击 No thanks, just start my download. 即可不登录账号进行下载
1.2 方式一:免安装配置mysql
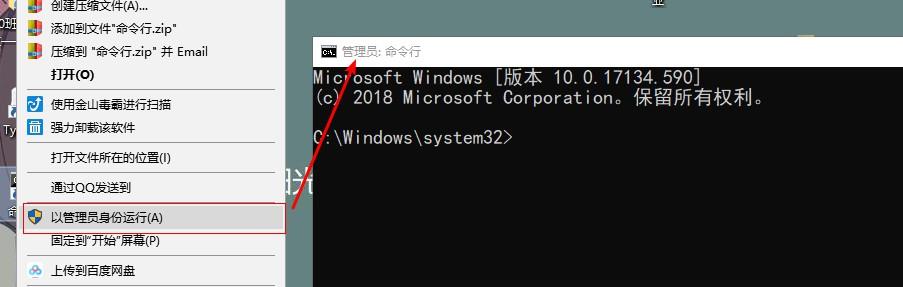
01、运行cmd
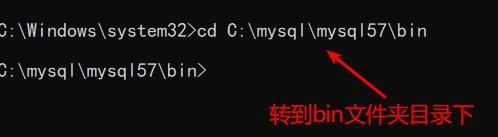
02、转到mysql的bin目录下
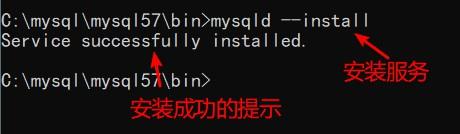
03、安装mysql的服务:mysqld --install
mysqld --install
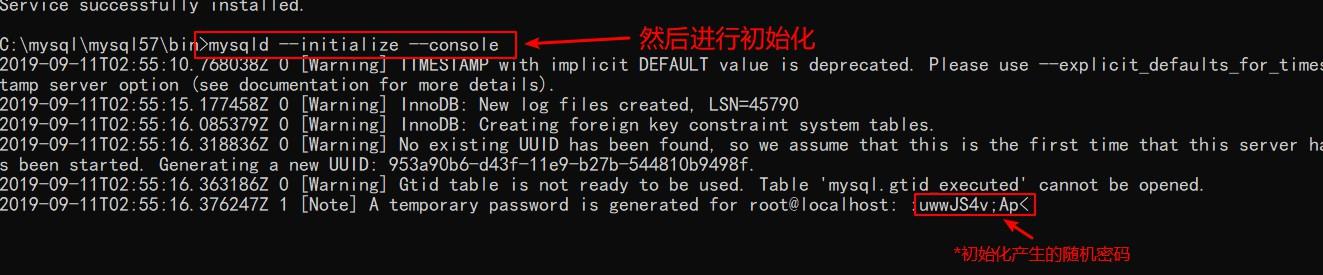
04、初始化mysql
mysqld --initialize --console
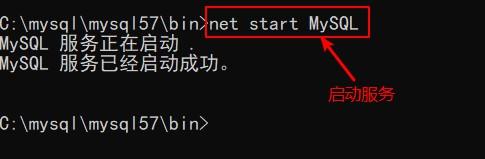
05、开启mysql的服务
net start mysql
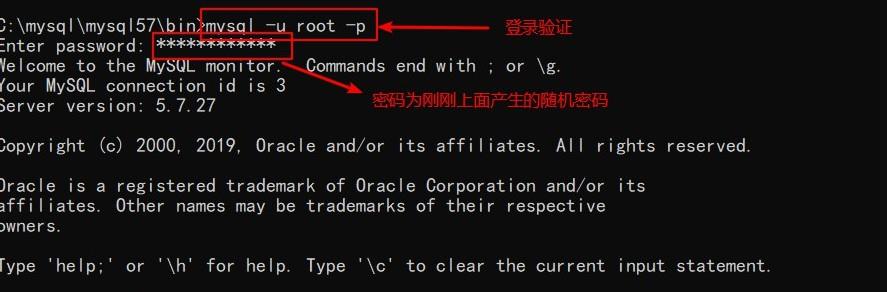
06、登录验证
mysql -u root -p
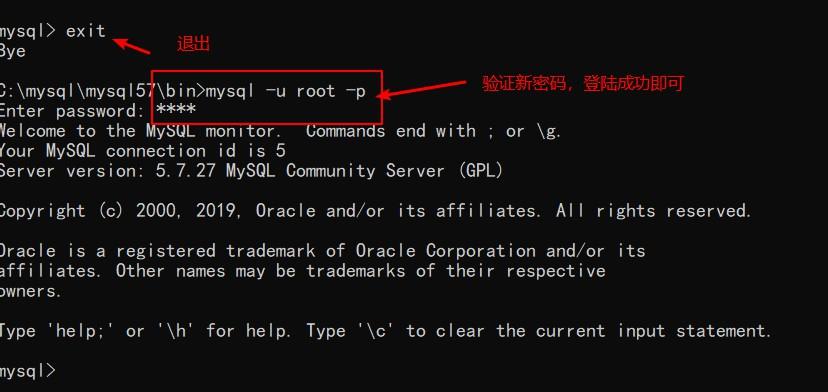
07、修改密码

再次登录验证新密码:
08、设置系统的全局变量:
为了方便登录操作mysql,在这里我们设置一个全局变量:
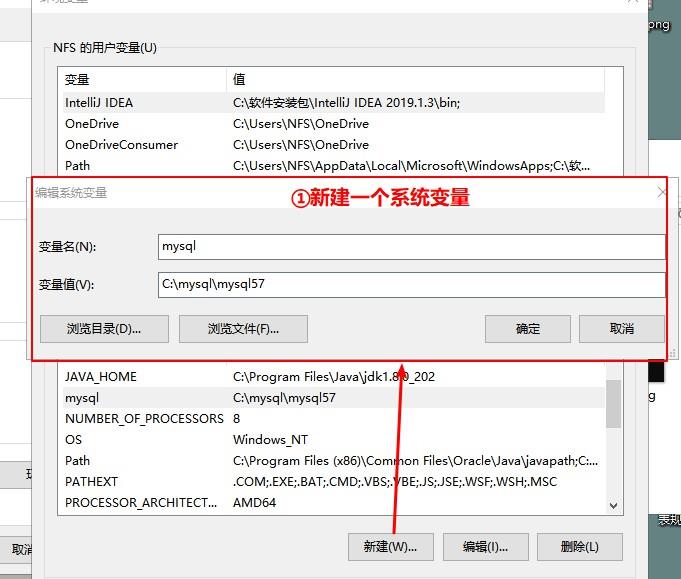
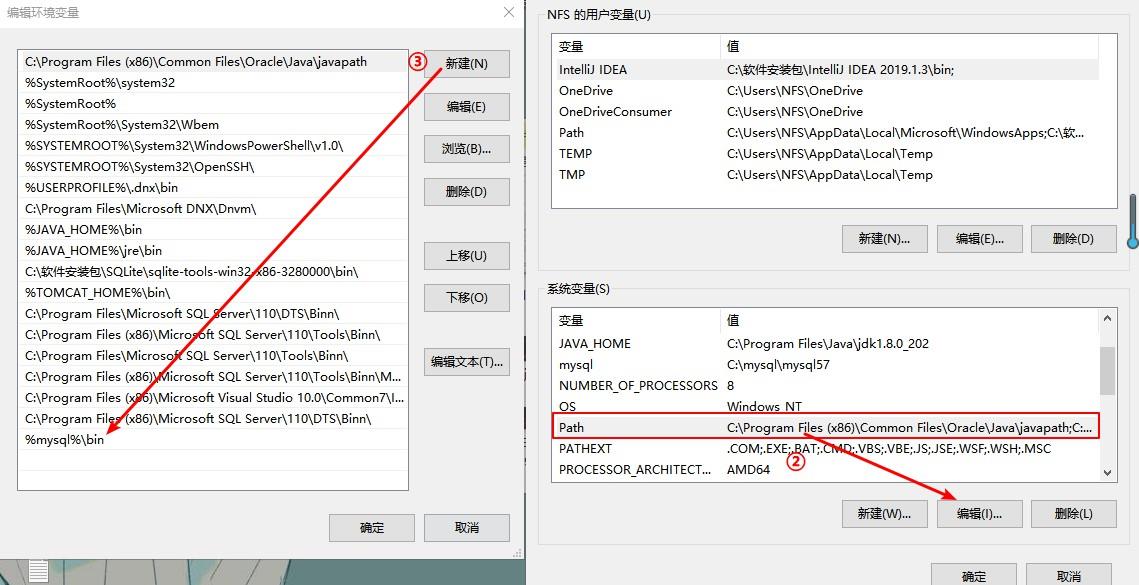
配置完成之后,每当我们想要用命令行使用mysql时,只需要win+R,-->输入"cmd"打开命令行,之后输入登录sql语句即可。
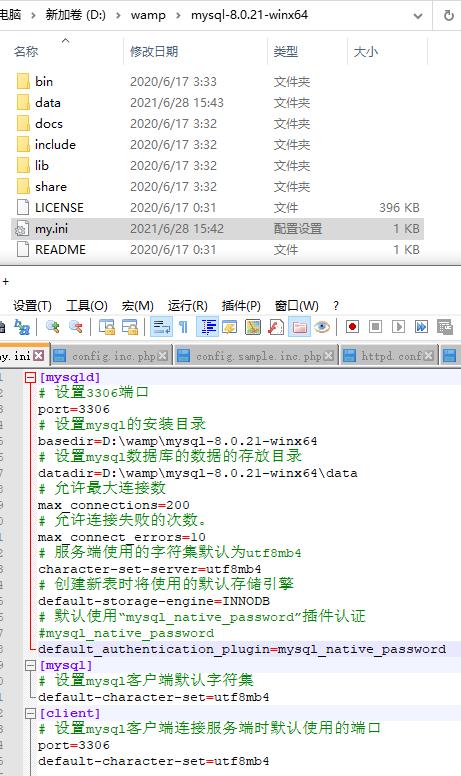
09、创建一个my.ini
[mysqld]
# 设置3306端口
port=3306
# 设置mysql的安装目录
basedir=D:\\wamp\\mysql-8.0.21-winx64
# 设置mysql数据库的数据的存放目录
datadir=D:\\wamp\\mysql-8.0.21-winx64\\data
# 允许最大连接数
max_connections=200
# 允许连接失败的次数。
max_connect_errors=10
# 服务端使用的字符集默认为utf8mb4
character-set-server=utf8mb4
# 创建新表时将使用的默认存储引擎
default-storage-engine=INNODB
# 默认使用“mysql_native_password”插件认证
#mysql_native_password
default_authentication_plugin=mysql_native_password
[mysql]
# 设置mysql客户端默认字符集
default-character-set=utf8mb4
[client]
# 设置mysql客户端连接服务端时默认使用的端口
port=3306
default-character-set=utf8mb4
1.3 方式二:执行安装程序
mysql安装以及2059 - Authentication plugin ‘caching_sha2_password’ cannot be loaded:报错的解决办法
1.4 参考命令
①安装服务:mysqld --install
②初始化: mysqld --initialize --console
③开启服务:net start mysql
④关闭服务:net stop mysql
⑤登录mysql:mysql -u root -p
Enter PassWord:(密码)
⑥修改密码:alter user 'root'@'localhost' identified by 'root';(by 接着的是密码)
⑦标记删除mysql服务:sc delete mysql
二、遇到的问题
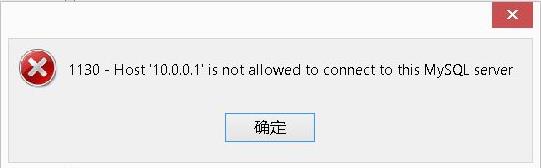
2.1 1130, "Host 'xxxx' is not allowed to connect to this MySQL server
在使用 Navicat Premium 12 进行连接的时候,遇到如下图所示错误:
01、连接数据库
D:\\wamp\\mysql-8.0.21-winx64\\bin>mysql -u root -p
Enter password: ****
Welcome to the MySQL monitor.  Commands end with ; or \\g.
Your MySQL connection id is 9
Server version: 8.0.21 MySQL Community Server - GPL

Copyright (c) 2000, 2020, Oracle and/or its affiliates. All rights reserved.

Oracle is a registered trademark of Oracle Corporation and/or its
affiliates. Other names may be trademarks of their respective
owners.

Type 'help;' or '\\h' for help. Type '\\c' to clear the current input statement.
02、看原先数据库的权限
use mysql;
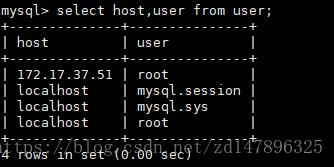
select host,user from user;
这里我自己事先没有查看,下图为其他资源图片
03、修改mysql权限表
mysql> update user set host='%' where user='root';
Query OK, 1 row affected (0.05 sec)
Rows matched: 1  Changed: 1  Warnings: 0
04、直接在当前状态下 重新远程连接OK
mysql> flush privileges;
Query OK, 0 rows affected (0.03 sec)
05、 再次查看mysql数据库的user表信息
mysql> select host,user from user;
+-----------+------------------+
| host      | user             |
+-----------+------------------+
| %         | root             |
| localhost | mysql.infoschema |
| localhost | mysql.session    |
| localhost | mysql.sys        |
+-----------+------------------+
4 rows in set (0.00 sec)
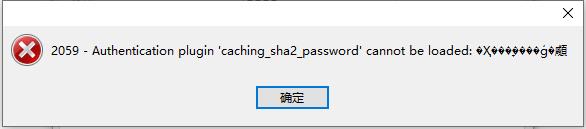
2.2 2059 - Authentication plugin 'caching_sha2_password' cannot be loaded
再处理2.1问题后,再次使用 Navicat Premium 12 进行连接的时候,遇到如下图所示错误:
01、连接数据库
D:\\wamp\\mysql-8.0.21-winx64\\bin>mysql -u root -p
Enter password: ****
Welcome to the MySQL monitor.  Commands end with ; or \\g.
Your MySQL connection id is 9
Server version: 8.0.21 MySQL Community Server - GPL

Copyright (c) 2000, 2020, Oracle and/or its affiliates. All rights reserved.

Oracle is a registered trademark of Oracle Corporation and/or its
affiliates. Other names may be trademarks of their respective
owners.

Type 'help;' or '\\h' for help. Type '\\c' to clear the current input statement.
02、看数据库加密方式
mysql> use mysql;
Database changed
mysql> select user,plugin from user where user='root';
+------+-----------------------+
| user | plugin                |
+------+-----------------------+
| root | caching_sha2_password |
+------+-----------------------+
1 row in set (0.00 sec)
上面连接时用的用户为root,所以我们登录root用户。可以看到当前用户的加密方式为caching_sha2_password
03、修改加密方式
mysql> alter user 'root'@'%' identified with mysql_native_password by 'root';
Query OK, 0 rows affected (0.06 sec)
或者也可以执行
alter user 'root'@‘localhost' identified with mysql_native_password by 'root';
通过以上,将用户的加密方式改为mysql_native_password。
04、直接在当前状态下 重新远程连接OK
mysql> flush privileges;
Query OK, 0 rows affected (0.03 sec)
05、再次查看用户加密方式
mysql> use mysql;
Database changed
mysql> select user,plugin from user where user='root';
+------+-----------------------+
| user | plugin                |
+------+-----------------------+
| root | mysql_native_password |
+------+-----------------------+
1 row in set (0.00 sec)
发现其加密方式已经修改为以前的加密方式了
三、参考链接
免安装版的Mysql
mysql安装以及2059 - Authentication plugin 'caching_sha2_password' cannot be loaded:报错的解决办法
报错:1130-host ... is not allowed to connect to this MySql server 解决方法
1130, "Host 'xxxx' is not allowed to connect to this MySQL server"
以上是关于mysql 8.0.21在windows10上安装的主要内容,如果未能解决你的问题,请参考以下文章