安卓网络编程(SocketWebView控件)
Posted 行稳方能走远
tags:
篇首语:本文由小常识网(cha138.com)小编为大家整理,主要介绍了安卓网络编程(SocketWebView控件)相关的知识,希望对你有一定的参考价值。
目录
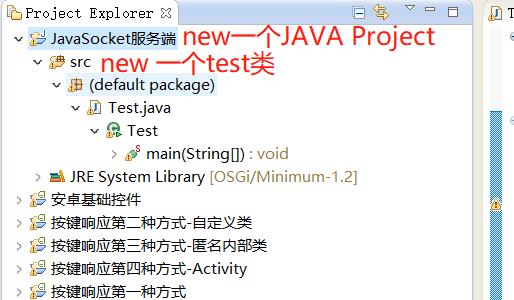
JavaSocket服务端开发

import java.io.IOException;
import java.io.InputStream;
import java.net.ServerSocket;
import java.net.Socket;


public class Test {
	public static void main(String[] args) {

		//创建套接字,ip,端口号
		try {//try...catch是JAVA内部错误管理机制,写完new ServerSocket就会自动提示 点击add就自动添加进来
			ServerSocket socket = new ServerSocket(8888);
			System.out.println("socket套接字创建成功,等待连接");

			//不断和新客户端建立连接
			while(true){//死循环写法  和C区别
				final Socket con = socket.accept();
				System.out.println("有客户端接入");

				//new Thread(...).start()  有客户端接入就创建线程去对接
				new Thread(new Runnable() {
					//写完自动跳出这个run函数 补全这个线程要做的事情
					public void run() {
						// TODO Auto-generated method stub
						InputStream in;
						try {
							//由于con的定义是在try外面的 鼠标放在上面,点击改变作用域  前面自动出现final关键字
							in = con.getInputStream();//获取输入流,用来读取数据  类似C中读取fd
							int len = 0;//定义写到try...catch里面 注意作用域
							byte[] data = new byte[128];
							len = in.read(data);//读取放到data里面
							                                     //输出data中从0到第len个字节 因为data中有128字节,防止输出多余乱码
							System.out.println("读到消息:"+new String(data,0,len));//输出里面直接写data输出可能会乱码
						} catch (IOException e) {
							// TODO Auto-generated catch block
							e.printStackTrace();
						}

					}
				}).start();


			}

		} catch (IOException e) {
			// TODO Auto-generated catch block
			e.printStackTrace();
		}

	}
}
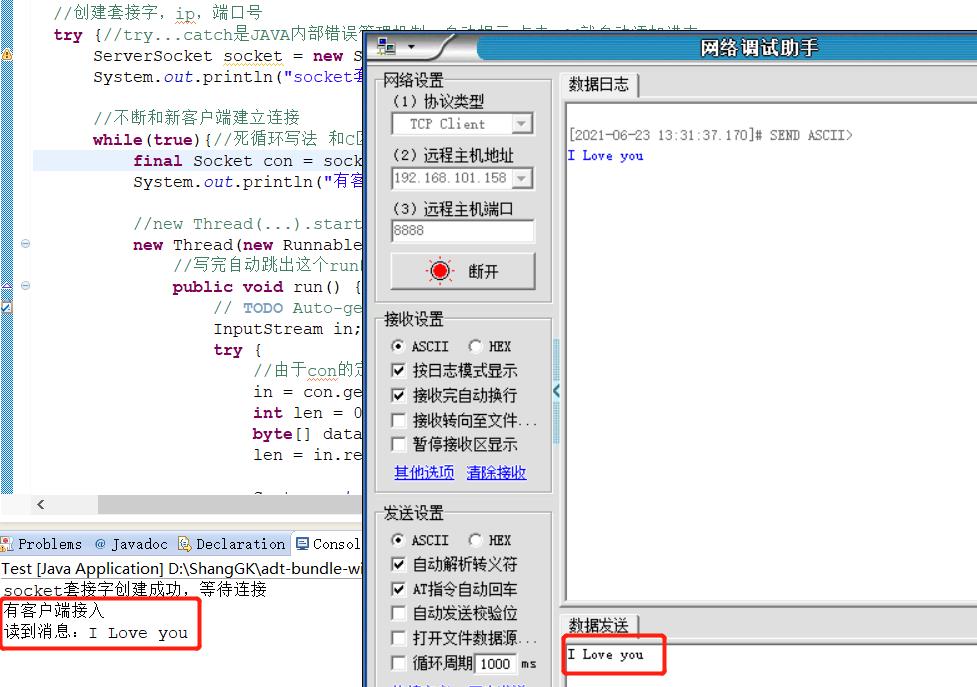
运行代码验证:

JavaSocket客户端开发
import java.io.IOException;
import java.io.InputStream;
import java.io.OutputStream;
import java.net.Socket;
import java.net.UnknownHostException;
import java.util.Scanner;


public class Test {
	public static void main(String[] args) {

		try {//try...catch也是自动产生的错误捕捉机制
			Socket client = new Socket("192.168.1.11", 8080);//这样就和客户端建立连接了
			OutputStream out = client.getOutputStream();//获得数据发送通道

			Scanner sc = new Scanner(System.in);
			String message = sc.next();//获取字符串用next() 如果客户端发送的内容有空格,空格及后面的字符串就收不到了

			out.write(message.getBytes());//发送通道,发送数据  会提示你API的使用方法,根据规则进行填充就行


			//接收客户端的消息
			InputStream in = client.getInputStream();//获得数据接受通道
			int len;
			byte[] data = new byte[128];
			len = in.read(data);//接受通道接受数据
			System.out.println("获得服务端返回数据是:"+new String(data,0,len));

		} catch (IOException e) {
			// TODO Auto-generated catch block
			e.printStackTrace();
		}

	}
}
上面写的socket通信代码,只能发送、接收一次,这没关系,因为安卓机制就是UI不断刷新,点击APP按键就建立一次新的连接了。
安卓Socket客户端开发
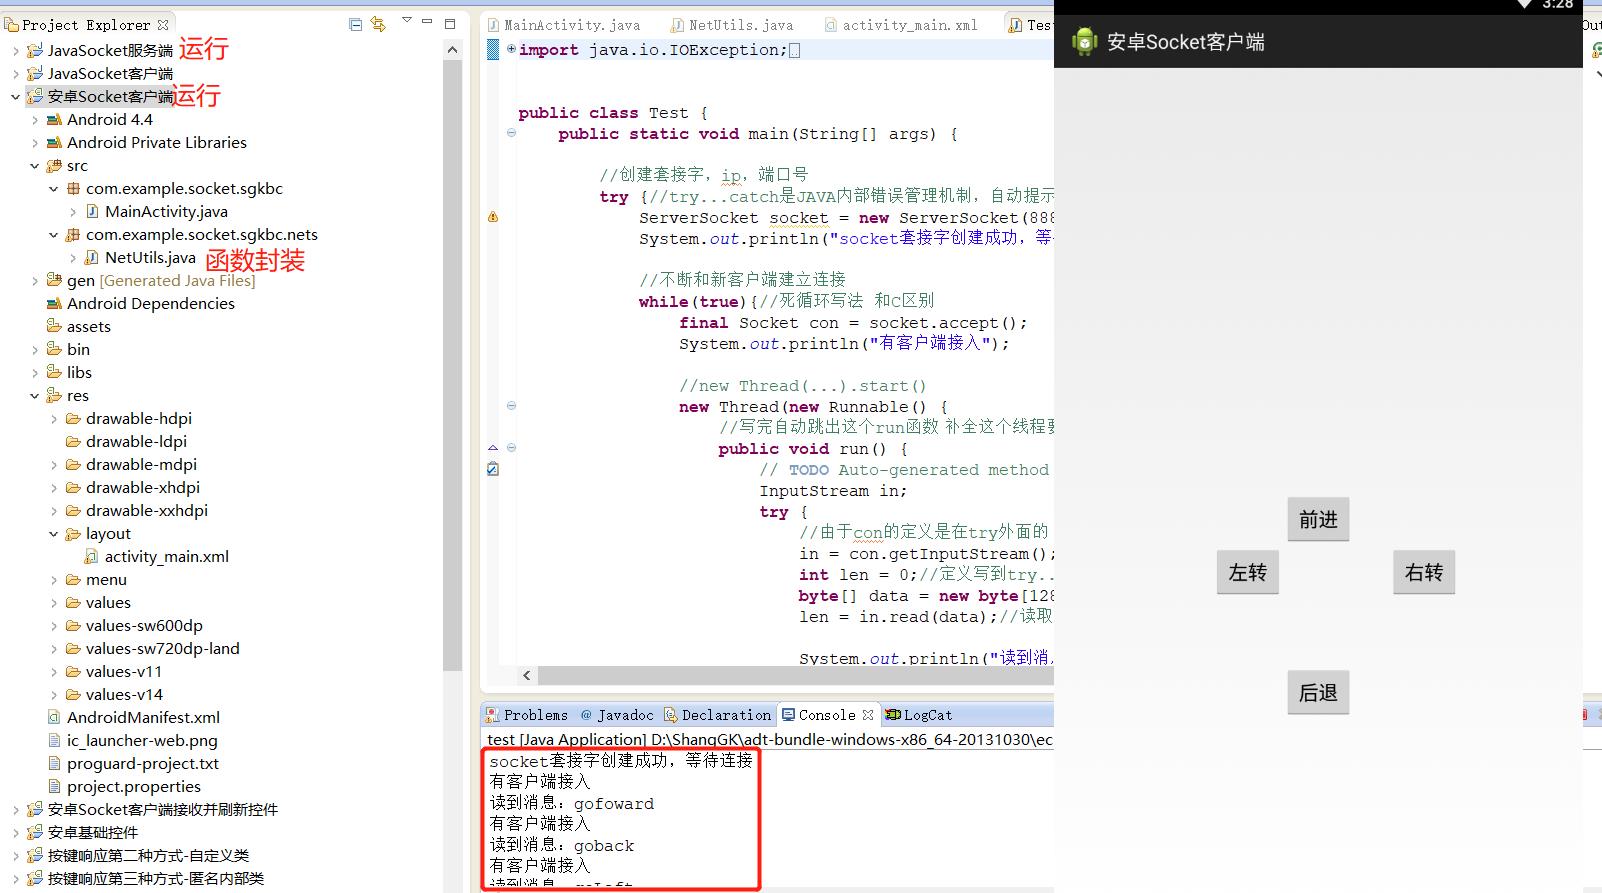
运行效果:

activity_main.xml
<RelativeLayout xmlns:android="http://schemas.android.com/apk/res/android"
    xmlns:tools="http://schemas.android.com/tools"
    android:layout_width="match_parent"
    android:layout_height="match_parent"
    android:paddingBottom="@dimen/activity_vertical_margin"
    android:paddingLeft="@dimen/activity_horizontal_margin"
    android:paddingRight="@dimen/activity_horizontal_margin"
    android:paddingTop="@dimen/activity_vertical_margin"
    tools:context=".MainActivity" >

    <Button
        android:id="@+id/fh"
        android:layout_width="wrap_content"
        android:layout_height="wrap_content"
        android:layout_above="@+id/turnLeft"
        android:layout_centerHorizontal="true"
        android:onClick="sendMessage"
        android:text="前进" />

    <Button
        android:id="@+id/turnR"
        android:layout_width="wrap_content"
        android:layout_height="wrap_content"
        android:layout_below="@+id/fh"
        android:layout_marginLeft="32dp"
        android:layout_toRightOf="@+id/fh"
        android:onClick="sendMessage"
        android:text="右转" />

    <Button
        android:id="@+id/back"
        android:layout_width="wrap_content"
        android:layout_height="wrap_content"
        android:layout_alignLeft="@+id/fh"
        android:layout_alignParentBottom="true"
        android:layout_marginBottom="175dp"
        android:onClick="sendMessage"
        android:text="后退" />

    <Button
        android:id="@+id/turnLeft"
        android:layout_width="wrap_content"
        android:layout_height="wrap_content"
        android:layout_above="@+id/back"
        android:layout_marginBottom="61dp"
        android:layout_toLeftOf="@+id/fh"
        android:onClick="sendMessage"
        android:text="左转" />

</RelativeLayout>
MainActivity.java
package com.example.socket.sgkbc;

import android.app.Activity;
import android.os.Bundle;
import android.view.View;

import com.example.socket.sgkbc.nets.NetUtils;

public class MainActivity extends Activity {

	@Override
	protected void onCreate(Bundle savedInstanceState) {
		super.onCreate(savedInstanceState);
		setContentView(R.layout.activity_main);
	}

	public void sendMessage(View v) {

		switch (v.getId()) {
			case R.id.fh:
				NetUtils.sendMessageHandler("gofoward");
				break;
			case R.id.back:
				NetUtils.sendMessageHandler("goback");
				break;
			case R.id.turnLeft:
				NetUtils.sendMessageHandler("goLeft");
				break;
			case R.id.turnR:
				NetUtils.sendMessageHandler("goRight");
				break;

		}

	}

}
NetUtils.java
package com.example.socket.sgkbc.nets;

import java.io.IOException;
import java.io.OutputStream;
import java.net.Socket;

public class NetUtils {

	public static void sendMessageHandler(final String command) {
		new Thread(new Runnable() {

			@Override
			public void run() {
				// TODO Auto-generated method stub

				try {
					Socket client = new Socket("192.168.101.158", 8888);
					OutputStream out = client.getOutputStream();// 获得数据发送通道
					out.write(command.getBytes());// 发送通道,发送数据

				} catch (IOException e) {
					// TODO Auto-generated catch block
					e.printStackTrace();
				}
			}
		}).start();

	}

}
接收消息显示到控件上(解决安卓线程无法修改控件问题)
问题引入:
1、在安卓里开辟线程,要另起新建线程(不要直接使用ui的线程)。前面页面跳转有讲到,要在ui线程外操控ui,否则会崩溃。
2、新创建的线程只能修改一次控件内容(使用textView.setText(…)),安卓的线刷机制下用循环去不停改变控件显示内容会提示崩溃,只有初始线程可以。我们在网络通信里面需要不停去修改text控件的显示内容,我们需要解决非UI线程控制控件这个问题。解决的办法就是是使用Handler这个类。
下面我们来制作一个倒计时软件,实现非UI线程对控件的修改。
activity_main.xml
<RelativeLayout xmlns:android="http://schemas.android.com/apk/res/android"
    xmlns:tools="http://schemas.android.com/tools"
    android:layout_width="match_parent"
    android:layout_height="match_parent"
  	android:background="#000000"
    tools:context=".MainActivity" >

    <TextView
        android:id="@+id/textView"
        android:layout_width="wrap_content"
        android:layout_height="wrap_content"
        android:layout_centerInParent="true"
        android:textSize="40dp"
        android:textColor="#ffffff"
        android:textStyle="bold"
        android:text="10s" />

    <Button
        android:id="@+id/button1"
        android:layout_width="match_parent"
        android:layout_height="wrap_content"
        android:onClick="testFunc"
        android:text="begin" />

</RelativeLayout>
MainActivity.java
package com.example.sgkbc;

import android.app.Activity;
import android.os.Bundle;
import android.os.Handler;
import android.os.Message;
import android.view.View;
import android.widget.TextView;

public class MainActivity extends Activity {

	public TextView textView;//定义控件 为了关联到控件    ctl+shift+O 控件导包

	public Handler h;//导包ctl+shift+o 选择OS的那个包


    @Override
    protected void onCreate(Bundle savedInstanceState) {
        super.onCreate(savedInstanceState);
        setContentView(R.layout.activity_main);

                  //根据提示类型强转
        textView = (TextView) findViewById(R.id.textView); //通过ID关联到控件

        h = new Handler(){//有点像UI主线程的家里的电话,处理一些其他进程无法处理的事件。
        	@Override
        	public void handleMessage(Message msg) {//一旦“接到电话”就会被调用
        		// TODO Auto-generated method stub
        		super.handleMessage(msg);
        		textView.setText(msg.what+"s");//设置text控件显示内容
        	}
        };
    }

    public void testFunc(View V)
    {
    	//new Thread(new Runnable() {} ).start();
    	new Thread(new Runnable() {//安卓里开辟线程  要另起新建线程
    							   //(不要直接使用ui的线程) 前面页面跳转有讲到 ui线程外操控ui

				@Override
				public void run() {
					for (int i = 10; i >=0 ; i--) {
							Message msg = new Message();
							msg.what = i;
							//"打电话"  将要处理的事件交给UI线程的Handler去做。 有点像进程间通信
							h.sendMessage(msg);
			    		try {
			    			//每隔一秒发一次消息 通知你修改UI
							Thread.sleep(1000);//sleep的try...catch机制  安卓的sleep都是线程机制实现的
						} catch (InterruptedException e) {
							// TODO Auto-generated catch block
							e.printStackTrace();
						}
					}
				}
			}).start();
    }

}
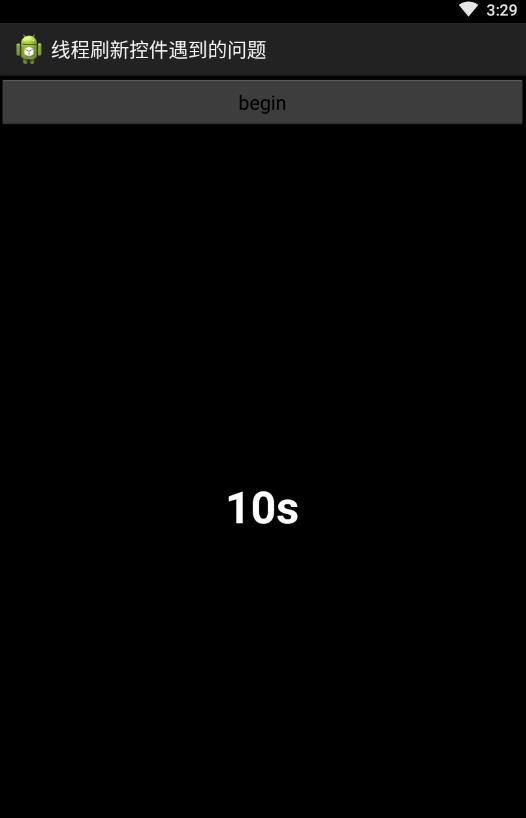
点击begin,开始倒计时10秒。运行效果如下:

另外,我们不断点击begin,可以不断使用这个定时器,我们并没有把按钮控件放到一个循环里面,这是因为安卓的不断刷新界面机制。
Android网络接收数据并刷新界面显示
activity_main.xml
<RelativeLayout xmlns:android="http://schemas.android.com/apk/res/android"
    xmlns:tools="http://schemas.android.com/tools"
    android:layout_width="match_parent"
    android:layout_height="match_parent"
   	android:background="#000000"
    tools:context=".MainActivity" >

    <Button
        android:id="@+id/fh"
        android:layout_width="match_parent"
        android:layout_height="wrap_content"
        android:onClick="sendMessage"
        android:text="发起网络请求" />

    <TextView
        android:id="@+id/tx"
        android:layout_width="wrap_content"
        android:layout_height="wrap_content"
        android:textSize="35dp"
        android:layout_centerInParent="true"
        android:textColor="#ffffff"
        />

</RelativeLayout>
MainActivity.java
package com.example.socket.sgkbc;

import android.app.Activity;
import android.os.Bundle;
import android.os.Handler;
import android.os.Message;
import android.view.View;
import android.widget.TextView;

import com.example.socket.sgkbc.nets.NetUtils;

public class MainActivity extends Activity {

	Handler handler;
	TextView tx;//定义控件  为了关联到xml中的Text控件

	@Override
	protected void onCreate(Bundle savedInstanceState) {
		super.onCreate(savedInstanceState);
		setContentView(R.layout.activity_main);

		    //强制转换 根据提示
		tx = (TextView) findViewById(R.id.tx);//关联到这个控件 通过ID号

		handler = new Handler(以上是关于安卓网络编程(SocketWebView控件)的主要内容,如果未能解决你的问题,请参考以下文章