Nginx优化
Posted 还行少年
tags:
篇首语:本文由小常识网(cha138.com)小编为大家整理,主要介绍了Nginx优化相关的知识,希望对你有一定的参考价值。
文章目录
一、nginx服务优化
1.隐藏版本号
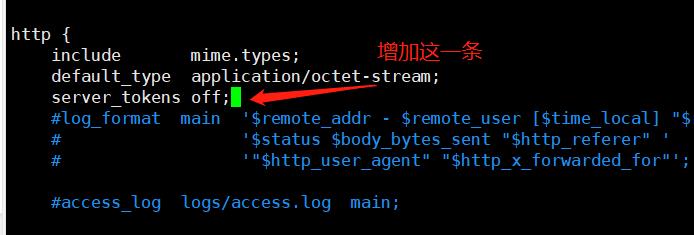
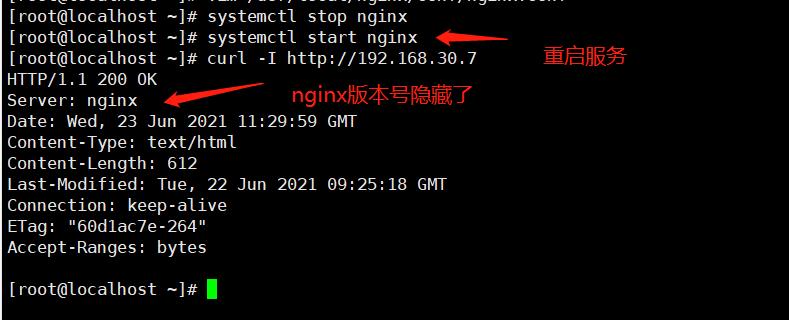
为防止攻击者针对特定版本进行攻击,我们需要隐藏Nginx的版本号

1.1 修改配置文件
[root@localhost ~]# vim /usr/local/nginx/conf/nginx.conf
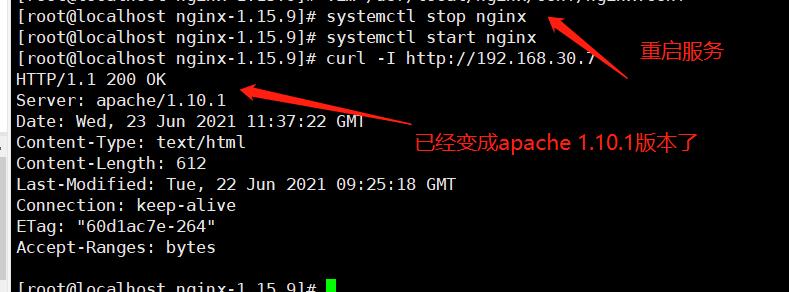
1.2 修改源码
[root@localhost ~]# vim /opt/nginx-1.15.9/src/core/nginx.h

重新编译安装
[root@localhost nginx-1.15.9]# ./configure --prefix=/usr/local/nginx --user=nginx --group=nginx --with-http_stub_status_module && make && make install

2.修改用户和组
2.1 编译时指定用户和组
[root@localhost nginx-1.15.9]# ./configure --prefix=/usr/local/nginx --user=nginx --group=nginx --with-http_stub_status_module

2.2 修改配置文件(编译时未指定用户与组)
[root@localhost ~]# vim /usr/local/nginx/conf/nginx.conf


3.配置网页缓存时间
为加快访问速度,对静态网页设置缓存时间
3.1 以图片作为缓存对象
[root@localhost ~]# cd /usr/local/nginx/html/
[root@localhost html]# ls
50x.html  index.html
[root@localhost html]# rz -E   //上传图片到网页根目录
rz waiting to receive.
[root@localhost html]# ls
50x.html  index.html  ms.jpeg

3.2 修改主配置文件,指定缓存时间
[root@localhost html]# vim /usr/local/nginx/conf/nginx.conf

3.3 重启nginx,查看缓存时间
[root@localhost html]# systemctl stop nginx
[root@localhost html]# systemctl start nginx

4.日志切割
太大的日志文件不利于分析排查,因此需要定期进行日志文件的切割
4.1 编写脚本
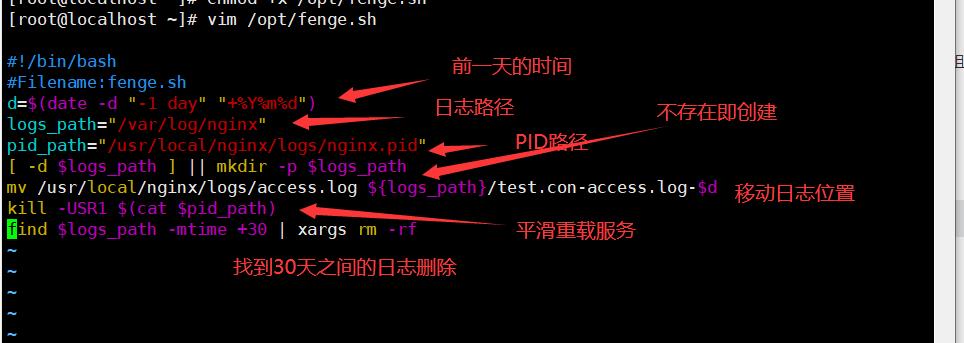
[root@localhost ~]# chmod +x /opt/fenge.sh //赋予执行权限
4.2 执行脚本,查看日志是否被切割
[root@localhost ~]# /opt/fenge.sh
[root@localhost ~]# ls /var/log/nginx/
test.con-access.log-20210622
[root@localhost ~]# date -s 20210624
2021年 06月 24日 星期四 00:00:00 CST
[root@localhost ~]# /opt/fenge.sh
[root@localhost ~]# ls /var/log/nginx/
test.con-access.log-20210622  test.con-access.log-20210623
[root@localhost ~]#
4.3 设置定时任务
[root@localhost ~]# crontab -e
30 2 * * * /opt/fenge.sh   //每天凌晨2.30执行脚本
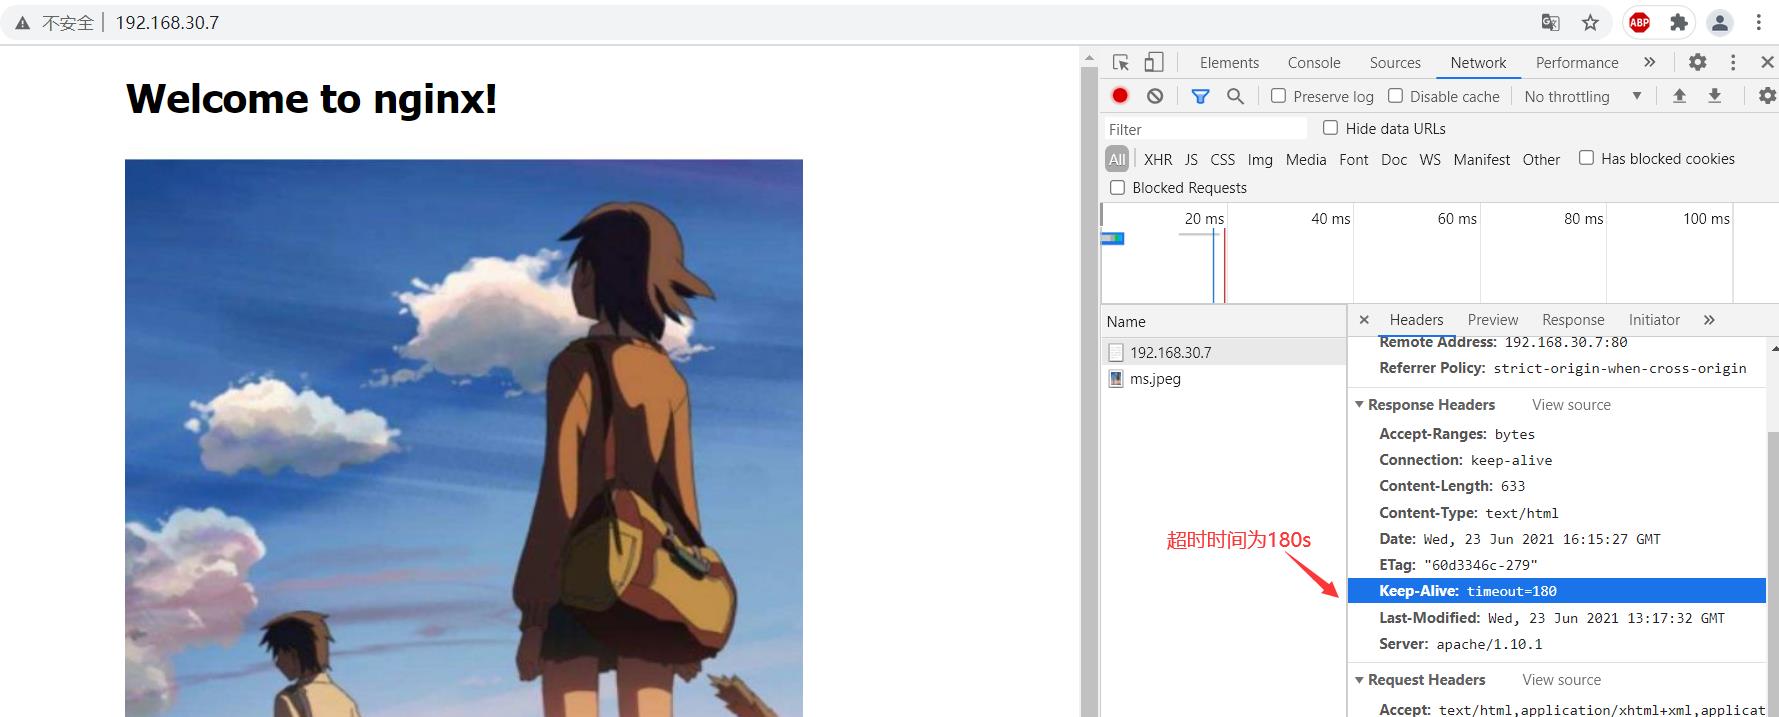
5.设置连接超时
5.1 修改配置文件,设置超时时间
[root@localhost ~]# vim /usr/local/nginx/conf/nginx.conf

5.2 查看效果(请求头和请求体在特殊情况下才能显示效果,此处不演示)
二、Nginx优化深入
1.更改进程数
高并发时可以修改为cpu核数的两倍
1.1 修改配置文件
[root@localhost ~]# cat /proc/cpuinfo | grep -c "physical"   //查看支持最大核心数
12
只有两个进程

[root@localhost ~]# vim /usr/local/nginx/conf/nginx.conf

1.2 重启服务,查看效果

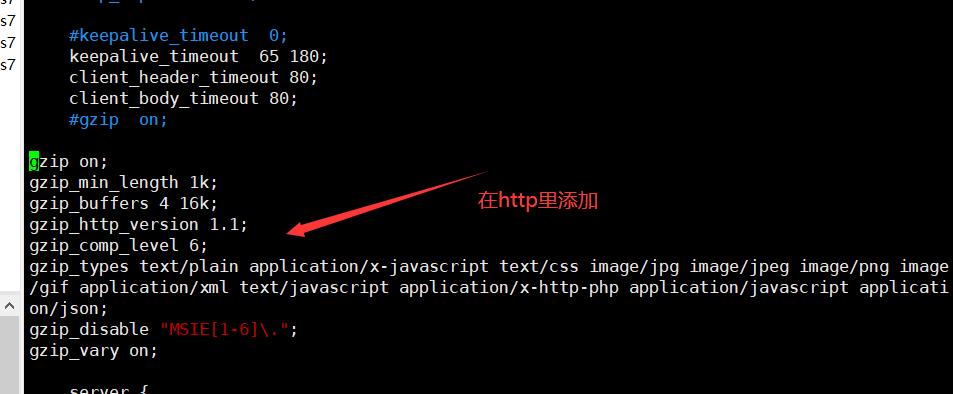
2.配置网页压缩
为节约网站的带宽,将网页内容在输出时进行压缩
2.1 修改配置文件
[root@localhost ~]# vim /usr/local/nginx/conf/nginx.conf
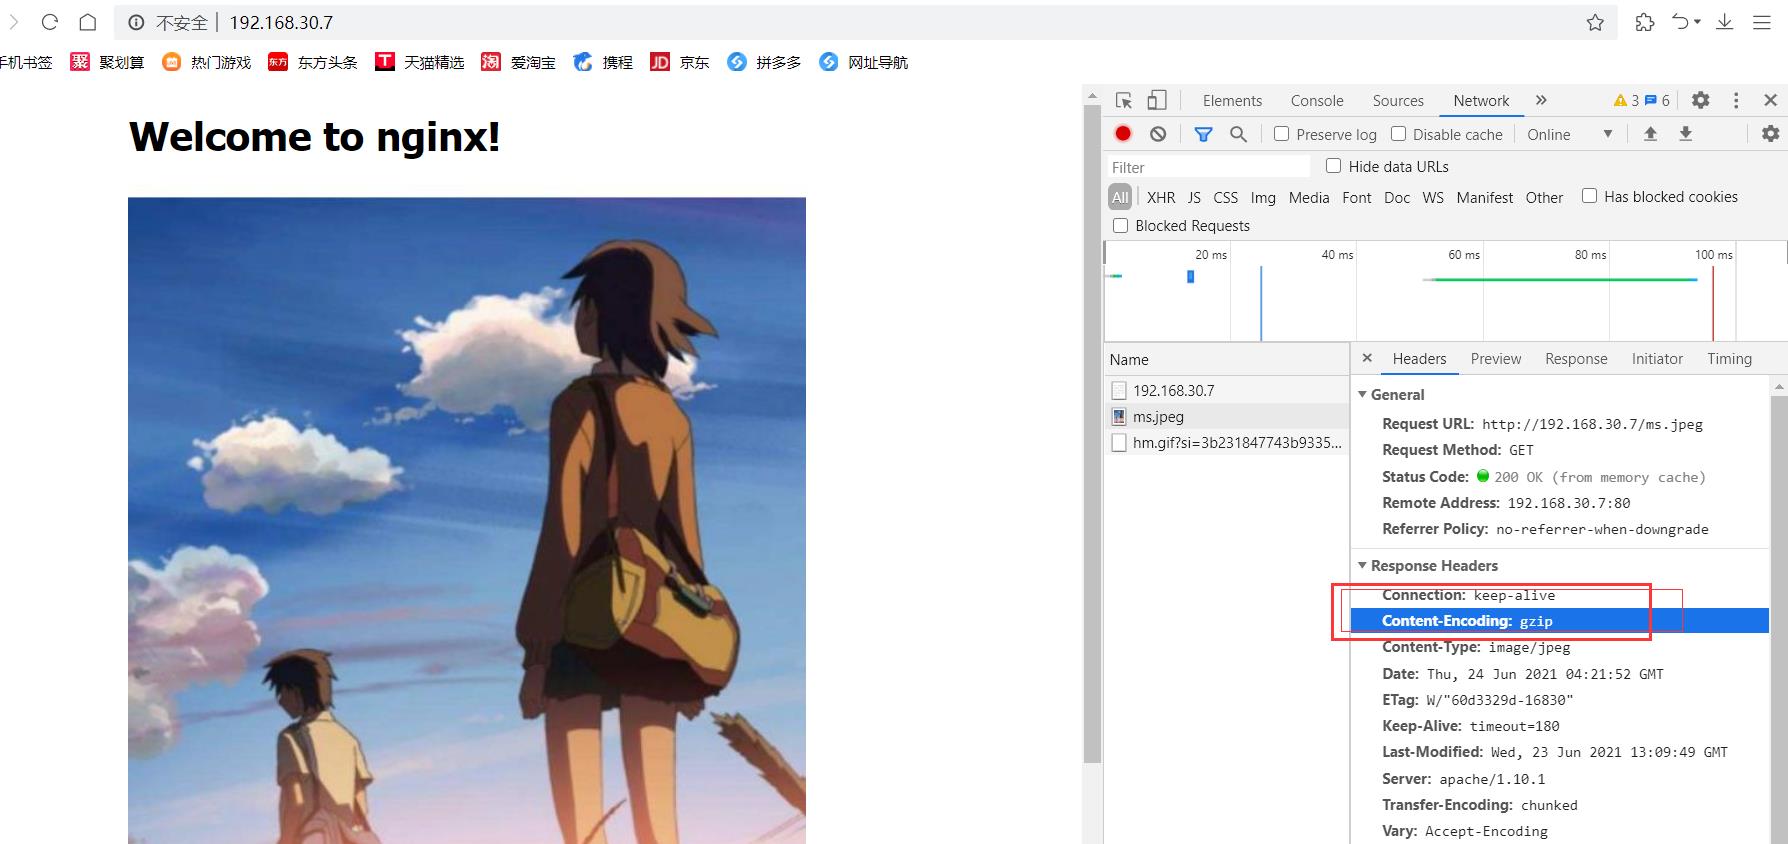
2.2 重启服务,查看效果
[root@localhost ~]# nginx -t  //检查配置文件
nginx: the configuration file /usr/local/nginx/conf/nginx.conf syntax is ok
nginx: configuration file /usr/local/nginx/conf/nginx.conf test is successful
[root@localhost ~]# systemctl stop nginx   //关闭服务
[root@localhost ~]# systemctl start nginx    //启动服务
3.配置防盗链
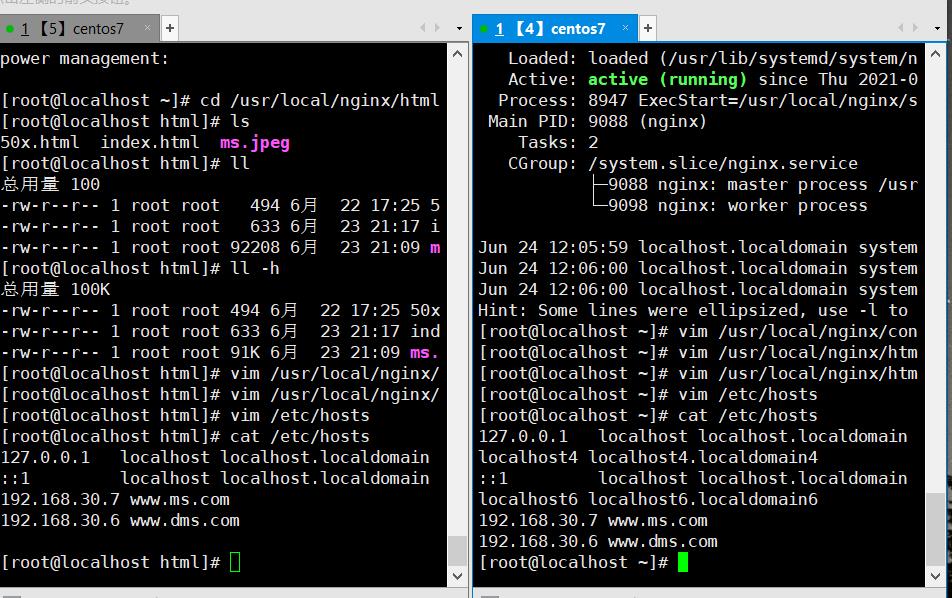
3.1 实现盗链功能
源主机:192.168.30.7
盗链端:192.168.30.6
测试端:win10  192.168.30.2

3.1.1 盗链端修改配置文件
查看原图路径


3.1.2 查看效果

3.2 防盗链
3.2.1 修改源主机配置文件
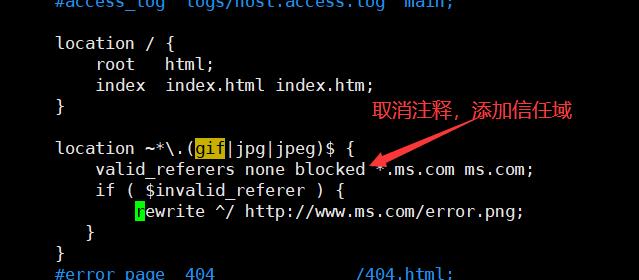
3.2.2 win10查看效果
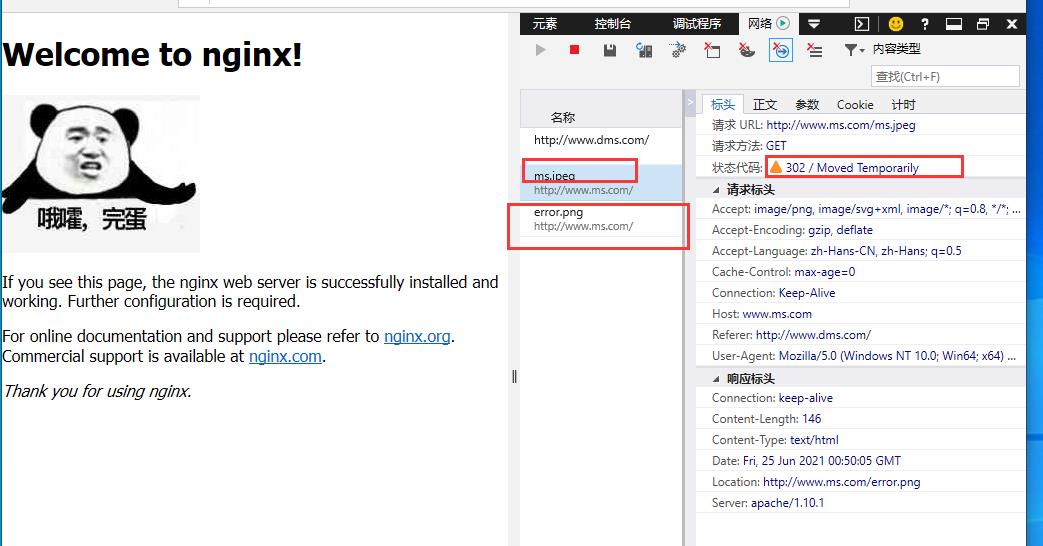
4.FPM参数优化
首先安装带FPM模块的php环境,保证PHP正常运行
FPM进程有两种启动方式,由pm参数指定,分别是static和dynamic
| pm.max_children | static模式下空闲进程数上限,大于下面的值 |
|---|---|
| pm.start_servers | 动态方式下默认开启的进程数,在最小和最大之间 |
| pm.min_spare_server | 动态方式下最少空闲进程数 |
| pm.max_spare_server | 动态方式下最大空闲进程数 |
源码安装的配置路径
/usr/local/php/etc/php-fpm.conf
总结
默认的Nginx安装参数只能提供最基本的服务,还需要调整相应的参数,才能发挥出服务器的最大作用
以上是关于Nginx优化的主要内容,如果未能解决你的问题,请参考以下文章