全网最新Spring Boot2.5.1整合Activiti5.22.0企业实战教程<基础篇>
Posted DT辰白
tags:
篇首语:本文由小常识网(cha138.com)小编为大家整理,主要介绍了全网最新Spring Boot2.5.1整合Activiti5.22.0企业实战教程<基础篇>相关的知识,希望对你有一定的参考价值。
文章目录
前言
创建Activiti工作流主要包含以下几步:
1、定义流程,按照BPMN的规范,使用流程定义工具,用流程符号把整个流程描述出来
2、部署流程,把画好的流程定义文件,加载到数据库中,生成表的数据
3、启动流程,使用java代码来操作数据库表中的内容
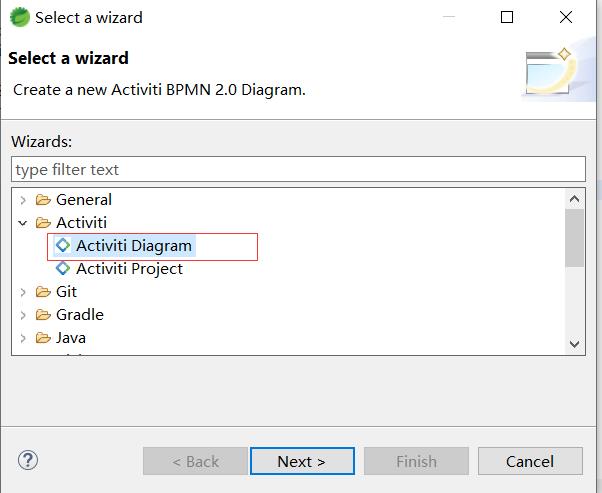
一、新建流程图
上一篇我们搭建了基础框架,这一篇我们就来实际操作:
首先Activiti的流程资源文件默认在resource目录的processes文件夹里面,这里我们就默认配置,一个资源的存放路径,不是重点。
1、新建processes文件夹

2、绘制流程图
因为我们使用的STS开发工具,并且安装了Activiti Designer插件,然后可以进行绘制流程图。
在processes文件夹上面鼠标右键,新建Activiti Designer流程设计器。
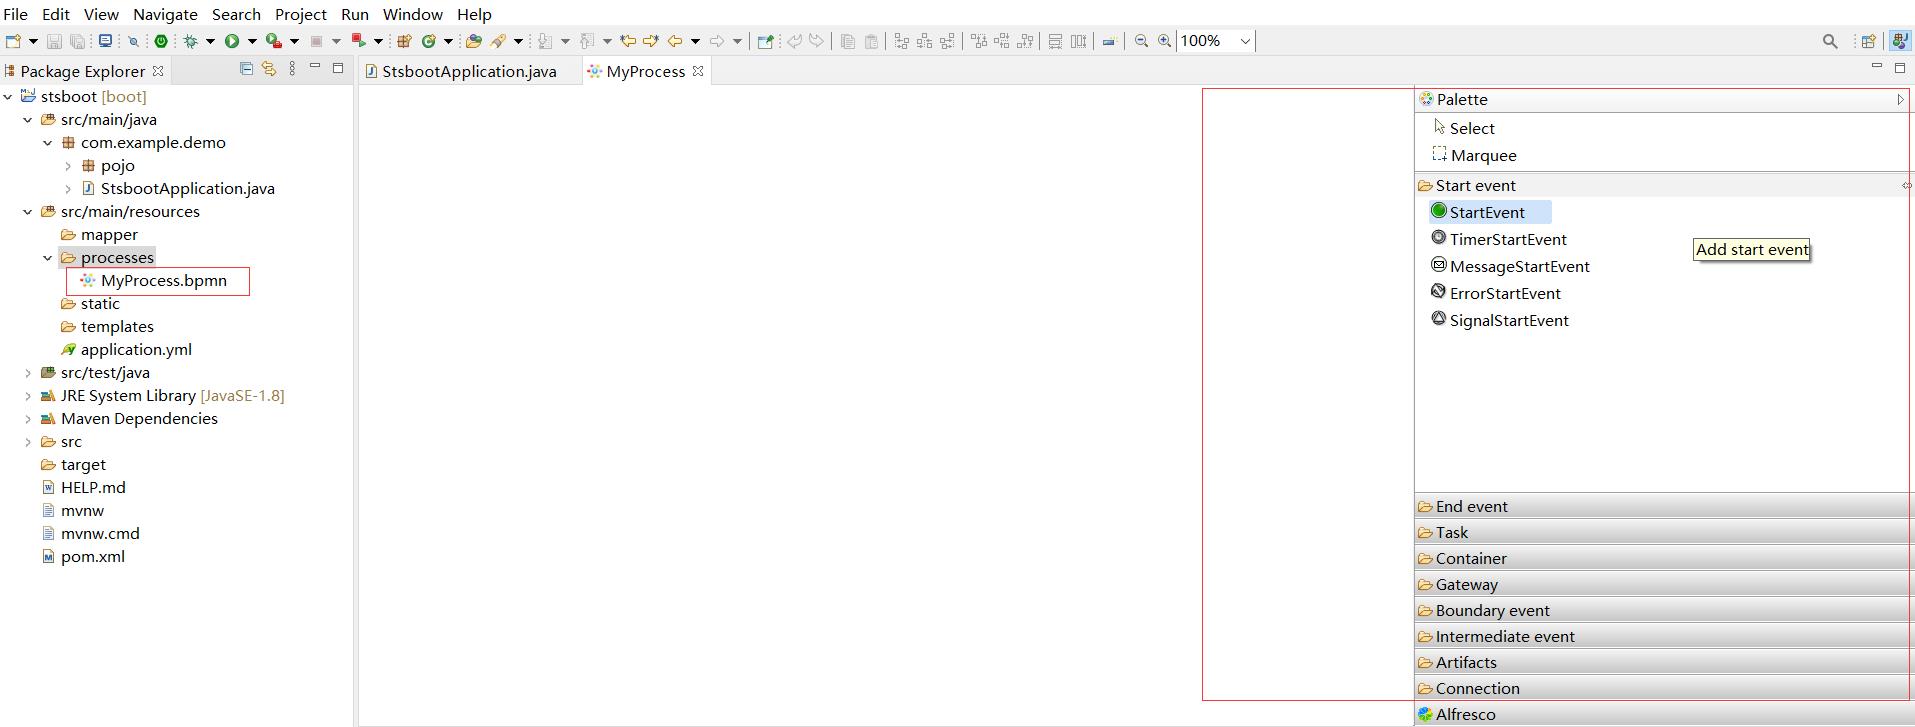
直接下一步,完成后会弹出这么画布,流程设计器,我们就可以绘制我们的流程图了。
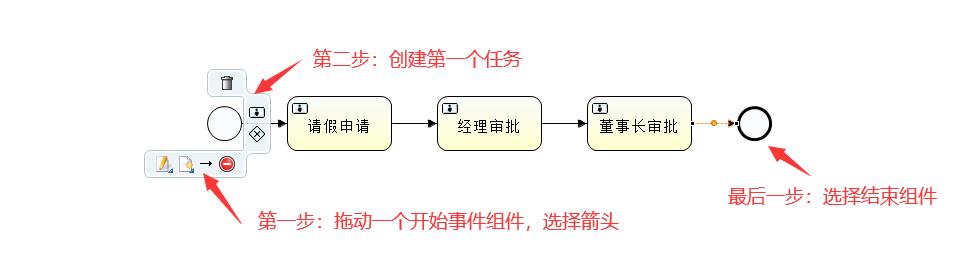
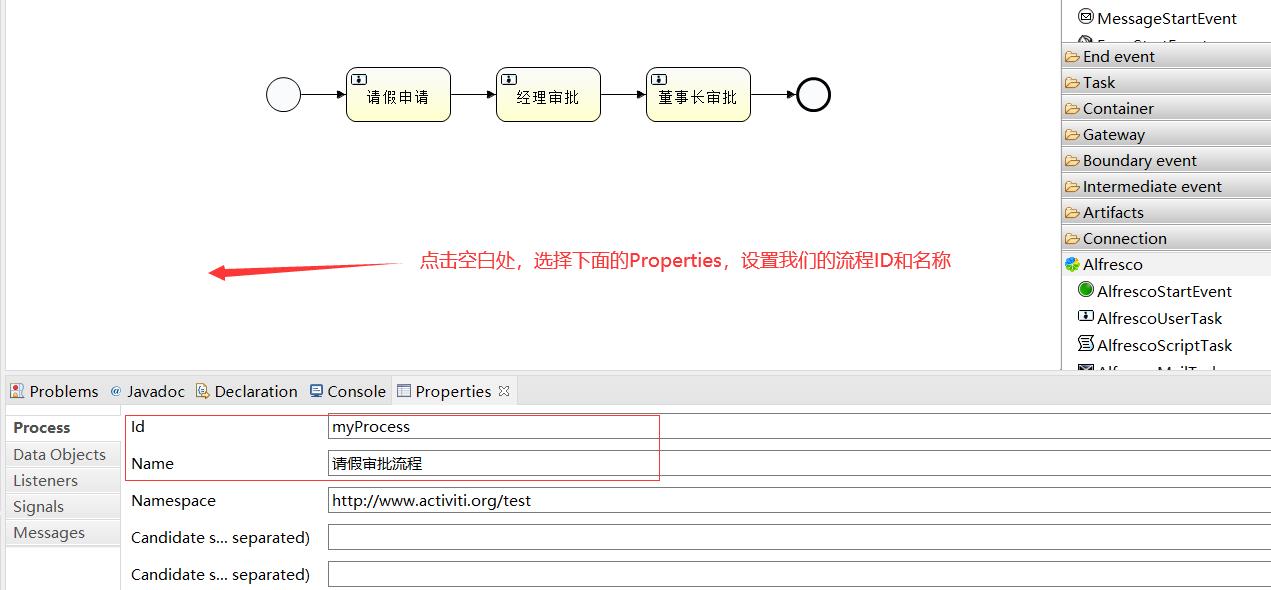
当我们画好了我们的流程图之后,我们需要给流程设置KEY(也就是ID),这里很重要:
设置好ID和名称之后,我们需要设置每个任务节点的负责人:
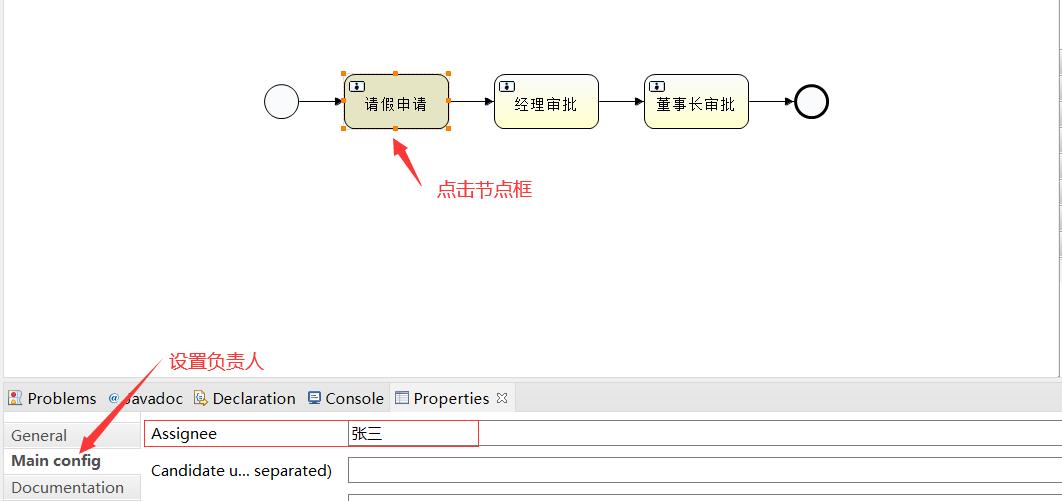
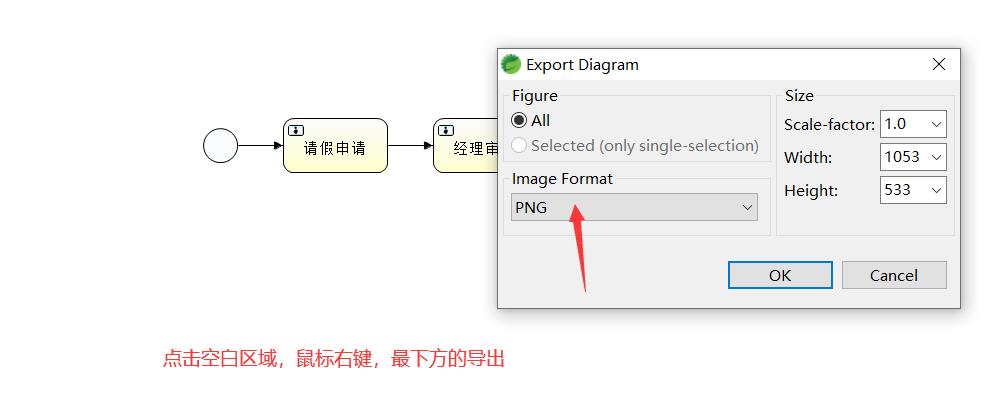
同样的其他两个节点也是如此,我们把经理审批设置为李四,董事长审批设置为王五。点击保存就可以了,我们生成了bpmn文件,下面我们再生成png文件,直接点击导出png文件,然后再复制到processes文件夹下面就可以了。

流程KEY(ID):myProcess
创建请假申请:张三
经理审批:李四
董事长审批:王五
3、完整的xml文件
<?xml version="1.0" encoding="UTF-8"?>
<definitions xmlns="http://www.omg.org/spec/BPMN/20100524/MODEL" xmlns:xsi="http://www.w3.org/2001/XMLSchema-instance" xmlns:xsd="http://www.w3.org/2001/XMLSchema" xmlns:activiti="http://activiti.org/bpmn" xmlns:bpmndi="http://www.omg.org/spec/BPMN/20100524/DI" xmlns:omgdc="http://www.omg.org/spec/DD/20100524/DC" xmlns:omgdi="http://www.omg.org/spec/DD/20100524/DI" typeLanguage="http://www.w3.org/2001/XMLSchema" expressionLanguage="http://www.w3.org/1999/XPath" targetNamespace="http://www.activiti.org/test">
  <process id="myProcess" name="请假审批流程" isExecutable="true">
    <startEvent id="startevent1" name="Start"></startEvent>
    <userTask id="usertask1" name="请假申请" activiti:assignee="张三"></userTask>
    <sequenceFlow id="flow1" sourceRef="startevent1" targetRef="usertask1"></sequenceFlow>
    <userTask id="usertask2" name="经理审批" activiti:assignee="李四"></userTask>
    <sequenceFlow id="flow2" sourceRef="usertask1" targetRef="usertask2"></sequenceFlow>
    <userTask id="usertask3" name="董事长审批" activiti:assignee="王五"></userTask>
    <sequenceFlow id="flow3" sourceRef="usertask2" targetRef="usertask3"></sequenceFlow>
    <endEvent id="endevent1" name="End"></endEvent>
    <sequenceFlow id="flow4" sourceRef="usertask3" targetRef="endevent1"></sequenceFlow>
  </process>
  <bpmndi:BPMNDiagram id="BPMNDiagram_myProcess">
    <bpmndi:BPMNPlane bpmnElement="myProcess" id="BPMNPlane_myProcess">
      <bpmndi:BPMNShape bpmnElement="startevent1" id="BPMNShape_startevent1">
        <omgdc:Bounds height="35.0" width="35.0" x="260.0" y="240.0"></omgdc:Bounds>
      </bpmndi:BPMNShape>
      <bpmndi:BPMNShape bpmnElement="usertask1" id="BPMNShape_usertask1">
        <omgdc:Bounds height="55.0" width="105.0" x="340.0" y="230.0"></omgdc:Bounds>
      </bpmndi:BPMNShape>
      <bpmndi:BPMNShape bpmnElement="usertask2" id="BPMNShape_usertask2">
        <omgdc:Bounds height="55.0" width="105.0" x="490.0" y="230.0"></omgdc:Bounds>
      </bpmndi:BPMNShape>
      <bpmndi:BPMNShape bpmnElement="usertask3" id="BPMNShape_usertask3">
        <omgdc:Bounds height="55.0" width="105.0" x="640.0" y="230.0"></omgdc:Bounds>
      </bpmndi:BPMNShape>
      <bpmndi:BPMNShape bpmnElement="endevent1" id="BPMNShape_endevent1">
        <omgdc:Bounds height="35.0" width="35.0" x="790.0" y="240.0"></omgdc:Bounds>
      </bpmndi:BPMNShape>
      <bpmndi:BPMNEdge bpmnElement="flow1" id="BPMNEdge_flow1">
        <omgdi:waypoint x="295.0" y="257.0"></omgdi:waypoint>
        <omgdi:waypoint x="340.0" y="257.0"></omgdi:waypoint>
      </bpmndi:BPMNEdge>
      <bpmndi:BPMNEdge bpmnElement="flow2" id="BPMNEdge_flow2">
        <omgdi:waypoint x="445.0" y="257.0"></omgdi:waypoint>
        <omgdi:waypoint x="490.0" y="257.0"></omgdi:waypoint>
      </bpmndi:BPMNEdge>
      <bpmndi:BPMNEdge bpmnElement="flow3" id="BPMNEdge_flow3">
        <omgdi:waypoint x="595.0" y="257.0"></omgdi:waypoint>
        <omgdi:waypoint x="640.0" y="257.0"></omgdi:waypoint>
      </bpmndi:BPMNEdge>
      <bpmndi:BPMNEdge bpmnElement="flow4" id="BPMNEdge_flow4">
        <omgdi:waypoint x="745.0" y="257.0"></omgdi:waypoint>
        <omgdi:waypoint x="790.0" y="257.0"></omgdi:waypoint>
      </bpmndi:BPMNEdge>
    </bpmndi:BPMNPlane>
  </bpmndi:BPMNDiagram>
</definitions>
二 Service总览
| service名称 | service作用 |
|---|---|
| RepositoryService | activiti的资源管理类 |
| RuntimeService | activiti的流程运行管理类 |
| TaskService | activiti的任务管理类 |
| HistoryService | activiti的历史管理类 |
| ManagerService | activiti的引擎管理类 |
简单介绍:
RepositoryService
是activiti的资源管理类,提供了管理和控制流程发布包和流程定义的操作。使用工作流建模工具设计的业务流程图需要使用此service将流程定义文件的内容部署到计算机。
RuntimeService
Activiti的流程运行管理类。可以从这个服务类中获取很多关于流程执行相关的信息
TaskService
Activiti的任务管理类。可以从这个类中获取任务的信息。
HistoryService
Activiti的历史管理类,可以查询历史信息,执行流程时,引擎会保存很多数据(根据配置),比如流程实例启动时间,任务的参与者, 完成任务的时间,每个流程实例的执行路径,等等。 这个服务主要通过查询功能来获得这些数据。
ManagementService
Activiti的引擎管理类,提供了对 Activiti 流程引擎的管理和维护功能,这些功能不在工作流驱动的应用程序中使用,主要用于 Activiti 系统的日常维护。
三、部署流程
@Autowired
private RepositoryService repositoryService;
@Autowired
private RuntimeService runtimeService;
@Autowired
private TaskService taskService;
/**
* 部署流程(将bpmn和png文件部署到数据库中)
* @return
*/
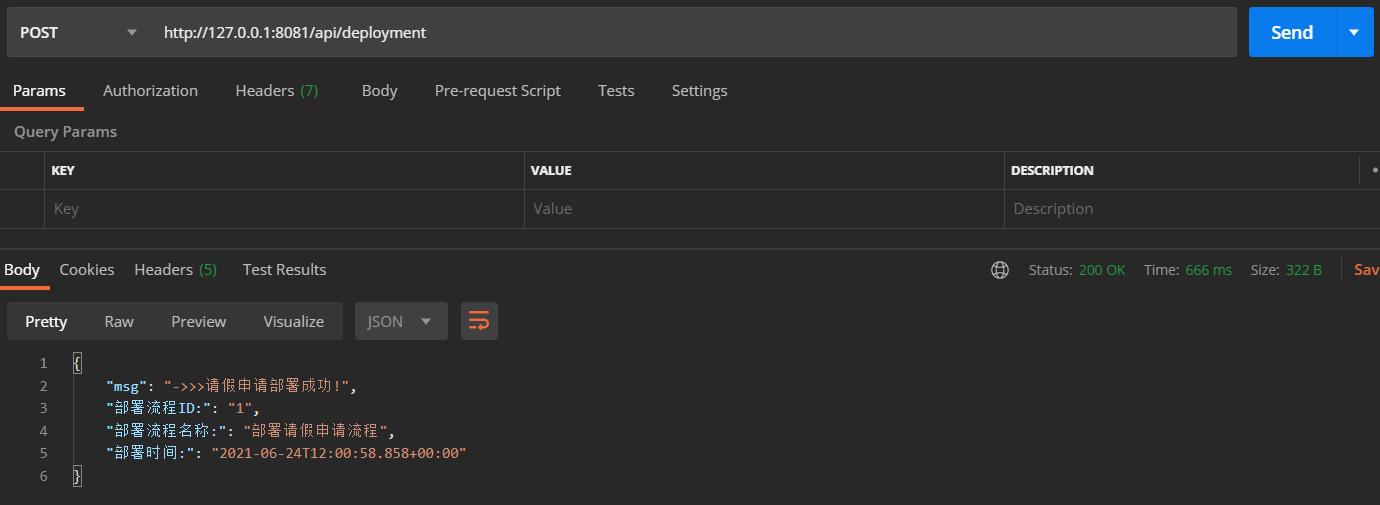
@GetMapping("deployment")
public Map<String, Object> deployment() {
Deployment deployment = repositoryService.createDeployment()
.name("部署请假申请流程")
.addClasspathResource("processes/MyProcess.bpmn")
.addClasspathResource("processes/MyProcess.png")
.deploy();
Map<String, Object> map = new HashMap<>();
map.put("msg", "->>>请假申请部署成功!");
map.put("部署流程ID:", deployment.getId());
map.put("部署流程名称:", deployment.getName());
map.put("部署时间:", deployment.getDeploymentTime());
return map;
}
1、涉及表
| 表分类 | 表名 | 解释 |
|---|---|---|
| 一般数据 | ||
| [act_ge_bytearray] | 通用的流程定义和流程资源 | |
| [act_ge_property] | 系统相关属性 | |
| 流程定义表 | ||
| [act_re_deployment] | 部署单元信息 | |
| [act_re_procdef] | 已部署的流程定义 |
2、部署分析
act_re_deployment: 流程部署表,每部署一次会增加一条记录。
act_re_deployment表与act_re_procdef是一对多的关系,在act_re_procdef表中科院有多条信息,比如张三的请假申请,或者李四的请假申请,每条记录对应一个流程的定义信息。
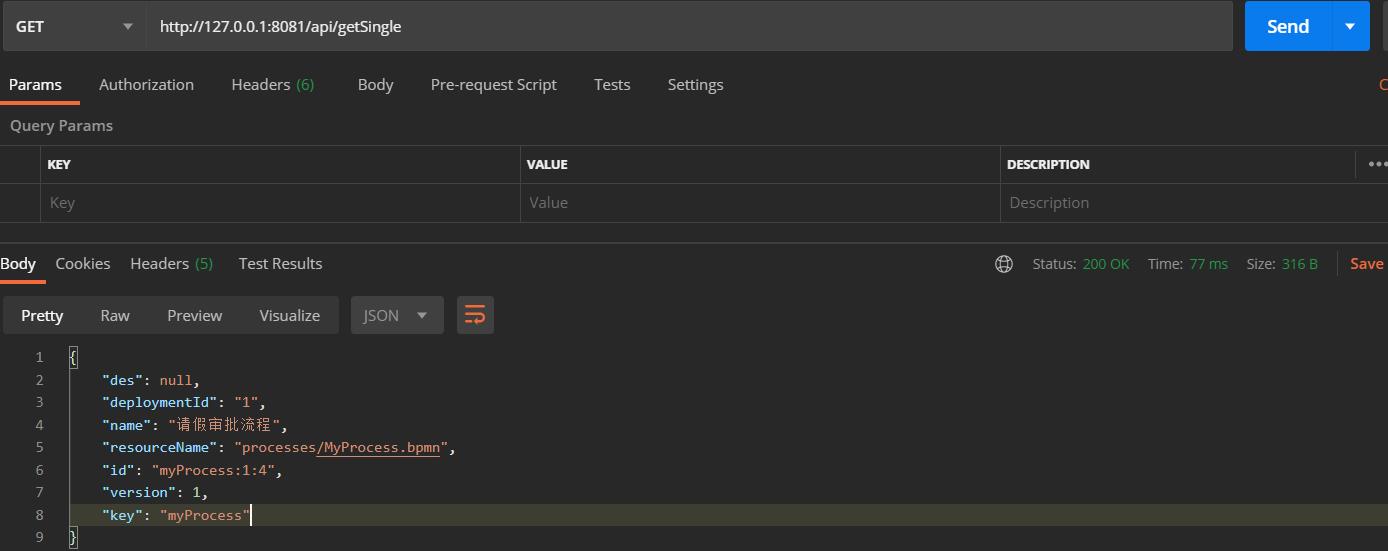
四、查询流程定义
核心:根据部署流程ID查询act_re_procdef表信息
@GetMapping("getSingle")
public Map<String, Object> getSingle() {
	//获取流程定义
	String deploymentId = "1";
	ProcessDefinition processDefinition = repositoryService.createProcessDefinitionQuery().deploymentId(deploymentId).singleResult();
	Map<String, Object> map = new HashMap<>();
	map.put("id", processDefinition.getId());
	map.put("name", processDefinition.getName());
	map.put("key", processDefinition.getKey());
	map.put("des", processDefinition.getDescription());
	map.put("version", processDefinition.getVersion());
	map.put("deploymentId", processDefinition.getDeploymentId());
	map.put("resourceName", processDefinition.getResourceName());
	return map;
}
五、启动流程实例
//1、根据流程实例ID,启动流程定义,返回流程实例
ProcessInstance pi = runtimeService.startProcessInstanceById(processDefinition.getId());
//2、根据流程实例Key来启动
runtimeService.startProcessInstanceByKey(processDefinition.getKey());

启动流程实例,科院根据流程定义的ID或者KEY.
/**
* 启动流程实例
* @return
*/
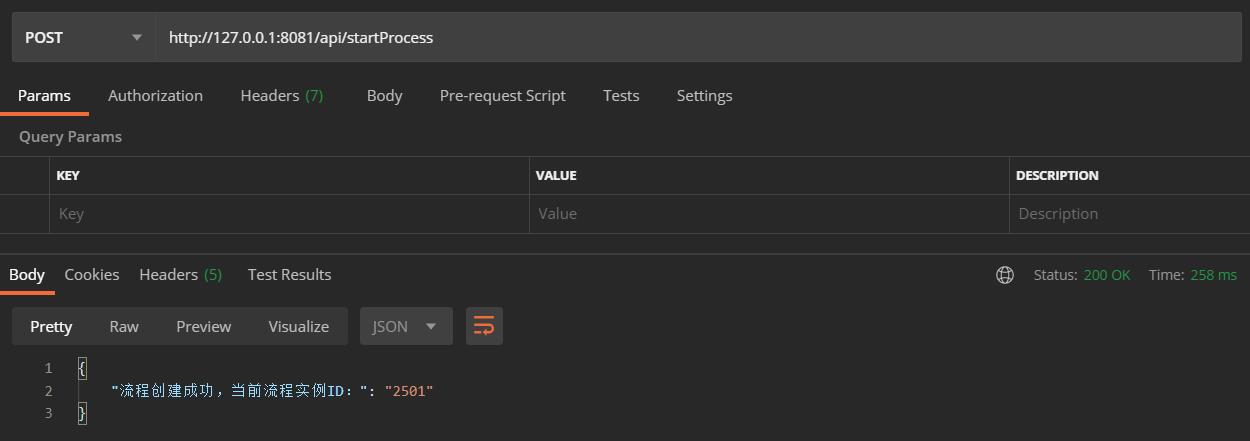
@PostMapping("startProcess")
public Map<String, Object> startProcess() {
//获取流程实例ID
String deploymentId = "1";
ProcessDefinition processDefinition = repositoryService.createProcessDefinitionQuery().deploymentId(deploymentId).singleResult();
String processId = processDefinition.getId();
//1、根据流程实例ID,启动流程定义,返回流程实例
ProcessInstance pi = runtimeService.startProcessInstanceById(processId);
Map<String, Object> map = new HashMap<>();
map.put("流程创建成功,当前流程实例ID:", pi.getId());
return map;
}
1、涉及表
| 表分类 | 表名 | 解释 |
|---|---|---|
| 一般数据 | ||
| [act_ge_property] | 系统相关属性 | |
| 流程历史记录 | ||
| [act_hi_actinst] | 历史的流程实例 | |
| [act_hi_identitylink] | 历史的流程运行过程中用户关系 | |
| [act_hi_procinst] | 历史的流程实例 | |
| [act_hi_taskinst] | 历史的任务实例 | |
| 运行实例表 | ||
| [act_ru_execution] | 运行时流程执行实例 | |
| [act_ru_identitylink] | 运行时用户关系信息,存储任务节点与参与者的相关信息 | |
| [act_ru_task] | 运行时任务 |
2、启动流程分析
针对该流程,启动一个流程表示发起一个新的请假申请单,这就相当于java类与java对象的关系,类定义好后需要new创建一个对象使用,当然可以new多个对象,对于请请假申请流程,张三发起一个请假申请单需要启动一个流程实例,请假申请单发起一个请假单也需要启动一个流程实例。
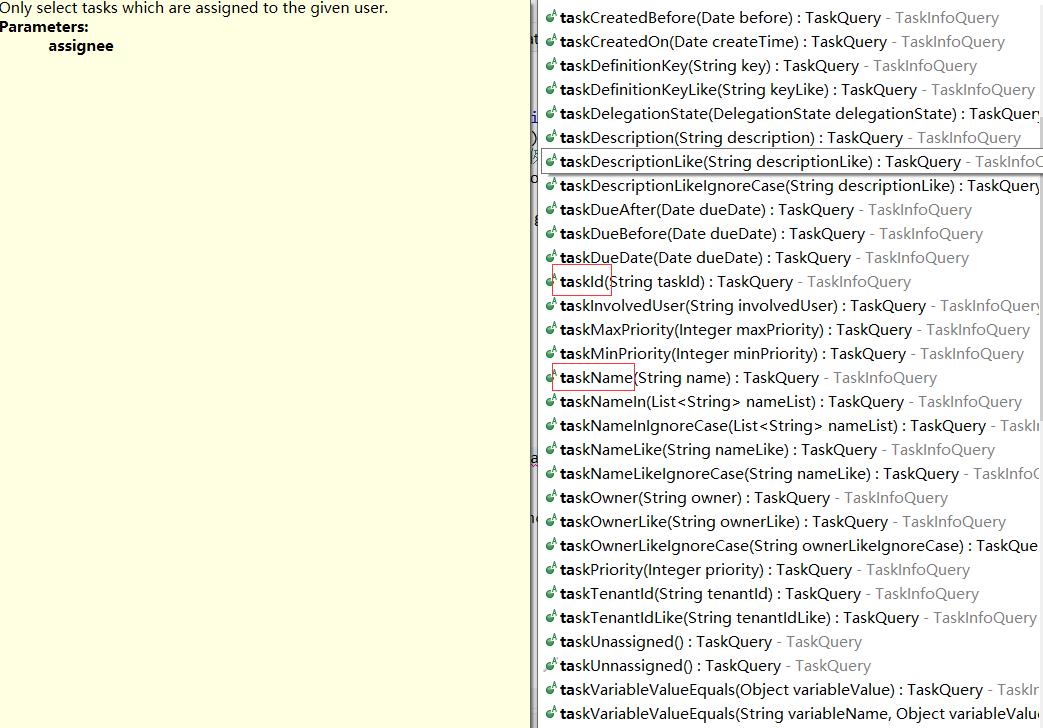
六、任务查询
这里taskService提供了很多的查询方法:
/**
 * 查询我的待办任务
 * @param name
 * @return
 */
@GetMapping("myTask")
public Map<String, Object> myTask(String id) {
	//1、根据任务ID查询
	Task task = taskService.createTaskQuery().taskId(id).singleResult();

    Map<String, Object> map = new HashMap<>();
	map.put("流程实例ID:", task.getProcessInstanceId());
	map.put("任务ID:", task.getId());
	map.put("任务负责人:", task.getAssignee());
	map.put("任务名称:", task.getName());
	return map;
}
/**
 * 查以上是关于全网最新Spring Boot2.5.1整合Activiti5.22.0企业实战教程<基础篇>的主要内容,如果未能解决你的问题,请参考以下文章