lnmp部署
Posted 码出未来_远
tags:
篇首语:本文由小常识网(cha138.com)小编为大家整理,主要介绍了lnmp部署相关的知识,希望对你有一定的参考价值。
lnmp
文章目录
nginx
创建系统用户nginx
[root@localhost src]# useradd -r -M -s /sbin/nologin nginx
安装依赖包
[root@localhost ~]# cd /usr/local/src/
[root@localhost src]# yum install gd-devel  automake pcre pcre-devel zlip zlib-devel openssl openssl-devel libxml2-devel libpng-devel curl-devel numactlwget
[root@localhost src]# yum -y groups mark install 'Development Tools'
创建日志存放目录
[root@localhost src]# mkdir -p /var/log/nginx
[root@localhost src]# chown -R nginx.nginx /var/log/nginx
下载nginx
[root@localhost src]# wget -c http://nginx.org/download/nginx-1.20.1.tar.gz
[root@localhost src]# ls
nginx-1.20.1.tar.gz
编译安装
[root@localhost src]# tar xf nginx-1.20.1.tar.gz
[root@localhost src]# cd nginx-1.20.1
[root@localhost nginx-1.20.1]# ./configure \\
--prefix=/usr/local/nginx \\
--user=nginx \\
--group=nginx \\
--with-debug \\
--with-http_ssl_module \\
--with-http_realip_module \\
--with-http_image_filter_module \\
--with-http_gunzip_module \\
--with-http_gzip_static_module \\
--with-http_stub_status_module \\
--http-log-path=/var/log/nginx/access.log \\
--error-log-path=/var/log/nginx/error.log
[root@localhost nginx-1.12.0]# make -j $(grep 'processor' /proc/cpuinfo | wc -l) && make install
配置环境变量并启动
[root@localhost nginx-1.20.1]# echo 'export PATH=/usr/local/nginx/sbin:$PATH' > /etc/profile.d/nginx.sh
[root@localhost nginx-1.20.1]# . /etc/profile.d/nginx.sh
[root@localhost nginx-1.20.1]# nginx
[root@localhost nginx-1.20.1]# ss -antl
State      Recv-Q     Send-Q           Local Address:Port           Peer Address:Port     Process
LISTEN     0          128                    0.0.0.0:80                  0.0.0.0:*
LISTEN     0          128                    0.0.0.0:22                  0.0.0.0:*
LISTEN     0          128                       [::]:22                     [::]:*
关闭防火墙
[root@localhost nginx-1.20.1]# systemctl disable --now firewalld
[root@localhost nginx-1.20.1]# setenforce 0

mysql
导入源码包
[root@localhost src]# ls
mysql-5.7.33-linux-glibc2.12-x86_64.tar.gz  nginx-1.20.1  nginx-1.20.1.tar.gz
添加用户
[root@localhost src]# useradd -r -M -s /sbin/nologin mysql
解压
[root@localhost src]# tar xf mysql-5.7.33-linux-glibc2.12-x86_64.tar.gz -C /usr/local/
ls /usr/local/
bin  games    lib    libexec                              nginx  share
etc  include  lib64  mysql-5.7.33-linux-glibc2.12-x86_64  sbin   src
创建软连接
[root@localhost src]# ln -s /usr/local/mysql-5.7.33-linux-glibc2.12-x86_64/ /usr/local/mysql
[root@localhost src]# ll /usr/local/
total 0
drwxr-xr-x.  2 root root   6 May 19  2020 bin
drwxr-xr-x.  2 root root   6 May 19  2020 etc
drwxr-xr-x.  2 root root   6 May 19  2020 games
drwxr-xr-x.  2 root root   6 May 19  2020 include
drwxr-xr-x.  2 root root   6 May 19  2020 lib
drwxr-xr-x.  3 root root  17 Mar 24 09:08 lib64
drwxr-xr-x.  2 root root   6 May 19  2020 libexec
lrwxrwxrwx.  1 root root  47 Jun 24 21:15 mysql -> /usr/local/mysql-5.7.33-linux-glibc2.12-x86_64/
drwxr-xr-x.  9 root root 129 Jun 24 21:14 mysql-5.7.33-linux-glibc2.12-x86_64
drwxr-xr-x. 11 root root 151 Jun 24 21:04 nginx
drwxr-xr-x.  2 root root   6 May 19  2020 sbin
drwxr-xr-x.  5 root root  49 Mar 24 09:08 share
drwxr-xr-x.  3 root root 103 Jun 24 21:08 src
修改用户属主和属组
[root@localhost src]# chown -R mysql.mysql /usr/local/mysql*
[root@localhost src]# ll /usr/local/
total 0
drwxr-xr-x.  2 root  root    6 May 19  2020 bin
drwxr-xr-x.  2 root  root    6 May 19  2020 etc
drwxr-xr-x.  2 root  root    6 May 19  2020 games
drwxr-xr-x.  2 root  root    6 May 19  2020 include
drwxr-xr-x.  2 root  root    6 May 19  2020 lib
drwxr-xr-x.  3 root  root   17 Mar 24 09:08 lib64
drwxr-xr-x.  2 root  root    6 May 19  2020 libexec
lrwxrwxrwx.  1 mysql mysql  47 Jun 24 21:15 mysql -> /usr/local/mysql-5.7.33-linux-glibc2.12-x86_64/
drwxr-xr-x.  9 mysql mysql 129 Jun 24 21:14 mysql-5.7.33-linux-glibc2.12-x86_64
drwxr-xr-x. 11 root  root  151 Jun 24 21:04 nginx
drwxr-xr-x.  2 root  root    6 May 19  2020 sbin
drwxr-xr-x.  5 root  root   49 Mar 24 09:08 share
drwxr-xr-x.  3 root  root  103 Jun 24 21:08 src
添加环境变量
[root@localhost src]# echo 'export PATH=/usr/local/mysql/bin:$PATH' > /etc/profile.d/mysql.sh
[root@localhost src]# source /etc/profile.d/mysql.sh
[root@localhost src]# which mysql
/usr/local/mysql/bin/mysql
创建存放数据的目录并修改属主属组
[root@localhost src]# mkdir /opt/data
[root@localhost src]# chown -R mysql.mysql /opt/data/
[root@localhost src]# ll /opt/
total 0
drwxr-xr-x. 2 mysql mysql 6 Jun 24 21:17 data
初始化数据库
[root@localhost src]# mysqld --initialize --user=mysql --datadir=/opt/data/
bkAPIOgvi7>j
写配置文件
[root@localhost src]# vi /etc/my.cnf
[root@localhost src]# cat /etc/my.cnf
[mysqld]
basedir = /usr/local/mysql
datadir = /opt/data
socket = /tmp/mysql.sock
port = 3306
pid-file = /opt/data/mysql.pid
user = mysql
skip-name-resolve
配置服务启动脚本
[root@localhost src]# cp -a /usr/local/mysql/support-files/mysql.server  /etc/init.d/mysqld
[root@localhost src]# ll /etc/init.d/
total 36
-rw-r--r--. 1 root  root  18434 Feb 15 23:09 functions
-rwxr-xr-x. 1 mysql mysql 10576 Dec 10  2020 mysqld
-rw-r--r--. 1 root  root   1161 Feb  1 17:04 README
[root@localhost src]# vi /etc/init.d/mysqld
basedir=/usr/local/mysql
datadir=/opt/data
启动MySQL
[root@localhost src]# service mysqld start
Starting MySQL.Logging to '/opt/data/localhost.localdomain.err'.
 SUCCESS!
[root@localhost src]# ss -antl
State      Recv-Q     Send-Q           Local Address:Port           Peer Address:Port     Process
LISTEN     0          128                    0.0.0.0:80                  0.0.0.0:*
LISTEN     0          128                    0.0.0.0:22                  0.0.0.0:*
LISTEN     0          80                           *:3306                      *:*
LISTEN     0          128                       [::]:22                     [::]:*
设置开机启动
[root@localhost src]# chkconfig mysqld on
[root@localhost src]# chkconfig --list

Note: This output shows SysV services only and does not include native
      systemd services. SysV configuration data might be overridden by native
      systemd configuration.

      If you want to list systemd services use 'systemctl list-unit-files'.
      To see services enabled on particular target use
      'systemctl list-dependencies [target]'.

mysqld         	0:off	1:off	2:on	3:on	4:on	5:on	6:off
修改密码
[root@localhost src]# mysql -uroot -p'bkAPIOgvi7>j'
set password = password('填入你要修改的密码');
头文件和库文件配置
[root@localhost src]# ln -s /usr/local/mysql/include /usr/include/mysql
[root@localhost src]# vi /etc/ld.so.conf.d/mysql.conf
[root@localhost src]# cat /etc/ld.so.conf.d/mysql.conf
/usr/local/mysql/lib
[root@localhost src]# ldconfig
php
[root@localhost src]# yum -y install php
[root@localhost src]# php -v
PHP 7.2.24 (cli) (built: Oct 22 2019 08:28:36) ( NTS )
Copyright (c) 1997-2018 The PHP Group
Zend Engine v3.2.0, Copyright (c) 1998-2018 Zend Technologies
运行以下命令添加并更新epel源。
dnf -y install epel-release
dnf update epel-release
运行以下命令删除缓存的无用软件包并更新软件源。
dnf clean all
dnf makecache
启用php7.2模块
dnf module enable php:7.2
运行以下命令安装PHP相应的模块
dnf install php php-curl php-dom php-exif php-fileinfo php-fpm php-gd php-hash php-json php-mbstring php-mysqli php-openssl php-pcre php-xml libsodium
[root@localhost src]# php -v
PHP 7.2.24 (cli) (built: Oct 22 2019 08:28:36) ( NTS )
Copyright (c) 1997-2018 The PHP Group
Zend Engine v3.2.0, Copyright (c) 1998-2018 Zend Technologies
配置nginx
location / {
    #将该路径替换为您的网站根目录。
    root    /usr/local/nginx/html;
    #添加默认首页信息index.php。
    index  index.html index.htm index.php;
}
location ~ \\.php$ {
    #将该路径替换为您的网站根目录。
    root           /usr/local/nginx/html;
    #Nginx通过unix套接字与PHP-FPM建立联系,该配置与/etc/php-fpm.d/www.conf文件内的listen配置一致。
    fastcgi_pass   unix:/run/php-fpm/www.sock;
    fastcgi_index  index.php;
    #将/scripts$fastcgi_script_name修改为$document_root$fastcgi_script_name。
    fastcgi_param  SCRIPT_FILENAME  $document_root$fastcgi_script_name;
    #Nginx调用fastcgi接口处理PHP请求。
    include        fastcgi_params;
}
配置PHP
[root@localhost ~]# vim /etc/php-fpm.d/www.conf
#找到user = apache和group = apache,将apache修改为nginx
user = nginx
; RPM: Keep a group allowed to write in log dir.
group = nginx
#新建phpinfo.php文件,用于展示PHP信息
[root@localhost ~]# vim /usr/local/nginx/html/phpinfo.php
#输入下列内容,函数phpinfo()会展示PHP的所有配置信息。
<?php echo phpinfo(); ?>
#运行以下命令启动PHP-FPM
[root@localhost ~]# systemctl start php-fpm
#运行以下命令设置PHP-FPM开机自启动
[root@localhost ~]# systemctl enable php-fpm
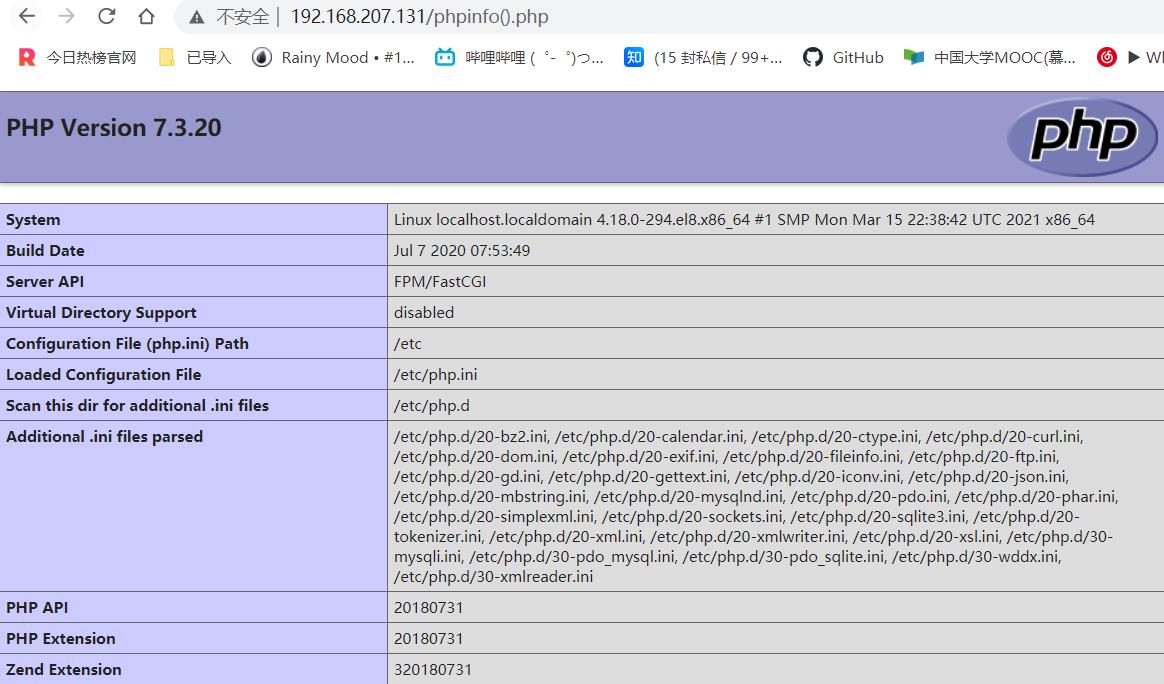
测试访问LNMP平台

以上是关于lnmp部署的主要内容,如果未能解决你的问题,请参考以下文章