Elasticseach之Linux单节点部署
Posted 爱上口袋的天空
tags:
篇首语:本文由小常识网(cha138.com)小编为大家整理,主要介绍了Elasticseach之Linux单节点部署相关的知识,希望对你有一定的参考价值。
1、将es的安装包上传到Linux服务器
2、解压软件
2.1、解压命令
tar -zxvf elasticsearch-7.8.0-linux-x86_64.tar.gz
3、创建用户
因为安全问题, Elasticsearch 不允许 root 用户直接运行,所以要创建新用户,在 root 用户中创建新用户。
useradd es #新增 es 用户
passwd es #为 es 用户设置密码
userdel -r es #如果错了,可以删除再加
chown -R es:es /opt/elasticsearch-7.8.0 #文件夹所有者
4、修改配置文件
修改/opt/elasticsearch-7.8.0/config/elasticsearch.yml文件。
# 加入如下配置
cluster.name: elasticsearch
node.name: node-1
network.host: 0.0.0.0
http.port: 9200
cluster.initial_master_nodes: ["node-1"]
修改/etc/security/limits.conf
# 在文件末尾中增加下面内容
# 每个进程可以打开的文件数的限制
es soft nofile 65536
es hard nofile 65536
修改/etc/security/limits.d/20-nproc.conf
# 在文件末尾中增加下面内容
# 每个进程可以打开的文件数的限制
es soft nofile 65536
es hard nofile 65536
# 操作系统级别对每个用户创建的进程数的限制
* hard nproc 4096
# 注: * 带表 Linux 所有用户名称
修改/etc/sysctl.conf
# 在文件中增加下面内容
# 一个进程可以拥有的 VMA(虚拟内存区域)的数量,默认值为 65536
vm.max_map_count=655360
重新加载
sysctl -p
5、启动软件
使用 ES 用户启动
cd /opt/elasticsearch-7.8.0/
#启动
bin/elasticsearch
#后台启动
bin/elasticsearch -d
6、关闭防火墙
#暂时关闭防火墙
systemctl stop firewalld
#永久关闭防火墙
systemctl enable firewalld.service #打开防火墙永久性生效,重启后不会复原
systemctl disable firewalld.service #关闭防火墙,永久性生效,重启后不会复原
7、测试软件
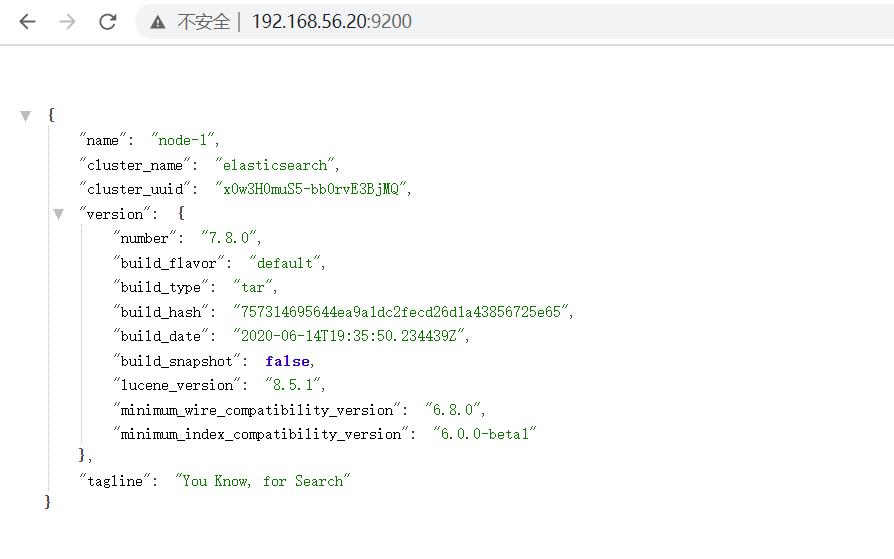
浏览器中输入地址: http://192.168.56.20:9200/
以上是关于Elasticseach之Linux单节点部署的主要内容,如果未能解决你的问题,请参考以下文章


