源码编译安装LNMP架构!
Posted 龙少。
tags:
篇首语:本文由小常识网(cha138.com)小编为大家整理,主要介绍了源码编译安装LNMP架构!相关的知识,希望对你有一定的参考价值。
一.什么是LNMP架构?
LNMP平台就是linux,nginx,mysql,php的组合架构。
其中L代表linux服务器,N代表nginix服务,M代表mysql数据库,P代表PHP解析环境。
此架构在单台服务器上部署。
二.源码安装Nginx
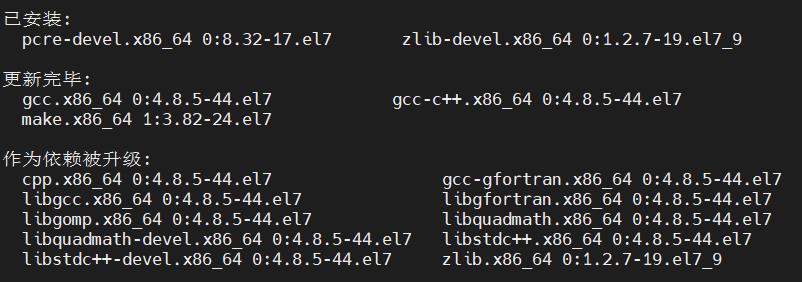
1.准备安装环境,安装环境依赖包
[root@localhost ~]# yum -y install gcc gcc-c++ pcre-devel zlib-devel make
2.创建运行用户,组
[root@localhost ~]# useradd -M -s /sbin/nologin nginx
3.编译安装
上传安装软件包并解压安装,编译
[root@localhost ~]# cd /opt
[root@localhost opt]# ls
rh
[root@localhost opt]# ls
nginx-1.15.9.tar.gz  rh                                #上传软件安装包并查看是否上传成功

[root@localhost opt]# tar xzvf nginx-1.15.9.tar.gz     #解压安装包


[root@localhost opt]# ls
nginx-1.15.9  nginx-1.15.9.tar.gz  rh
[root@localhost opt]# cd nginx-1.15.9/
[root@localhost nginx-1.15.9]# ./configure --prefix=/usr/local/nginx --user=nginx --group=nginx --with-http_stub_status_module

[root@localhost nginx-1.15.9]# make && make install
4.路径优化,创建软链接
[root@localhost nginx-1.15.9]# ln -s /usr/local/nginx/sbin/nginx /usr/local/sbin
[root@localhost nginx-1.15.9]# ll /usr/local/sbin/nginx
lrwxrwxrwx. 1 root root 27 6月  23 19:32 /usr/local/sbin/nginx -> /usr/local/nginx/sbin/nginx
5.检查配置文件
[root@localhost nginx-1.15.9]# nginx -t
nginx: the configuration file /usr/local/nginx/conf/nginx.conf syntax is ok
nginx: configuration file /usr/local/nginx/conf/nginx.conf test is successful
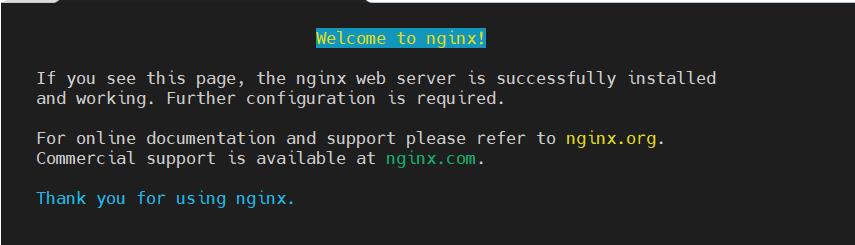
6.启动服务,查看服务状态
通过检查Nginx程序的监听状态,或者在浏览器中访问此 web 服务(默认页面将显示"welcom to nginx!" ),可以确认 Nginx服务是否正常运行。
[root@localhost opt]# nginx

[root@localhost opt]# netstat -antp | grep nginx
tcp        0      0 0.0.0.0:80              0.0.0.0:*               LISTEN      31529/nginx: master


[root@localhost opt]# curl 192.168.206.77
<!DOCTYPE html>
<html>
<head>
<title>Welcome to nginx!</title>
<style>
    body {
        width: 35em;
        margin: 0 auto;
        font-family: Tahoma, Verdana, Arial, sans-serif;
    }
</style>
</head>
<body>
<h1>Welcome to nginx!</h1>
<p>If you see this page, the nginx web server is successfully installed and
working. Further configuration is required.</p>

<p>For online documentation and support please refer to
<a href="http://nginx.org/">nginx.org</a>.<br/>
Commercial support is available at
<a href="http://nginx.com/">nginx.com</a>.</p>

<p><em>Thank you for using nginx.</em></p>
</body>
</html>


[root@localhost opt]# yum -y install lynx
[root@localhost opt]# lynx 127.0.0.1
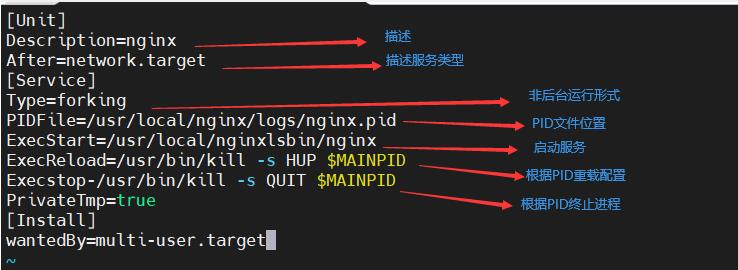
7.添加系统服务
为了使 Nginx服务的启动、停止、重载等操作更加方便,可以编写基于CentOS 7.6 的Nginx 服务控制文件使用systemctl工具来进行关管,Centos7.6系统的管理习惯
vim /lib/systemd/system/nginx.service
[root@localhost ~]# chmod 754 /lib/systemd/system/nginx.service
[root@localhost ~]# systemctl enable nginx.service
Created symlink from /etc/systemd/system/multi-user.target.wants/nginx.service to /usr/lib/systemd/system/nginx.service.
8.检查通过systemctl命令能否正常启动、停止、重启、重载 Nginx服务
[root@localhost ~]# netstat -anutp | grep nginx
tcp        0      0 0.0.0.0:80              0.0.0.0:*               LISTEN      31529/nginx: master
[root@localhost ~]# killall -3 nginx
[root@localhost ~]# systemctl start nginx
[root@localhost ~]# netstat -anutp | grep nginx
tcp        0      0 0.0.0.0:80              0.0.0.0:*               LISTEN      32736/nginx: master
[root@localhost ~]# systemctl enable nginx
[root@localhost ~]#
三.源码安装MySQL
1.安装环境依赖包
[root@localhost ~]# yum -y install ncurses ncurses-devel bison cmake

2.创建运行用户
[root@localhost ~]# useradd -s /sbin/nologin mysql
3.编译安装
上传软件安装包,解压,cmake编译
[root@localhost ~]# cd /opt
[root@localhost opt]# ls
nginx-1.15.9 nginx-1.15.9.tar.gz rh
[root@localhost opt]# ls
mysql-boost-5.7.20.tar.gz nginx-1.15.9 nginx-1.15.9.tar.gz rh
[root@localhost opt]# tar xzvf mysql-boost-5.7.20.tar.gz
[root@localhost opt]# cd mysql-5.7.20/
[root@localhost mysql-5.7.20]# cmake \\
-DCMAKE_INSTALL_PREFIX=/usr/local/mysql \\ #指定安装路径(目录)
-DMYSQL_UNIX_ADDR=/usr/local/mysql/mysql.sock \\ #指定通信文件,连接数据库,通讯协议的载体
-DSYSCONFDIR=/etc \\ #配置文件目录指向/etc
-DSYSTEMD_PID_DIR=/usr/local/mysql \\ #指定pid目录文件
-DDEFAULT_CHARSET=utf8 \\ #字符集设定
-DDEFAULT_COLLATION=utf8_general_ci \\ #字符集设定
-DWITH_INNOBASE_STORAGE_ENGINE=1 \\ #以下三行均为存储引擎ENGINE
-DWITH_ARCHIVE_STORAGE_ENGINE=1 \\
-DWITH_BLACKHOLE_STORAGE_ENGINE=1 \\
-DWITH_PERFSCHEMA_STORAGE_ENGINE=1 \\
-DMYSQL_DATADIR=/usr/local/mysql/data \\ #指定数据存放位置
-DWITH_BOOST=boost \\ #底层C++运营库,5.7的版本独立的表空间结构
-DWITH_SYSTEMD=1 #守护进程id跑在后台的一个支撑服务正常运行的一个特殊进程
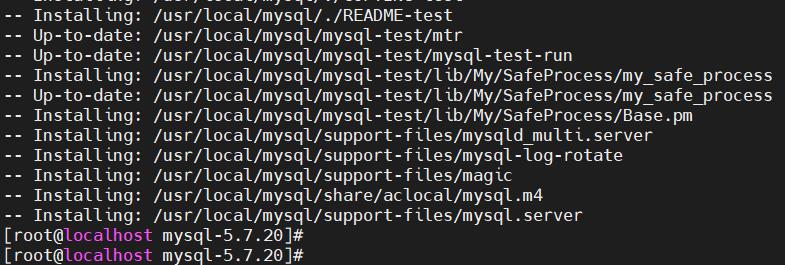
[root@localhost mysql-5.7.20]# make && make install

4.数据库目录进行权限调整
[root@localhost mysql-5.7.20]# chown -R mysql:mysql /usr/local/mysql/
5.调整配置文件
[root@localhost mysql-5.7.20]# cd /etc
[root@localhost etc]# vim my.cnf


[client]									#client用户程序
	port = 3306
	default-character-set=utf8
	socket = /usr/local/mysql/mysql.sock 	#连接数据库的数据端
	[mysql]		#mysql软件内容
	port = 3306								#端口
	default-character-set=utf8
	socket = /usr/local/mysql/mysql.sock
	[mysqld]								#以后对msq1配置时更多的会针对于mysqld进行配置
	user = mysql		#程序用户
	basedir = /usr/local/mysql		 		#工作目录
	datadir = /usr/local/mysql/data			#数据文件目录
	port = 3306  		##端口
	character_set_server=utf8   			#服务的字符集
	pid-file = /usr/local/mysql/mysqld.pid 	#PID文件目录
	socket = /usr/local/mysql/mysql.sock	#通讯文件
	server-id = 1							#服务id,在之后的mysql集群中用于标识mysq1服务器
sql_mode=NO_ENGINE_SUBSTITUTION,STRICT_TRANS_TABLES,NO_AUTO_CREATE_USER,NO_AUTO_VALUE_ON_ZERO,NO_ZERO_IN_DATE,NO_ZERO_DATE,ERROR_FOR_DIVISION_BY_ZERO,PIPES_AS_CONCAT,ANSI_QUOTES		 ##模块,默认加载


[root@localhost etc]# chown mysql:mysql /etc/my.cnf
说明
跳过数据库权限验证的命令为: skip-grant-tables 即进入数据库无须使用密码; 一般用于忘记密码时
6.设置环境变量
[root@localhost etc]# echo 'PATH=/usr/local/mysql/bin:/usr/local/mysql/lib:$PATH' >> /etc/profile
[root@localhost etc]# echo 'export PATH' >> /etc/profile
[root@localhost etc]# cat /etc/profile | tail -n 5

export aa=10

PATH=/usr/local/mysql/bin:/usr/local/mysql/lib:$PATH
export PATH
[root@localhost etc]# source /etc/profile
[root@localhost etc]#
7.初始化数据库
[root@localhost etc]# cd /usr/local/mysql/

[root@localhost mysql]# ls
bin      COPYING-test  include  man         README       share          usr
COPYING  docs          lib      mysql-test  README-test  support-files

[root@localhost mysql]# bin/mysqld --initialize-insecure --user=mysql --basedir=/usr/local/mysql --datadir=/usr/local/mysql/data
2021-06-23T17:48:14.275050Z 0 [Warning] TIMESTAMP with implicit DEFAULT value is deprecated. Please use --explicit_defaults_for_timestamp server option (see documentation for more details).
2021-06-23T17:48:14.683867Z 0 [Warning] InnoDB: New log files created, LSN=45790
2021-06-23T17:48:14.750716Z 0 [Warning] InnoDB: Creating foreign key constraint system tables.
2021-06-23T17:48:14.813699Z 0 [Warning] No existing UUID has been found, so we assume that this is the first time that this server has been started. Generating a new UUID: 2f6b6b37-d44b-11eb-b979-000c298f71dc.
2021-06-23T17:48:14.815411Z 0 [Warning] Gtid table is not ready to be used. Table 'mysql.gtid_executed' cannot be opened.
2021-06-23T17:48:14.816430Z 1 [Warning] root@localhost is created with an empty password ! Please consider switching off the --initialize-insecure option.


[root@localhost system]# cd /usr/local/mysql/usr/lib/systemd/system
[root@localhost system]# ls
mysqld.service  mysqld@.service
[root@localhost system]# cp mysqld.service /usr/lib/systemd/system
8.数据库开启开机自启,关闭,状态
可以使用systemctl管理
[root@localhost system]# systemctl enable mysqld
Created symlink from /etc/systemd/system/multi-user.target.wants/mysqld.service to /usr/lib/systemd/system/mysqld.service.
[root@localhost system]# netstat -anpt | grep mysqld
[root@localhost system]# systemctl start mysqld
[root@localhost system]# netstat -anpt | grep mysqld
tcp6       0      0 :::3306                 :::*                    LISTEN      52706/mysqld

[root@localhost system]# systemctl status mysqld
● mysqld.service - MySQL Server
   Loaded: loaded (/usr/lib/systemd/system/mysqld.service; enabled; vendor preset: disabled)
   Active: active (running) since 四 2021-06-24 02:11:42 CST; 48s ago
     Docs: man:mysqld(8)
           http://dev.mysql.com/doc/refman/en/using-systemd.html
  Process: 52703 ExecStart=/usr/local/mysql/bin/mysqld --daemonize --pid-file=/usr/local/mysql/mysqld.pid $MYSQLD_OPTS (code=exited, status=0/SUCCESS)
  Process: 52683 ExecStartPre=/usr/local/mysql/bin/mysqld_pre_systemd (code=exited, status=0/SUCCESS)
 Main PID: 52706 (mysqld)
    Tasks: 27
   CGroup: /system.slice/mysqld.service
           └─52706 /usr/local/mysql/bin/mysqld --daemonize --pid-file=/usr/lo...

6月 24 02:11:42 localhost.localdomain mysqld[52703]: 2021-06-23T18:11:42.626...
6月 24 02:11:42 localhost.localdomain mysqld[52703]: 2021-06-23T18:11:42.626...
6月 24 02:11:42 localhost.localdomain mysqld[52703]: 2021-06-23T18:11:42.626...
6月 24 02:11:42 localhost.localdomain mysqld[52703]: 2021-06-23T18:11:42.640...
6月 24 02:11:42 localhost.localdomain mysqld[52703]: 2021-06-23T18:11:42.641...
6月 24 02:11:42 localhost.localdomain mysqld[52703]: Version: '5.7.20'  sock...
6月 24 02:11:42 localhost.localdomain mysqld[52703]: 2021-06-23T18:11:42.641...
6月 24 02:11:42 localhost.localdomain mysqld[52703]: 2021-06-23T18:11:42.641...
6月 24 02:11:42 localhost.localdomain mysqld[52703]: 2021-06-23T18:11:42.657...
6月 24 02:11:42 localhost.localdomain systemd[1]: Started MySQL Server.
Hint: Some lines were ellipsized, use -l to show in full.
9.设置mysql密码
[root@localhost system]# mysqladmin -u root -p password
Enter password:             			#刚开始的时候密码为空,按回车然后设置新密码,并且二次输入进行确认
New password:
Confirm new password:
Warning: Since password will be sent to server in plain text, use ssl connection to ensure password safety.
[root@localhost system]#
10.登录mysql数据库
[root@localhost system]# mysql -uroot -p
Enter password:					#此处输入密码
Welcome to the MySQL monitor.  Commands end with ; or \\g.
Your MySQL connection id is 4
Server version: 5.7.20 Source distribution

Copyright (c) 2000, 2017, Oracle and/or its affiliates. All rights reserved.

Oracle is a registered trademark of Oracle Corporation and/or its
affiliates. Other names may be trademarks of their respective
owners.

Type 'help;' or '\\h' for help. Type '\\c' to clear the current input statement.

mysql> show databases;
+--------------------+
| Database           |
+--------------------+
| information_schema |
| mysql              |
| performance_schema |
| sys                |
+--------------------+
4 rows in set (0.00 sec)

mysql>
mysql> quit
Bye
[root@localhost system]#
四.PHP解析环境安装配置
1.安装环境依赖包
[root@localhost ~]# yum -y install \\
> libjpeg \\
> libjpeg-devel \\
> libpng libpng-devel \\
> freetype freetype-devel \\
> libxml2 \\
> libxml2-devel \\
> zlib zlib-devel \\
> curl curl-devel \\
> openssl openssl-devel
以上是关于源码编译安装LNMP架构!的主要内容,如果未能解决你的问题,请参考以下文章