安卓APP开发基础
Posted 行稳方能走远
tags:
篇首语:本文由小常识网(cha138.com)小编为大家整理,主要介绍了安卓APP开发基础相关的知识,希望对你有一定的参考价值。
目录
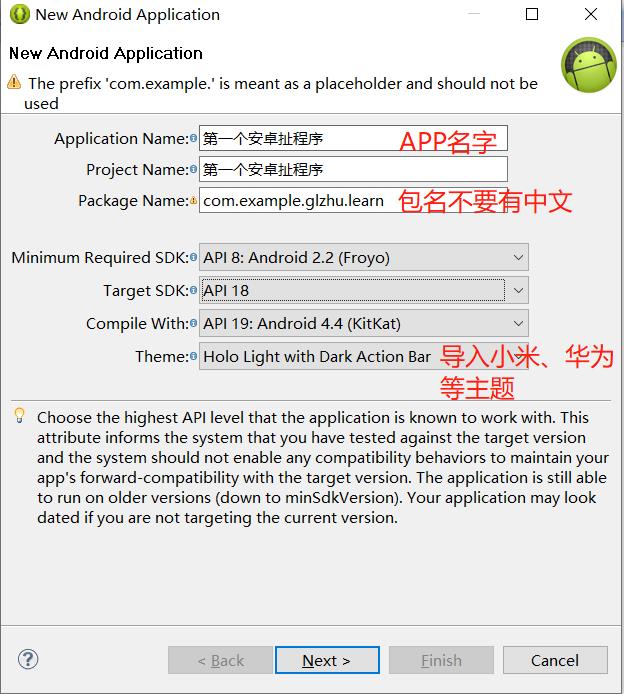
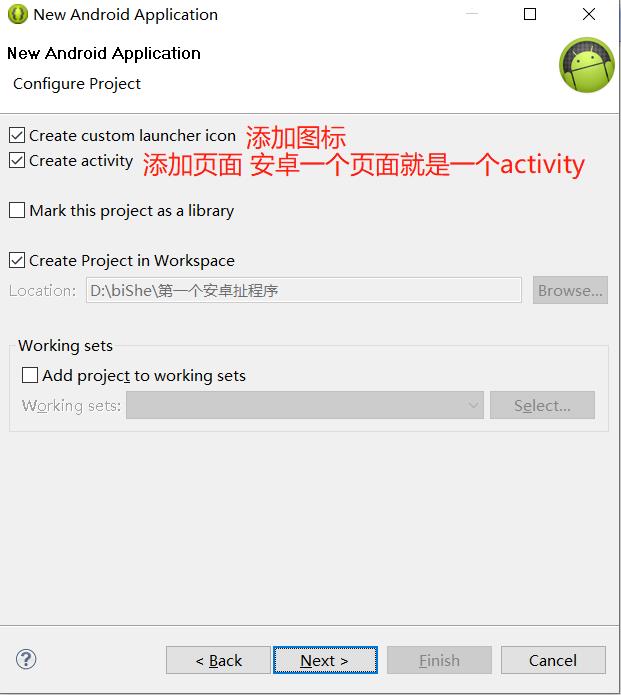
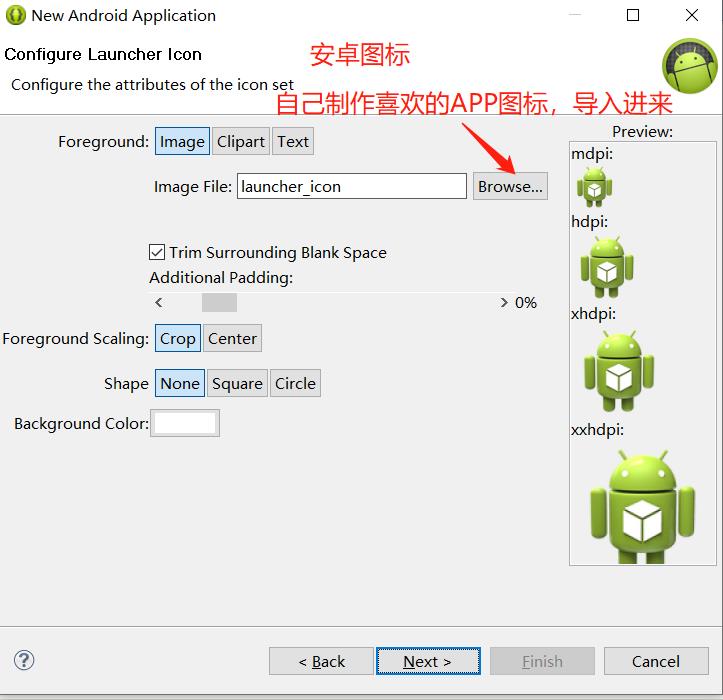
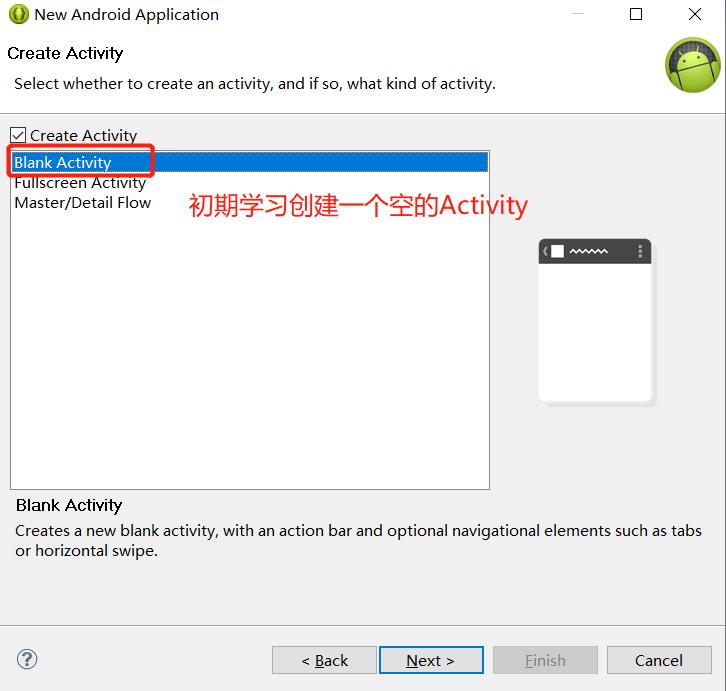
安卓工程构建第一个APP运行
嵌入式学习安卓目的其实是为了掌握简单的安卓APP开发,最重要的目的并不是为了开发APP,而是为了了解APP开发的整个过程,方便为安卓开发工程师提供SDK包,也就是如何在手机APP上实现点灯等控制硬件的一系列操作。
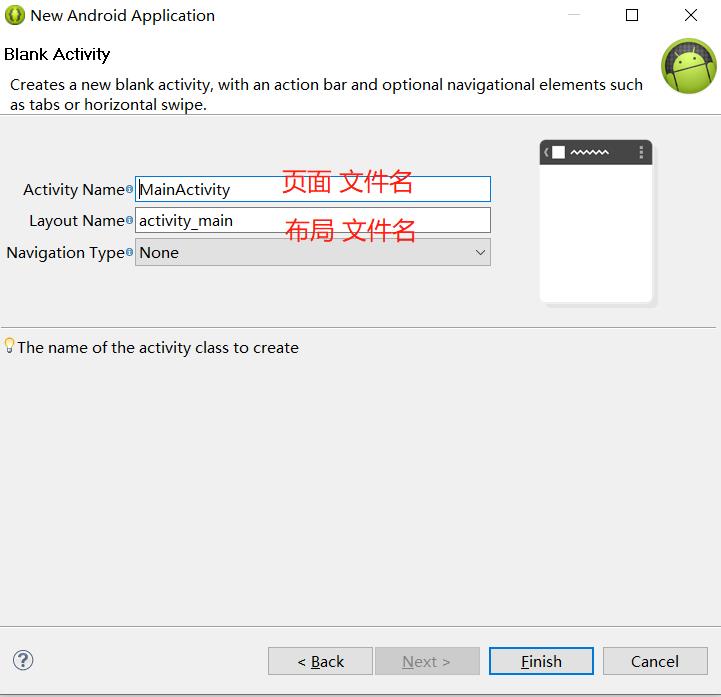
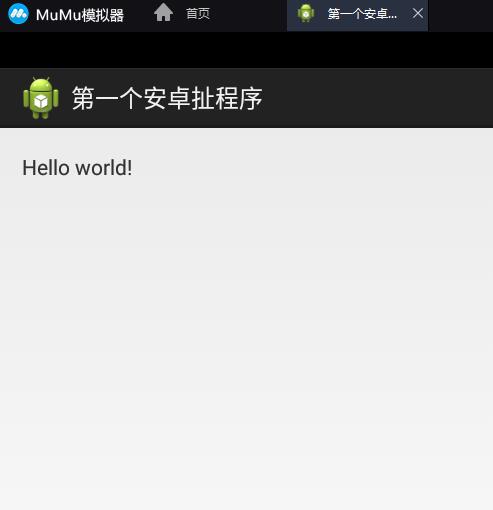
点击Finish,程序构建完毕。
如何启动这个程序?由于自带的模拟器启动较慢,我们先去下载夜神模拟器(或者mumu模拟器,我是用的这个),运行。
eclipse和夜神建立连接之前,需要配置adb的环境变量(因为我们要在Windows的命令行终端使用这个指令):
找到之前我们安装eclipse的路径,找到adb.exe,如下图所示
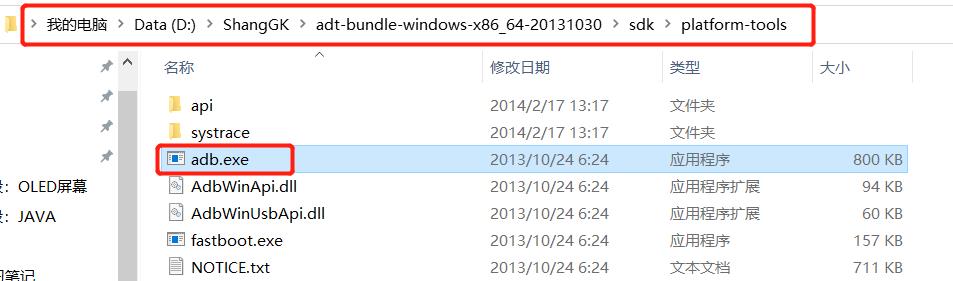
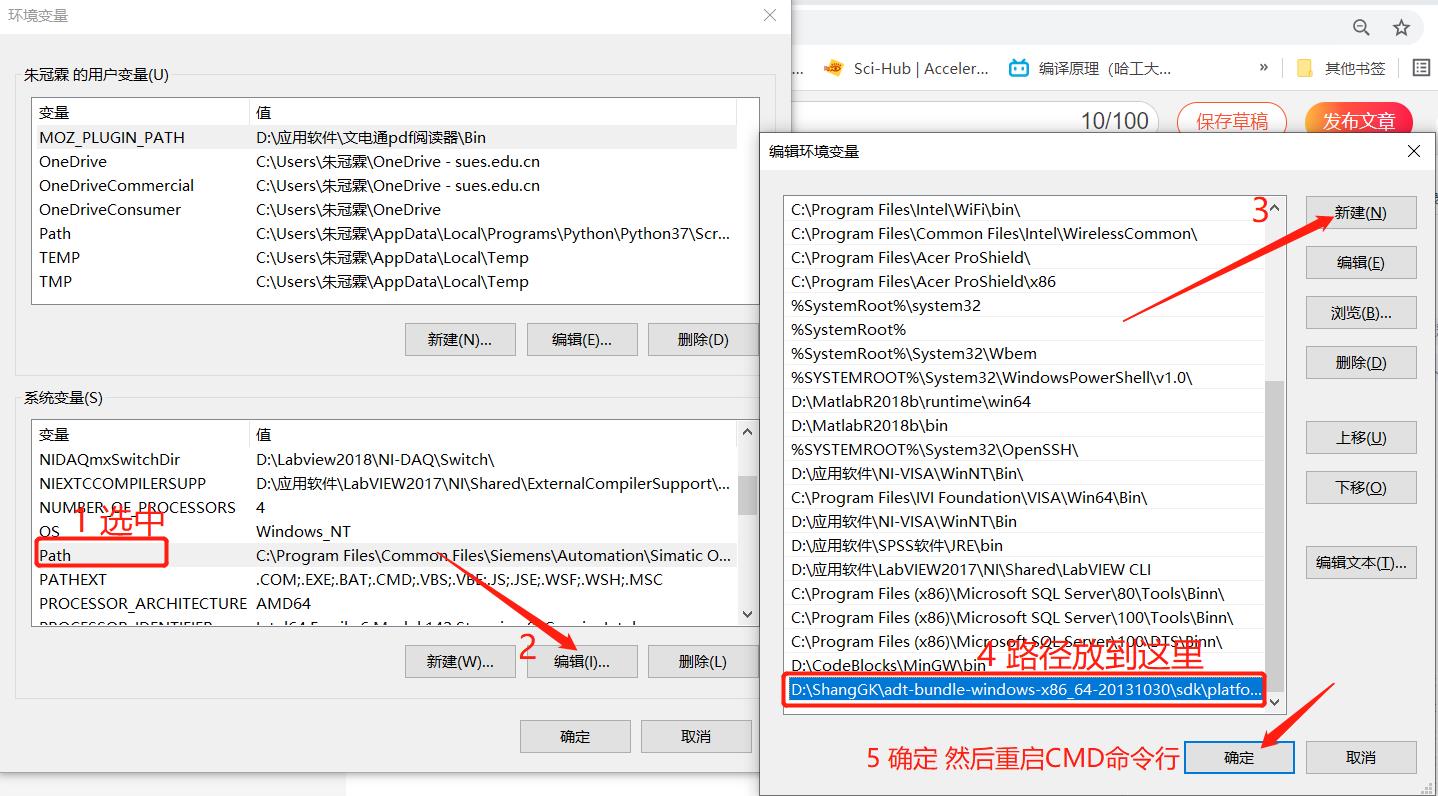
复制这个路径,打开Windows环境变量配置界面(右击我的电脑,属性,高级系统设置,环境变量)
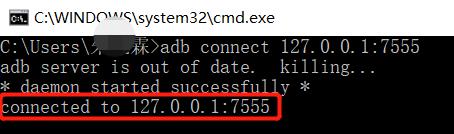
eclipse和mumu模拟器建立连接命令:
adb connect 127.0.0.1:7555
连接成功:
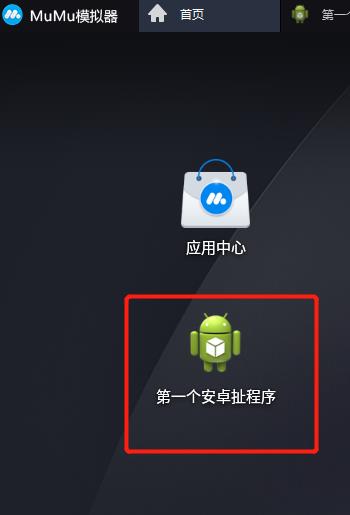
运行,工程名字上右键,run as android appclication,发现mumu模拟器出现运行界面。
- 构建容易,包名不能包含中文
- 模拟器一般用夜神和mumu,eclipse和夜神建立连接adb connect 127.0.0.1:62001 (127.0.0.1是网络本地地址,也就是连接自己,夜神模拟器的端口号是62001,mumu模拟器端口号是7555)
- 连接失败要重启adb adb kill-server adb start-server
- 运行,工程名字上右键,run as android appclication
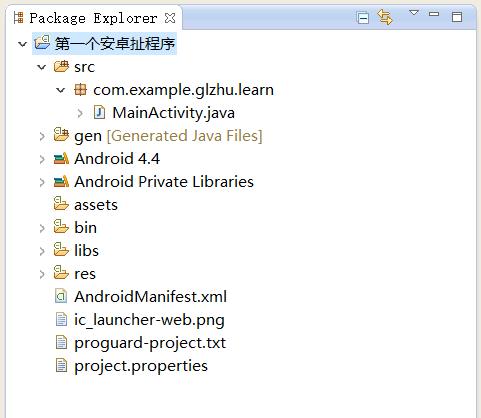
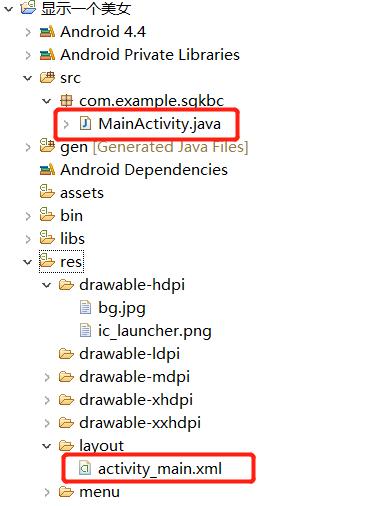
安卓的工程目录文件夹介绍
-
src: 存放java代码的,有包,有文件
-
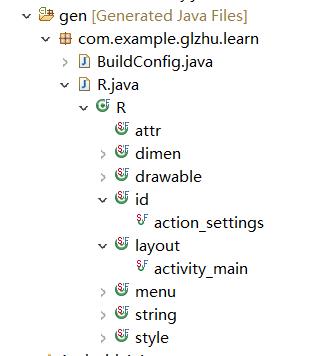
gen: 存放自动生成的文件,关心里面的R.java,保存程序的页面,按键,文本等控件的ID,它是自己生成的
-
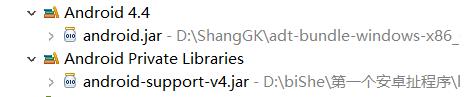
Android:4.4: 存放安卓开发的一些库(UI、蓝牙等),供开发者调用
-
asserts: 存放一些资源,配置文件,图片
-
bin: 编译后会生成的一些文件,包括我们关心的apk
-
libs: 依赖库
-
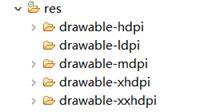
res:
*drawable前缀:存放app程序要用到的一些图片(高分辨率、低分辨率等)
*layout: 存放布局文件的文件夹
一般一个activity(安卓页面)对应一个布局(可以拖拽和编程实现界面布局,复杂界面最好采用编程方式,避免出现界面变形,QT也存在这个问题。)

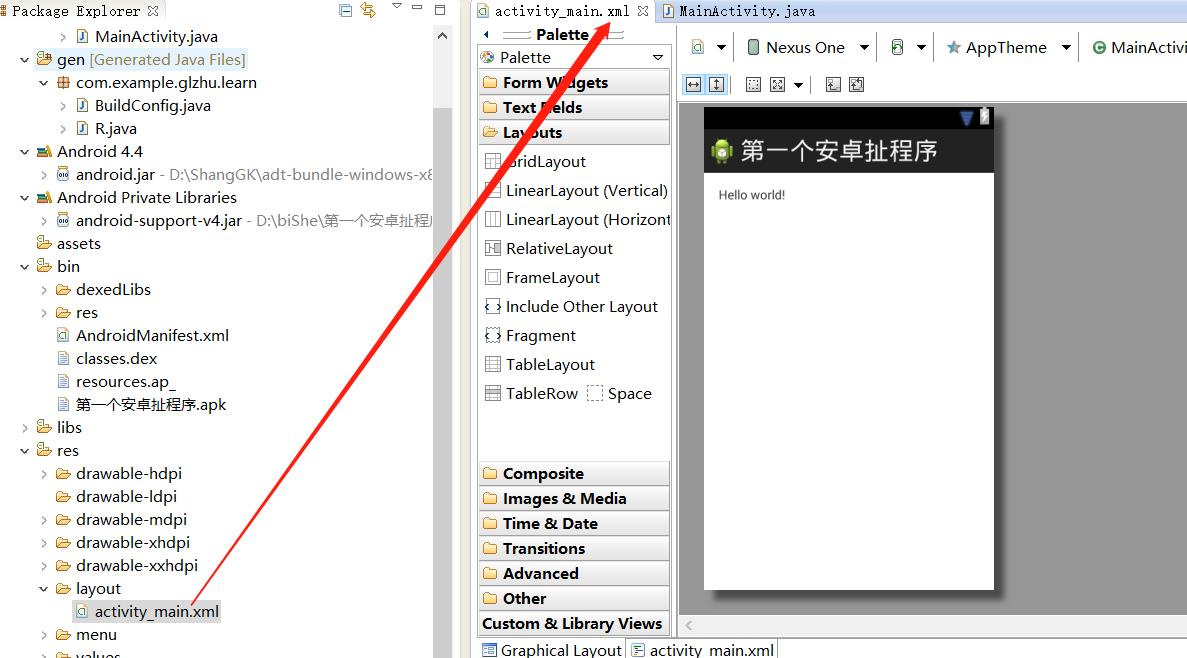
*values: 存放一些参数,或者自定义控件的文件 -
AndroidMainfirst.xml: APP的配置
*权限:网络访问权限,名片夹访问权限,相机访问权限
*目标机器SDK版本
*APP的名字
*APP的图标
*配置第一个被加载,启动页面
安卓APP启动过程
Laucher(不断检测屏幕触摸)->Androidmanifirst.xml->lauch标签的activity被加载->oncreat被调用->java关联xml布局页面->显示->等待用户触摸等操作
详细参照博文:https://www.jianshu.com/p/4d199e96ec60
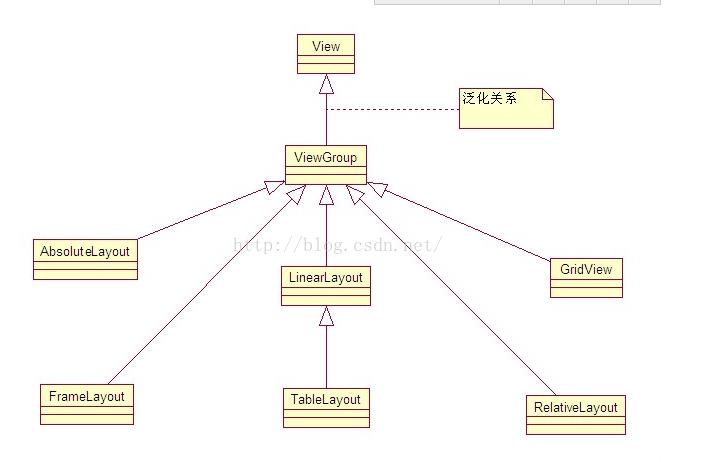
安卓布局控件
布局的种类
详见https://blog.csdn.net/wenzhi20102321/article/details/52677595
布局和页面的关系
显示一张美女图
将提前准备好的图片,选中复制,粘贴到下图目录下。添加一行代码,将图片成功添加到APP中。
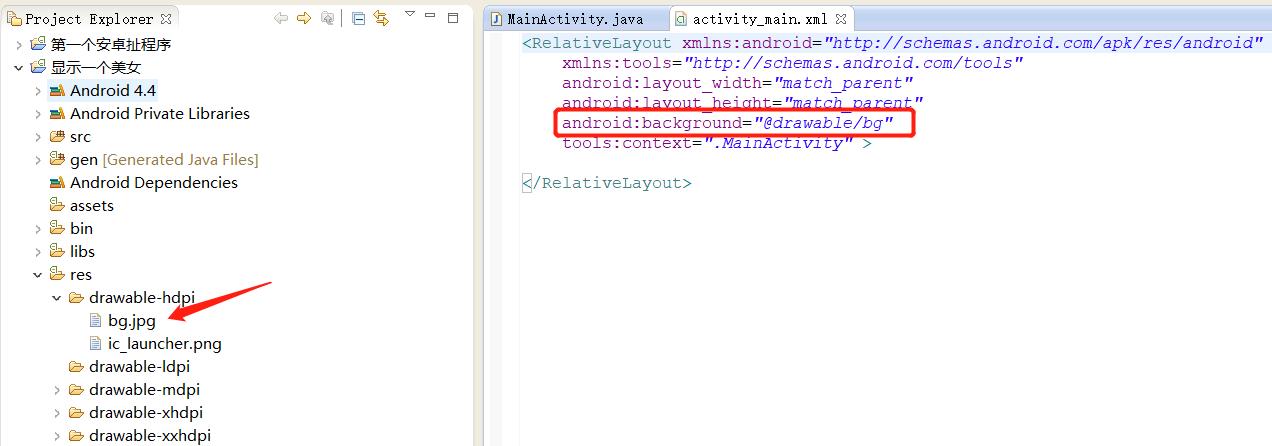
activity_main.xml
<RelativeLayout xmlns:android="http://schemas.android.com/apk/res/android"
    xmlns:tools="http://schemas.android.com/tools"
	android:layout_width="match_parent"
	android:layout_height="match_parent"
	android:background="@drawable/bg"
    tools:context=".MainActivity" >

</RelativeLayout>

将别人的安卓工程源码导入到eclipse中的方法:
file->import->选中整个文件夹,如下图所示
打开后相应的代码:

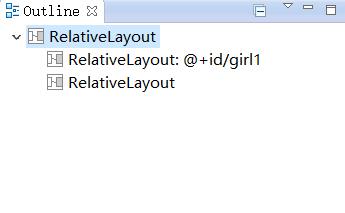
显示两个美女
引入ID、below(指定ID位置下方)的使用方法。
布局关系:
activity_main.xml
<RelativeLayout xmlns:android="http://schemas.android.com/apk/res/android"
    xmlns:tools="http://schemas.android.com/tools"
	android:layout_width="match_parent"
	android:layout_height="match_parent"
    tools:context=".MainActivity" >


    <RelativeLayout
        android:id="@+id/girl1"
        android:layout_width="match_parent"
        android:layout_height="400dp"
        android:background="@drawable/girl1"
        ></RelativeLayout>

    <RelativeLayout
        android:layout_below="@id/girl1"
        android:layout_width="match_parent"
        android:layout_height="400dp"
        android:background="@drawable/girl2"
        ></RelativeLayout>

</RelativeLayout>

常用布局之相对布局
RelativeLayout中子控件常用属性:
-
1、相对于父控件,例如:android:layout_alignParentTop=“true”
android:layout_alignParentTop 控件的顶部与父控件的顶部对齐;
android:layout_alignParentBottom 控件的底部与父控件的底部对齐;
android:layout_alignParentLeft 控件的左部与父控件的左部对齐;
android:layout_alignParentRight 控件的右部与父控件的右部对齐; -
2、相对给定Id控件,例如:android:layout_above=“@id/**”
android:layout_above 控件的底部置于给定ID的控件之上;
android:layout_below 控件的底部置于给定ID的控件之下;
android:layout_toLeftOf 控件的右边缘与给定ID的控件左边缘对齐;
android:layout_toRightOf 控件的左边缘与给定ID的控件右边缘对齐;
android:layout_alignBaseline 控件的baseline与给定ID的baseline对齐;
android:layout_alignTop 控件的顶部边缘与给定ID的顶部边缘对齐;
android:layout_alignBottom 控件的底部边缘与给定ID的底部边缘对齐;
android:layout_alignLeft 控件的左边缘与给定ID的左边缘对齐;
android:layout_alignRight 控件的右边缘与给定ID的右边缘对齐; -
3、居中,例如:android:layout_centerInParent=“true”
android:layout_centerHorizontal 水平居中;
android:layout_centerVertical 垂直居中;
android:layout_centerInParent 父控件的中央;
activity_main.xml
<RelativeLayout xmlns:android="http://schemas.android.com/apk/res/android"
    xmlns:tools="http://schemas.android.com/tools"
	android:layout_width="match_parent"
	android:layout_height="match_parent"
    tools:context=".MainActivity" >


      <RelativeLayout
        android:id="@+id/girl2"
        android:layout_width="wrap_content"
        android:layout_height="wrap_content"
        android:background="@drawable/testpic32"
        android:layout_centerInParent="true"
        ></RelativeLayout>


</RelativeLayout>
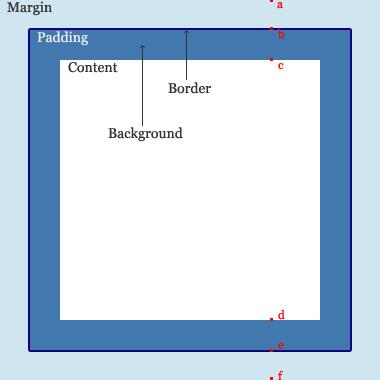
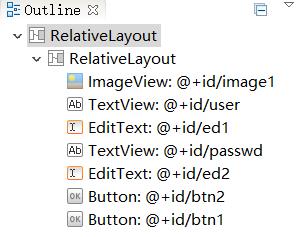
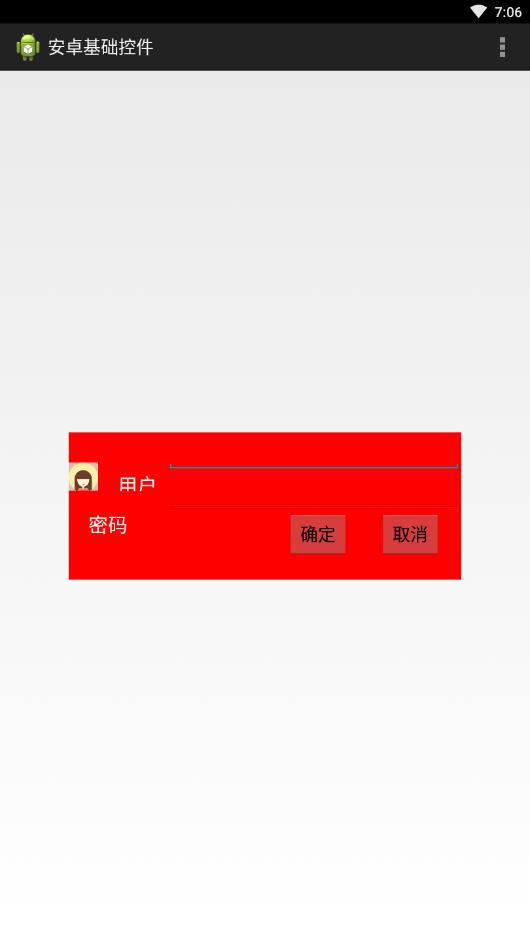
基础控件之Button,TextView,EditText,ImageView, padding和margin(内外边框)
由于拖拽的方式产生的控件容易跑飞,这里我们采用代码的方式去生成控件。
内外边框参照博文:https://www.cnblogs.com/dongh/p/9584962.html
<RelativeLayout xmlns:android="http://schemas.android.com/apk/res/android"
    xmlns:tools="http://schemas.android.com/tools"
    android:layout_width="match_parent"
    android:layout_height="match_parent"
    android:paddingBottom="@dimen/activity_vertical_margin"
    android:paddingLeft="@dimen/activity_horizontal_margin"
    android:paddingRight="@dimen/activity_horizontal_margin"
    android:paddingTop="@dimen/activity_vertical_margin"
    tools:context=".MainActivity" >


    <RelativeLayout
        android:layout_width="400dp"
        android:layout_height="150dp"
        android:layout_centerInParent="true"
        android:background="#ff0000"
        >

       <ImageView
       	android:id="@+id/image1"
        android:layout_width="30dp"
        android:layout_height="30dp"
        android:background="#ff0000"
        android:src="@drawable/user"
        android:layout_marginTop="30dp"
        />

        <TextView
            android:layout_toRightOf="@id/image1"
            android:layout_alignBottom="@id/image1"
            android:layout_alignTop="@id/image1"
            android:layout_marginTop="10dp"
            android:id="@+id/user"
            android:layout_width="wrap_content"
            android:layout_height="wrap_content"
            android:text="用户"
            android:layout_marginLeft="20dp"
            android:layout_marginRight="10dp"
            android:textSize="20dp"
            android:textColor="#ffffff"
            />

        <EditText
            android:id="@+id/ed1"
            android:layout_width="320dp"
            android:layout_height="40dp"
            android:layout_toRightOf="@id/user"
            />

        <TextView
            android:id="@+id/passwd"
            android:layout_width="wrap_content"
            android:layout_height="wrap_content"
            android:text="密码"
            android:layout_marginLeft="20dp"
            android:layout_marginRight="10dp"
            android:layout_marginTop="20dp"

            android:textSize="20dp"
            android:layout_below="@id/user"
            android:textColor="#ffffff"
            />

         <EditText
            android:id="@+id/ed2"
            android:layout_width="320dp"
            android:layout_height="40dp"
            android:layout_toRightOf="@id/user"
            android:layout_below="@id/ed1"
            />


           <Button
             android:layout_width="wrap_content"
             android:layout_height="wrap_content"
             android:layout_alignParentRight="true"
             android:layout_marginRight="20dp"
             android:text="取消"
             android:id="@+id/btn2"
             android:layout_below="@id/ed2"

             />

           <Button
             android:layout_width="wrap_content"
             android:layout_height="wrap_content"
             android:layout_marginRight="30dp"
             android:text="确定"
             android:id="@+id/btn1"
             android:layout_below="@id/ed2"
             android:layout_toLeftOf="@id/btn2"

             />

    </RelativeLayout>


</RelativeLayout>
相对布局综合小演练-智能家居刷卡界面
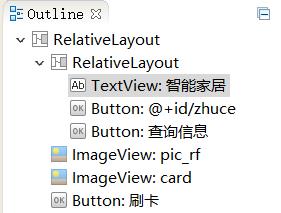
<RelativeLayout xmlns:android="http://schemas.android.com/apk/res/android"
xmlns:tools="http://schemas.android.com/tools"
android:layout_width="match_parent"
android:layout_height="match_parent"
android:background="@drawable/bg_shopping_menu"
tools:context=".MainActivity" >
<RelativeLayout
android:layout_width="match_parent"
android:layout_height="wrap_content"
android:background="#00ff00"
>
<TextView
android:layout_width="wrap_content"
android:layout_height="wrap_content"
android:text="智能家居"
android:textSize="25dp"
android:layout_marginLeft="15dp"
android:layout_marginTop="6dp"
/>
<Button
android:id="@+id/zhuce"
android:layout_width="wrap_content"
android:layout_height="wrap_content"
android:text="注册"
android:layout_alignParentRight="true"
android:layout_marginRight="20dp"
/>
<Button
android:layout_width="wrap_content"
android:layout_height="wrap_content"
android:text="查询信息"
android:layout_toLeftOf="@id/zhuce"
/>
</RelativeLayout>
<ImageView
android:layout_width="wrap_content"
android:layout_height="wrap_content"
android:src="@drawable/pic_rf"
android:layout_centerInParent="true"
/>
<ImageView
android:layout_width="wrap_content"
android:layout_height="wrap_content"
android:src="@drawable/card"
android:layout_centerInParent="true"
android:paddingLeft="120dp"
/>
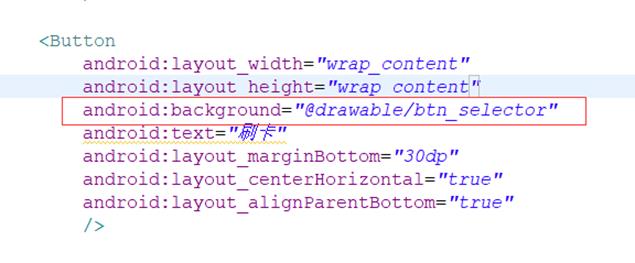
<Button
android:layout_width="wrap_content"
android:layout_height="wrap_content"
android:background="@drawable/btn_selector"
android:text="刷卡"
android:layout_marginBottom="30dp"
android:layout_centerHorizontal="true"
android:layout_alignParentBottom="true"
/>
</RelativeLayout>
运行效果:
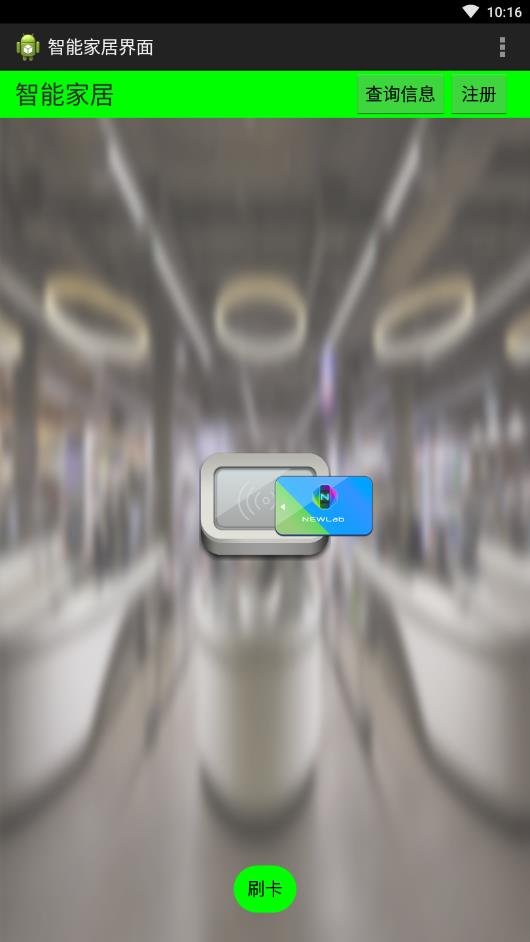
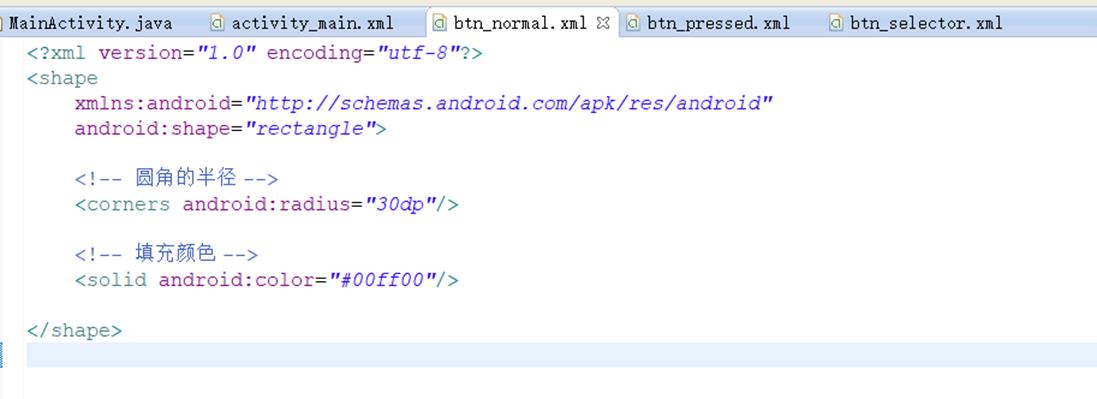
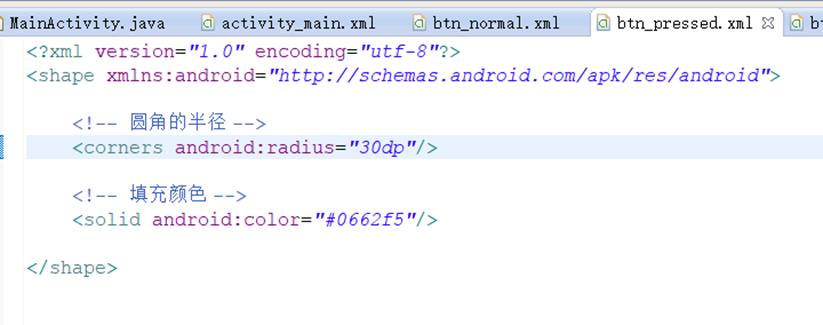
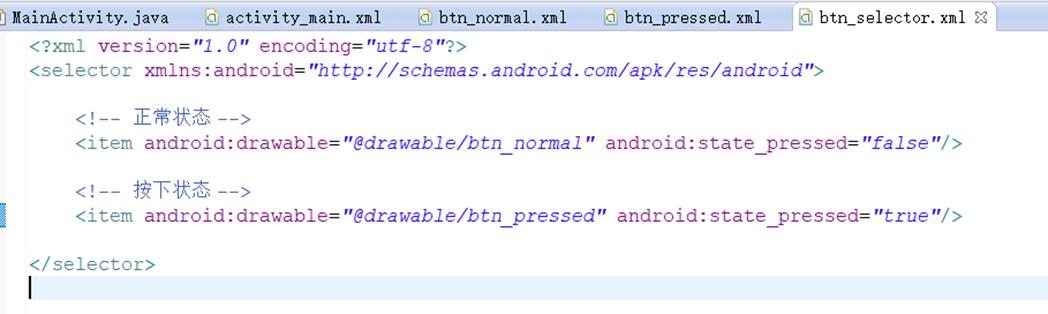
按键美化
方法:在drawable底下新建.xml文件(代码如下面博文中介绍),然后在主xml里面去引用这些美化的xml。
https://blog.csdn.net/tracydragonlxy/article/details/88552262
常用布局之线性布局
介绍
之前介绍的相对布局,自由拖拽控件时,摆放的位置是任意的,而线性布局在拖拽时,控件是不能任意放置的。只能在横线(默认)、竖线方向排列控件。
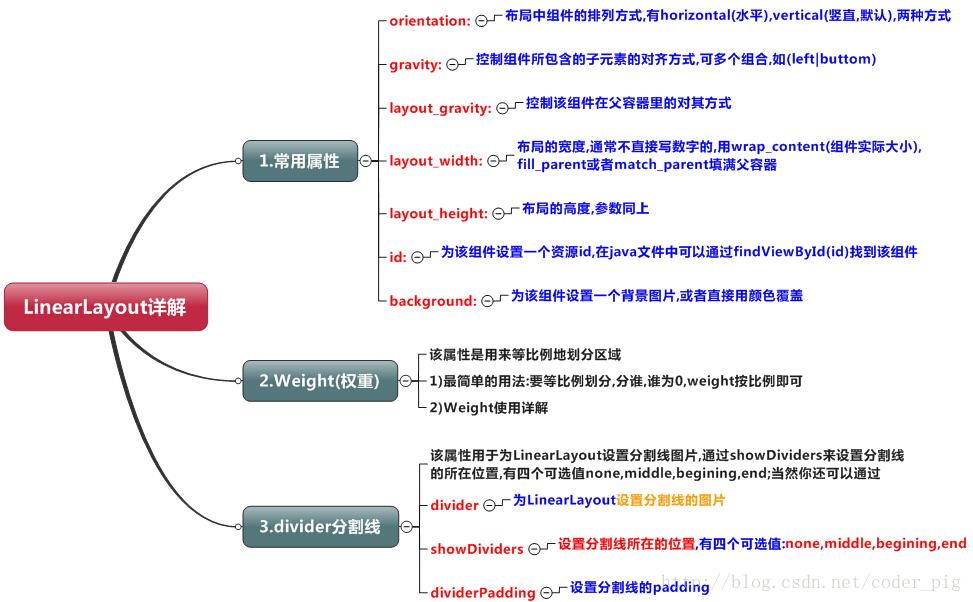
线性布局orientation、weight、gravity、divider属性
activity_main.xml
<RelativeLayout xmlns:android="http://schemas.android.com/apk/res/android"
xmlns:tools="http://schemas.android.com/tools"
android:layout_width="match_parent"
android:layout_height="match_parent"
android:background="@drawable/bg_shopping_menu"
tools:context=".MainActivity" >
<LinearLayout
android:layout_width="400dp"
android:layout_height="100dp"
android:layout_centerInParent="true"
android:orientation="horizontal" >
<LinearLayout
android:layout_width="0dp"