python爬取彼岸图4k壁纸,想要什么类型的壁纸就输入什么壁纸,太方便了。。
Posted 武亮宇
tags:
篇首语:本文由小常识网(cha138.com)小编为大家整理,主要介绍了python爬取彼岸图4k壁纸,想要什么类型的壁纸就输入什么壁纸,太方便了。。相关的知识,希望对你有一定的参考价值。
python爬取彼岸图4k壁纸,想要什么类型的壁纸就输入什么壁纸,太方便了。。
你桌面的壁纸还是用的默认壁纸么?太low了,今天教你用python爬取彼岸图网的4k壁纸,想要什么类型的壁纸就爬什么壁纸,快点来跟我一起试试吧!!!
这个壁纸怎么样?喜欢吗?你值得拥有。。。

代码操作一下

工具使用
开发环境
python3.6
Windows10
开发工具
pycharm
工具包
lxml,os,tkinter
思路解析
1.定义可视化窗口,并设置窗口和主题大小布局
2.定义触发事件1,调用main函数
3.构造起始地址,获取响应,解析数据,提取图片的url地址
start_url = f’http://pic.netbian.com/4k{image_type}/'
4.循环遍历每一个图片的url地址,再获取响应,解析数据,提取标题和地址
5.对img_url发送请求得到img_content,最后保存数据
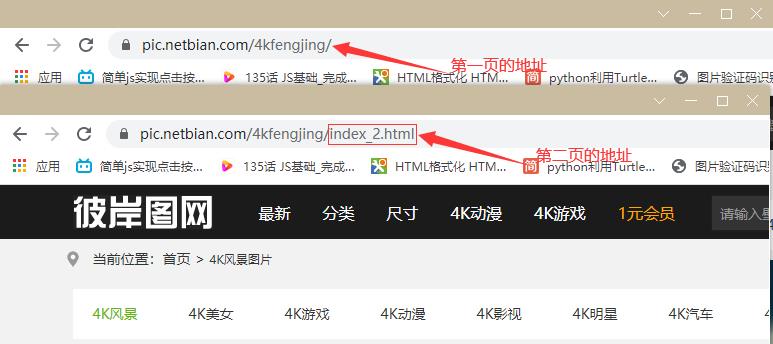
6.构造翻页的url地址
next_url = f’http://pic.netbian.com/4k{image_type}/index_{i}.html’
7.接下来和第一页的操作一样
第一页和其他页的请求地址不一样,我采用了第一页和其他页分开写

要将输入的汉字转换为拼音
p = Pinyin()     # user_name为输入的汉字
image_type = p.get_pinyin(user_name).replace('-', '')
得到页面所有图片的url地址
# 请求获取响应
response = session.get(start_url, headers=headers).content.decode('gbk')  # 右键检查 head/meta/@charset 为编码格式

# 解析数据
html_str = etree.HTML(response)
img_info_urls = html_str.xpath('//ul[@class="clearfix"]/li/a/@href')
循环遍历每个图片的url地址,发送请求拿回图片的地址和标题
# 循环遍历,构造img_info_url
        for img_info_url in img_info_urls:
        	# img_info_url需要拼接
            img_info_url = 'http://pic.netbian.com' + img_info_url


            # 对img_info_url发送请求,解析得到img_url img_name
            response = session.get(img_info_url, headers=headers).content.decode('gbk')

            html_str = etree.HTML(response)
            img_url = html_str.xpath('//a[@id="img"]/img/@src')[0]

            img_url = 'http://pic.netbian.com' + img_url

            img_name = html_str.xpath('//a[@id="img"]/img/@title')[0]
第二页的地址构造, for循环进行翻页
        for i in range(2, pass_wd+1):
            next_url = f'http://pic.netbian.com/4k{image_type}/index_{i}.html'
接着和第一页是一样的操作
源码展示:
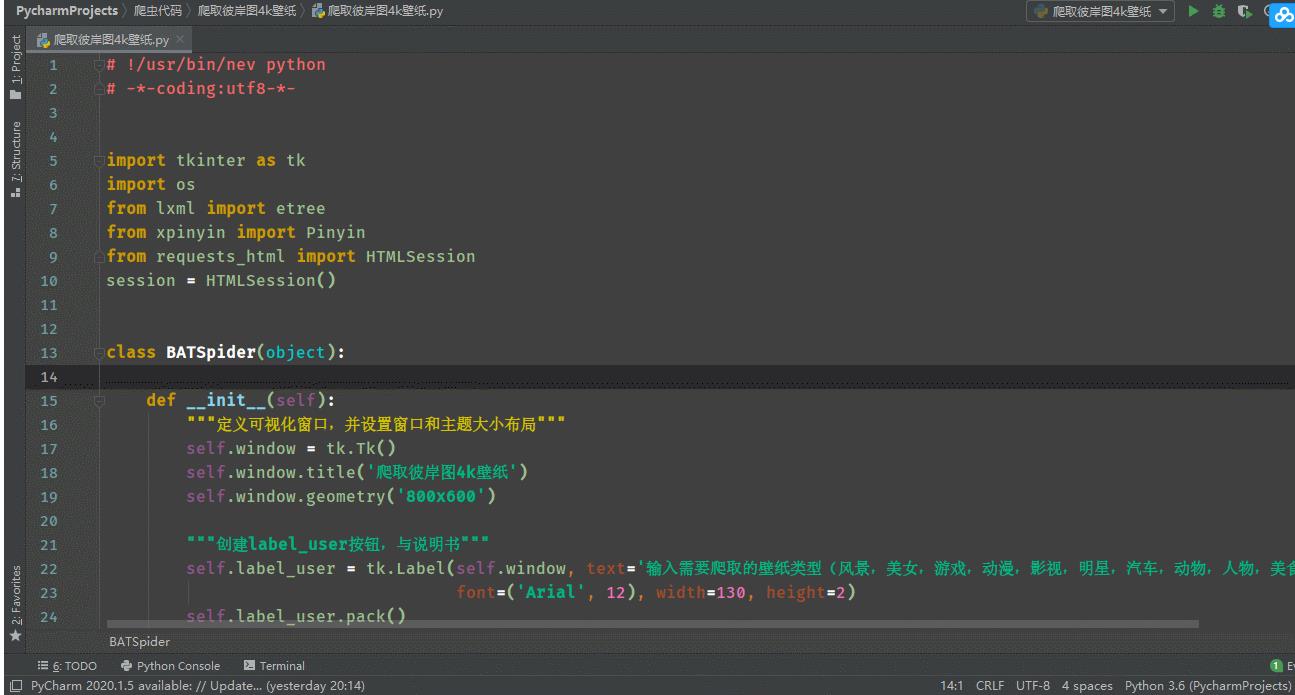
# !/usr/bin/nev python
# -*-coding:utf8-*-


import tkinter as tk
import os
from lxml import etree
from xpinyin import Pinyin
from requests_html import HTMLSession
session = HTMLSession()


class BATSpider(object):

    def __init__(self):
        """定义可视化窗口,并设置窗口和主题大小布局"""
        self.window = tk.Tk()
        self.window.title('爬取彼岸图4k壁纸')
        self.window.geometry('800x600')

        """创建label_user按钮,与说明书"""
        self.label_user = tk.Label(self.window, text='输入需要爬取的壁纸类型(风景,美女,游戏,动漫,影视,明星,汽车,动物,人物,美食,宗教,背景):',
                                   font=('Arial', 12), width=130, height=2)
        self.label_user.pack()
        """创建label_user关联输入"""
        self.entry_user = tk.Entry(self.window, show=None, font=('Arial', 14))
        self.entry_user.pack(after=self.label_user)

        """创建label_passwd按钮,与说明书"""
        self.label_passwd = tk.Label(self.window, text="爬取多少页:", font=('Arial', 12), width=30, height=2)
        self.label_passwd.pack()
        """创建label_passwd关联输入"""
        self.entry_passwd = tk.Entry(self.window, show=None, font=('Arial', 14))
        self.entry_passwd.pack(after=self.label_passwd)

        """创建Text富文本框,用于按钮操作结果的展示"""
        self.text1 = tk.Text(self.window, font=('Arial', 12), width=85, height=22)
        self.text1.pack()

        """定义按钮1,绑定触发事件方法"""

        self.button_1 = tk.Button(self.window, text='爬取', font=('Arial', 12), width=10, height=1,
                                  command=self.parse_hit_click_1)
        self.button_1.pack(before=self.text1)

        """定义按钮2,绑定触发事件方法"""
        self.button_2 = tk.Button(self.window, text='清除', font=('Arial', 12), width=10, height=1,
                                  command=self.parse_hit_click_2)
        self.button_2.pack(anchor="e")


    def parse_hit_click_1(self):
        """定义触发事件1,调用main函数"""
        user_name = self.entry_user.get()
        pass_wd = int(self.entry_passwd.get())
        self.main(user_name, pass_wd)

    def main(self, user_name, pass_wd):
        p = Pinyin()
        image_type = p.get_pinyin(user_name).replace('-', '')
        start_url = f'http://pic.netbian.com/4k{image_type}/'
        headers = {
            'User-Agent': 'Mozilla/5.0 (Windows NT 10.0; Win64; x64) AppleWebKit/537.36 (KHTML, like Gecko) '
                          'Chrome/73.0.3683.103 Safari/537.36'
        }
        # 请求获取响应
        response = session.get(start_url, headers=headers).content.decode('gbk')  # 右键检查 head/meta/@charset 为编码格式


        # 解析数据
        html_str = etree.HTML(response)
        img_info_urls = html_str.xpath('//ul[@class="clearfix"]/li/a/@href')


        # 循环遍历,构造img_info_url
        for img_info_url in img_info_urls:
            # img_info_url需要拼接
            img_info_url = 'http://pic.netbian.com' + img_info_url


            # 对img_info_url发送请求,解析得到img_url img_name
            response = session.get(img_info_url, headers=headers).content.decode('gbk')

            html_str = etree.HTML(response)
            img_url = html_str.xpath('//a[@id="img"]/img/@src')[0]

            img_url = 'http://pic.netbian.com' + img_url

            img_name = html_str.xpath('//a[@id="img"]/img/@title')[0]

            # 对img_url发送请求得到img_content
            img_content = session.get(img_url, headers=headers).content
            # 创建文件夹
            if not os.path.exists(r'D:/PycharmProjects/爬虫代码/爬取彼岸图4k壁纸/{}'.format('image')):
                os.mkdir(r'D:/PycharmProjects/爬虫代码/爬取彼岸图4k壁纸/{}'.format('image'))
            # 保存图片
            try:
                with open(r'./{}/{}.jpg'.format('image', img_name), 'wb')as f:
                    f.write(img_content)
                    print('*****图片已下载:{}.jpg'.format(img_name))
                    self.text1.insert("insert", '*****图片已下载:{}.jpg'.format(img_name))
                    self.text1.insert("insert", '\\n ')
                    self.text1.insert("insert", '\\n ')
            except Exception as e:
                continue

        # 构造第二页的请求地址
        for i in range(2, pass_wd+1):
            next_url = f'http://pic.netbian.com/4k{image_type}/index_{i}.html'
            headers = {
                'User-Agent': 'Mozilla/5.0 (Windows NT 10.0; Win64; x64) AppleWebKit/537.36 (KHTML, like Gecko) '
                              'Chrome/73.0.3683.103 Safari/537.36'
            }
            # 请求获取响应
            response = session.get(next_url, headers=headers).content.decode('gbk')  # 右键检查 head/meta/@charset 为编码格式


            # 解析数据
            html_str = etree.HTML(response)
            img_info_urls = html_str.xpath('//ul[@class="clearfix"]/li/a/@href')


            # 循环遍历,构造img_info_url
            for img_info_url in img_info_urls:
                img_info_url = 'http://pic.netbian.com' + img_info_url


                # 对img_info_url发送请求,解析得到img_url img_name
                response = session.get(img_info_url, headers=headers).content.decode('gbk')

                html_str = etree.HTML(response)
                img_url = html_str.xpath('//a[@id="img"]/img/@src')[0]

                img_url = 'http://pic.netbian.com' + img_url

                img_name = html_str.xpath('//a[@id="img"]/img/@title')[0]

                # 对img_url发送请求得到img_content
                img_content = session.get(img_url, headers=headers).content


                # 保存图片
                try:
                    with open(r'D:/PycharmProjects/爬虫代码/爬取彼岸图4k壁纸/{}/{}.jpg'.format('image', img_name), 'wb')as f:
                        f.write(img_content)
                        print('*****图片已下载:{}.jpg'.format(img_name))
                        self.text1.insert("insert", '*****图片已下载:{}.jpg'.format(img_name))
                        self.text1.insert("insert", '\\n ')
                        self.text1.insert("insert", '\\n ')
                except Exception as e:
                    continue


    def parse_hit_click_2(self):
        """定义触发事件2,删除文本框中内容"""
        self.entry_user.delete(0, "end")
        self.entry_passwd.delete(0, "end")
        self.text1.delete("1.0", "end")

    def center(self):
        """创建窗口居中函数方法"""
        ws = self.window.winfo_screenwidth()
        hs = self.window.winfo_screenheight()
        x = int((ws / 2) - (800 / 2))
        y = int((hs / 2) - (600 / 2))
        self.window.geometry('{}x{}+{}+{}'.format(800, 600, x, y))

    def run_loop(self):
        """禁止修改窗体大小规格"""
        self.window.resizable(False, False)
        """窗口居中"""
        self.center()
        """窗口维持--持久化"""
        self.window.mainloop()


if __name__ == '__main__':
    b = BATSpider()
    b.run_loop()
快去试试吧,4k壁纸等你来拿!!!可以给博主点赞和收藏么?感谢支持!代码仅供学习使用,切记。

祝大家学习python顺利!
以上是关于python爬取彼岸图4k壁纸,想要什么类型的壁纸就输入什么壁纸,太方便了。。的主要内容,如果未能解决你的问题,请参考以下文章