Android Studio入门:Android应用界面详解(中)(Android控件详解AdapterView及其子类)
Posted Lora青蛙
tags:
篇首语:本文由小常识网(cha138.com)小编为大家整理,主要介绍了Android Studio入门:Android应用界面详解(中)(Android控件详解AdapterView及其子类)相关的知识,希望对你有一定的参考价值。
Android Studio入门:Android应用界面详解(上)(View、布局管理器)
文章目录
android控件详解
在学习过安卓的布局方式以后,要进行UI界面的设计,还需要熟练掌握各种控件的应用。开始一个界面的设计都是先创建容器,然后不断地向容器中添加组件,最后形成一个UI界面。掌握这些基本用户界面组件是学好Android编程的基础。接下来将详细地介绍各个组件如何地使用。
TextView(文本框)
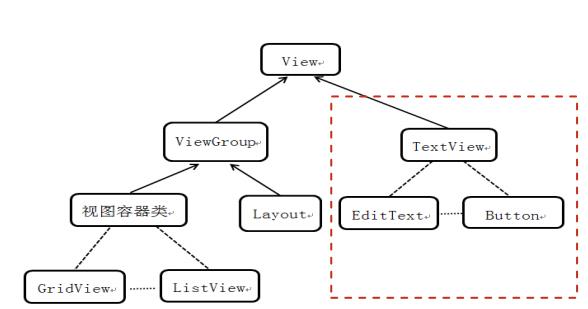
TextView直接继承了View,它还是EditText和Button两个UI组件类的父类。
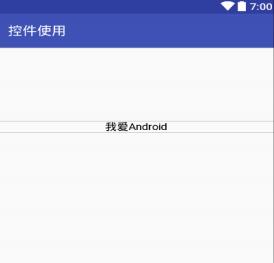
TextView的作用就是在界面上显示文字,通过在布局文件当中或者在Activity中修改文字的内容。
TextView常用属性:
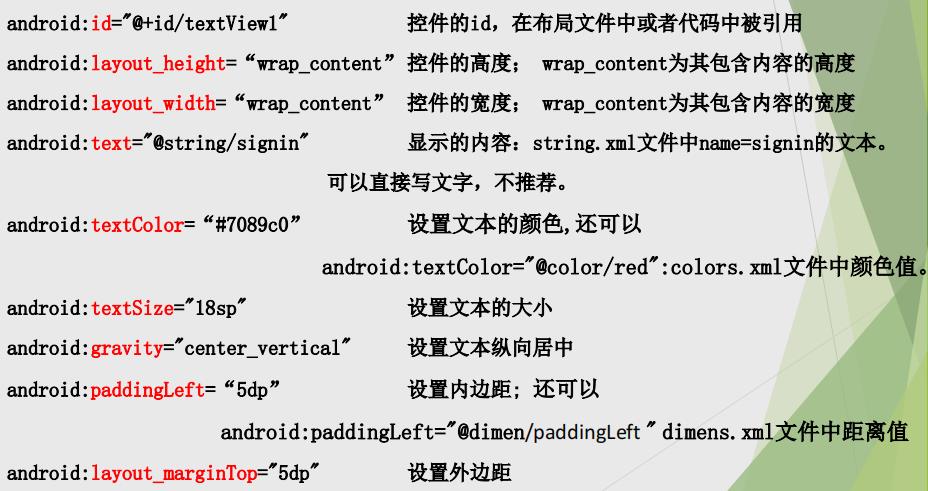
values/colors.xml:
<?xml version="1.0" encoding="utf-8"?>
<resources>
<color name="purple_200">#FFBB86FC</color>
<color name="purple_500">#FF6200EE</color>
<color name="purple_700">#FF3700B3</color>
<color name="teal_200">#FF03DAC5</color>
<color name="teal_700">#FF018786</color>
<color name="black">#FF000000</color>
<color name="white">#FFFFFFFF</color>
<color name="red">#ff0000</color>
</resources>
values/dimens.xml:
<?xml version="1.0" encoding="utf-8"?>
<resources>
<dimen name="paddingLeft">555dp</dimen>
</resources>
EditText(输入框)
EditText与TextView非常的相似,许多XML属性都能共用,与TextView的最大区别就是EditText能够接受用户的输入。
EditText的重要属性就是inputType,该属性相当于html的<input…/>元素的type属性,用于将EditText设置为指定类型的输入组件,如手机号、密码、日期等。还有一个属性是当提示用户当前文本框要输入的内容是什么,使用android:hint=“”来提示用户,当用户点击文本框这些文字就会消失。
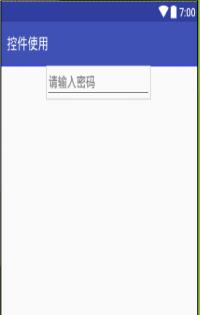
EditText的inputType属性
inputType属性在EditText输入值时, 启动虚拟键盘的风格。有时需要虚拟键盘
只能输入字符或数字。所以inputType尤为重要。
android:inputType=“textCapCharacters” 字母大写
android:inputType=“textMultiLine” 多行输入
android:inputType=“textEmailAddress” 电子邮件地址
android:inputType=“textPassword” 密码,隐藏字符
android:inputType=“textVisiblePassword” 密码,字符可见
android:inputType=“number” 数字
android:inputType=“phone” 拨号键盘
android:inputType=“datetime” 时间日期
android:inputType=“date” 日期键盘
android:inputType=“time” 时间键盘
Button(按钮)
Button继承了TextView,它主要是UI界面上生成的一个按钮,用户可以点击按钮,并且能为按钮添加onClick事件即点击事件。按钮使用起来相对容易,可以通过android:background为按钮设置背景或者自定义样式,关于Button的xml属性和TextView相似,大多数属性能够共用。
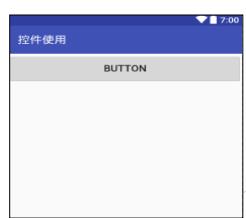
<Button
android:layout_height="40dp"
android:layout_width="wrap_content"
android:minWidth="100dp"
android:layout_marginLeft="0dp"
android:layout_marginRight="2dp"
android:layout_marginTop="5dp"
android:layout_marginBottom="10dp"
android:background="@drawable/button"
android:text="@string/login"
android:textColor="#fff"
android:textSize="18sp"
android:id="@+id/login"
android:textAllCaps="true"
android:onClick=“onLoginClick” //单击事件处理方法
/>
ImageView(图像视图)
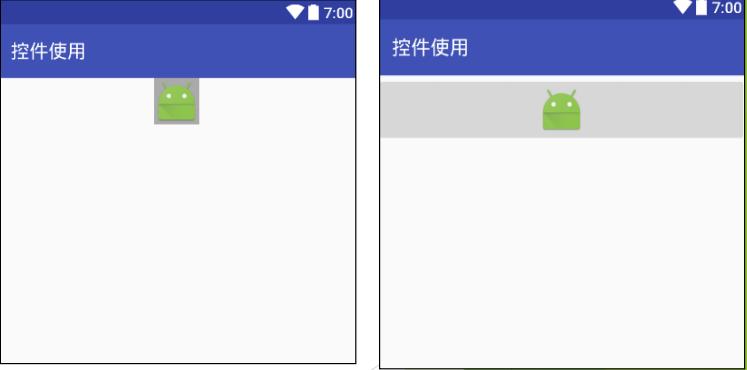
ImageView,它的主要功能是用于显示图片,任何Drawable对象都可以使用ImageView显示。ImageView还派生了ImageButton组件,因此ImageView支持的XML属性、方法,基本上也可以应用于这两个组件。
<LinearLayout xmlns:android="http://schemas.android.com/apk/res/android"
xmlns:app="http://schemas.android.com/apk/res-auto"
android:layout_width="match_parent"
android:layout_height="match_parent"
android:orientation="vertical">
<ImageView
android:id="@+id/imageView"
android:layout_width="wrap_content"
android:layout_height="wrap_content"
android:layout_gravity="center"
android:src="@mipmap/ic_launcher" />
<ImageButton
android:id="@+id/imageButton"
android:layout_width="fill_parent"
android:layout_height="wrap_content"
android:src="@mipmap/ic_launcher" />
</LinearLayout>
RadioButton(单选按钮)和CheckBox(多选框)
单选按钮(RadioButton)和复选框(CheckBox)是用户界面中最普通的UI组件,它们都继承自Button类,因此可以直接使用Button支持的各种属性和方法。
RadioButton和CheckBox都多了一个可选中的功能,因此可以额外指定一个android:checked属性,用于指定RadioButton和CheckBox初始时是否被选中。
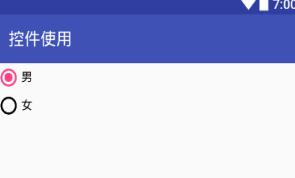
RadioButton和CheckBox的不同之处在于,一组RadioButton只能只能选中其中一个,因此RadioButton通常要和RadioGroup一起使用,用于定义一组单选按钮。
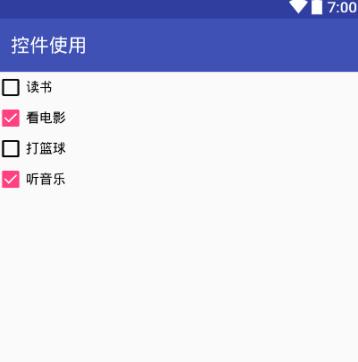
CheckBox:同时可以选择多个选项的控件
RadioButton:仅可以选择一个选项的控件
RadioGroup是RadioButton的承载体,程序运行时不可见,应用程序中可能包含一个或多个RadioGroup。
RadioGroup继承至LinearLayout,所以LinearLayout的属性RadioGroup都可以使用android:orientation属性控制RadioButton 的排列方向。
一个RadioGroup包含多个RadioButton,在每个RadioGroup中,用户仅能够选择其中一RadioButton
checked 属性:android:checked=“true” 或 “false”
RadioButton必须设置id属性,才能实现单选
<!--单选按钮-->
<RadioGroup
android:layout_width="match_parent"
android:layout_height="wrap_content">
<RadioButton
android:id="@+id/radioButton2"
android:layout_width="wrap_content"
android:layout_height="wrap_content"
android:checked="true"
android:text="男" />
<RadioButton
android:id="@+id/radioButton"
android:layout_width="wrap_content"
android:layout_height="wrap_content"
android:text="女" />
</RadioGroup>
<!--复选框-->
<CheckBox
android:id="@+id/checkBox"
android:layout_width="match_parent"
android:layout_height="wrap_content"
android:text="读书" />
<CheckBox
android:id="@+id/checkBox2"
android:layout_width="match_parent"
android:layout_height="wrap_content"
android:text="看电影" />
。。。。。。
ProgressBar(进度条)
ProgressBar也是一组重要的组件,ProgressBar本身代表了进度条组件,它还派生了两个常用的组件:seekBar和RatingBar。ProgressBar及其子类十分相似,只是在显示上有一定的区别。
进度条通常用于向用户显示某个耗时操作完成的百分比。进度条可以动态地显示进度,因此避免长时间地执行某个耗时操作时,让用户感觉程序失去了响应,从而带给用户更好的体验。
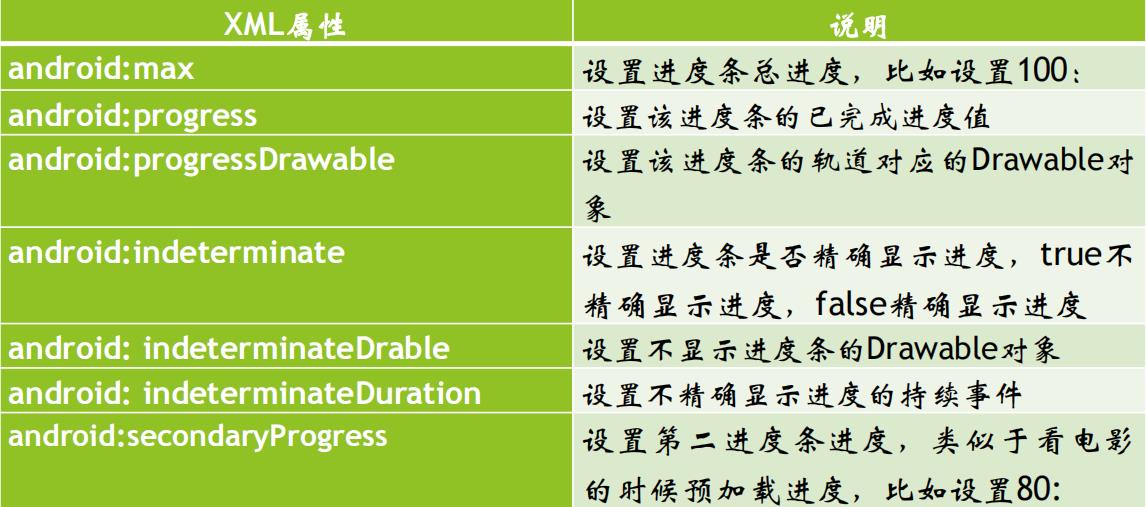
ProgressBar分为确定的和不确定的,不确定的就是不确定一个操作需要多长时间来完成,这个时候就需要用的不确定的ProgressBar。这个是由属性android:indeterminate来控制的,如果设置为true的话,那么ProgressBar就可能是圆形的滚动条或者水平的滚动条(由样式决定)。默认情况下,如果是水平进度条,那么就是确定的。
Android支持多种风格的进度条,通过style属性可以为ProgressBar指定风格:
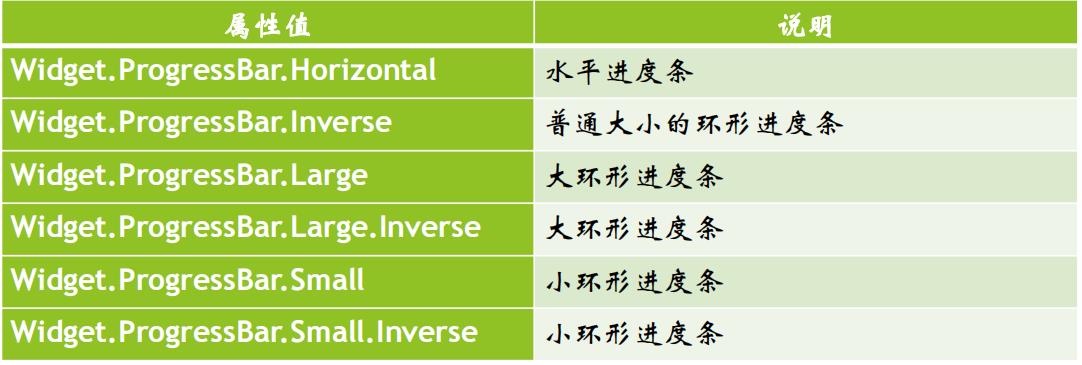
使用时候style="@android:style/Widget.ProgressBar.Small"。
另外还有一种方式就是使用系统的attr:
style="?android:attr/progressBarStyle“
style="?android:attr/progressBarStyleHorizontal"
style="?android:attr/progressBarStyleInverse"
style="?android:attr/progressBarStyleLarge"
style="?android:attr/progressBarStyleLargeInverse"
style="?android:attr/progressBarStyleSmall"
style="?android:attr/progressBarStyleSmallInverse“
style="?android:attr/progressBarStyleSmallTitle"
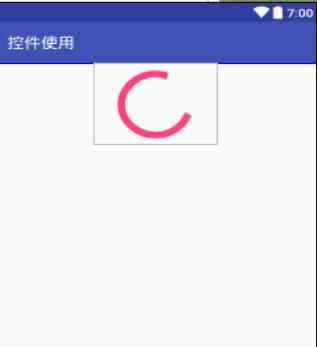
<?xml version="1.0" encoding="utf-8"?>
<LinearLayout
xmlns:android="http://schemas.android.com/apk/res/android"
android:layout_width="match_parent"
android:layout_height="match_parent"
android:orientation="vertical">
<ProgressBar
android:id="@+id/progressBar5"
style="?android:attr/progressBarStyle"
android:layout_width="match_parent"
android:layout_height="wrap_content" />
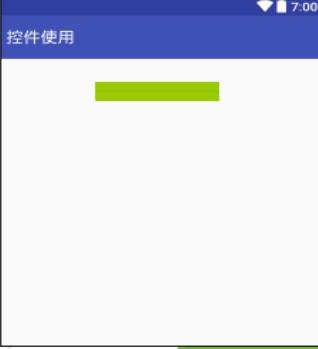
<ProgressBar
android:id="@+id/progressBar4"
style="?android:attr/progressBarStyleHorizontal"
android:layout_width="145dp"
android:layout_height="25dp"
android:layout_gravity="center"
android:layout_marginTop="30dp"
android:background="@android:color/holo_green_light" />
</LinearLayout>
SeekBar(拖动条)
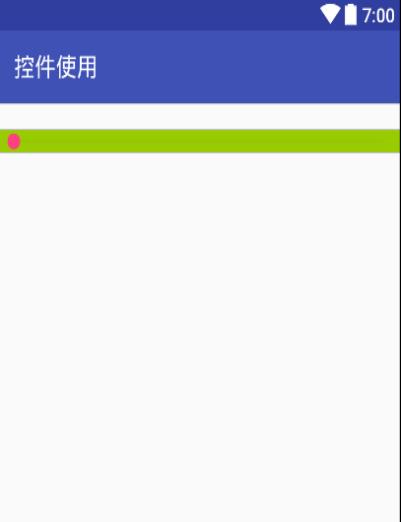
拖动条(SeekBar)与进度条非常相似,只是进度条采用颜色填充来表示进度完成的程度,而拖动条则通过滑块的位置来标识数字。拖动条允许用户拖动滑块来改变值,因此拖动条通常用于对系统的某种数值进行调节,比如音量调节等。
由于拖动条继承了进度条,因此进度条所支持的XML属性和方法同样适用于拖动条。进度条允许用户改变拖动条的滑块外观,改变滑块外观通过android:thumb属性来指定,这个属性指定一个Drawable对象,该对象将作为自定义滑块。为了让程序能够响应拖动条滑块位置的改变,程序可以为它绑定一个OnSeekBarChangeListener监听器。
<?xml version="1.0" encoding="utf-8"?>
<LinearLayout
xmlns:android="http://schemas.android.com/apk/res/android"
android:layout_width="match_parent"
android:layout_height="match_parent">
<SeekBar
android:id="@+id/seekBar"
android:layout_width="wrap_content"
android:layout_height="wrap_content"
android:layout_marginTop="20dp"
android:background="@android:color/holo_green_light"
android:layout_weight="1" />
</LinearLayout>
AdapterView及其子类
AdapterView是一组重要的组件,AdapterView本身是一个抽象基类,它派生的子类在用法上十分相似,只是显示界面上有一定的区别。AdapterView具有如下特征:
AdapterView继承了ViewGroup,它的本质是容器。
AdapterView可以包括多个“列表项”,并以合适的方式显示出来。
AdapterView显示的多个“列表项”由Adapter提供。调用AdapterView的setAdapter(Adapter)方法设置Adapter。
ListView和ListActivity
ListView是手机系统中使用非常广泛的一种组件,它以垂直列表的形式显示所有的列表项。
手机屏幕空间有限,能显示的内容不多。可以借助ListView来显示更多的内容。
ListView允许用户通过上下滑动来将屏幕外的数据滚动到屏幕内,同时屏幕内原有的数据滚动出屏幕,从而显示更多的数据内容。

生成列表视图有如下两种方式:
直接使用ListView进行创建。
创建一个继承ListActivity的Activity(相当于该Activity显示的组件为ListView)。
一旦在程序中获得了ListView之后,接下来就需要为ListView设置它要显示的列表项。通过setAdapter(Adapter)方法为ListView提供Adapter, 由Adapter提供列表项。
使用ListActivity用来显示列表数据
ListActivity的使用步骤:
1)继承自ListActivity,如:xxx extends ListActivity
2)重写onCreate方法,在该方法中,需要做三件事情:
a)准备数据源
b)设置适配器
c)绑定适配器
3)重写点击事件
void onListItemClick(ListView l, View v, int position, long id)
public class MainActivity extends ListActivity {
@Override
protected void onCreate(Bundle savedInstanceState) {
super.onCreate(savedInstanceState);
//setContentView(R.layout.main);
//1.数据源
String[] data = {"武汉","北京","上海","成都","西安"};
//2.适配器
@SuppressWarnings("unchecked")
ArrayAdapter arrayAdapter = new ArrayAdapter(this,
android.R.layout.simple_list_item_1, data);
//3.绑定
setListAdapter(arrayAdapter);
}
@Override
protected void onListItemClick(ListView l, View v, int position, long id) {
super.onListItemClick(l, v, position, id);
Toast.makeText(MainActivity.this
,"点中了第"+position+"个"+" "+l.getAdapter().getItem(position).toString()
,Toast.LENGTH_LONG).show();
} }
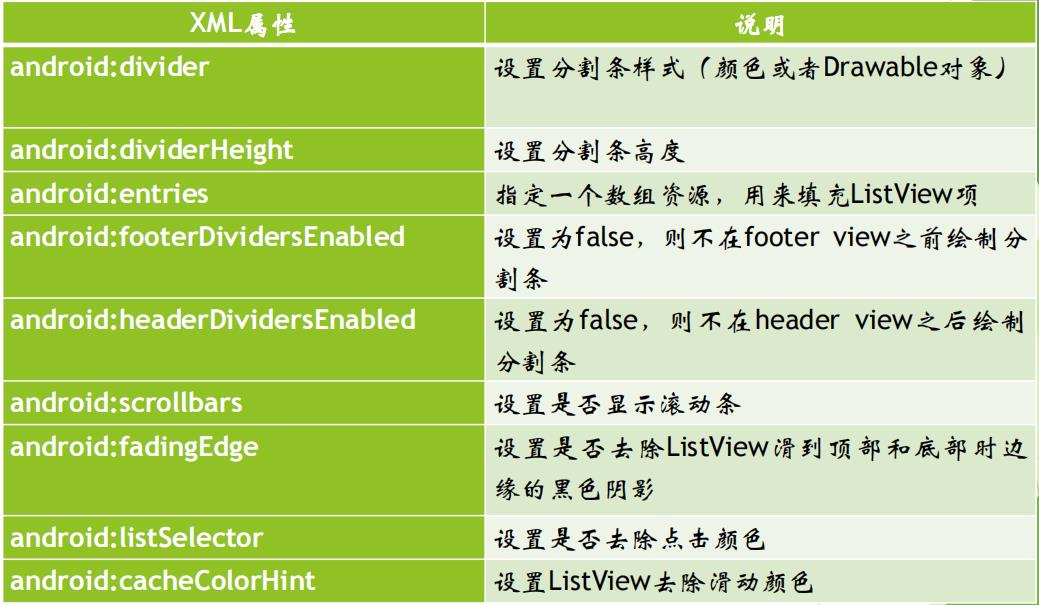
ListView常用的XML属性
<?xml version="1.0" encoding="utf-8"?>
<LinearLayout
xmlns:android="http://schemas.android.com/apk/res/android"
android:layout_width="match_parent"
android:layout_height="match_parent">
<!--直接使用数组资源给list view添加列表项-->
<!--设置分割条的颜色-->
<!--设置分割条的高度--> <ListView
android:id="@+id/listview1"
android:layout_width="match_parent"
android:layout_height="wrap_content"
android:divider="#C4C4C4“
android:dividerHeight="1dp">
android:entries="@array/teacher_name" </ListView>
</LinearLayout>
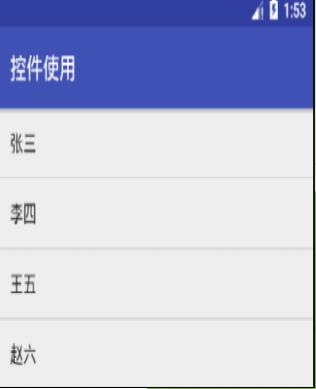
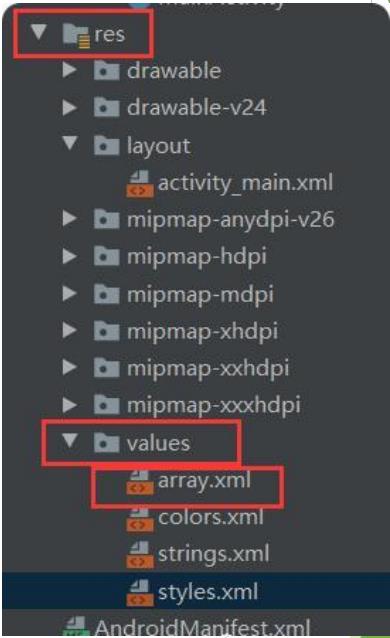
values/arrays.xml文件
<?xml version="1.0" encoding="utf-8"?>
<resources>
<!--添加数组元素-->
<string-array name="teacher_name">
<item>张三</item>
<item>李四</item>
<item>王五</item>
<item>赵六</item>
</string-array>
</resources>
在res文件夹下新建array.xm
Adapter接口
Adapter本身只是一个接口,它派生了ListAdapter和SpinnerAdapter两个子接口,其中ListAdapter为AbsListView提供列表项,而SpinnerAdapter为AbsSpinner提供列表项。
Adapter常用的实现类如下:
ArrayAdapter:支持泛型操作,最为简单,只能展示一行字。
SimpleAdapter:有最好的扩充性,可以自定义出各种效果。
BaseAdapter:是一个抽象类,继承它需要实现较多的方法,所以也就具有较高的灵活性。
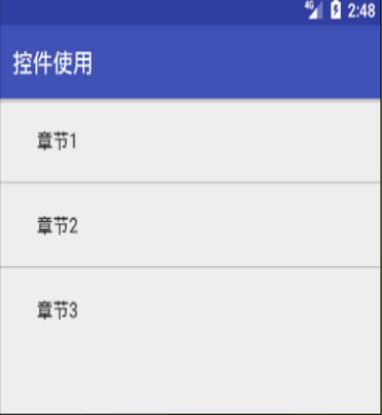
实例一:基于ArrayApter创建ListView
public class MainActivity extends AppCompatActivity {
@Override
protected void onCreate(Bundle savedInstanceState) {
super.onCreate(savedInstanceState);
setContentView(R.layout.listview_layout);
ListView listView=findViewById(R.id.listview1);
//定义一个数组,用来填充listview
String[] arr={"章节1","章节2","章节3"};
ArrayAdapter<String>adapter=newArrayAdapter<String>(
this,android.R.layout.simple_expandable_list_item_1,arr);
//为listview设置adapter
listView.setAdapter(adapter);
} }
实例二:基于SimpleAdapter创建ListView
activity_main.xml
<?xml version="1.0" encoding="utf-8"?>
<LinearLayout
xmlns:android="http://schemas.android.com/apk/res/android"
android:layout_width="match_parent"
android:layout_height="match_parent">
<ListView
android:id="@+id/listview1"
android:layout_width="match_parent"
android:layout_height="wrap_content"
>
</ListView>
</LinearLayout>
list_item_layout.xml
<LinearLayout
xmlns:android="http://schemas.android.com/apk/res/android"
android:layout_width="match_parent"
android:layout_height="match_parent"
android:orientation="horizontal">
<!--定义一个ImageView组件,用来显示头像--> <ImageView
android:id="@+id/icon"
android:layout_width="wrap_content"
android:layout_height="wrap_content" />
<LinearLayout
android:layout_width="match_parent"
android:layout_height="wrap_content"
android:orientation="vertical">
<!--定义一个TextView组件,用来显示名字--> <TextView
android:id="@+id/name"
android:layout_width="wrap_content"
android:layout_height="wrap_content"
android:textSize="16sp"/>
<!--定义一个TextView组件,用来显示人物的描述--> <TextView
android:id="@+id/dexc"
android:layout_width="wrap_content"
android:layout_height="wrap_content"
android:textSize="16sp"/>
</LinearLayout>
</LinearLayout>
Activity代码:
public class MainActivity extends AppCompatActivity {
//定义名字数组
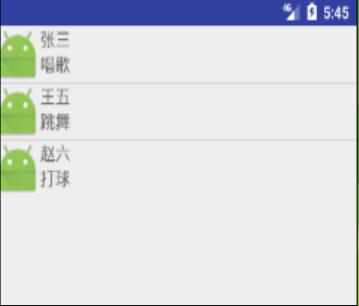
private String[] name={"张三","王五","赵六"};
//定义描述任务数组
private String[] desc={"唱歌","跳舞","打球"};
//定义头像数组
private int[] icon=new int[]
{R.mipmap.ic_launcher,R.mipmap.ic_launcher,R.mipmap.ic_launch
er};
@Override
protected void onCreate(Bundle savedInstanceState) {
super.onCreate(savedInstanceState);
setContentView(R.layout.activity_main);
ListView listView = findViewById(R.id.listview1);
//创建一个list集合,list集合的元素是MAP
List<Map<String,Object>> list=
new ArrayList<Map<String,Object>>();
for(int i=0;i<name.length;i++){
Map<String, Object> listitem=new HashMap<String, Object>();
listitem.put("icon",icon[i]);
listitem.put("name",name[i]);
listitem.put("desc",desc[i]);
list.add(listitem);
//创建一个SimpleAdapter
SimpleAdapter adapter=
new SimpleAdapter(this,list,R.layout.list_item_layout,
new String[]{"name","icon","desc"},
new int[]{R.id.name,R.id.icon,R.id.dexc});
listView.setAdapter(adapter); } }
使用SimpleAdapter最重要的是它的5个参数,尤其是后面4个,第二个参数是List<Map<String,?>>类型的集合对象,该集合中每个Map<String,?>对象生成一行;第三个参数是指定一个界面布局的ID,这里引用了一个自定义的布局list_item_layout.xml文件;第四个参数是String[]类型的参数,该参数决定提取哪些内容显示在listview的每一行;最后一个是int[]类型的参数,决定显示哪些组件。
实例三:基于BaseAdapter创建ListView
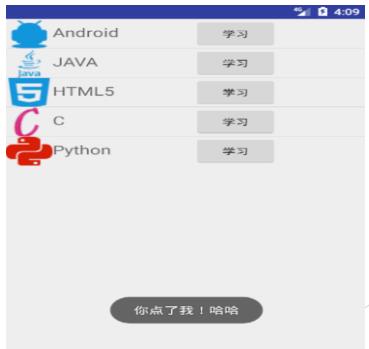
在使用SimpleAdapter时,用户可以在布局当中定义按钮,但是当用户点击时,由于点击操作被ListView的Item所覆盖,导致按钮无法获取到焦点,这时候最方便的方法就是使用灵活的适配器BaseAdapter了。BaseAdapter是最基础的Adapter,具有全能性,不会像ArrayAdapter等的封装好的类有那么多局限性,但是这样的话,使用起来自然会更加麻烦一点。
(1)自定义布局文件list_item_layout.xml作为每一行的布局样式
<?xml version="1.0" encoding="utf-8"?>
<LinearLayout
xmlns:android="http://schemas.android.com/apk/res/android"
android:layout_width="match_parent"
android:layout_height="match_parent"
android:orientation=以上是关于Android Studio入门:Android应用界面详解(中)(Android控件详解AdapterView及其子类)的主要内容,如果未能解决你的问题,请参考以下文章