Windows10下PyTorch环境安装
Posted 何以解忧 `唯有暴富
tags:
篇首语:本文由小常识网(cha138.com)小编为大家整理,主要介绍了Windows10下PyTorch环境安装相关的知识,希望对你有一定的参考价值。
一、CUDA安装
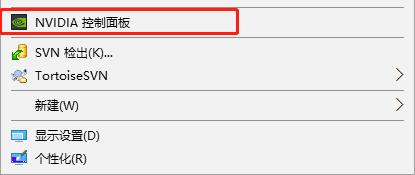
桌面点击右键,查看NVIDIA控制面板
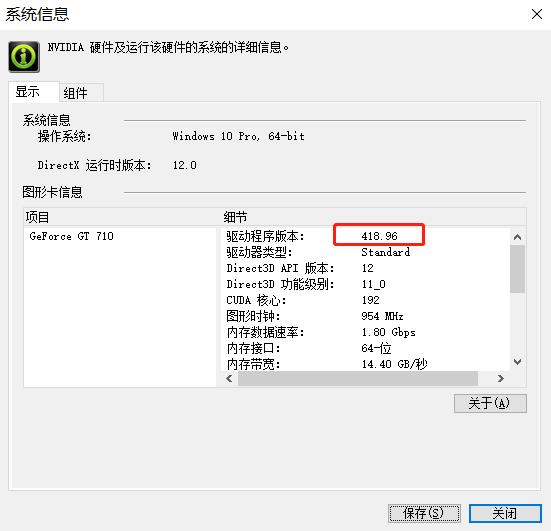
查看系统信息

查看版本
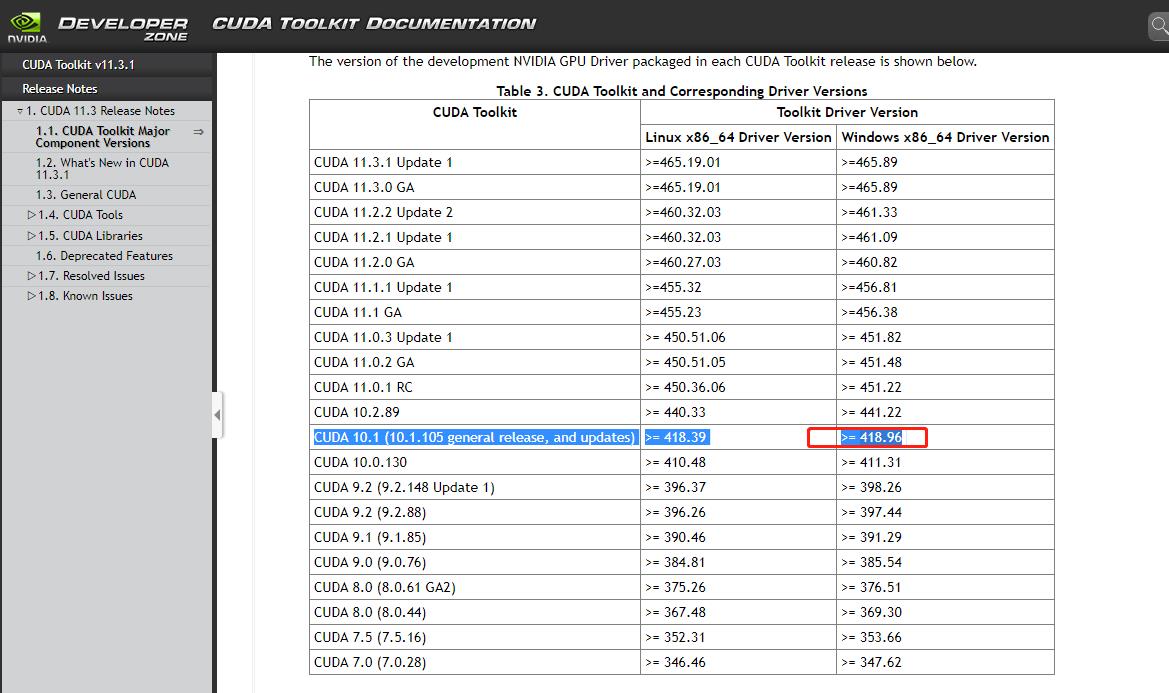
登录nvidia官网查看选择cuda的安装版本
https://docs.nvidia.com/cuda/cuda-toolkit-release-notes/index.html
我的显卡只能安装CUDA 10.1在高的版本就无法安装了
下载CUDA 10.1,需要注册一个账号,如果无法访问,请使用绕墙软件
官网:https://developer.nvidia.com/cuda-10.1-download-archive-update2

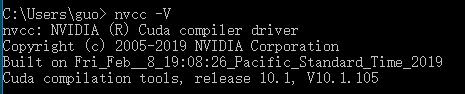
下载安装完毕,在命令行下输入 nvcc -V, 出现下列信息说明Cuda安装成功
二、CuDNN安装
下载CuDNN
官网 https://developer.nvidia.com/rdp/cudnn-download
注意版本不要选高了
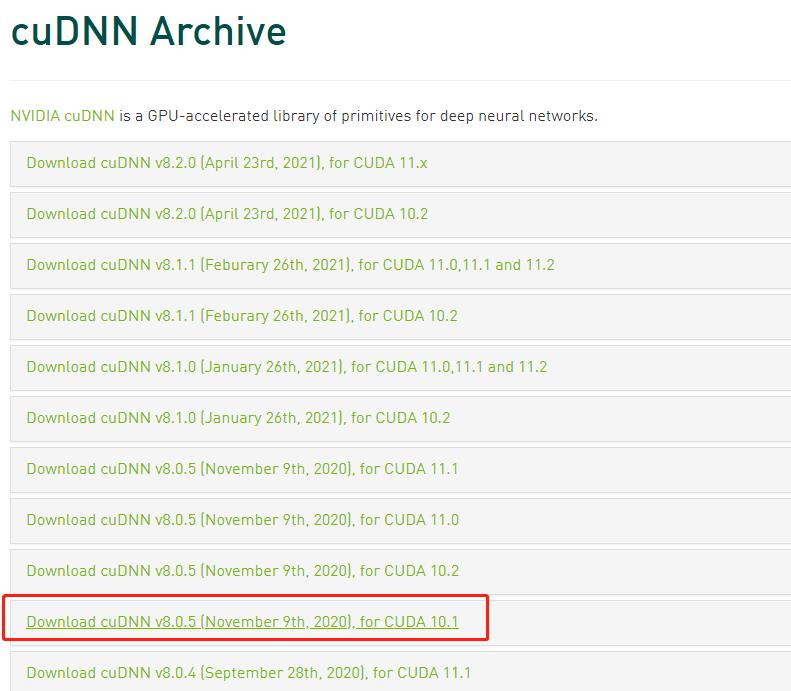
下载比较慢,我提前下载好放到这里了,2个版本,选一个下载就行,然后解压
https://download.csdn.net/download/g313105910/19714002
https://download.csdn.net/download/g313105910/19713955
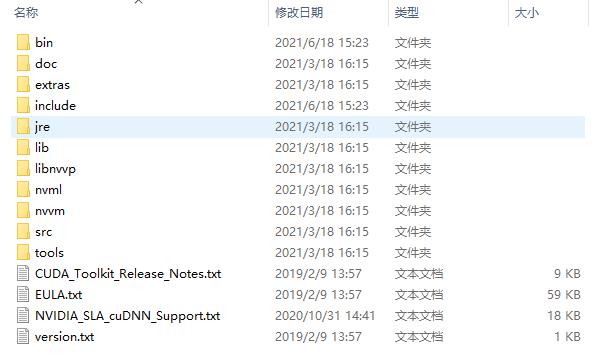
复制到CUDA的安装目录,我的安装目录如下
C:\\Program Files\\NVIDIA GPU Computing Toolkit\\CUDA\\v10.1
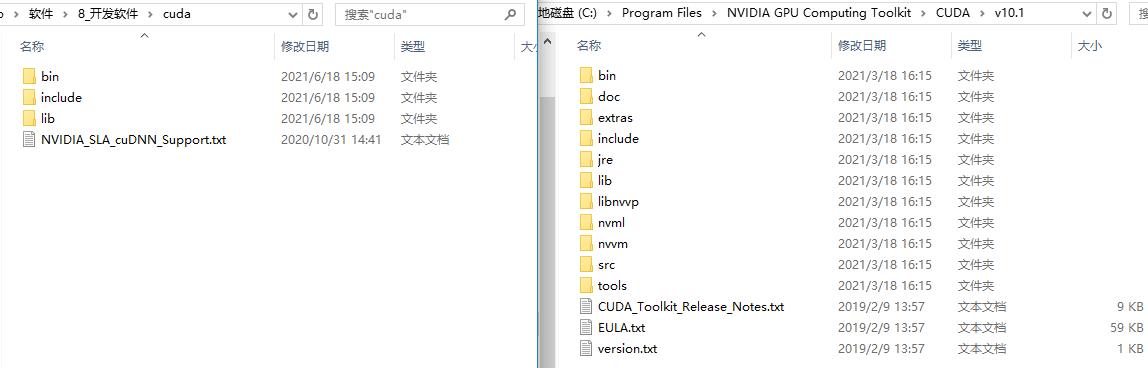
复制后
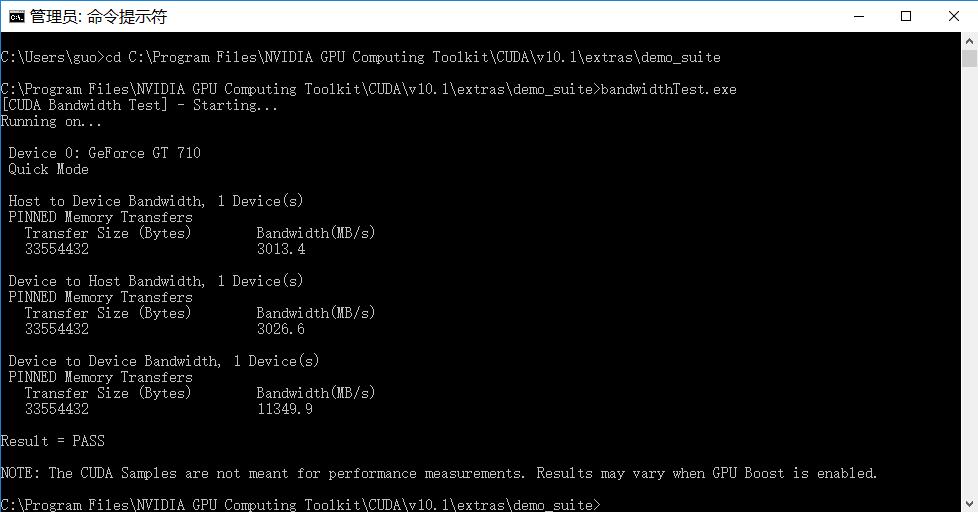
测试,使用管理员运行cmd,进入NVIDIA GPU Computing Toolkit\\CUDA\\v10.1\\extras\\demo_suite目录,运行bandwidthTest.exe,显示PASS则说明安装成功
三、Anaconda安装
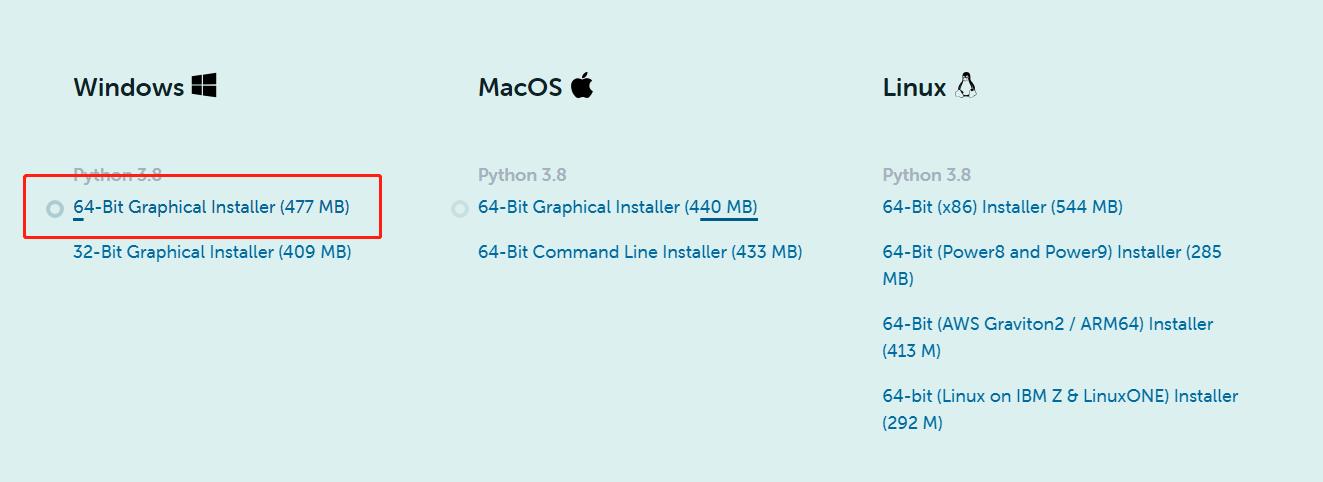
下载链接:https://www.anaconda.com/


选择版本
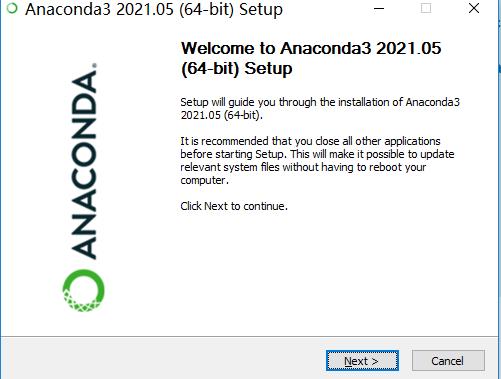
一路下一步将其安装
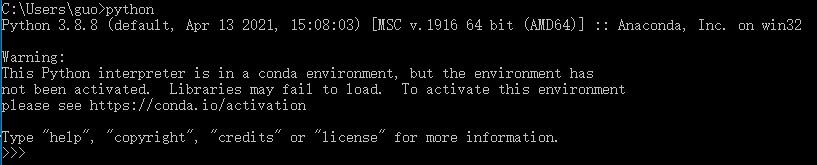
查看python版本
四、Anaconda Prompt配置
单击启动Anaconda Prompt 创建虚拟“房间”
![]()
通过conda创建一个名为:pytorch的虚拟“房间”,可以方便未来对不同版本的PyTorch进行管理,具体方法如下:
conda create -n pytorch python=3.6如果出现如下错误
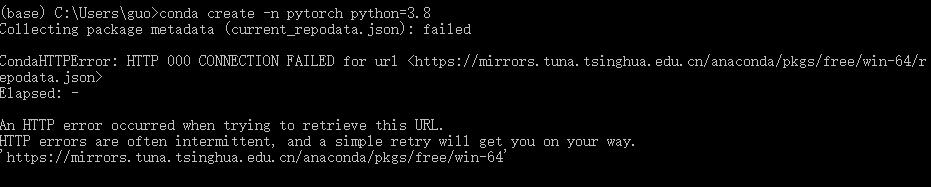
# 使用清华的镜像链接
conda config --add channels 'https://mirrors.tuna.tsinghua.edu.cn/anaconda/pkgs/free/'
conda config --set show_channel_urls yes
如果还是不行,到打开 C盘/用户/(你的用户名xx)/.condarc,我自己的如下图所示:
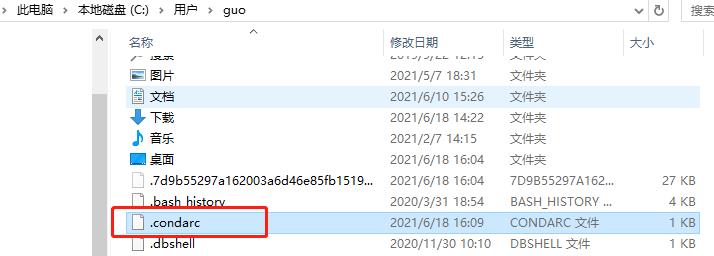
把以下这段代码复制到这个.condarc文件中:
channels:
  - defaults
show_channel_urls: true
channel_alias: https://mirrors.tuna.tsinghua.edu.cn/anaconda
default_channels:
  - https://mirrors.tuna.tsinghua.edu.cn/anaconda/pkgs/main
  - https://mirrors.tuna.tsinghua.edu.cn/anaconda/pkgs/free
  - https://mirrors.tuna.tsinghua.edu.cn/anaconda/pkgs/r
  - https://mirrors.tuna.tsinghua.edu.cn/anaconda/pkgs/pro
  - https://mirrors.tuna.tsinghua.edu.cn/anaconda/pkgs/msys2
custom_channels:
  conda-forge: https://mirrors.tuna.tsinghua.edu.cn/anaconda/cloud
  msys2: https://mirrors.tuna.tsinghua.edu.cn/anaconda/cloud
  bioconda: https://mirrors.tuna.tsinghua.edu.cn/anaconda/cloud
  menpo: https://mirrors.tuna.tsinghua.edu.cn/anaconda/cloud
  pytorch: https://mirrors.tuna.tsinghua.edu.cn/anaconda/cloud
  simpleitk: https://mirrors.tuna.tsinghua.edu.cn/anaconda/cloud
保存,即可
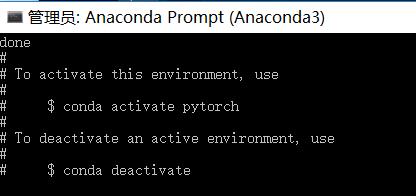
查看创建的“房间”
conda info --envs
五、通过“房间”安装PyTorch
conda activate pytorch 
当前面从(base)变为(pytorch)时表示此时已经切换到pytorch房间,随后正式进入安装pytorch环节。
安装pytorch
通过pytorch官网,点击Get Started,尴尬没我我们的10.1
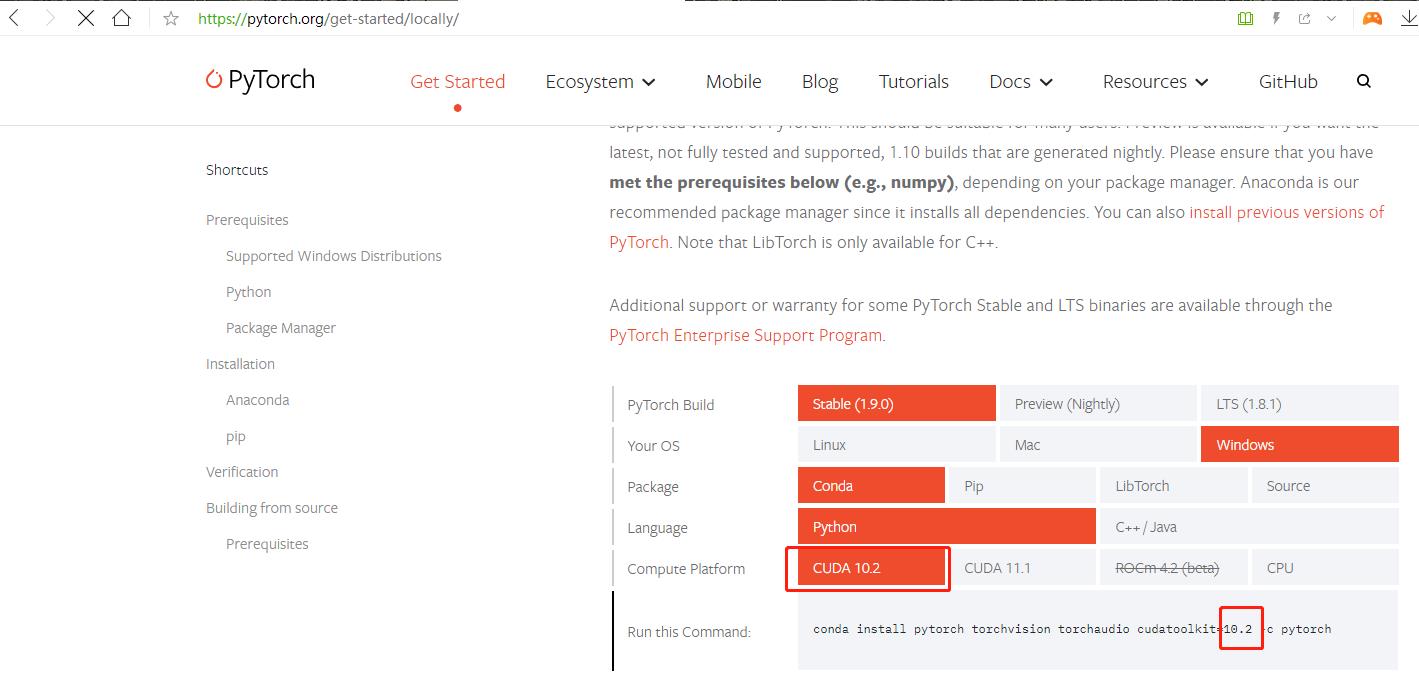
将代码粘贴进Anaconda Prompt,将10.2改为10.1

需要安装的东西真的好多啊,漫长的等待啊
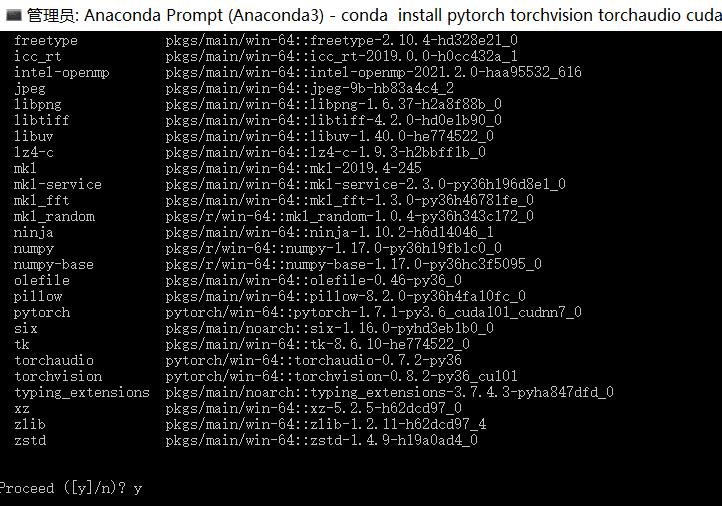
如果网络不好有些包无法下载,可以手动安装
conda install pytorch-1.4.0-cpu_py36ha775e86_0.tar.bz2
下载地址:https://mirrors.tuna.tsinghua.edu.cn/anaconda/pkgs/main/
六、安装PyCharm
下载地址:https://www.jetbrains.com/pycharm/download/
安装过程没什么需要讲解的,不花钱下载社区版
七、测试
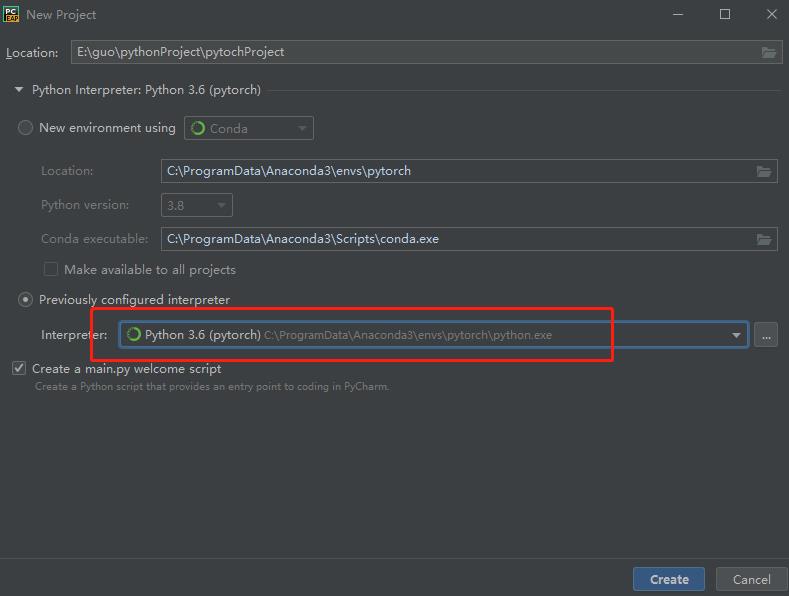
在pycharm中添加pytorch房间的解释器,新建工程
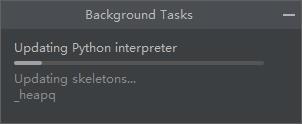
等待
运行,没有错误,说明pytorch环境安装成功

以上是关于Windows10下PyTorch环境安装的主要内容,如果未能解决你的问题,请参考以下文章