教你使用Unity实现录屏生成GIF的功能,录个妹子跳舞的GIF吧
Posted 林新发
tags:
篇首语:本文由小常识网(cha138.com)小编为大家整理,主要介绍了教你使用Unity实现录屏生成GIF的功能,录个妹子跳舞的GIF吧相关的知识,希望对你有一定的参考价值。
文章目录
一、前言
嗨,大家好,我是新发。
昨天有同学私信我问我如何在Unity中实现录屏的功能,

作为一个热心的博主,我今天就来实现这个功能吧,希望可以帮到这位同学~
二、思考与解决方案
1、思考
首先思考一下,要实现录屏功能,我们需要先思考这两个问题:
1 如何获取屏幕图像信息?
2 这些屏幕图像如何采样并保存为可播放格式的文件呢?
2、解决方案
2.1、问题一的解决方案
先回答第一个问题,如何获取屏幕图像信息?
最好先了解一下Unity的渲染流程,我这里简单啰嗦几句。
我们游戏画面的最终的呈现是由CPU与GPU相互配合运算产生的效果,这个过程是一个流水线的模式,也称之为渲染流水线,我们可将其分为三个阶段:应用程序阶段、几何阶段、光栅化阶段,画成图是这样子:
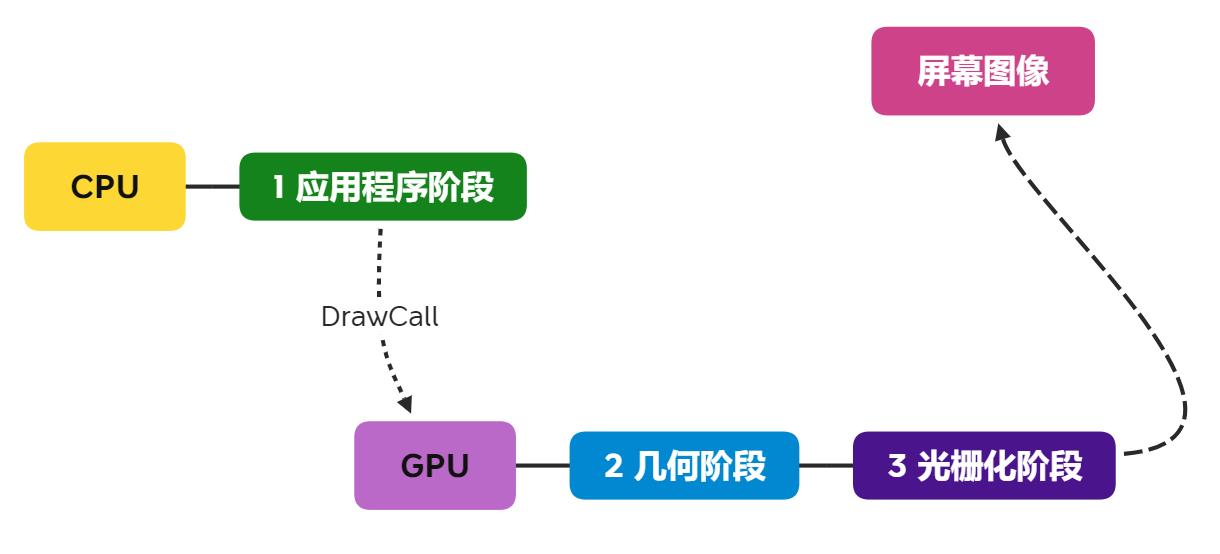
在最后一步屏幕图像这里,Unity提供了后处理回调接口给开发者:OnRenderImage回调。
关于后处理我之前写了一篇演示的文章,感兴趣的同学可以看看:https://blog.csdn.net/linxinfa/article/details/108283232

OnRenderImage接口如下:
// 注:OnRenderImage是Mono的函数,需要放在MonoBehaviour的脚本中
void OnRenderImage(RenderTexture source, RenderTexture dest)
Unity会把当前渲染的图像存储在source纹理中,我们可以使用Graphics.Blit和特定的Shader对当前图像进行处理,再把dest显示在屏幕上。
Graphics.Blit函数模型如下,它的功能就是使用着色器将源纹理复制到目标渲染纹理上。
// Graphics.cs
public static void Blit (Texture source, RenderTexture dest);
public static void Blit (Texture source, RenderTexture dest, Material mat, int pass= -1);
public static void Blit (Texture source, Material mat, int pass= -1);
public static void Blit (Texture source, RenderTexture dest, Vector2 scale, Vector2 offset);
如果不做任何后处理,其实就是直接把source复制到dest上,如下:
void OnRenderImage(RenderTexture source, RenderTexture dest)
{
	Graphics.Blit(source, dest);
}
所以,这个source或dest就是我们要拿的屏幕图像了。
不过,我在测试Graphics.Blit接口的时候,发现了一个秘密,当我通过RenderTexture.GetTemporary获取临时纹理,并Bilt一个null给它,即:
RenderTexture rt = RenderTexture.GetTemporary(with, height, 0);
Graphics.Blit(null, rt);
这样子拿到的rt就是屏幕后备缓冲区的图像了,也就是我们屏幕显示的图像了。

2.2、问题二的解决方案
要把图像帧保存为可播放的格式的文件,我们比较常见的就是视频格式或者GIF格式。如果是保存为视频格式(比如.avi),需要用到OpenCV库:OpenCVSharp,可以在GitHub上找到,
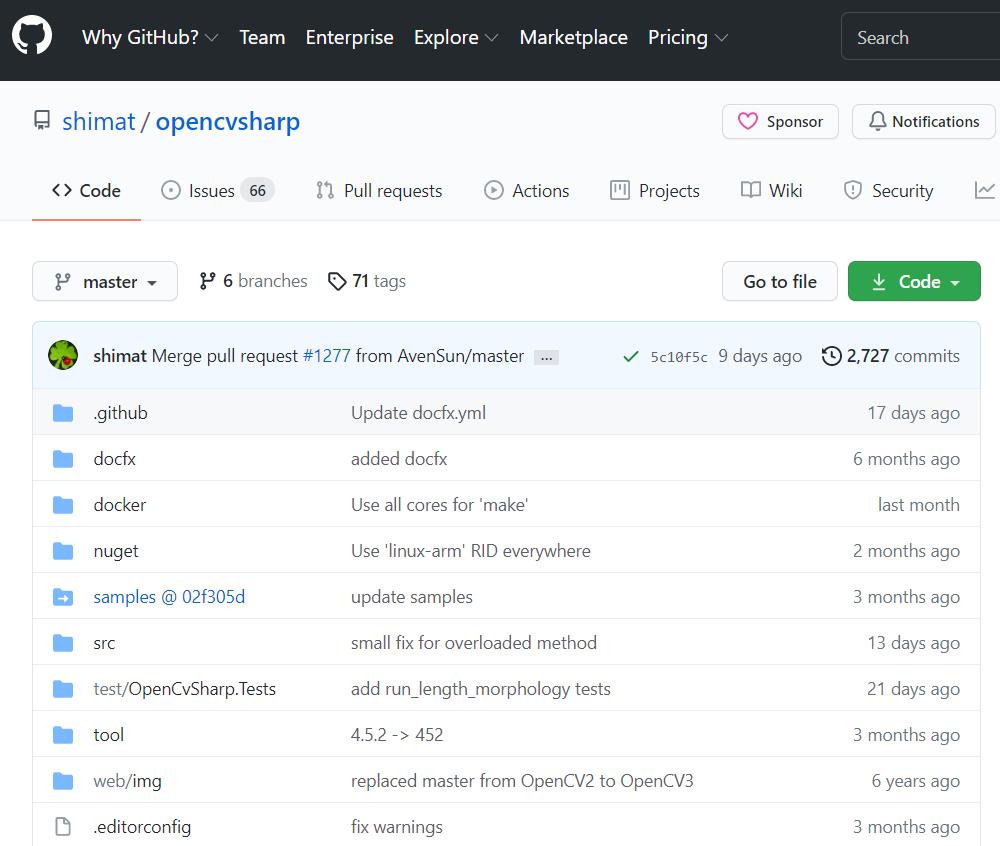
不过,因为我之前对GIF有做过一点点研究,实现起来比较简单,所以我决定保存为GIF格式,不使用OpenCV。
三、撸起袖子开干
1、找个妹子
在做录屏功能之前,我们得先有屏幕内容,嘛,那就找个妹子模型吧。
关于找资源,我之前写了一篇文章:《Unity游戏开发——新发教你做游戏(二):60个Unity免费资源获取网站》,有了这些找资源的渠道,相信足够你平时学习使用了~
我找了下面这个妹子模型,喜欢的可以自行从Asset Store上免费下载:传送门。
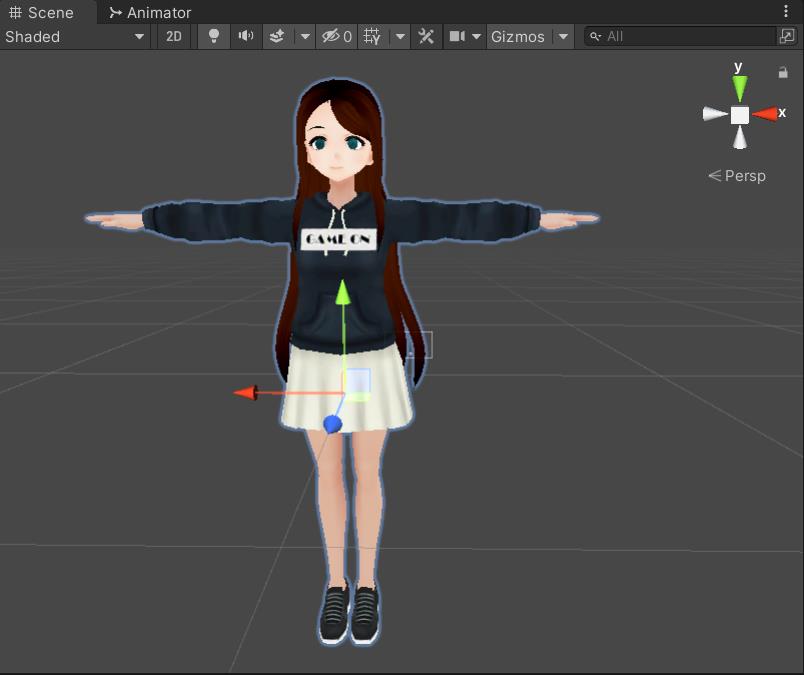
不过光有模型不会动,这不行,我们要让她动起来~
2、给妹子加动画
给人物模型加动画,我给大家推荐一个宝藏网站Mixamo:https://www.mixamo.com/
Mixamo是Adobe旗下的一个产品,可以上传静态人形模型文件,在网站上绑定人形模板动画,并可以下载绑定动画后的模型文件,可以直接在Unity中使用。

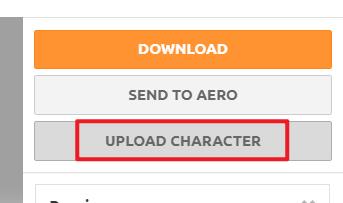
我们点击UPLOAD CHARACTER按钮,上传我们的妹子模型FBX文件。
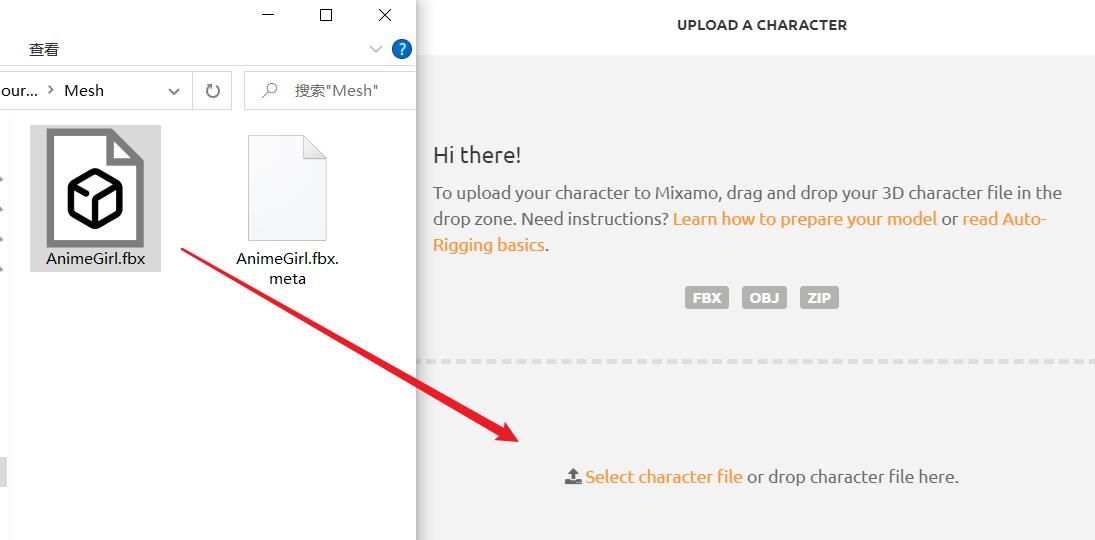
把.fbx文件拖到如下框框中,
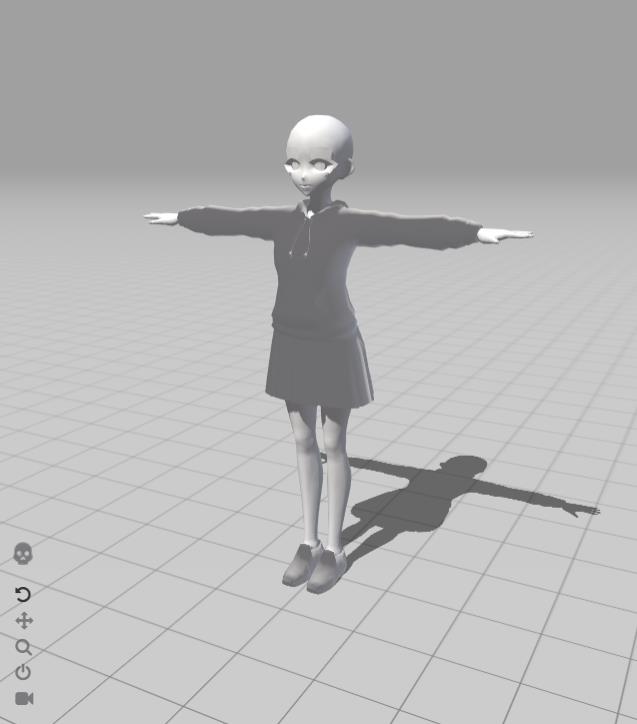
上传成功后,选择你喜欢的动作,
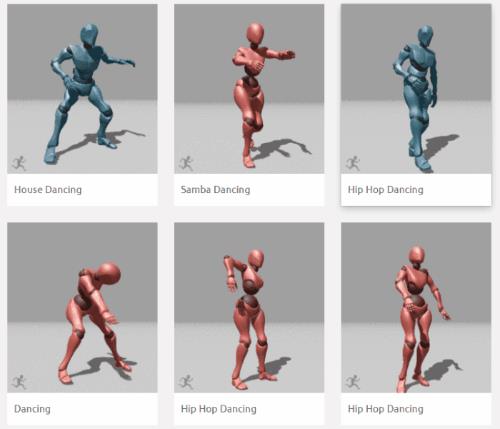
效果如下,这样子看好像有点吓人,
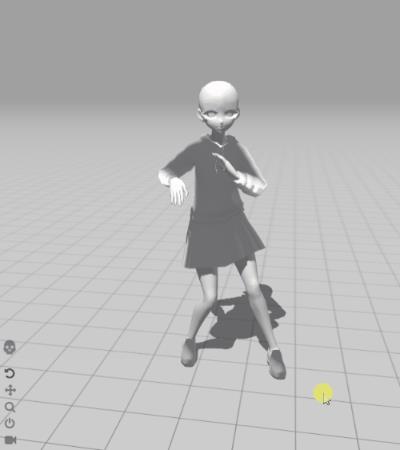
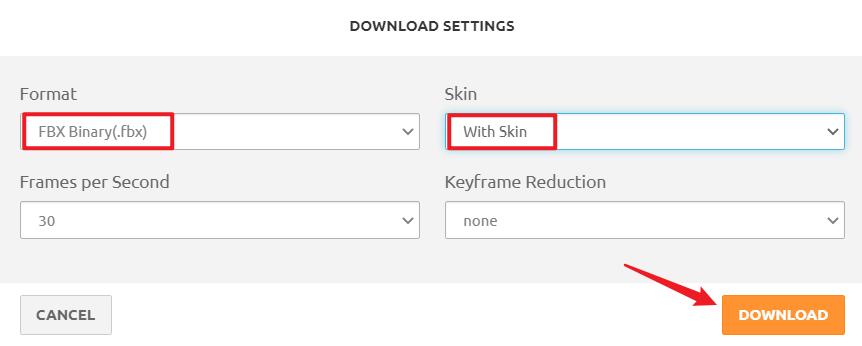
我们点击DOWNLOAD按钮,
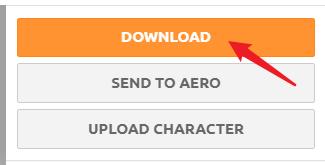
格式选择FBX,Skin选择With Skin,点击DOWNLOAD下载,
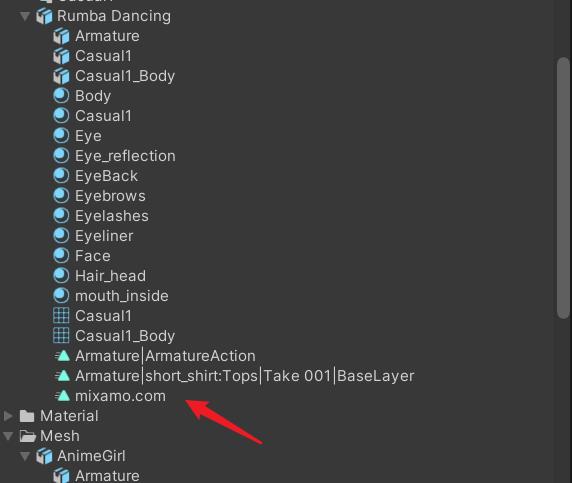
把FBX文件导入到Unity工程中,可以看到里面有一个动画文件,
把动画文件拖给我们的模型妹子,
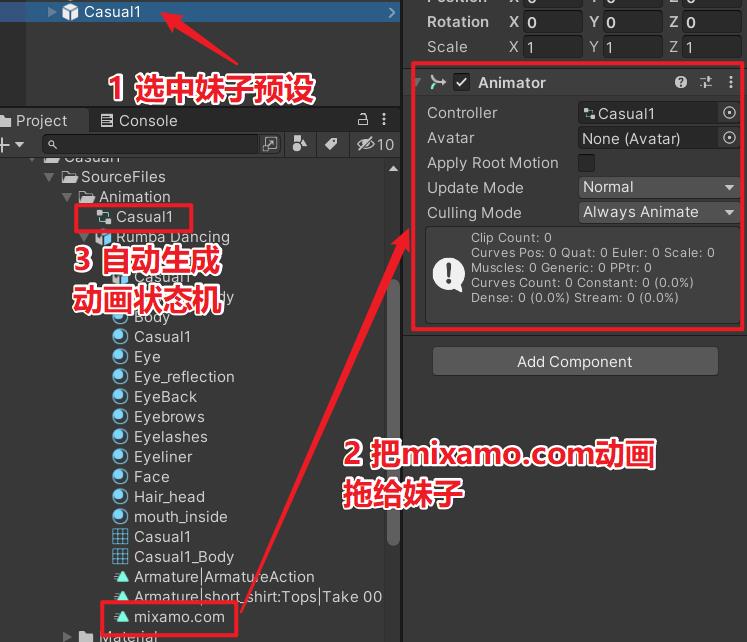
生成的动画状态机如下:

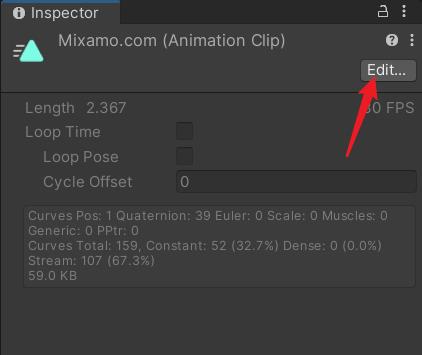
此时我们播放动画会发现这个跳舞动画不会循环播放,我们需要设置一下循环播放,选中动画文件,
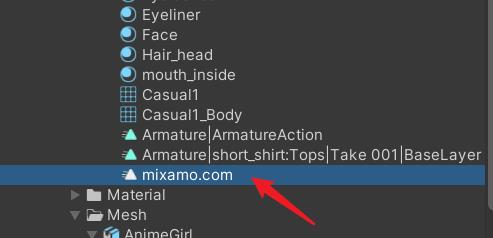
点击Edit按钮,
勾选Loop Time,点击Apply按钮,
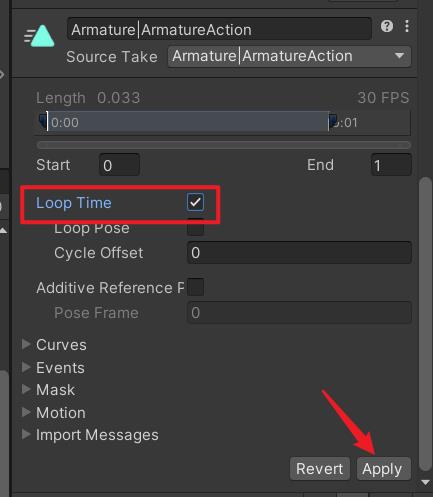
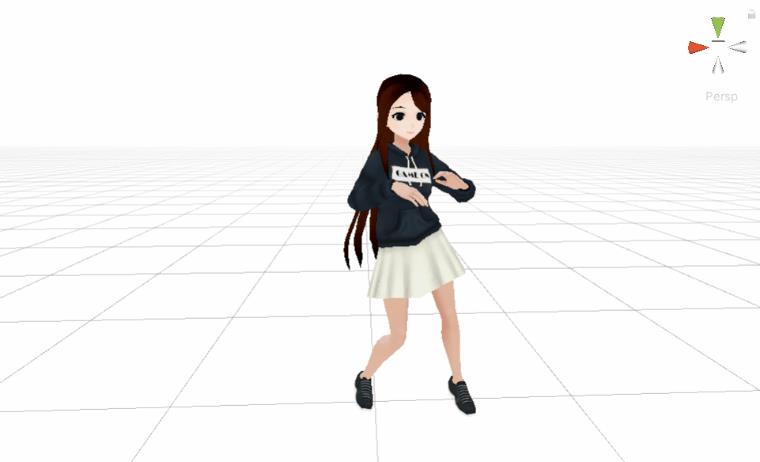
重新播放动画,可以循环播放了,如下:

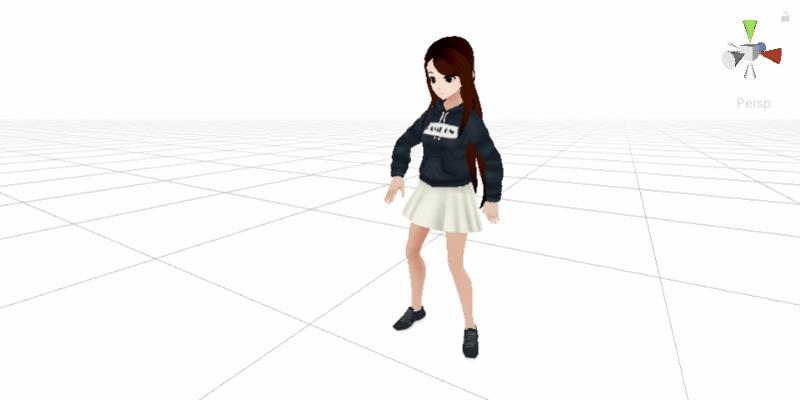
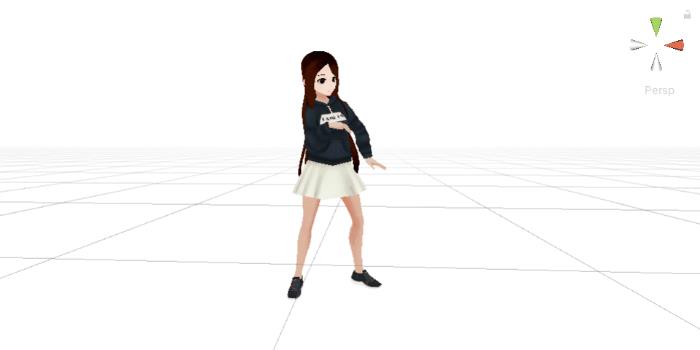
可以多试几个舞蹈动作,


3、程序设计
到了写代码的环节了,不过写代码之前,我们先设计一下程序模块,如下:
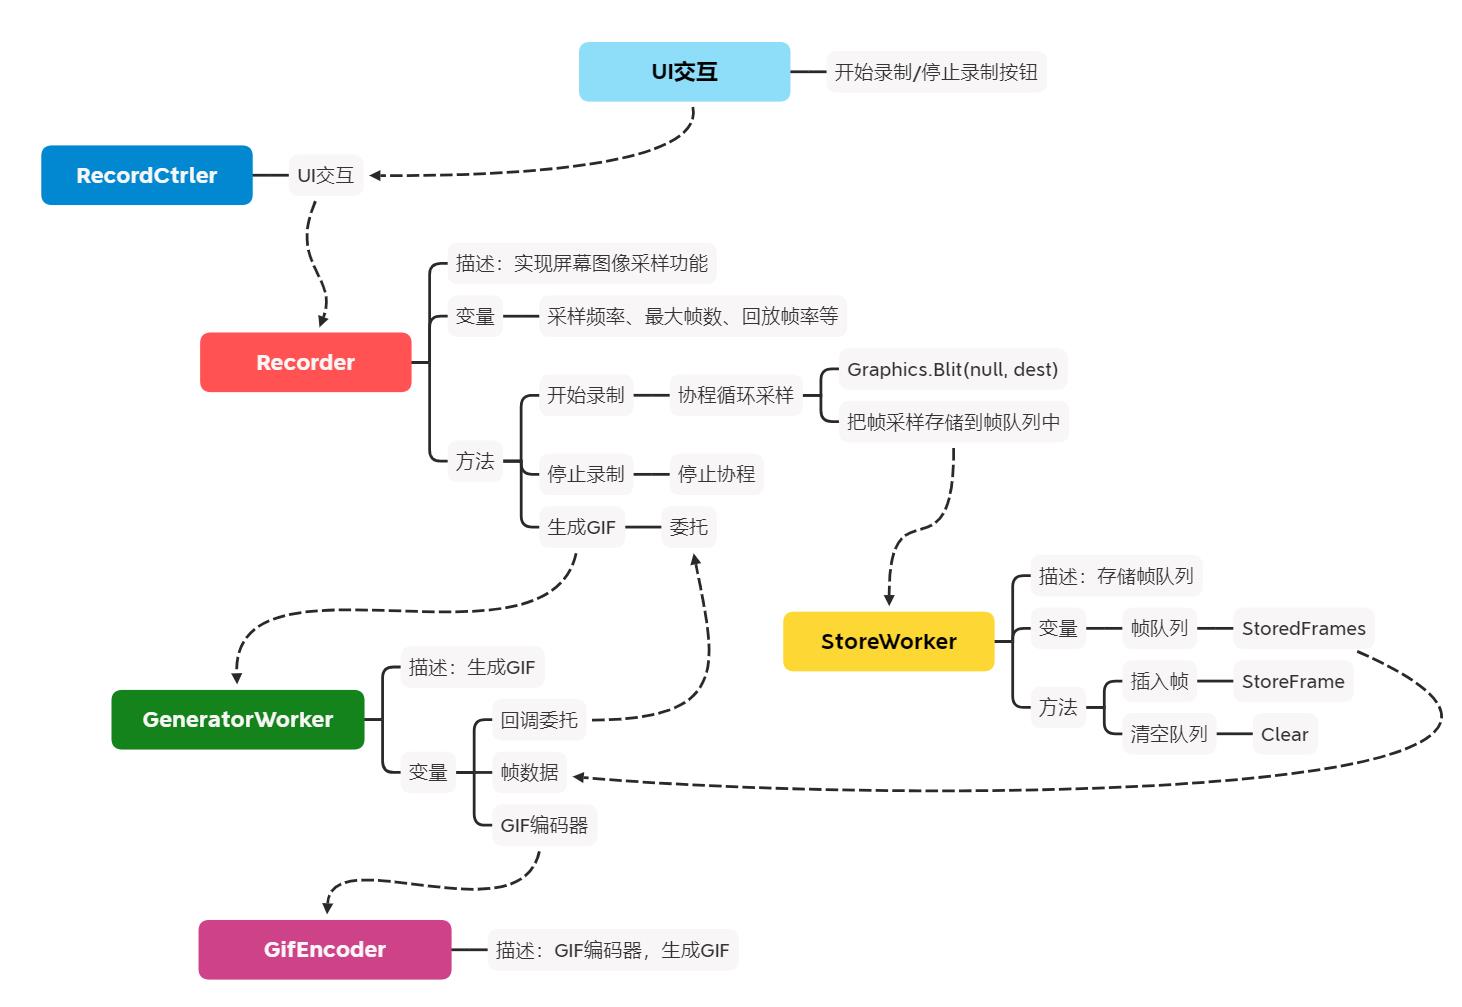
4、屏幕图像采样:Recorder.cs
我们先从Recorder模块写起,先定义我们需要的成员变量,
// Recorder.cs

public class Recorder : MonoBehaviour
{
   internal enum RecordingState
    {
        OnHold = 0,
        Recording = 1,
    }

    // 录制状态
    internal RecordingState CurrentState;

    /// <summary>
    /// 每秒采样次数
    /// </summary>
    public int captureFrameRate = 20;

    /// <summary>
    /// 最帧数量
    /// </summary>
    public int maxCapturedFrames = 1000;

    /// <summary>
    /// 每秒播放帧数
    /// </summary>
    public int playbackFrameRate = 20;

    /// <summary>
    /// 生成的GIF是否循环播放
    /// </summary>
    public bool loopPlayback = true;

    /// <summary>
    /// 主摄像机
    /// </summary>
    public Camera capturedCamera;


    /// <summary>
    ///  计时器
    /// </summary>
    private float _elapsedTime;

    /// <summary>
    /// 生成的GIF尺寸与原图的尺寸比例
    /// </summary>
    private static double RESIZE_RATIO = 0.5;

    /// <summary>
    /// 生成的GIF ID
    /// </summary>
    private string _captureId;
    /// <summary>
    /// GIF保存路径
    /// </summary>
    private string _resultFilePath;

    /// <summary>
    /// 生成的GIF保存文件夹
    /// </summary>
    private const string GeneratedContentFolderName = "GifOutput";

    /// <summary>
    /// 录制协程
    /// </summary>
    private Coroutine _recordCoroutine;
	// ...
}
用协程实现屏幕图像采样,
/// <summary>
/// 运行录制
/// </summary>
/// <returns></returns>
IEnumerator RunRecord()
{
    while (true)
    {
        yield return new WaitForEndOfFrame();
        _elapsedTime += Time.unscaledDeltaTime;
        if (_elapsedTime >= 1.0f / captureFrameRate)
        {
            _elapsedTime = 0;
            RenderTexture rt = GetTemporaryRenderTexture();
            Graphics.Blit(null, rt);
            // TODO 将rt存到帧队列中

        }
    }
}

// 获取临时渲染纹理
private RenderTexture GetTemporaryRenderTexture()
{
    var rt = RenderTexture.GetTemporary(capturedCamera.pixelWidth, capturedCamera.pixelHeight, 0, RenderTextureFormat.ARGB32);
    rt.wrapMode = TextureWrapMode.Clamp;
    rt.filterMode = FilterMode.Bilinear;
    rt.anisoLevel = 0;
    return rt;
}
上面RenderTexture.GetTemporary是获取临时渲染纹理,因为每次使用的纹理尺寸是一样的,我们不需要每次重复构建纹理对象,可以利用Unity提供给我们的临时渲染纹理来重复使用,这样可以提升性能。
给这张临时纹理Blit一个null,即Graphics.Blit(null, rt);,此时rt就是屏幕图像了。
开始录制和停止录制就是开启协程和停止协程,
/// <summary>
/// 开始录制
/// </summary>
public void StartRecord()
{
    _recordCoroutine = StartCoroutine(RunRecord());
}

/// <summary>
/// 停止录制
/// </summary>
public void StopRecord()
{
    StopCoroutine(_recordCoroutine);
}
5、帧队列缓存:StoreWorker.cs
先定义下针对列缓存的成员,最关键的就是队列变量StoredFrames,
/// <summary>
/// 帧队列缓存
/// </summary>
public sealed class StoreWorker
{
	// 帧队列
    public FixedSizedQueue<GifFrame> StoredFrames { get; private set; }

    internal static StoreWorker Instance
    {
        get { return _instance ?? (_instance = new StoreWorker()); }
    }

    private static StoreWorker _instance;
}
实现塞入帧数据的接口,如下:
/// <summary>
/// 缓存帧数据到队列中
/// </summary>
/// <param name="renderTexture"></param>
/// <param name="resizeRatio"></param>
internal void StoreFrame(RenderTexture renderTexture, double resizeRatio)
{
    var newWidth = Convert.ToInt32(renderTexture.width * resizeRatio);
    var newHeight = Convert.ToInt32(renderTexture.height * resizeRatio);
    renderTexture.filterMode = FilterMode.Bilinear;

    var resizedRenderTexture = RenderTexture.GetTemporary(newWidth, newHeight);
    resizedRenderTexture.filterMode = FilterMode.Bilinear;

    RenderTexture.active = resizedRenderTexture;
    Graphics.Blit(renderTexture, resizedRenderTexture);

    // 转化为Texture2D
    var resizedTexture2D =
        new Texture2D(newWidth, newHeight, TextureFormat.RGBA32, false)
        {
            hideFlags = HideFlags.HideAndDontSave,
            wrapMode = TextureWrapMode.Clamp,
            filterMode = FilterMode.Bilinear,
            anisoLevel = 0
        };

    resizedTexture2D.ReadPixels(new Rect(0, 0, newWidth, newHeight), 0, 0);
    resizedTexture2D.Apply();
    RenderTexture.active = null;

    var frame = new GifFrame
    {
        Width = resizedTexture2D.width,
        Height = resizedTexture2D.height,
        Data = resizedTexture2D.GetPixels32()
    };

    resizedRenderTexture.Release();
    Object.Destroy(resizedTexture2D);

    StoredFrames.Enqueue(frame);
}
其中,GifFrame为帧数据结构,如下:
public class GifFrame
{
	public int Width;
	public int Height;
	public Color32[] Data;
}
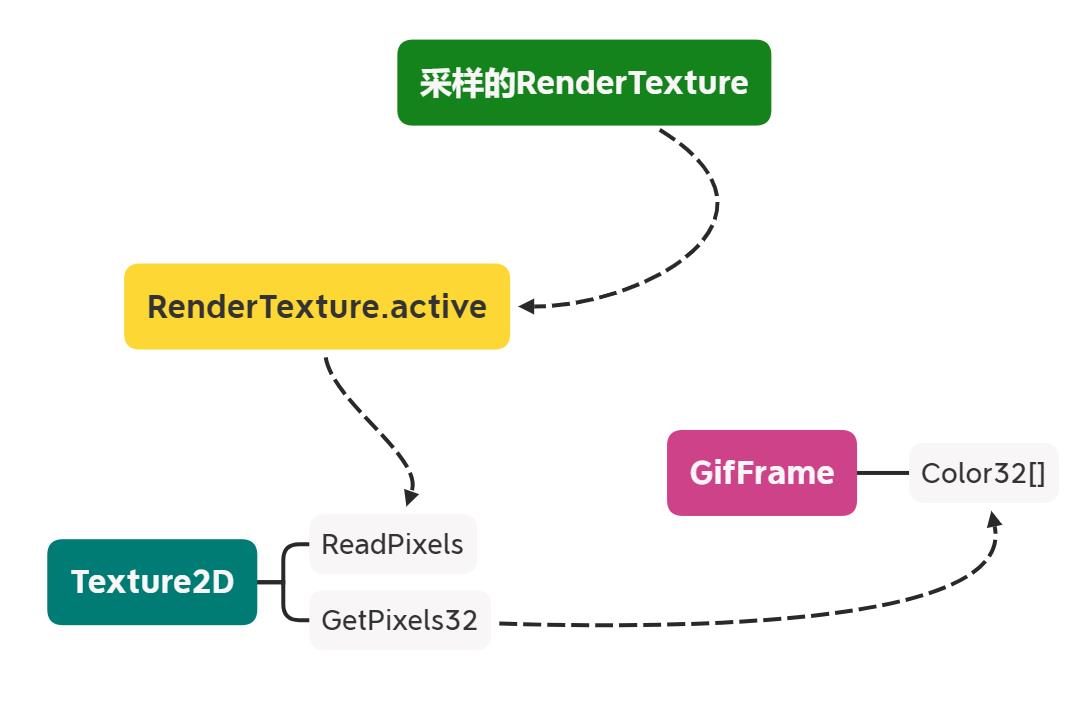
我们要把采样的图像RenderTexture转成Color32[],上面用到的方法是先把采样的RenderTexture赋值给RenderTexture.active,然后构建Texture2D对象,通过ReadPixels方法读取像素,最后再通过GetPixels32方法得到Color32[],画成图是这样子:
6、生成GIF:GeneratorWorker.cs
生成GIF需要一些运算时间,为了不卡住主线程,我们使用Thread线程来处理。
internal sealed class GeneratorWorker
{
	private readonly Thread _thread;

	internal GeneratorWorker(...)
	{
		// ...
		_thread = new Thread(Run) { Priority = priority };
	}

	internal void Start()
	{
		// ...
         _thread.Start();
	}

	private void Run()
	{
		// TODO 开始执行
	}
}
核心的运算模块是GifEncoder,我们通过它来编码生成GIF文件,
// ...
private GifEncoder _encoder;

private void Run()
{
    var startTimestamp = DateTime.Now;
    _encoder.Start(_filePath);
    _encoder.BuildPalette(ref _capturedFrames);
    for (int i = 0; i < _capturedFrames.Count(); i++)
    {
        _encoder.AddFrame(_capturedFrames.ElementAt(i));
    }
    _encoder.Finish();
    Debug.Log("GIF生成完毕,耗时: " + (DateTime.Now - startTimestamp).Milliseconds + " 毫秒");
    _onFileSaved?.Invoke();
}
这个GIF编码器GifEncoder就是按照GIF的编码格式进行写入即可。
比如,GIF文件的头部标识(header)为GIF89a,
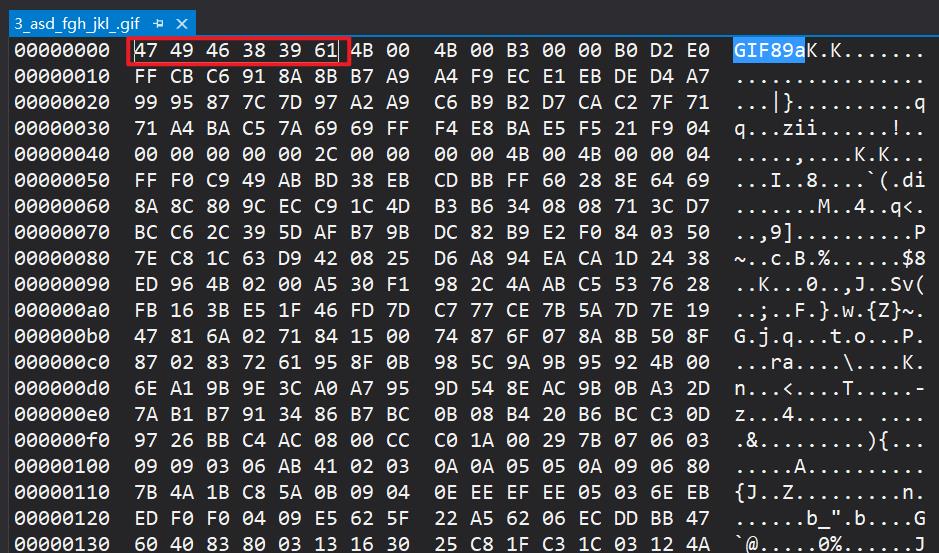
所以要给头部写入对应的字节:
WriteString("GIF89a");

protected void WriteString(String s)
{
    char[] chars = s.ToCharArray();

    for (int i = 0; i < chars.Length; i++)
        m_FileStream.WriteByte((byte)chars[i]);
}
补充一下其他二进制格式的头部标识:
| 文件格式 | 头部字节 | 尾部字节 |
|---|---|---|
| JPG | FF D8 | FF D9 |
| PNG | 89 50 4E 47 0D 0A 1A 0A | |
| GIF 89a | 47 49 46 38 39 61 | |
| GIF 87a | 47 49 46 37 39 61 | |
| TGA未压缩 | 00 00 02 00 00 | |
| TGA压缩 | 00 00 10 00 00 | |
| BMP | 42 4D | |
| PCX | 0A | |
| TIFF | 4D 4D 或 49 49 | |
| ICO | 00 00 01 00 01 00 20 20 | |
| CUR | 00 00 02 00 01 00 20 20 | |
| IFF | 46 4F 52 4D | |
| ANI | 52 49 4646 |
封装其他写入的接口:
protected void WriteGraphicCtrlExt()
{
    m_FileStream.WriteByte(0x21); // Extension introducer
    m_FileStream.WriteByte(0xf9); // GCE label
    m_FileStream.WriteByte(4);    // Data block size

    // Packed fields
    m_FileStream.WriteByte(Convert.ToByte(0 |     // 1:3 reserved
                                          0 |     // 4:6 disposal
                                          0 |     // 7   user input - 0 = none
                                          0));    // 8   transparency flag

    WriteShort(m_FrameDelay); // Delay x 1/100 sec
    m_FileStream.WriteByte(Convert.ToByte(0)); // Transparent color index
    m_FileStream.WriteByte(0); // Block terminator
}

// Writes Image Descriptor.
protected void WriteImageDesc()
{
    m_FileStream.WriteByte(0x2c); // Image separator
    WriteShort(0);                // Image position x,y = 0,0
    WriteShort(0);
    WriteShort(m_Width);          // image size
    WriteShort(m_Height);

    // Packed fields
    if (m_IsFirstFrame)
    {
        m_FileStream.WriteByte(0); // No LCT  - GCT is used for first (or only) frame
    }
    else
    {
        // Specify normal LCT
        m_FileStream.WriteByte(Convert.ToByte(0x80 |           // 1 local color table  1=yes
                                              0 |              // 2 interlace - 0=no
                                              0 |              // 3 sorted - 0=no
                                              0 |              // 4-5 reserved
                                              m_PaletteSize)); // 6-8 size of color table
    }
}

// Writes Logical Screen Descriptor.
protected void WriteLSD()
{
    // Logical screen size
    WriteShort(m_Width);
    WriteShort(m_Height);

    // Packed fields
    m_FileStream.WriteByte(Convert.ToByte(0x80 |           // 1   : global color table flag = 1 (gct used)
                                          0x70 |           // 2-4 : color resolution = 7
                                          0x00 |           // 5   : gct sort flag = 0
                                          m_PaletteSize)); // 6-8 : gct size

    m_FileStream.WriteByte(0); // Background color index
    m_FileStream.WriteByte(0); // Pixel aspect ratio - assume 1:1
}

// Writes Netscape application extension to define repeat count.
protected void WriteNetscapeExt()
{
    m_FileStream.WriteByte(0x21);    // Extension introducer
    m_FileStream.WriteByte(0xff);    // App extension label
    m_FileStream.WriteByte(11);      // Block size
    WriteString("NETSCAPE" + "2.0"); // App id + auth code
    m_FileStream.WriteByte(3);       // Sub-block size
    m_FileStream.WriteByte(1);       // Loop sub-block id
    WriteShort(m_Repeat);            // Loop count (extra iterations, 0=repeat forever)
    m_FileStream.WriteByte(0);       // Block terminator
}

// Write color table.
protected void WritePalette()
{
    m_FileStream.Write(m_ColorTab, 0, m_ColorTab.Length);
    int n = (3 * 256) - m_ColorTab.Length;

    for (int i = 0; i < n; i++)
        m_FileStream.WriteByte(0);
}

// Encodes and writes pixel data.
protected void WritePixels()
{
    LzwEncoder encoder = new LzwEncoder(m_Width, m_Height, m_IndexedPixels, m_ColorDepth);
    encoder.Encode(m_FileStream);
}

// Write 16-bit value to output stream, LSB first.
protected void WriteShort(int value)
{
    m_FileStream.WriteByte(Convert以上是关于教你使用Unity实现录屏生成GIF的功能,录个妹子跳舞的GIF吧的主要内容,如果未能解决你的问题,请参考以下文章