视线估计算法的工程实践
Posted SpikeKing
tags:
篇首语:本文由小常识网(cha138.com)小编为大家整理,主要介绍了视线估计算法的工程实践相关的知识,希望对你有一定的参考价值。
视线估计算法ELG的工程实践,来源于 https://github.com/SpikeKing
算法:
- ELG:Eye region Landmarks based Gaze Estimation,基于视线估计的眼睛区域关键点
- DPG:Deep Pictorial Gaze Estimation,深度图像视线估计
Papers:
- ELG:Learning to find eye region landmarks for remote gaze estimation in unconstrained settings, ACM-2018
- DPG:Deep Pictorial Gaze Estimation,ECCV-2018
GitHub:
- 原始工程:https://github.com/swook/GazeML
- 修改工程:https://github.com/SpikeKing/GazeML-Export
下载模型
下载GazeML至GazeML-Export
git clone https://github.com/swook/GazeML GazeML-Export
安装配置环境,如dlib等Python库
预训练模型
下载预训练模型
bash get_trained_weights.bash
模型位于outputs文件夹,即两个不同输入尺寸的模型,108x180和36x60
## ELG model
# eye_image_shape    = (108, 180)
# first_layer_stride = 3
# num_modules        = 3
# num_feature_maps   = 64
wget -Nnv https://ait.ethz.ch/projects/2018/landmarks-gaze/downloads/ELG_i180x108_f60x36_n64_m3.zip
unzip -oq ELG_i180x108_f60x36_n64_m3.zip

## ELG model
# eye_image_shape    = (36, 60)
# first_layer_stride = 1
# num_modules        = 2
# num_feature_maps   = 32
wget -Nnv https://ait.ethz.ch/projects/2018/landmarks-gaze/downloads/ELG_i60x36_f60x36_n32_m2.zip
unzip -oq ELG_i60x36_f60x36_n32_m2.zip
百度网盘下载链接:
ELG_i180x108_f60x36_n64_m3.zip:
链接:https://pan.baidu.com/s/1Glgu4mkPrIIhz6tPXu6wbg  密码:8cgr

ELG_i60x36_f60x36_n32_m2.zip:
链接:https://pan.baidu.com/s/1OXqYu4_CekH41NYTvMmylQ  密码:6cut
第三方模型
下载三个第三方模型(3rdparty):
lbpcascade_frontalface_improved.xml,OpenCV的人脸检测模型,算法来源于 Improving Open Source Face Detection by Combining an Adapted Cascade Classification Pipeline and Active Learning ,LBP即Local Binary Patterns,局部二值模式。mmod_human_face_detector.dat和shape_predictor_5_face_landmarks.dat,dlib的人脸检测模型和人脸5个关键点检测模型,参考dlib-models。
百度网盘下载链接:
3rdparty.zip:
链接:https://pan.baidu.com/s/1FJTpgzCEA9iWq6sFftahfw  密码:qk8g
人脸5个关键点,两个眼角x2+一个鼻子,共5个:

调试算法
增加Utils和测试Demo
Utils
增加utils,源码
测试Demo
测试视频逻辑,位于src/vid_demo.py中
判断是否使用GPU:
- tf.ConfigProto()主要的作用是配置tf.Session()的运算方式,如GPU运算或者CPU运算。
- 当
allow_growth设置为True时,分配器将不会指定所有的GPU内存,而是根据需求动态增长。
源码如下:
from tensorflow.python.client import device_lib

session_config = tf.ConfigProto(gpu_options=tf.GPUOptions(allow_growth=True))
gpu_available = False
try:
    gpus = [d for d in device_lib.list_local_devices(config=session_config)
            if d.device_type == 'GPU']
    gpu_available = len(gpus) > 0
except Exception as e:
    print('[Info] GPU异常,使用CPU!')

print('[Info] 是否启用GPU: {}'.format(gpu_available))
配置logging和session,源码如下:
coloredlogs.install(
    datefmt='%d/%m %H:%M',
    fmt='%(asctime)s %(levelname)s %(message)s',
    level="INFO",
)

tf.logging.set_verbosity(tf.logging.INFO)
session = tf.Session(config=session_config)
设置数据源Video和模型ELG:
batch_size设置为1或2,一次处理1个眼睛或2个眼睛,与导出模型的输入相关eye_image_shape,输入眼睛图像尺寸,108x180- 在ELG模型中,配置videostream输入数据源
data_source - 其余是网络配置,如
first_layer_stride、num_modules等
源码如下:
batch_size = 1  # 配置Batch Size
print('[Info] 输入视频路径: {}'.format(from_video))
assert os.path.isfile(from_video)

data_source = Video(from_video,
                    tensorflow_session=session,
                    batch_size=batch_size,
                    data_format='NCHW' if gpu_available else 'NHWC',
                    eye_image_shape=(108, 180))

# Define model
model = ELG(
    session, train_data={'videostream': data_source},
    first_layer_stride=3,
    num_modules=3,
    num_feature_maps=64,
    learning_schedule=[
        {
            'loss_terms_to_optimize': {'dummy': ['hourglass', 'radius']},
        },
    ],
)
创建模型的推理infer,循环处理视频,在process_output中,处理结果。
源码如下:
infer = model.inference_generator()

count = 0

while True:
    print('')
    print('-' * 50)
    output = next(infer)
    # process_output(output, batch_size, data_source, frames_dir)  # 处理输出
    count += 1
    print('count: {}'.format(count))
    if count == 1000:
        break
在process_output()中,处理输出结果。
导出模型
在模型预测时,导出TF的PB模型,简化操作。
fetches = dict(self.output_tensors['train'], **data_source.output_tensors)
outputs = self._tensorflow_session.run(
    fetches=fetches,
    feed_dict={
        self.is_training: False,
        self.use_batch_statistics: True,
    },
)
fetches
在src/core/model.py中,inference_generator()输出sess.run()的fetches,如下:
fetches = dict(self.output_tensors['train'], **data_source.output_tensors)
print('[Info] fetches: {}'.format(fetches))
- heatmaps:热力图
- landmarks:眼睛关键点
- radius:眼睛半径
- frame_index:帧索引
- eye:眼睛图像
- eye_index:眼睛索引
注意:batch_size=2,shape的第0维都是2,两个眼睛,batch_size=2更合理和高效。
{
  'heatmaps': <tf.Tensor 'hourglass/hg_3/after/hmap/conv/BiasAdd:0' shape=(2, 36, 60, 18) dtype=float32>,
  'landmarks': <tf.Tensor 'upscale/mul:0' shape=(2, 18, 2) dtype=float32>,
  'radius': <tf.Tensor 'radius/out/fc/BiasAdd:0' shape=(2, 1) dtype=float32>,
  'frame_index': <tf.Tensor 'Video/fifo_queue_DequeueMany:0' shape=(2,) dtype=int64>,
  'eye': <tf.Tensor 'Video/fifo_queue_DequeueMany:1' shape=(2, 108, 180, 1) dtype=float32>,
  'eye_index': <tf.Tensor 'Video/fifo_queue_DequeueMany:2' shape=(2,) dtype=uint8>
}
feed_dict
feed_dict两个参数:
self.is_training,未使用self.use_batch_statistics,是否使用批统计,在batch_norm的is_training中使用。
is_training和use_batch_statistics都是placeholder,类型是tf.bool,源码如下:
self.is_training = tf.placeholder(tf.bool)
self.use_batch_statistics = tf.placeholder(tf.bool)
位于ELG模型文件中,src/models/elg.py,源码如下:
def _apply_bn(self, tensor):
    return tf.contrib.layers.batch_norm(
        tensor,
        scale=True,
        center=True,
        is_training=self.use_batch_statistics,
        trainable=True,
        data_format=self._data_format,
        updates_collections=None,
    )
在模型导出时,需要将placeholder替换为固定值False,当推理时,is_training是False,当训练时,is_training是True。
直接修改文件src/models/elg.py的_apply_bn()函数,is_training=False,即可。
存储模型
输入是session(),调用图工具类graph_util的convert_variables_to_constants(),替换参数:
hourglass/hg_2/after/hmap/conv/BiasAdd,热力图heatmapsupscale/mul,标志位landmarksradius/out/fc/BiasAdd,半径radiusVideo/fifo_queue_DequeueMany,输入队列
输出constant_graph,将数据存储在gaze.pb文件中。
源码如下:
from root_dir import MODELS_DIR
sess = self._tensorflow_session
from tensorflow.python.framework import graph_util
constant_graph = graph_util.convert_variables_to_constants(
    sess, sess.graph_def,
    [
        'hourglass/hg_2/after/hmap/conv/BiasAdd',  # heatmaps
        'upscale/mul',  # landmarks
        'radius/out/fc/BiasAdd',  # radius
        'Video/fifo_queue_DequeueMany',  # frame_index, eye, eye_index
    ])

gaze_path = os.path.join(MODELS_DIR, "gaze.pb")

with tf.gfile.FastGFile(gaze_path, mode='wb') as f:
    f.write(constant_graph.SerializeToString())
读取gaze.pb,替换OP,RefSwitch和AssignSub,导出默认图GraphDef(),存储pb和pbtxt,pb是二进制的模型,pbtxt是二进制文本的模型。
from tensorflow.python.platform import gfile

f = gfile.FastGFile(gaze_path, "rb")
graph_def = tf.GraphDef()
graph_def.ParseFromString(f.read())

for node in graph_def.node:
    if node.op == 'RefSwitch':
        node.op = 'Switch'
        for index in range(len(node.input)):
            if 'moving_' in node.input[index]:
                node.input[index] = node.input[index] + '/read'
    elif node.op == 'AssignSub':
        node.op = 'Sub'
        if 'use_locking' in node.attr:
            del node.attr['use_locking']

# import graph into session
tf.import_graph_def(graph_def, name='')

gaze_opt_name = "gaze_opt_b2"

tf.train.write_graph(graph_def, MODELS_DIR, "{}.pb".format(gaze_opt_name), as_text=False)
tf.train.write_graph(graph_def, MODELS_DIR, "{}.pbtxt".format(gaze_opt_name), as_text=True)
最后,抛出异常,终止过程
raise Exception('模型导出完成!!!')
执行src/vid_demo.py,即可导出模型good_frozen_b2.pb和good_frozen_b2.pbtxt。
人脸算法
在工程中,添加:
人脸算法包括4个,即:MTCNN、dlib人脸检测、OpenCV人脸检测、dlib人脸5个关键点检测。
4个人脸算法的源码,参考:face_detector.py
MTCNN
MTCNN源码和模型数据,参考mtcnn
MTCNN,即Multi-Task Cascaded Convolutional Neural Network,多任务级联卷积神经网络,将人脸检测与人脸关键点检测融合在一起,框架类似于Cascade。MTCNN兼顾性能和准确率,首先使用较小模型,生成粗略的目标候选框,然后使用复杂模型,进行精细分类和更高精度的边框回归,实现高效的人脸检测算法。
初始化MTCNN网络,三个网络,即PNet、RNet、ONet,加载参数:
def get_mtcnn_models(self):
    """
    获取MTCNN模型
    """
    from mtcnn.detector import PNet, RNet, ONet
    pnet, rnet, onet = PNet(), RNet(), ONet()
    pnet.eval()
    rnet.eval()
    onet.eval()
    return [pnet, rnet, onet]
调用MTCNN模型,输出bounding_boxes和landmarks:
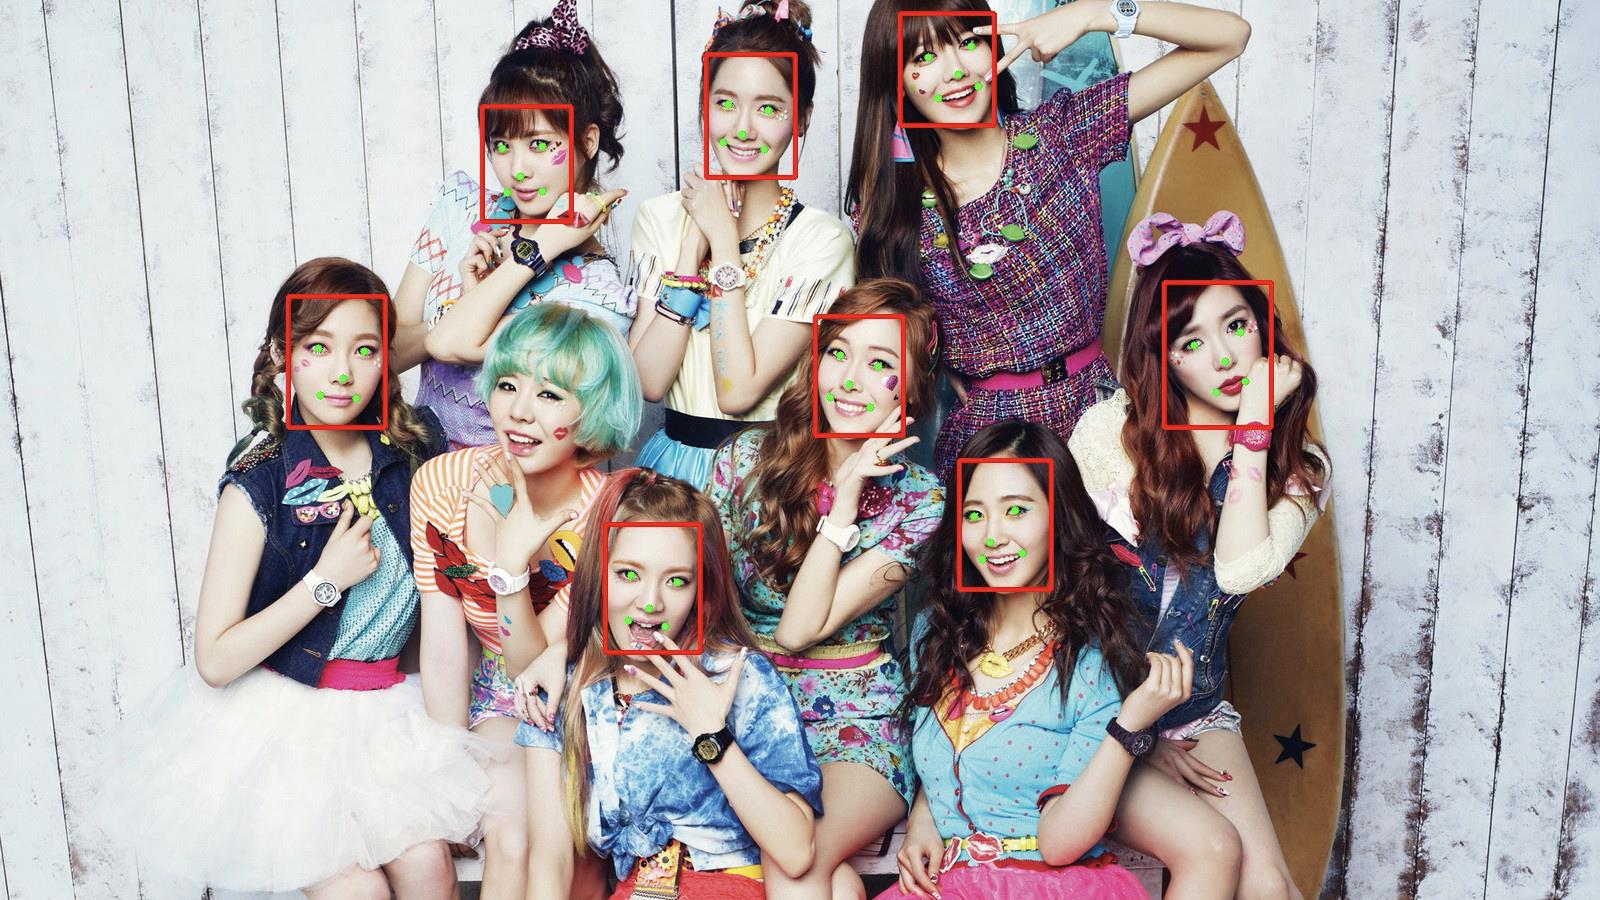
bounding_boxes的shape是(N,5),N是检测出的人脸个数,在5维中,第1~4维是人脸四个点坐标,[x_min, y_min, x_max, y_max],第5维是概率,dtype是float64。landmarks的shape是(N,10),N是检测出的人脸个数,在10维中,共5个点,第15维是x坐标,第610维是y坐标,dtype是float32。5个点是2个眼睛中心,2个嘴角,1个鼻子。
例如,bounding_boxes,9x5:

源码如下:
def get_faces_mtcnn(self, img_bgr):
    """
    基于MTCNN检测人脸
    """
    from mtcnn.detector import detect_faces
    bbox_mtcnn, landmarks_mtcnn = detect_faces(img_bgr, self.mtcnn_pro, min_face_size=50)

    bbox_list, lms_list, size_list = [], [], []

    for bbox, lms in zip(bbox_mtcnn, landmarks_mtcnn):
        box_prob = bbox[4]  # 置信度
        if box_prob < 0.9:  # 小于0.9直接pass
            continue

        box = bbox[0:4].astype(np.int32)
        bbox_list.append(box)

        lms_tmp = lms.astype(np.int32)
        lms_points = []
        for x, y in zip(lms_tmp[0:5], lms_tmp[5:10]):
            lms_points.append([x, y])
        lms_list.append(lms_points)

    return bbox_list, lms_list
检测结果,漏检1个人脸:

dlib和OpenCV
dlib和OpenCV都是基于C++的两个人脸检测库,两个人脸检测可以融合在一起,优先进行dlib,如果效果不好,再进行OpenCV。
dlib
dlib是一个现代化的C++工具箱,其中包含机器学习算法,这些算法使用C++创建复杂的软件,来解决实际问题。在工业和学术界广泛使用,包括机器人技术,嵌入式设备,移动电话和大型高性能计算环境等。
加载dlib模型,源码如下:
def get_dlib_model(self, model_path):
    """
    基于Dlib的人脸检测模型
    """
    dat_path = os.path.join(model_path, 'mmod_human_face_detector.dat')
    dlib_detector = dlib.cnn_face_detection_model_v1(dat_path)
    return dlib_detector
检测人脸,dlib的输入是灰度图像,图像尺寸较小,效果较好,因此使用scale缩放。dlib算法,检测人脸较大的情况较好,不适合多人脸小尺寸检测。
源码如下:
def get_faces_dlib(self, img_gray):
    """
    基于Dlib的人脸检测
    """
    scale = 2
    detections = self.dlib_detector(cv2.resize(img_gray, (0, 0), fx=1 / scale, fy=1 / scale), 0)

    box_list = []
    print(detections)
    for d in detections:
        box = [d.rect.left() * scale, d.rect.top() * scale, d.rect.right() * scale, d.rect.bottom() * scale]
        box_list.append(box)

    return box_list
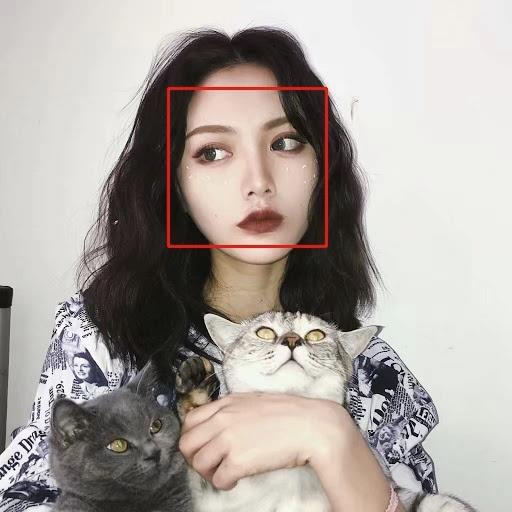
检测效果,不适合多人脸检测,单人脸效果还行,如下:

OpenCV
OpenCV使用局部二值模式级联检测算法,加载模型。源码如下:
def get_opencv_model(self, model_path):
    """
    基于OpenCV的人脸检测模型
    """
    xml_path = os.path.join(model_path, 'lbpcascade_frontalface_improved.xml')
    opencv_detector = cv2.CascadeClassifier(xml_path)
    return opencv_detector
OpenCV检测人脸,输入是灰度图像,输出[x_min, y_min, wide, height],源码如下:
def get_faces_opencv(self, img_gray):
    """
    基于OpenCV的人脸检测
    """
    detections = self.opencv_detector.detectMultiScale(img_gray)

    box_list = []  # 列表

    for d in detections:
        l, t, w, h = d
        r, b = l + w, t + h
        box = [l, t, r, b]
        box_list.append(box)

        draw_box(img_bgr, box, is_new=False)

    from root_dir import IMGS_DIR
    img_path = os.path.join(IMGS_DIR, "opencv_res.jpg")
    cv2.imwrite(img_path, img_bgr)

    return box_list
检测结果,漏检1个人脸,如下:

Landmarks
加载dlib的5个关键点模型
def get_lms_model(self, model_path):
    """
    基于dlib的人脸关键点模型,两个眼角和一个鼻子
    """
    dat_path = os.path.join(model_path, 'shape_predictor_5_face_landmarks.dat')
    landmarks_predictor = dlib.shape_predictor(dat_path)
    return landmarks_predictor
调用dlib检测人脸关键点,5个人脸关键点,2个眼角x2+1个鼻子,输入是灰度图像+脸部矩形点,输出是5个关键点。
源码如下:
def detect_landmarks(self, img_gray, bbox):
    """Detect 5-point facial landmarks for faces in frame."""
    l, t, r, b = bbox

    rectangle = dlib.rectangle(left=int(l), top=int(t), right=int(r), bottom=int(b))
    landmarks_dlib = self.lms_detector(img_gray, rectangle)

    def tuple_from_dlib_shape(index):
        p = landmarks_dlib.part(index)
        return p.x, p.y

    num_landmarks = landmarks_dlib.num_parts
    landmarks = np.array([tuple_from_dlib_shape(i) for i in range(num_landmarks)])
    landmarks = list(landmarks)
    return landmarks
连接人脸检测和人脸关键点检测,即优先使用dlib,其次使用opencv,检测人脸位置,再使用灰度图像和人脸位置,检测人脸关键点。
源码如下:
    def get_faces_dwo(self, img_bgr):
        """
        检测人脸关键点
        """
        img_gray = cv2.cvtColor(img_bgr, cv2.COLOR_BGR2GRAY)

        # 优先使用dlib,其次使用opencv
        box_list = self.get_faces_dlib(img_gray)
        if not box_list:
            box_list = self.get_faces_opencv(img_gray)

        lms_list = []
        for bbox in box_list:
            lms = self.detect_landmarks(img_gray, bbox)  # 检测脸部关键点
            lms_list.append(lms)

        return box_list, lms_list
检测效果,如下:

眼睛区域
抠出眼睛区域:输入灰度图像和眼角关键点,输出眼睛区域的图像。源码参考:eyes_detector.py的crop_eyes方法。
计算参数:
- 输出图像的高宽是108x180,长条形图像。
- 计算眼睛的宽度,两个眼角点欧式距离的1.5倍。
- 眼睛中心,两个眼角点的中心点。
源码如下:
# Final output dimensions
oh, ow = (108, 180)

# Segment eyes
# for corner1, corner2, is_left in [(36, 39, True), (42, 45, False)]:
for corner1, corner2, is_left in [(2, 3, True), (0, 1, False)]:
    x1, y1 = landmarks[corner1, :]
    x2, y2 = landmarks[corner2, :]

    # 裁剪出1.5倍眼睛宽度
    eye_width = 1.5 * np.linalg.norm(landmarks[corner1, :] - landmarks[corner2, :])
    if eye_width == 0.0:
        continue

    cx, cy = 0.5 * (x1 + x2), 0.5 * (y1 + y2)
使
以上是关于视线估计算法的工程实践的主要内容,如果未能解决你的问题,请参考以下文章