SpringBoot中使用Redis
Posted Firm陈
tags:
篇首语:本文由小常识网(cha138.com)小编为大家整理,主要介绍了SpringBoot中使用Redis相关的知识,希望对你有一定的参考价值。
一.redis的下载安装
1.安装Redis
根据不同的需求下载Linux或Windows版本的,目前Redis官网只有Linux版本,但由于大多数开发者还是基于windows平台开发的,所有GitHub上的技术牛人基于linux平台下的Redis实现了windows版本,给windows开发带来了福音。
2.下载Windows版本Redis
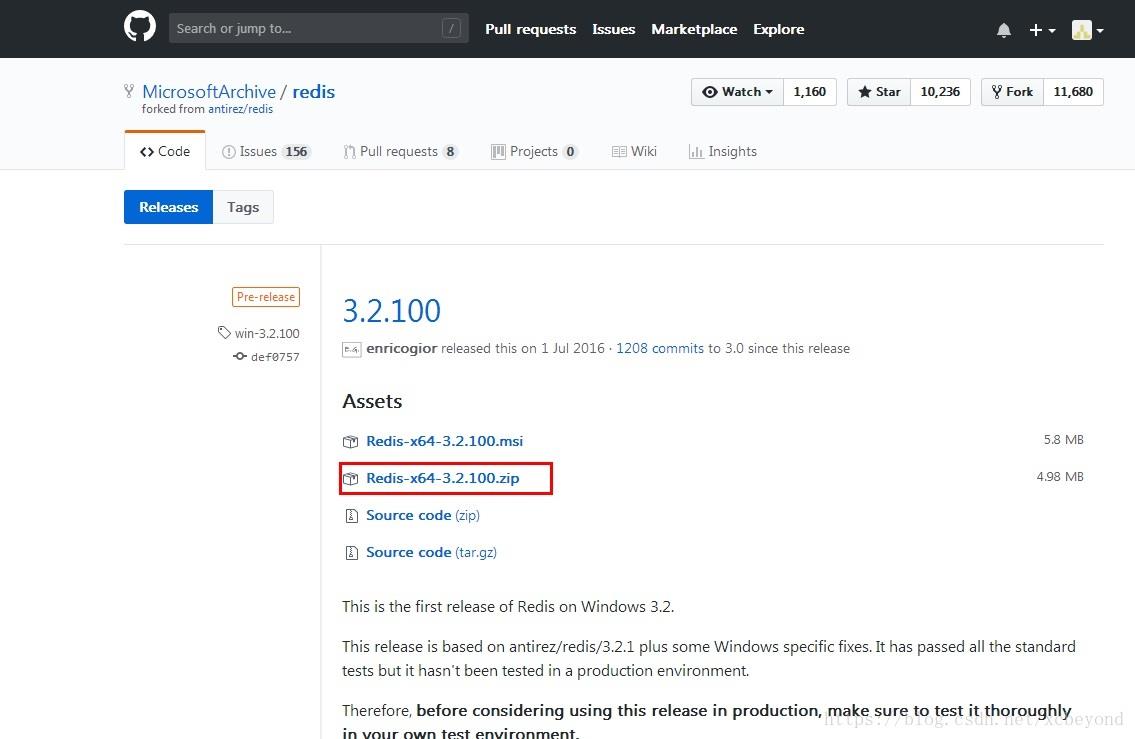
直接访问github网址:https://github.com/MSOpenTech/redis/releases,下载最新的windows X64版本的压缩包,如下图所示:

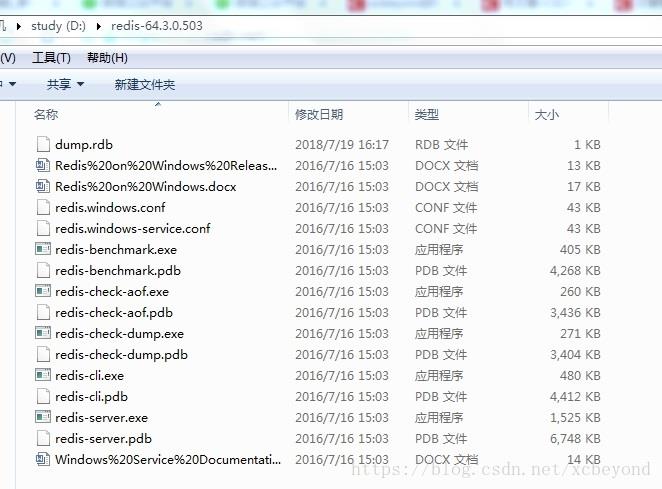
下载第二个.zip,免安装,解压就直接可以用,解压后如下图:

3.启动Redis
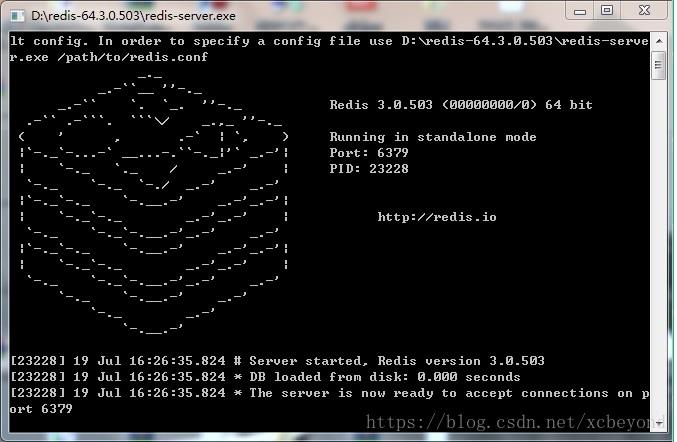
redis.windows.conf为redis配置文件,相关参数可以在这里配置,如:端口等,我这里使用默认参数,暂不修改,默认端口为6379。双击redis-server.exe启动,则出现如下图所示,则启动成功。

二.springboot整合redis
1.添加Redis依赖包
<!-- redis依赖包 -->
<dependency>
		<groupId>org.springframework.boot</groupId>
		<artifactId>spring-boot-starter-data-redis</artifactId>
</dependency>
2. 配置Redis数据库连接
在application.properties中配置redis数据库连接信息,如下:
#redis配置
#Redis服务器地址
spring.redis.host=127.0.0.1
#Redis服务器连接端口
spring.redis.port=6379
#Redis数据库索引(默认为0)
spring.redis.database=0
#连接池最大连接数(使用负值表示没有限制)
spring.redis.jedis.pool.max-active=50
#连接池最大阻塞等待时间(使用负值表示没有限制)
spring.redis.jedis.pool.max-wait=3000
#连接池中的最大空闲连接
spring.redis.jedis.pool.max-idle=20
#连接池中的最小空闲连接
spring.redis.jedis.pool.min-idle=2
#连接超时时间(毫秒)
spring.redis.timeout=5000
3.编写Redis操作工具类
将RedisTemplate实例包装成一个工具类,便于对redis进行数据操作。
com.xcbeyond.springboot.redis.RedisUtils.java
package com.xcbeyond.springboot.redis;

import org.springframework.beans.factory.annotation.Autowired;
import org.springframework.data.redis.core.RedisTemplate;
import org.springframework.stereotype.Component;

/**
 * redis操作工具类.</br>
 * (基于RedisTemplate)
 * @author xcbeyond
 * 2018年7月19日下午2:56:24
 */
@Component
public class RedisUtils {

	@Autowired
	private RedisTemplate<String, String> redisTemplate;

	/**
	 * 读取缓存
	 *
	 * @param key
	 * @return
	 */
	public String get(final String key) {
		return redisTemplate.opsForValue().get(key);
	}

	/**
	 * 写入缓存
	 */
	public boolean set(final String key, String value) {
		boolean result = false;
		try {
			redisTemplate.opsForValue().set(key, value);
			result = true;
		} catch (Exception e) {
			e.printStackTrace();
		}
		return result;
	}

	/**
	 * 更新缓存
	 */
	public boolean getAndSet(final String key, String value) {
		boolean result = false;
		try {
			redisTemplate.opsForValue().getAndSet(key, value);
			result = true;
		} catch (Exception e) {
			e.printStackTrace();
		}
		return result;
	}

	/**
	 * 删除缓存
	 */
	public boolean delete(final String key) {
		boolean result = false;
		try {
			redisTemplate.delete(key);
			result = true;
		} catch (Exception e) {
			e.printStackTrace();
		}
		return result;
	}
}
4.测试
写一个测试用例类来完成对redis的读写。
/springboot/src/test/java/com/xcbeyond/springboot/redis/RedisTest.java
package com.xcbeyond.springboot.redis;

import javax.annotation.Resource;

import org.junit.Test;
import org.junit.runner.RunWith;
import org.springframework.boot.test.context.SpringBootTest;
import org.springframework.test.context.junit4.SpringJUnit4ClassRunner;
/**
 *
 * @author xcbeyond
 * 2018年7月19日下午3:08:04
 */

@RunWith(SpringJUnit4ClassRunner.class)
@SpringBootTest
public class RedisTest {
	@Resource
	private RedisUtils redisUtils;

	/**
	 * 插入缓存数据
	 */
	@Test
	public void set() {
		redisUtils.set("redis_key", "redis_vale");
	}

	/**
	 * 读取缓存数据
	 */
	@Test
	public void get() {
		String value = redisUtils.get("redis_key");
		System.out.println(value);
	}

}
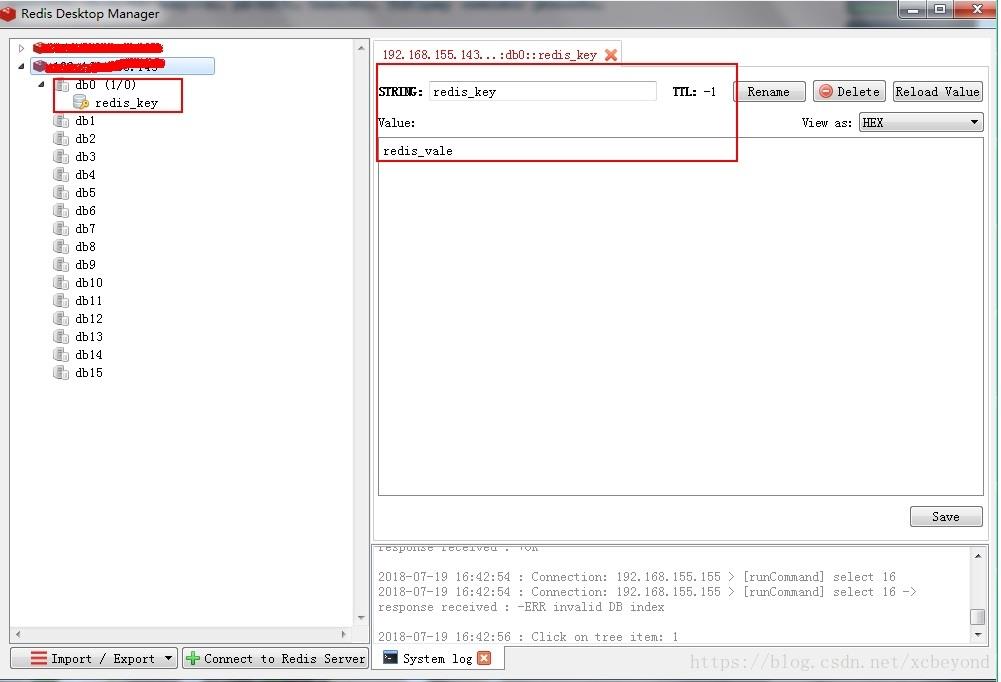
执行完测试方法set后,可以登录到redis上查看数据是否插入成功。
(建议使用RedisDesktopManager可视化工具进行查看)

5.总结
本章节只是简单的介绍了下在SpringBoot中如何使用Redis,Redis的使用远远不止这些,根据实际项目需求将会变得更加复杂,其中事物等都是可以通过redis来处理的。
以上是关于SpringBoot中使用Redis的主要内容,如果未能解决你的问题,请参考以下文章