WPF实现用户头像裁剪
Posted dotNET跨平台
tags:
篇首语:本文由小常识网(cha138.com)小编为大家整理,主要介绍了WPF实现用户头像裁剪相关的知识,希望对你有一定的参考价值。
WPF开发者QQ群: 340500857
前言
需要做一个用户选择头像并进行裁剪。
欢迎转发、分享、点赞,谢谢大家~。
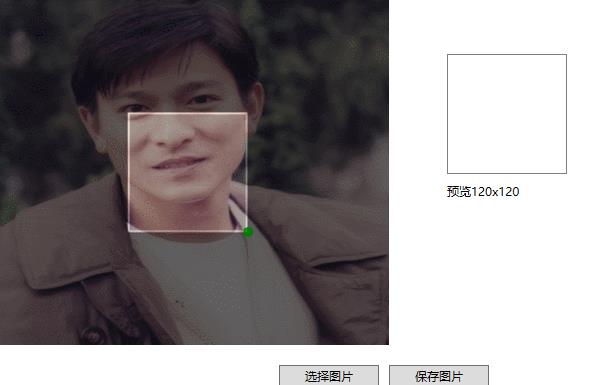
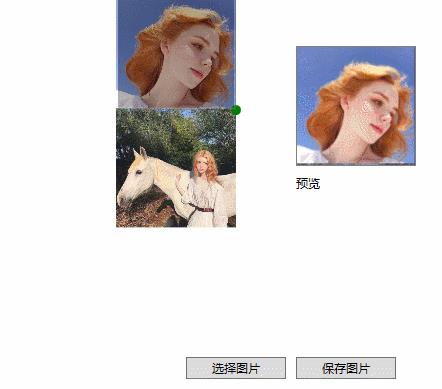
效果预览(更多效果请下载源码体验):


一、MainWindow.xaml代码如下:
<Grid>
        <Border x:Name="containerPanel">
            <Canvas x:Name="DrawCanvas"
                    VerticalAlignment="Center"
                    Background="Transparent"
                    Width="{Binding ElementName=containerPanel,Path=ActualWidth}"
                    Height="{Binding ElementName=containerPanel,Path=ActualHeight}">
                <Rectangle x:Name="rectImage" VerticalAlignment="Center" HorizontalAlignment="Center"
                           Width="{Binding ElementName=containerPanel,Path=ActualWidth}"
                           Height="{Binding ElementName=containerPanel,Path=ActualHeight}">
                    <Rectangle.Fill>
                        <ImageBrush ImageSource="{Binding ImageSource,RelativeSource={ RelativeSource AncestorType={x:Type local:ImageCutCustoms}}}"/>
                    </Rectangle.Fill>
                </Rectangle>
                <Rectangle VerticalAlignment="Center" HorizontalAlignment="Center"
                           Width="{Binding ElementName=rectImage,Path=ActualWidth}"
                           Height="{Binding ElementName=rectImage,Path=ActualHeight}"
                           Fill="#99000000"/>
                <Rectangle VerticalAlignment="Center" HorizontalAlignment="Center"
                           Width="{Binding ElementName=containerPanel,Path=ActualWidth}"
                           Height="{Binding ElementName=containerPanel,Path=ActualHeight}">
                    <Rectangle.Fill>
                        <ImageBrush ImageSource="{Binding ImageSource,RelativeSource={ RelativeSource AncestorType={x:Type local:ImageCutCustoms}}}"/>
                    </Rectangle.Fill>
                    <Rectangle.Clip>
                        <RectangleGeometry x:Name="rectRectangle" Rect="{Binding CutRect,RelativeSource={RelativeSource AncestorType={x:Type local:ImageCutCustoms}}}"/>
                    </Rectangle.Clip>
                </Rectangle>


                <local:DragDropView x:Name="dragDropItem"
                           Width="{Binding ElementName=rectRectangle, Path= Rect.Width}"
                           Height="{Binding ElementName=rectRectangle, Path= Rect.Height}"
                           Canvas.Left="{Binding ElementName=rectRectangle, Path= Rect.X}"
                           Canvas.Top="{Binding ElementName=rectRectangle, Path= Rect.Y}"
                           ParentMaxHeight="{Binding ElementName=DrawCanvas,Path=ActualHeight}"
                           ParentMaxWidth="{Binding ElementName=DrawCanvas,Path=ActualWidth}"/>

            </Canvas>
        </Border>
    </Grid>
二、ImageCutCustoms代码如下:
public partial class ImageCutCustoms : UserControl
    {


        public ImageSource ImageSource
        {
            get { return (ImageSource)GetValue(ImageSourceProperty); }
            set { SetValue(ImageSourceProperty, value); }
        }


        // Using a DependencyProperty as the backing store for ImageSource.  This enables animation, styling, binding, etc...
        public static readonly DependencyProperty ImageSourceProperty =
            DependencyProperty.Register("ImageSource", typeof(ImageSource), typeof(ImageCutCustoms), new PropertyMetadata(ImageSourcePropertyChangedCallback));


        public ImageSource SaveImageSource
        {
            get { return (ImageSource)GetValue(SaveImageSourceProperty); }
            set { SetValue(SaveImageSourceProperty, value); }
        }


        // Using a DependencyProperty as the backing store for SaveImageSource.  This enables animation, styling, binding, etc...
        public static readonly DependencyProperty SaveImageSourceProperty =
            DependencyProperty.Register("SaveImageSource", typeof(ImageSource), typeof(ImageCutCustoms), new PropertyMetadata());


        public Rect CutRect
        {
            get { return (Rect)GetValue(CutRectProperty); }
            set { SetValue(CutRectProperty, value); }
        }


        // Using a DependencyProperty as the backing store for CutRect.  This enables animation, styling, binding, etc...
        public static readonly DependencyProperty CutRectProperty =
            DependencyProperty.Register("CutRect", typeof(Rect), typeof(ImageCutCustoms), new PropertyMetadata());


        private Point startPoint, endPoint;


        public ImageCutCustoms()
        {
            InitializeComponent();
            this.dragDropItem.UpdateImageEvent += DragDropItem_UpdateImageEvent;
        }
        private void DragDropItem_UpdateImageEvent()
        {
            var x = Canvas.GetLeft(dragDropItem);
            var y = Canvas.GetTop(dragDropItem);
            var w = dragDropItem.Width;
            var h = dragDropItem.Height;
            RenderTargetBitmap rtb = new RenderTargetBitmap((int)rectImage.RenderSize.Width,
    (int)rectImage.RenderSize.Height, 96d, 96d, System.Windows.Media.PixelFormats.Default);
            rtb.Render(rectImage);


            var crop = new CroppedBitmap(rtb, new Int32Rect((int)x, (int)y, (int)w, (int)h));
            SaveImageSource = crop;
            startPoint = new Point(x, y);
            endPoint = new Point(x+w, y+h);
            CutRect = new Rect(startPoint, endPoint);
        }
        private static void ImageSourcePropertyChangedCallback(DependencyObject d, DependencyPropertyChangedEventArgs e)
        {
            var cutCustoms = d as ImageCutCustoms;
            var x = cutCustoms.ActualWidth / 3;
            var y = cutCustoms.ActualHeight / 3;
            cutCustoms.startPoint = new Point(x, y);
            cutCustoms.endPoint = new Point(x + 120, y + 120);
            cutCustoms.CutRect = new Rect(cutCustoms.startPoint,cutCustoms.endPoint);
        }

    }
源码地址
github:https://github.com/yanjinhuagood/WPFDevelopers.git
gitee:https://gitee.com/yanjinhua/WPFDevelopers.git
WPF开发者QQ群: 340500857
blogs: https://www.cnblogs.com/yanjinhua
Github:https://github.com/yanjinhuagood
出处:https://www.cnblogs.com/yanjinhua
版权:本作品采用「署名-非商业性使用-相同方式共享 4.0 国际」许可协议进行许可。
转载请著名作者 出处 https://github.com/yanjinhuagood
以上是关于WPF实现用户头像裁剪的主要内容,如果未能解决你的问题,请参考以下文章