手敲一个前后端分离项目! Day01(Vite+Vue3+Naive UI)
Posted 结构化思维wz
tags:
篇首语:本文由小常识网(cha138.com)小编为大家整理,主要介绍了手敲一个前后端分离项目! Day01(Vite+Vue3+Naive UI)相关的知识,希望对你有一定的参考价值。
vite + vue3 +springboot
前端部分
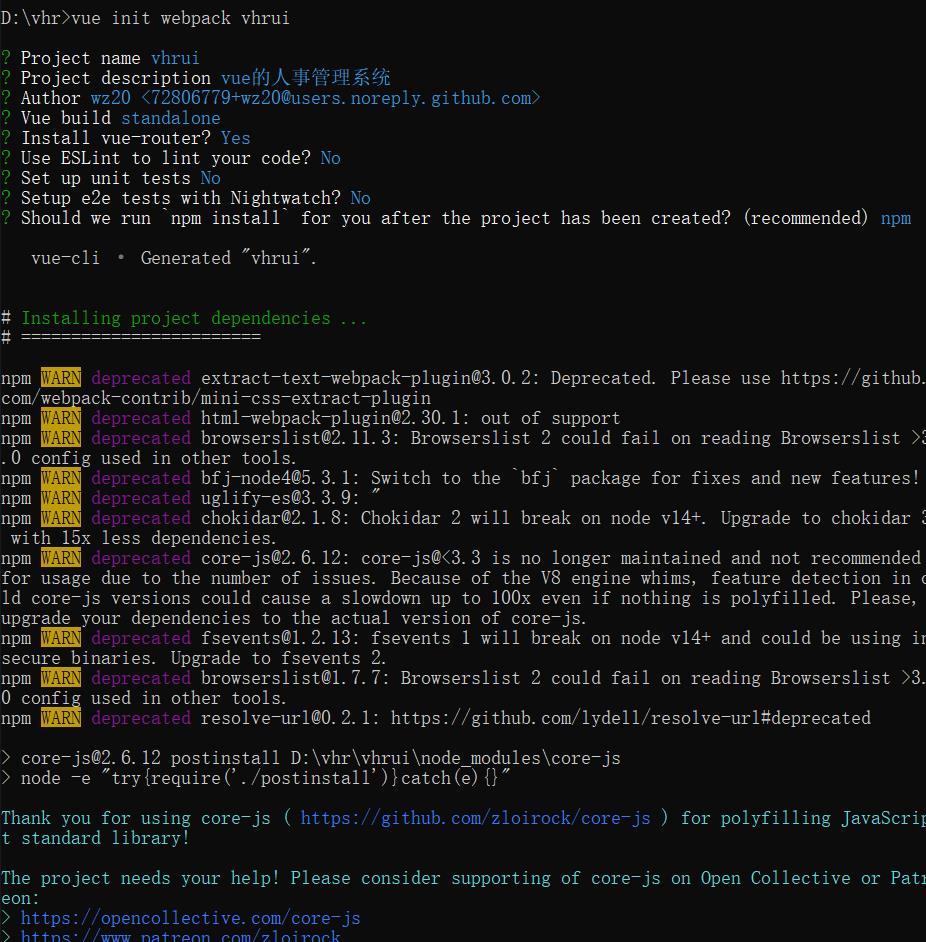
1.用webpack环境搭建
创建项目
vue init webpack vhrui

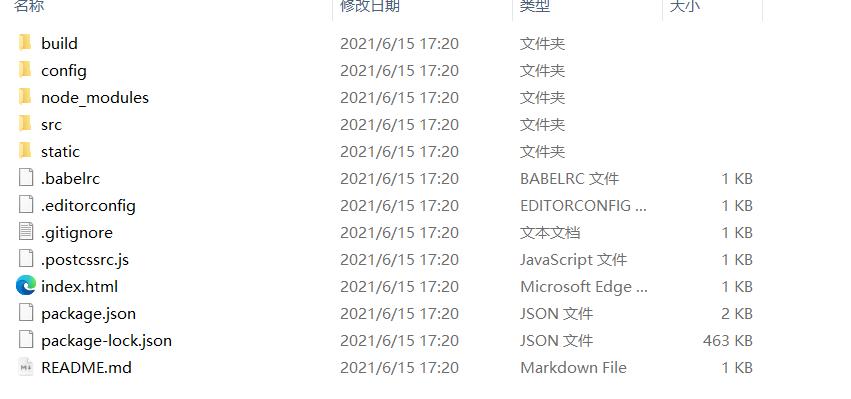
完成后我们发现我们的项目已经创建完成:

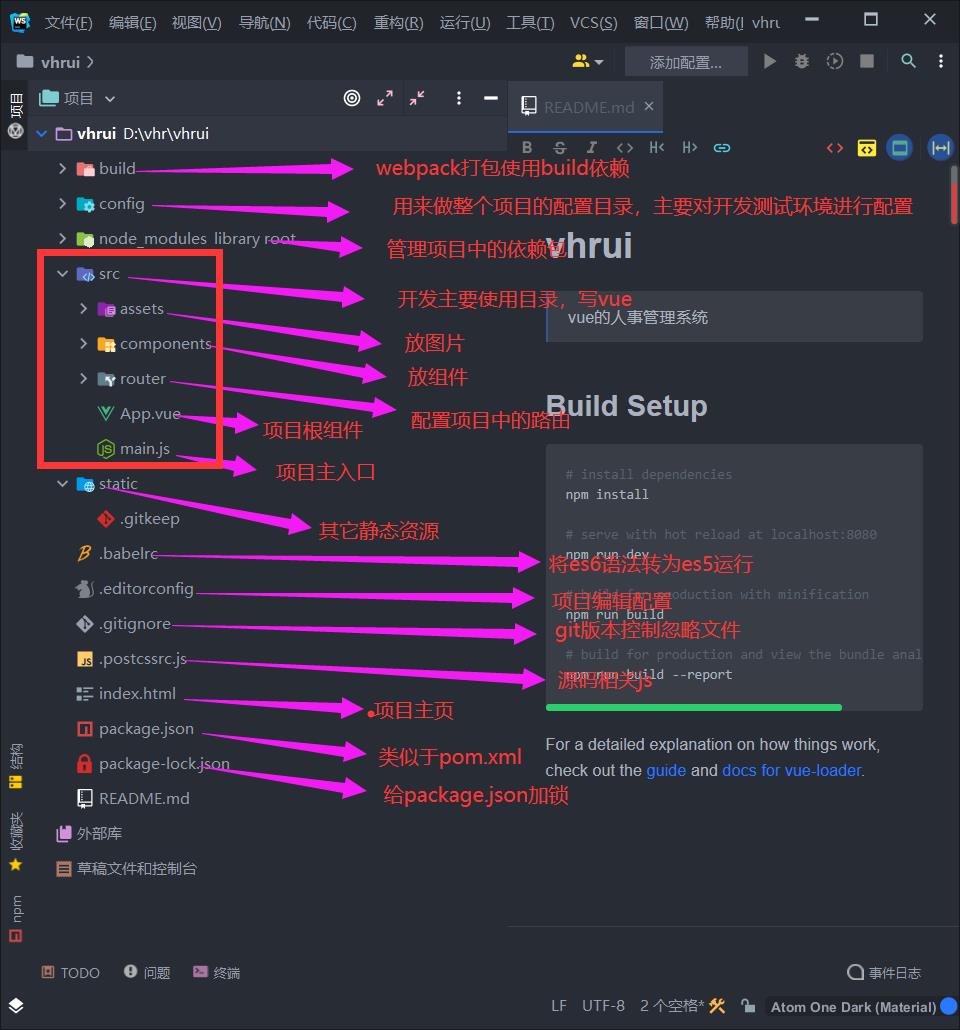
项目结构:

讲了这么多webpack但是。。我不用,就是玩!!!用vite!!
2.用vite 进行环境搭建
响应尤大的号召,使用vite!
-
npm init @vitejs/app vhrui --template vue -
cd vhrui -
npm install
至此项目创建完成!接下来我们需要引入我们所需要的其他组件
引入路由
-
npm install vue-router@next -
创建router目录来存放router配置
import { createRouter,createWebHistory} from "vue-router"; // 路由信息 const routes = [ { path: "/", name: "Index", component: () => import('../views/idnex.vue'), }, ]; // 导出路由 const router = createRouter({ history: createWebHistory(), routes }); export default router; -
在main.js中使用路由
import { createApp } from 'vue'
import App from './App.vue'
import router from "./router/router";

const app = createApp(App)
app.mount('#app')
app.use(router)
注意:在使用的时候要到inde.vue
<template>
  <img alt="Vue logo" src="./assets/logo.png" />
  <index></index>
</template>

<script>
import Index from "./views/index.vue";
export default {
  components: {Index}
}
</script>

<style>
#app {
  font-family: Avenir, Helvetica, Arial, sans-serif;
  -webkit-font-smoothing: antialiased;
  -moz-osx-font-smoothing: grayscale;
  text-align: center;
  color: #2c3e50;
  margin-top: 60px;
}
</style>

引入UI组件库Naive UI
选一个喜欢的UI组件库,并使用它(我选的Naive UI)
-
安装
npm i -D naive-ui -
字体:
npm i -D vfonts -
在main.js中引入
import { createApp } from 'vue'
import App from './App.vue'
import router from "./router/router";
import naive from 'naive-ui'
import 'vfonts/Lato.css'

const app = createApp(App)
app.mount('#app')
app.use(router)
app.use(naive)
ok,至此,前端环境就so easy的搭建完成,下面开始编码!
以上是关于手敲一个前后端分离项目! Day01(Vite+Vue3+Naive UI)的主要内容,如果未能解决你的问题,请参考以下文章