TensorFlow2 一小时学会基本操作 4
Posted 我是小白呀
tags:
篇首语:本文由小常识网(cha138.com)小编为大家整理,主要介绍了TensorFlow2 一小时学会基本操作 4相关的知识,希望对你有一定的参考价值。
TensorFlow2 一小时学会基本操作 4
张量排序

tf.sort
tf.sort函数可以帮我们对张量进行排序.
格式:
tf.sort(
    values, axis=-1, direction='ASCENDING', name=None
)
参数:
- values: 要进行排序的张量
- axis: 操作维度
- direction: 正序或者倒序
- name: 数据名称
例子:
# 创建张量0~9, 并打乱顺序
a = tf.random.shuffle(tf.range(10))
print(a)

# 从小到大
b = tf.sort(a)  # direction="ASCENDING"
print(b)

# 从大到小
c = tf.sort(a, direction="DESCENDING")
print(c)
输出结果:
tf.Tensor([6 3 7 5 4 0 2 9 8 1], shape=(10,), dtype=int32)
tf.Tensor([0 1 2 3 4 5 6 7 8 9], shape=(10,), dtype=int32)
tf.Tensor([9 8 7 6 5 4 3 2 1 0], shape=(10,), dtype=int32)
tf.argsort
tf.argsort返回张量的索引排序, 沿给的轴排序.
格式:
tf.argsort(
    values, axis=-1, direction='ASCENDING', stable=False, name=None
)
参数:
- 要进行排序的张量
- axis: 操作维度
- direction: 正序或者倒序
- stable: 如果为 True, 则原始张量中的相等元素将不会按返回的顺序重新排序
- name: 数据名称
例子:
# 创建张量0~9, 并打乱顺序
a = tf.random.shuffle(tf.range(10))
print(a)

# 从小到大
b = tf.argsort (a)
print(b)

# 从大到小
c = tf.argsort (a, direction="DESCENDING")
print(c)
输出结果:
tf.Tensor([9 4 3 1 2 6 0 5 7 8], shape=(10,), dtype=int32)
tf.Tensor([6 3 4 2 1 7 5 8 9 0], shape=(10,), dtype=int32)
tf.Tensor([0 9 8 5 7 1 2 4 3 6], shape=(10,), dtype=int32)
tf.math.top_k
tf.math.top_k可以帮助我们查找最后一个维度的 k 个最大条目的值和索引.
格式:
tf.math.top_k(
    input, k=1, sorted=True, name=None
)
参数:
- input: 传入张量
- k=1: 前 k 位
- sorted: 是否排序
- name: 数据名称
例子:
# 创建张量0~9, 并打乱顺序, 形状为 3*3
a = tf.reshape(tf.random.shuffle(tf.range(9)), [3, 3])
print(a)

# 取top2
b = tf.math.top_k(a, 2)
print(b)
输出结果:
tf.Tensor(
[[2 1 4]
 [5 7 0]
 [8 6 3]], shape=(3, 3), dtype=int32)
TopKV2(values=<tf.Tensor: shape=(3, 2), dtype=int32, numpy=
array([[4, 2],
       [7, 5],
       [8, 6]])>, indices=<tf.Tensor: shape=(3, 2), dtype=int32, numpy=
array([[2, 0],
       [1, 0],
       [0, 1]])>)
填充与复制
tf.pad
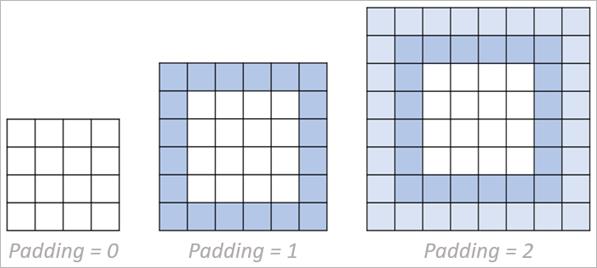
tf.pad可以帮我们对一个 tensor 四周进行填充.

格式:
tf.pad(
    tensor, paddings, mode='CONSTANT', constant_values=0, name=None
)
参数:
- tensor: 传入的张量
- paddings: 要扩展的维度
- mode: 模式, 默认为 “CONSTANT”
- constant_value: 在 “CONSTANT” 模式下, 要使用的标量填充值 (必须与张量类型相同)
- name: 数据名称
例子:
# pad
a = tf.reshape(tf.range(9), [3, 3])
print(a)

# 上下左右填充一圈0
b = tf.pad(a, [[1, 1], [1, 1]])
print(b)
输出结果:
tf.Tensor(
[[0 1 2]
 [3 4 5]
 [6 7 8]], shape=(3, 3), dtype=int32)
tf.Tensor(
[[0 0 0 0 0]
 [0 0 1 2 0]
 [0 3 4 5 0]
 [0 6 7 8 0]
 [0 0 0 0 0]], shape=(5, 5), dtype=int32)
tf.tile
tf.tile可以帮助我们实现 tensor 的复制.
格式:
tf.tile(
    input, multiples, name=None
)
参数:
- input: 传入的张量
- multiples: 复制的次数
- name: 数据名称
例子:
# tile
a = tf.reshape(tf.range(9), [3, 3])
print(a)

b = tf.tile(a, [2, 2])
print(b)
输出结果:
tf.Tensor(
[[0 1 2]
 [3 4 5]
 [6 7 8]], shape=(3, 3), dtype=int32)
tf.Tensor(
[[0 1 2 0 1 2]
 [3 4 5 3 4 5]
 [6 7 8 6 7 8]
 [0 1 2 0 1 2]
 [3 4 5 3 4 5]
 [6 7 8 6 7 8]], shape=(6, 6), dtype=int32)
查找与替换

tf.where (第一种)
返回元素为 True 的位置.
格式:
tf.where(
    condition, name=None
)
参数:
- condition: 判断条件
- name: 数据名称
例子:
# 第一种用法(单参数)
mask = tf.constant([[True, True, True], [False, True, True], [True, False, False]])
print(mask)

indices = tf.where(mask)
print(indices)
输出结果:
tf.Tensor(
[[ True  True  True]
 [False  True  True]
 [ True False False]], shape=(3, 3), dtype=bool)
tf.Tensor(
[[0 0]
 [0 1]
 [0 2]
 [1 1]
 [1 2]
 [2 0]], shape=(6, 2), dtype=int64)
tf.where (第二种)
类似三元运算符的用法.
格式:
tf.where(
    condition, x=None, y=None, name=None
)
参数:
- condition: 判断条件
- x: 如果条件为 True 赋值
- y: 如果条件为 False 赋值
- name: 数据名称
例子:
# 第二种用法(三个参数)
zeros = tf.zeros([3, 3])
print(zeros)

ones = tf.ones([3, 3])
print(ones)

mask = tf.constant([[True, True, True], [False, True, True], [True, False, False]])
print(mask)

result = tf.where(mask, zeros, ones)
print(result)
输出结果:
tf.Tensor(
[[0. 0. 0.]
 [0. 0. 0.]
 [0. 0. 0.]], shape=(3, 3), dtype=float32)
tf.Tensor(
[[1. 1. 1.]
 [1. 1. 1.]
 [1. 1. 1.]], shape=(3, 3), dtype=float32)
tf.Tensor(
[[ True  True  True]
 [False  True  True]
 [ True False False]], shape=(3, 3), dtype=bool)
tf.Tensor(
[[0. 0. 0.]
 [1. 0. 0.]
 [0. 1. 1.]], shape=(3, 3), dtype=float32)
tf.scatter_nd
使用索引更新张量.

格式:
tf.scatter_nd(
    indices, updates, shape, name=None
)
参数:
- indices: 索引
- updates: 更新的值
- shape: 形状
- name: 数据名称
例子:
# scatter_nd
indices = tf.constant([[4], [3], [1], [7]])
print(indices)

updates = tf.constant([9, 10, 11, 12])
print(updates)

shape = tf.constant([8])
print(shape)

result = tf.scatter_nd(indices, updates, shape)
print(result)
输出结果:
tf.Tensor(
[[4]
 [3]
 [1]
 [7]], shape=(4, 1), dtype=int32)
tf.Tensor([ 9 10 11 12], shape=(4,), dtype=int32)
tf.Tensor([8], shape=(1,), dtype=int32)
tf.Tensor([ 0 11  0 10  9  0  0 12], shape=(8,), dtype=int32)
以上是关于TensorFlow2 一小时学会基本操作 4的主要内容,如果未能解决你的问题,请参考以下文章