实现自己的HAL2 HAL helloworld 之HAL层代码的编写
Posted 杨斌并
tags:
篇首语:本文由小常识网(cha138.com)小编为大家整理,主要介绍了实现自己的HAL2 HAL helloworld 之HAL层代码的编写相关的知识,希望对你有一定的参考价值。
实现自己的HAL2 HAL helloworld 之HAL层代码的编写
编写目标
- 编写一个实现简单功能(加法运算)的HAL代码,不涉及驱动操作
- 编译通过并打包到system.ing中
编写头文件helloworld.h
#define android_HELLOWORLD_INTERFACE_H
#include <hardware/hardware.h>

__BEGIN_DECLS

//定义模块ID
#define HELLOWORLD_HARDWARE_MODULE_ID "helloworld"

//硬件模块结构

struct helloworld_module_t
{
    struct hw_module_t common;
    char * description;
    int methodsNum;
};

//硬件接口结构体

struct helloworld_device_t
{
    struct  hw_device_t common;
    int (*helloworld_add) (struct helloworld_device_t *dev, int a , int b, int *c);
};


__END_DECLS
编写helloworld.c
- 在系统源码的这个路径 Z:\\itop-3399_8.1\\hardware\\libhardware\\modules ,下新建helloworld 文件夹
- 在helloworld文件夹下创建helloworld.c文件
代码
#define LOG_TAG "HelloStub"

#include <hardware/hardware.h>
#include <malloc.h>
#include <fcntl.h>
#include <errno.h>
#include <cutils/log.h>
#include <hardware/helloworld.h>

#define MODULE_NAME "helloworld"
#define MODULE_DES "HelloWorld : Implement Add function"
#define MODULE_AUTHOR "963416867@qq.com"

static int helloworld_open(const struct hw_module_t* module, const char* id, struct hw_device_t** device);
static int helloworld_close(struct hw_device_t* device);
static int helloworld_add(struct helloworld_device_t *dev, int a , int b, int *c);
static int  helloworld_open(const struct hw_module_t* module, const char* id, struct hw_device_t** device){

    __android_log_print(ANDROID_LOG_INFO, LOG_TAG, "helloworld_open");


    struct helloworld_device_t *dev;

    dev = (struct helloworld_device_t *)malloc(sizeof(struct helloworld_device_t));
    if(!dev){
        ALOGE("Helloworld open: faild to alloc device space");
        return -EFAULT;
    }

    memset(dev, 0, sizeof(struct helloworld_device_t));
    dev->common.tag = HARDWARE_MODULE_TAG;
    dev->common.version = 0;
    dev->common.module = (hw_module_t *)module;
    dev->common.close = helloworld_close;
    dev->helloworld_add = helloworld_add;
    * device = &(dev->common);
    ALOGE("helloworld open: driver file successfully");


    return 0;
    }

static struct  hw_module_methods_t helloworld_module_methods_t = {
    .open = helloworld_open
};

//module struct  注意这里必须是 HAL_MODULE_INFO_SYM 变量名

struct helloworld_module_t HAL_MODULE_INFO_SYM = {

    .common = {
        .tag = HARDWARE_MODULE_TAG,
        .module_api_version = 1,
        .hal_api_version = 0,
        .id = HELLOWORLD_HARDWARE_MODULE_ID,
        .name = MODULE_NAME,
        .author = MODULE_AUTHOR,
        .methods = &helloworld_module_methods_t
    },

    .description = MODULE_DES,
    .methodsNum = 3

};

static int helloworld_close(struct hw_device_t* device){
    struct helloworld_device_t* helloworld_device= (struct helloworld_device_t *)device;
    if(helloworld_device){
        free(helloworld_device);
    }

    return 0;
}

static int helloworld_add(struct helloworld_device_t *dev, int a , int b, int *c){
    ALOGI("helloworld add: success %d + %d", a, b);
    *c = a + b;
    return 0;
}
编写Android.mk 编译文件
- Android.mk
# Copyright (C) 2008 The Android Open Source Project
#
# Licensed under the Apache License, Version 2.0 (the "License");
# you may not use this file except in compliance with the License.
# You may obtain a copy of the License at
#
#      http://www.apache.org/licenses/LICENSE-2.0
#
# Unless required by applicable law or agreed to in writing, software
# distributed under the License is distributed on an "AS IS" BASIS,
# WITHOUT WARRANTIES OR CONDITIONS OF ANY KIND, either express or implied.
# See the License for the specific language governing permissions and
# limitations under the License.


LOCAL_PATH := $(call my-dir)

# HAL module implemenation stored in
# hw/<OVERLAY_HARDWARE_MODULE_ID>.<ro.product.board>.so
include $(CLEAR_VARS)

#用于打印的库
LOCAL_LDLIBS := -llog

LOCAL_MODULE_RELATIVE_PATH := hw
LOCAL_PROPRIETARY_MODULE := true
LOCAL_SRC_FILES := helloworld.c
LOCAL_HEADER_LIBRARIES := libhardware_headers
LOCAL_MODULE := helloworld.default
LOCAL_CFLAGS:= -DLOG_TAG=\\"helloworld\\"
LOCAL_MODULE_TAGS := optional
include $(BUILD_SHARED_LIBRARY)
编译自己写的helloworld hal
- 在编译这个模块前先将系统源码编译通过,为编译系统源码会生成好多工具,这些工具可以用来单独模块编译
- 配置执行文件
source build//envsetup.sh
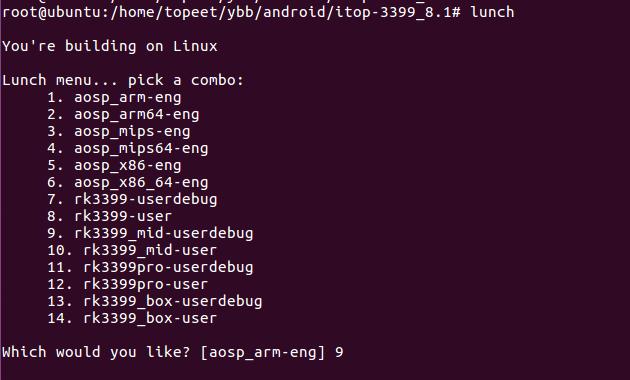
- 选择在什么环境编译
lunch
- 编译自己编写的模块
mmm hardware/libhardware/modules/helloworld/
- 打包system.img 镜像
make snod
以上是关于实现自己的HAL2 HAL helloworld 之HAL层代码的编写的主要内容,如果未能解决你的问题,请参考以下文章