PDF分割?有了这把魔法剪,PDF任你裁剪(PyPDF2)-
Posted Tisfy
tags:
篇首语:本文由小常识网(cha138.com)小编为大家整理,主要介绍了PDF分割?有了这把魔法剪,PDF任你裁剪(PyPDF2)-相关的知识,希望对你有一定的参考价值。
前情提要
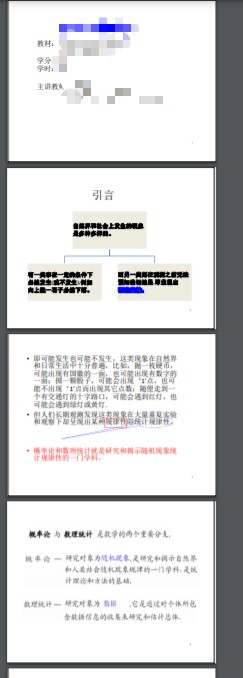
前面我们已经知道了如何使用python裁剪PDF,因此,对于1张4页的横向PDF,我们只需要每页裁剪4次即可。
这里需要注意的是,如果一个PageObject对象裁剪多次,那么后面的裁剪会对前面的裁剪照成影响
一页需要裁剪4次,因此我们需要定义4个对象。
与上一篇不同的是,上篇的
input_file = PyPDF2.PdfFileReader(open(input_file_path, 'rb'))
需要改成:
input_file_list = []
for i in range(4):
    input_file_list.append(PyPDF2.PdfFileReader(open(input_file_path, 'rb')))  # 创建4个对象
因每页需要裁剪的4次的相对位置是固定的,因此我们可以先使用一个列表存起来
to_split_XYs = [(0,0,width/2,height/2), (0,height/2,width/2,height), (width/2,0,width,height/2), (width/2,height/2,width,height)] # 要分隔的xy坐标
这样一个for循环就搞定了
'''
*--------->y
|
|
↓
x
'''

import PyPDF2

input_file_path = 'C:\\\\Users\\\\LetMeFly\\\\Desktop\\\\lec1_1.pdf'
output_file_path = 'C:\\\\Users\\\\LetMeFly\\\\Desktop\\\\lec1_1-sp.pdf'


def split(page, tup):
    page.mediaBox.lowerLeft=(tup[0],tup[1])
    page.mediaBox.lowerRight=(tup[2],tup[1])
    page.mediaBox.upperLeft = (tup[0], tup[3])
    page.mediaBox.upperRight = (tup[2], tup[3])


input_file_list = []
for i in range(4):
    input_file_list.append(PyPDF2.PdfFileReader(open(input_file_path, 'rb')))
output_file = PyPDF2.PdfFileWriter()

page_info = input_file_list[0].getPage(0)
width = float(page_info.mediaBox.getWidth())
height = float(page_info.mediaBox.getHeight())
page_count = input_file_list[0].getNumPages()

to_split_XYs = [(0,0,width/2,height/2), (0,height/2,width/2,height), (width/2,0,width,height/2), (width/2,height/2,width,height)]  # 要分隔的xy坐标

for page_num in range(page_count):
    for i in range(4):
        this_page = input_file_list[i].getPage(page_num)
        split(this_page,to_split_XYs[i])
        output_file.addPage(this_page)

output_file.write(open(output_file_path, 'wb'))
打开生成的PDF,不错!

但是又一些瑕疵,就是原PDF每页分隔用的黑框不是靠边的,所以裁剪出来的结果有黑边。
篇幅限制,放到下一篇讲解如何优化。
原创不易,转载请附上原文链接哦~
Tisfy:https://letmefly.blog.csdn.net/article/details/117638496
以上是关于PDF分割?有了这把魔法剪,PDF任你裁剪(PyPDF2)-的主要内容,如果未能解决你的问题,请参考以下文章