监控(Prometheus)的使用
Posted givenchy_yzl
tags:
篇首语:本文由小常识网(cha138.com)小编为大家整理,主要介绍了监控(Prometheus)的使用相关的知识,希望对你有一定的参考价值。
监控
监控就是实时的帮助我们来监控或者探测我们部署的服务是否正常运行
常用的监控
-
zabbix(基于数据库的)
- 组件比较全,缺点性能不高
- 当数据库中的一个表的数据超过2000W时,数据库性能急剧下降
-
阿里云云监控
-
腾讯云蓝鲸监控
-
普罗米修斯(prometeus)
- 性能比较高,底层使用时序数据库
- 原生支持监控容器
prometheus部署
普罗米修斯监控流程
普罗米修斯监控分为两种情况:
1、携带metrics接口的服务 (kubernetes、ETCD、docker)
2、不携带mertrics接口的服务(nginx、mysql、linux主机)针对于不携带mertrics接口的服务,我们需要安装一个exporter插件。
# 下载
[root@prometheus opt]# wget https://github.com/prometheus/prometheus/releases/download/v2.27.1/prometheus-2.27.1.linux-amd64.tar.gz

# 解压
[root@prometheus opt]# tar -xf prometheus-2.25.0.linux-amd64.tar.gz -C /usr/local/

# 建立超链接
[root@prometheus local]# ln -s /usr/local/prometheus-2.25.0.linux-amd64 /usr/local/prometheus

# 创建环境变量
[root@prometheus local]# cat >> /etc/profile <<EOF
export PROMETHEUS_HOME=/usr/local/prometheus
PATH=$PATH:$PROMETHEUS_HOME
export PATH
EOF
[root@prometheus ~]# source /etc/profile

# 测试
[root@prometheus ~]# prometheus --version
prometheus, version 2.25.0 (branch: HEAD, revision: a6be548dbc17780d562a39c0e4bd0bd4c00ad6e2)
  build user:       root@615f028225c9
  build date:       20210217-14:17:24
  go version:       go1.15.8
  platform:         linux/amd64
使用普罗米修斯监控一台Linux主机
web服务器
# 下载
[root@web01 opt]# wget https://github.com/prometheus/node_exporter/releases/download/v1.1.2/node_exporter-1.1.2.linux-amd64.tar.gz

[root@web01 opt]# tar -xf node_exporter-1.1.2.linux-amd64.tar.gz -C /usr/local/

[root@web01 local]# ln -s /usr/local/node_exporter-1.1.2.linux-amd64/ /usr/local/node_exporter

export NODE_EXPORTER=/usr/local/node_exporter
export PATH=$PATH:$NODE_EXPORTER

[root@web01 ~]# source /etc/profile
[root@web01 ~]# node_exporter
prometheus主机
[root@prometheus prometheus]# vim /usr/local/prometheus/prometheus.yml
...........
scrape_configs:
  # The job name is added as a label `job=<job_name>` to any timeseries scraped from this config.
  - job_name: 'prometheus'

    # metrics_path defaults to '/metrics'
    # scheme defaults to 'http'.

    static_configs:
    - targets: ['localhost:9090']
  - job_name: 'web01'
    static_configs:
      - targets: ['192.168.1.7:9100']

[root@prometheus prometheus]# prometheus --config.file=/usr/local/prometheus/prometheus.yml
最后一段出现以下内容即为正确   level=info ts=2021-06-02T02:49:57.047Z caller=main.go:959 msg="Completed loading of configuration file" filename=/usr/local/prometheus/prometheus.yml totalDuration=2.682531ms remote_storage=25.802µs web_handler=457ns query_engine=17.121µs scrape=1.593395ms scrape_sd=99.713µs notify=77.917µs notify_sd=11.912µs rules=18.563µs
level=info ts=2021-06-02T02:49:57.047Z caller=main.go:751 msg="Server is ready to receive web requests."
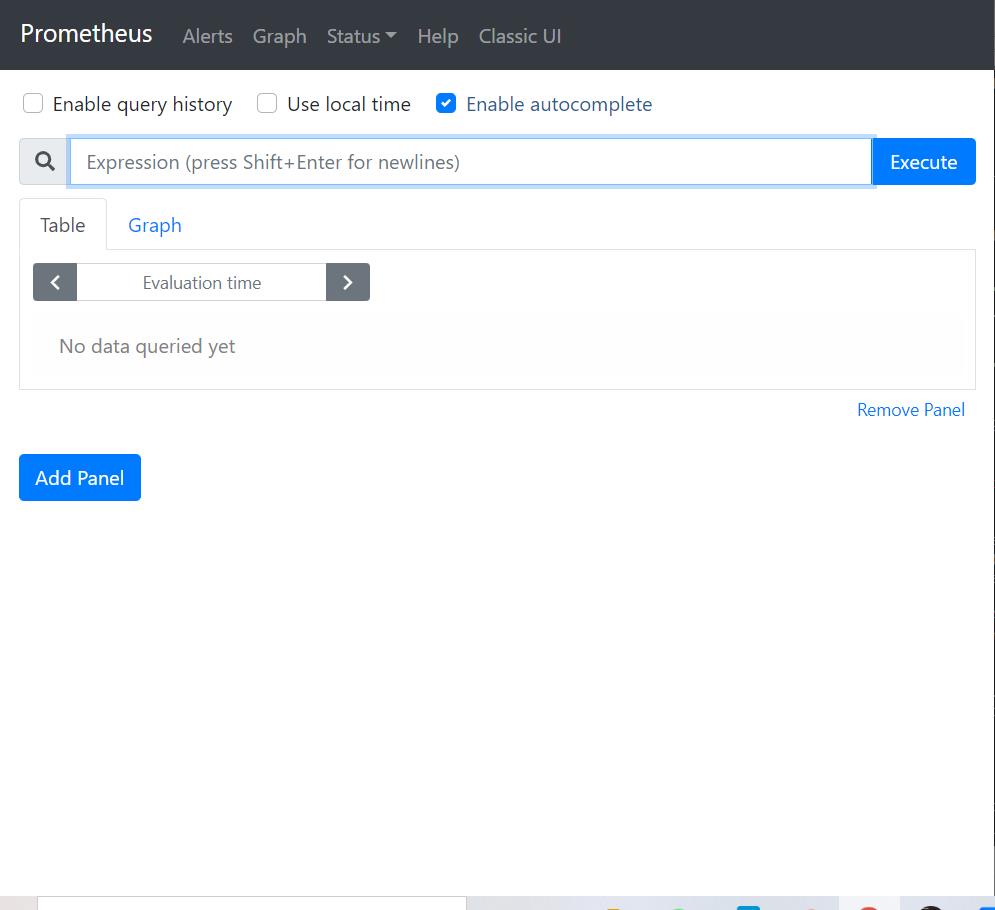
最后在浏览器输入prometheus主机的ip+端口号即可:http://192.168.1.71:9090/出现以下界面即为成功
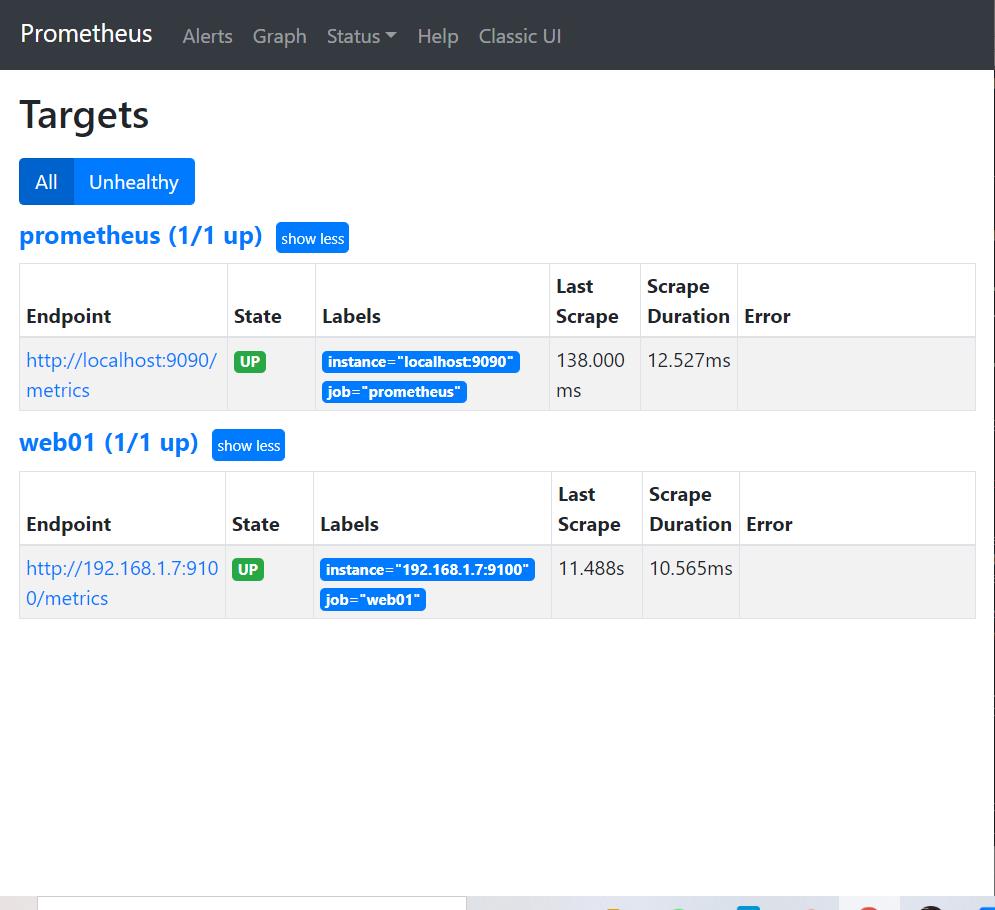
点击status—>targets会出现以下界面
为监控添加更加直观且美观的画面(grafana)
1、将grafanna下载到prometheus主机上(此处我是从桌面上传到prometheus主机上的)
[root@prometheus opt]# ls
grafana-7.3.6-1.x86_64.rpm
2、安装grafana
[root@prometheus opt]# yum install -y grafana-7.3.6-1.x86_64.rpm
3、启动grafana
[root@prometheus ~]# systemctl start grafana-server.service
4、查看端口是否开启
[root@prometheus ~]# netstat -ntlp
tcp6 0 0 :::3000 ::😗 LISTEN 7503/grafana-server
5、浏览器访问
http://192.168.1.71:3000/
出现以下界面即为成功,输入账户admin,密码admin即可登录

改密后登录
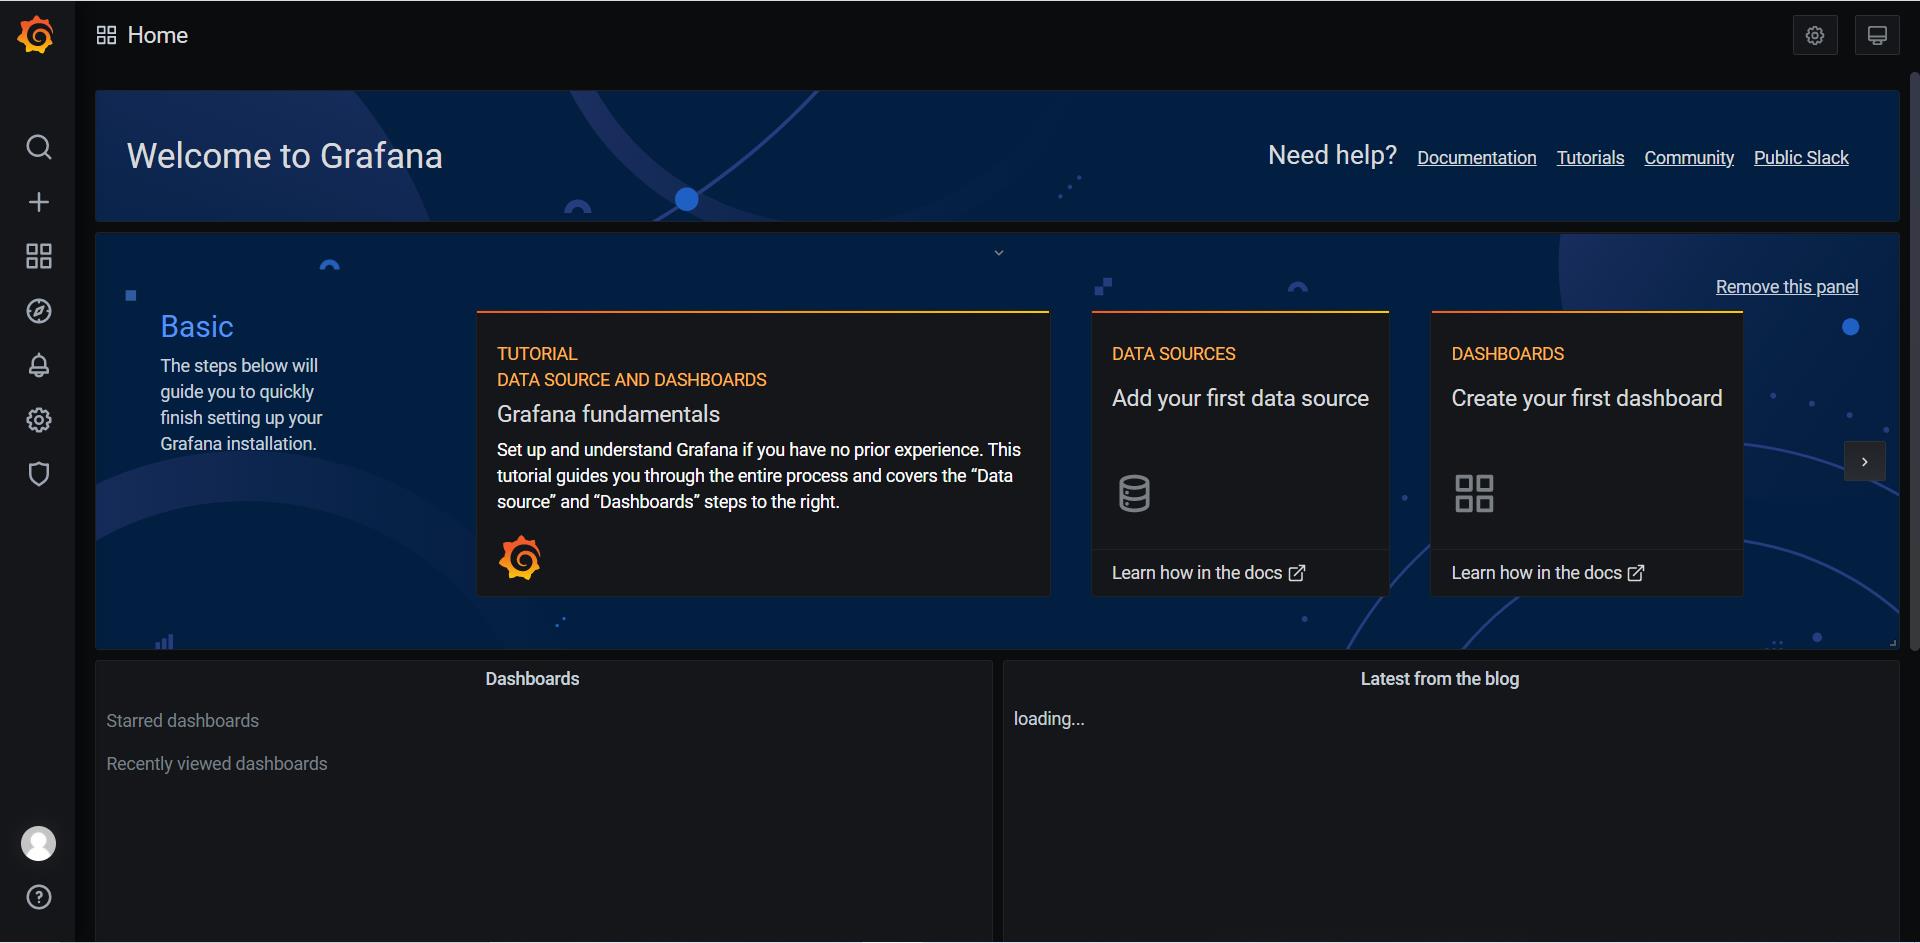
点击左边设置按钮-------》点击datasources-------->点击add datasource---------->点击prometheus
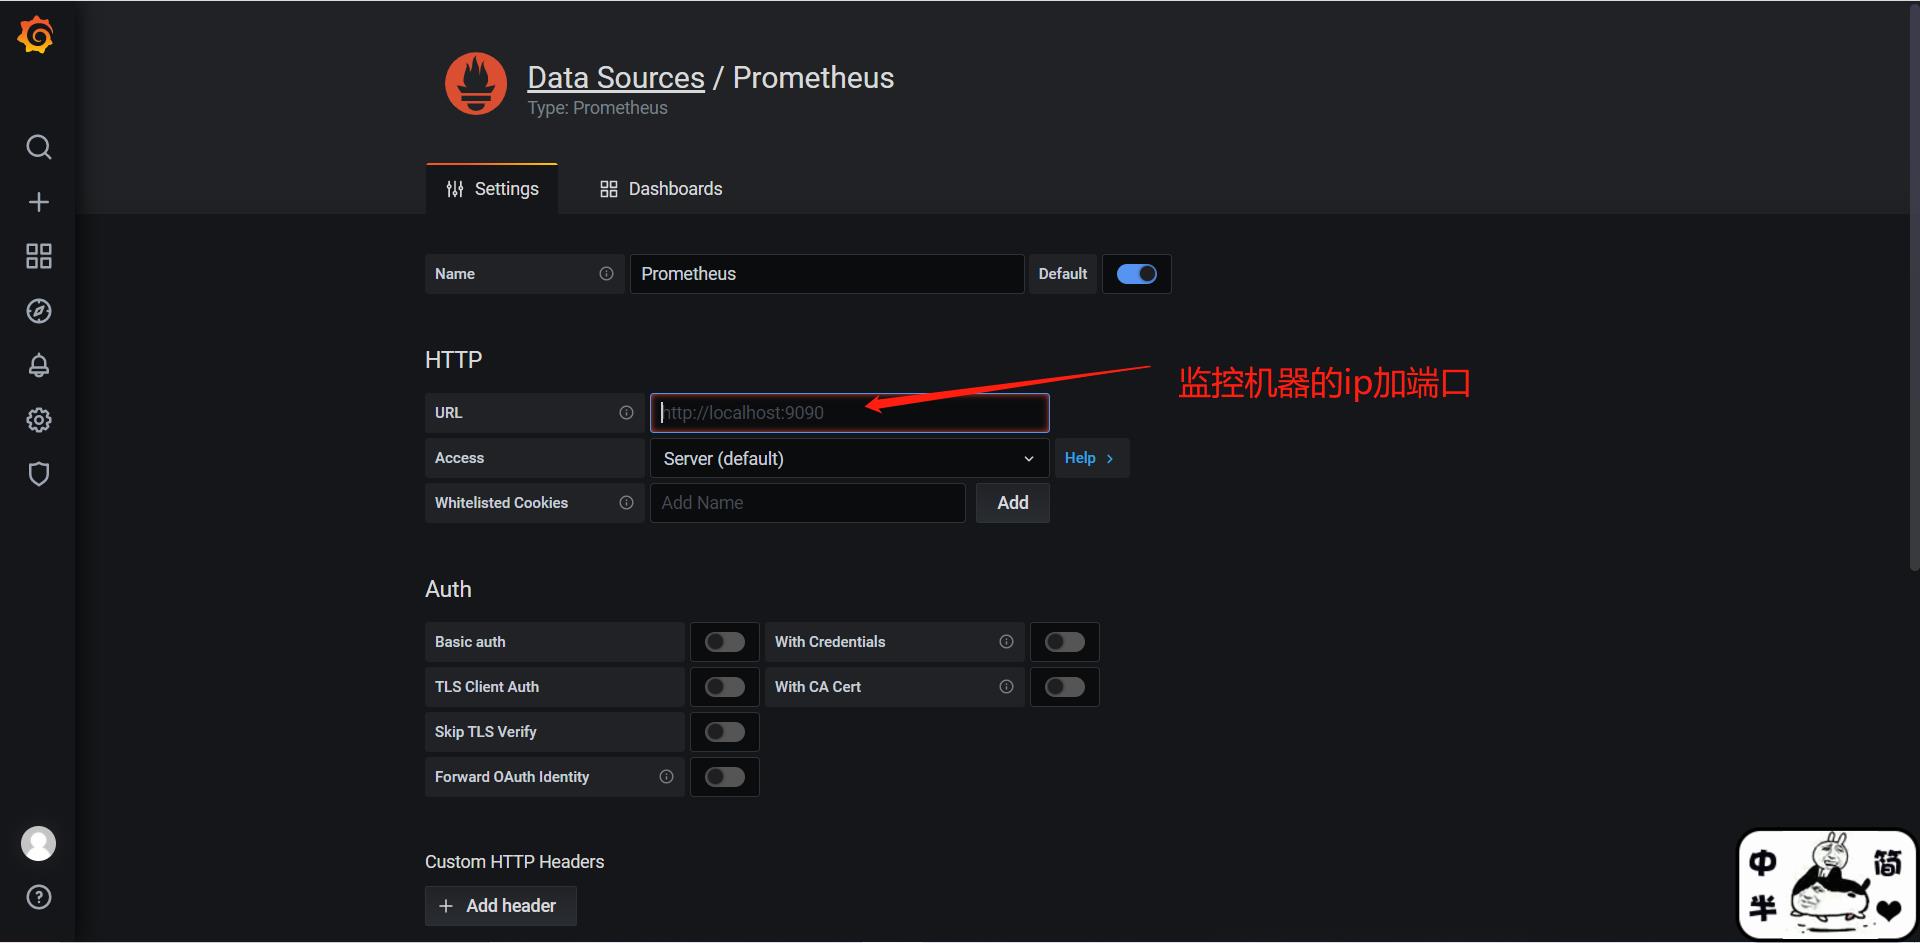
点击保存后,浏览器访问grafana官网:https://grafana.com/grafana/

点击dashboard,如图所示,选择自己喜欢的模板
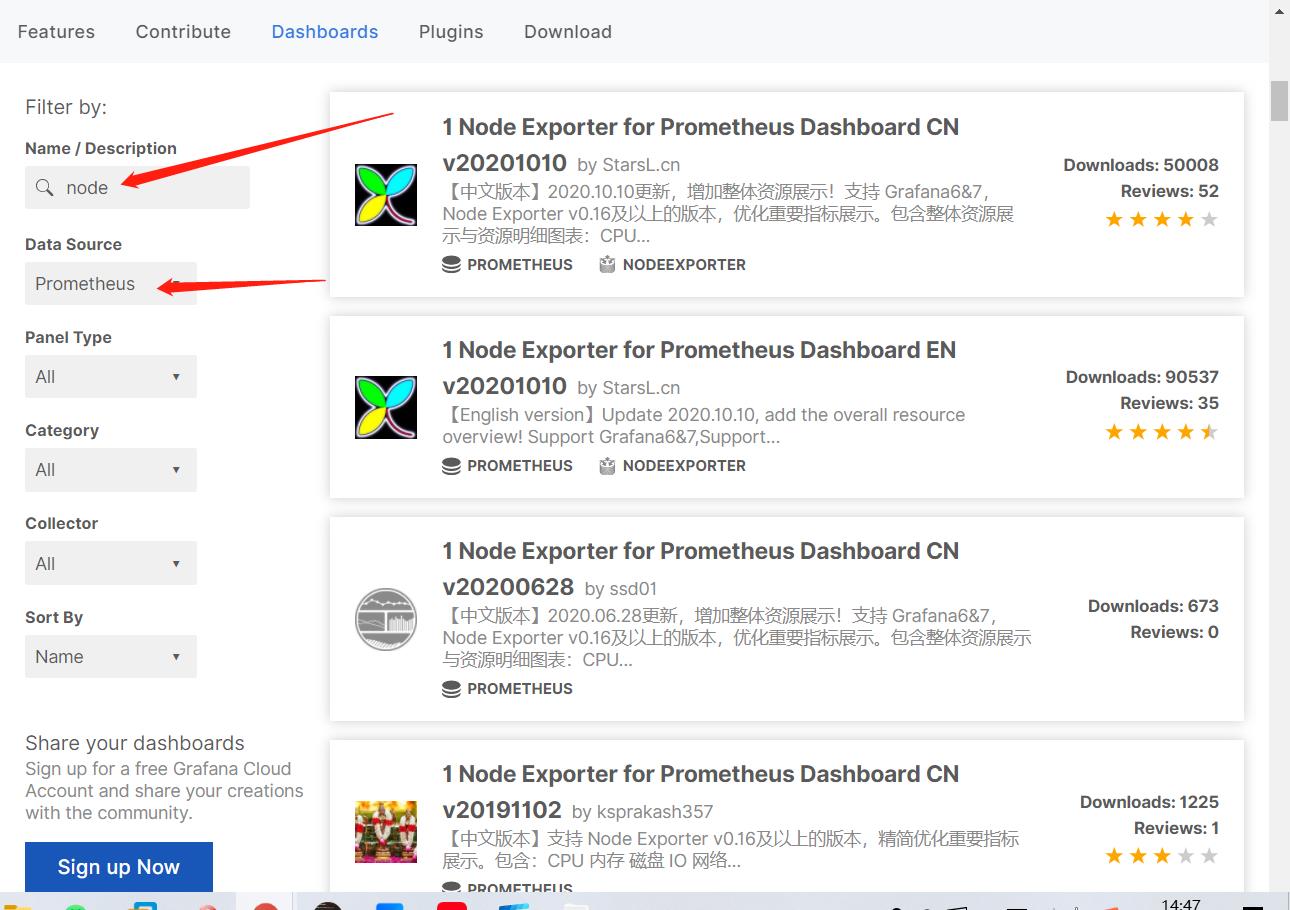

点击箭头处,然后点击import

点击load------>点击import
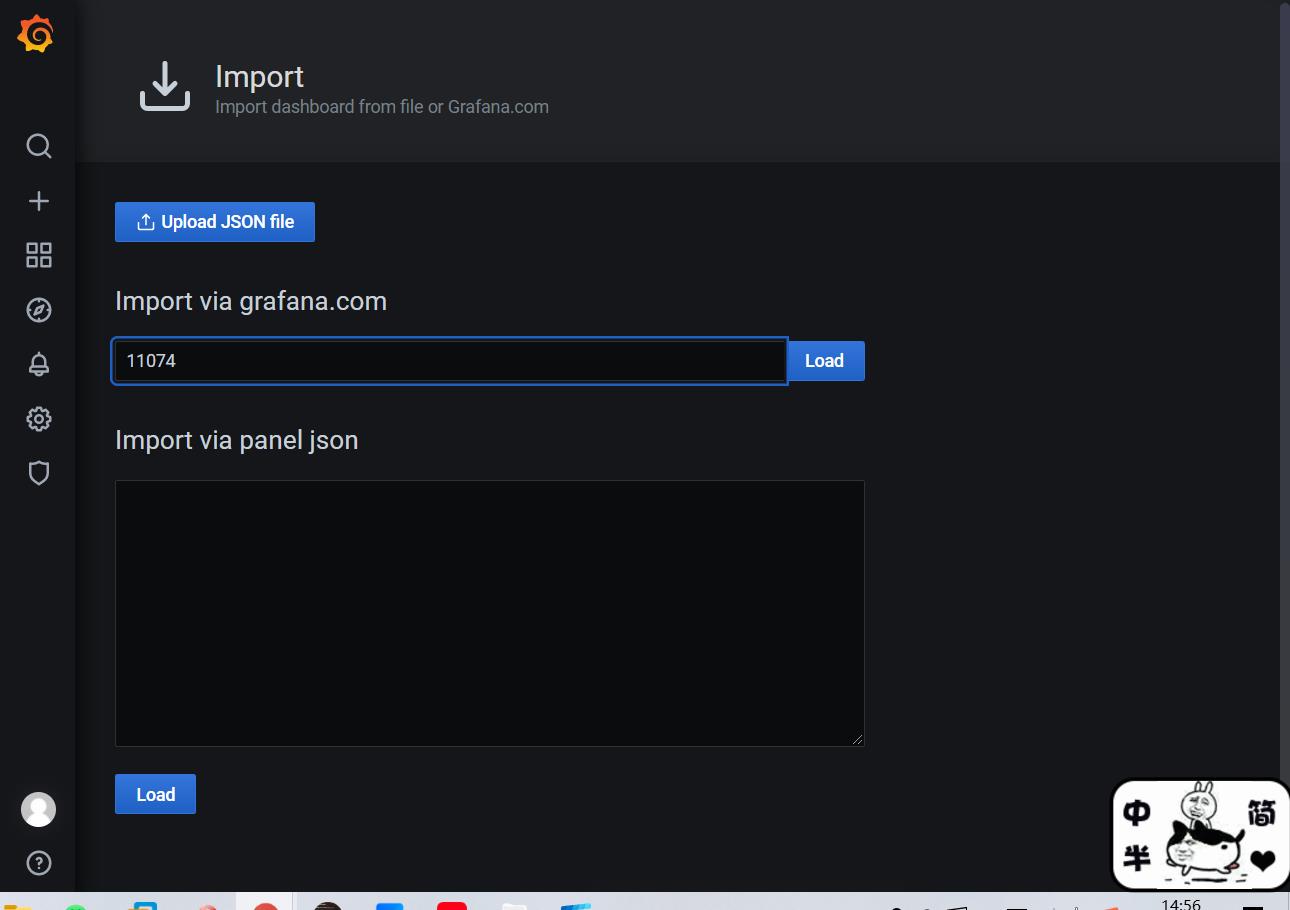
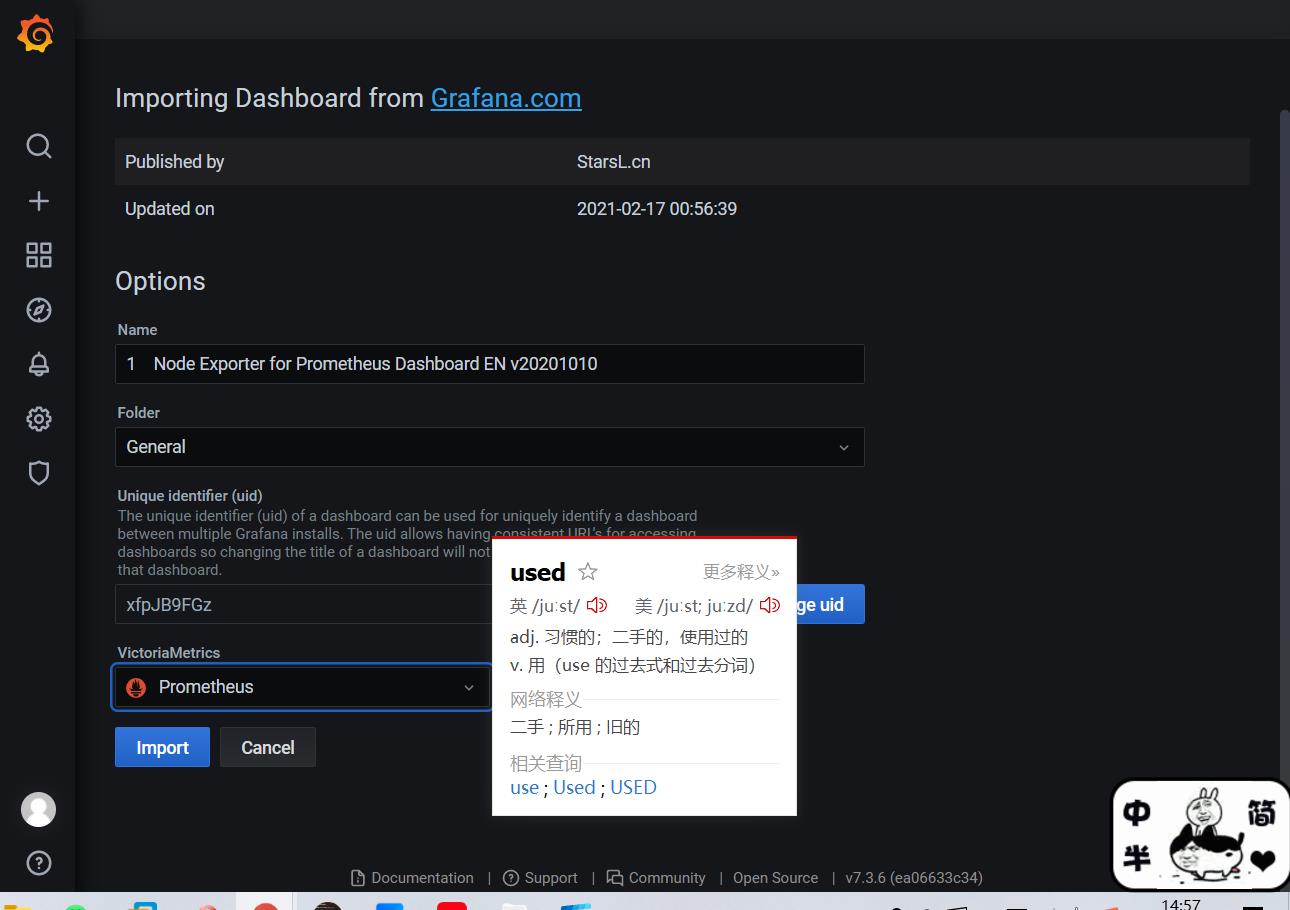
干饭啦!未完待续
prometheus监控数据库
以上是关于监控(Prometheus)的使用的主要内容,如果未能解决你的问题,请参考以下文章