Angdroid Studio仿QQ界面实现简单的功能
Posted 康小庄
tags:
篇首语:本文由小常识网(cha138.com)小编为大家整理,主要介绍了Angdroid Studio仿QQ界面实现简单的功能相关的知识,希望对你有一定的参考价值。
写在前面
由于本人初学阶段,写这篇博客是总结所学的知识点,为后面的进阶打好基础
有任何关于代码和表述问题,欢迎评论区指出
楼主近期在学习关于安卓中Fragment和ListView中的知识,按照老师的要求模仿一下QQ界面 要求功能
- 有登录界面
- 密码不对提示密码不对
- 账号密码任一为空提示用户不能为空
- 登录成功提示登录成功
- 可以实现账号密码记住功能
- 有三个界面可以点击底部按钮实现页面的切换
- 实现按钮选中状态和未选中状态不一样
- 联系人界面
- 信息界面
- 状态界面
- 发送信息功能
- 点击信息界面中的任意消息可以进入发消息界面
- 可以实现点击发送按钮将所输入的文字显示在屏幕中
提示:本人用的IDE开发环境是android Studio API是30
目录结构一览
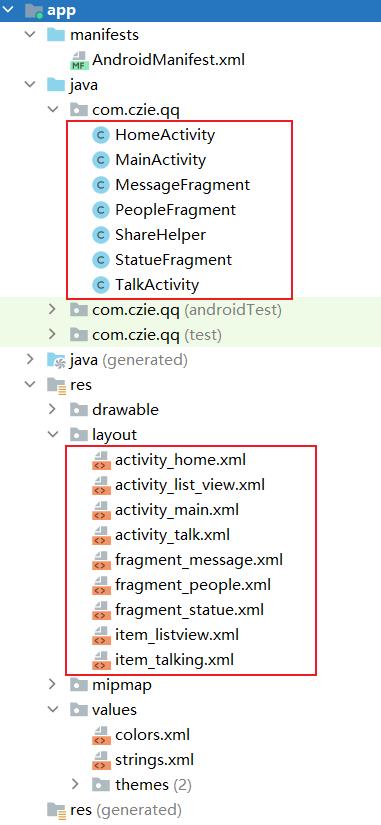
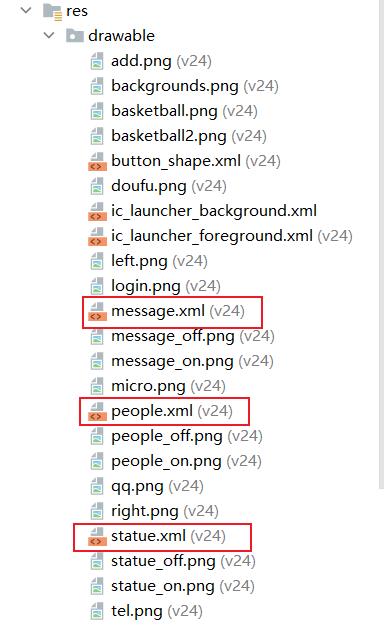
res中的文件
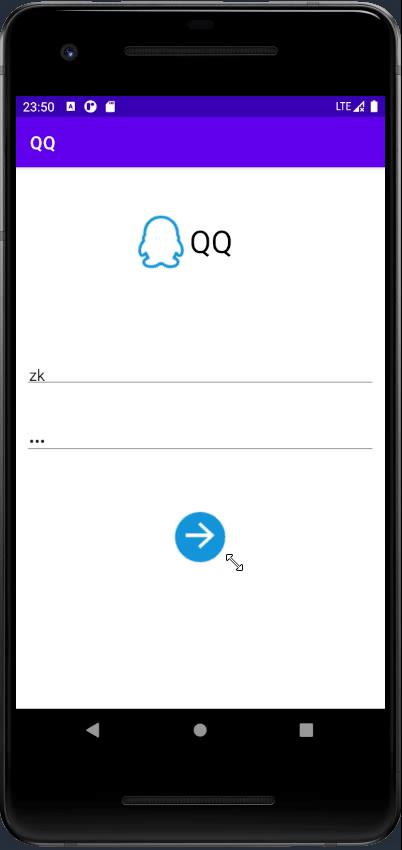
1. 登录界面
- 登录界面的布局文件
activity_main.xml
所用图标都可以在阿里巴巴图标网找到iconfont-阿里巴巴矢量图标库
<?xml version="1.0" encoding="utf-8"?>
<RelativeLayout xmlns:android="http://schemas.android.com/apk/res/android"
    xmlns:app="http://schemas.android.com/apk/res-auto"
    xmlns:tools="http://schemas.android.com/tools"
    android:layout_width="match_parent"
    android:layout_height="match_parent"
    tools:context=".MainActivity">

    <LinearLayout
        android:layout_width="match_parent"
        android:layout_height="match_parent"
        android:layout_marginLeft="10dp"
        android:layout_marginRight="10dp"
        android:orientation="vertical"
        tools:ignore="UselessParent">
        <TextView
            android:drawableLeft="@drawable/qq"
            android:layout_width="wrap_content"
            android:layout_height="wrap_content"
            android:layout_marginTop="50dp"
            android:layout_marginLeft="120dp"
            android:gravity="center"
            android:text="QQ"
            android:textColor="#000000"
            android:textSize="35sp"
            app:drawableStartCompat="@drawable/qq"
            android:drawableStart="@drawable/qq"
            tools:ignore="UseCompatTextViewDrawableXml"
            android:layout_marginStart="120dp">
        </TextView>
        <EditText
            android:id="@+id/userNameEditText"
            android:layout_width="match_parent"
            android:layout_height="wrap_content"
            android:layout_marginTop="100dp"
            android:hint="请输入用户名/账号/手机号"
            android:inputType="text"
            android:padding="5dp">
        </EditText>
        <EditText
            android:id="@+id/passwordEditText"
            android:layout_width="match_parent"
            android:layout_height="wrap_content"
            android:layout_marginTop="40dp"
            android:hint="请输入密码"
            android:inputType="textPassword"
            android:padding="5dp">
        </EditText>
        <ImageButton
            android:id="@+id/loginButton"
            android:layout_marginTop="60dp"
            android:layout_gravity="center"
            android:layout_width="60dp"
            android:layout_height="60dp"
            android:src="@drawable/login"
            android:background="#fff">
        </ImageButton>
    </LinearLayout>

</RelativeLayout>
所对应的MainActivity
- 其中的判断通过if语句判断用户是否输入和输入正确
- 提示 通过
Toast的方式提示
package com.czie.qq;

import androidx.appcompat.app.AppCompatActivity;

import android.annotation.SuppressLint;
import android.content.Context;
import android.content.Intent;
import android.os.Bundle;
import android.view.View;
import android.widget.Button;
import android.widget.EditText;
import android.widget.ImageButton;
import android.widget.Toast;

public class MainActivity extends AppCompatActivity {
    private Context context;
    private EditText userNameEditText, passwordEditText;
    private ImageButton loginButton;
    private ShareHelper shareHelper;

    @Override
    protected void onCreate(Bundle savedInstanceState) {
        super.onCreate(savedInstanceState);
        setContentView(R.layout.activity_main);
        context=this;
        shareHelper=new ShareHelper(context);
        initview();
    }

    private void initview() {
        userNameEditText = findViewById(R.id.userNameEditText);
        passwordEditText = findViewById(R.id.passwordEditText);
        loginButton = findViewById(R.id.loginButton);
        loginButton.setOnClickListener(new View.OnClickListener() {
            @Override
            public void onClick(View view) {
                //进行登录页面的处理
                String username = userNameEditText.getText().toString();
                String password = passwordEditText.getText().toString();
                if (username.length() > 0) {
                    if (username.equals("zk")) {
                        if (password.length() > 0) {
                            if (password.equals("123")) {
                                // 对账号和密码进行保存
                                shareHelper.save("username",username);
                                shareHelper.save("password",password);
                                startActivity(new Intent(MainActivity.this, HomeActivity.class));
                                Toast.makeText(MainActivity.this, "登录成功", Toast.LENGTH_SHORT).show();
                            } else {
                                Toast.makeText(MainActivity.this, "密码不正确", Toast.LENGTH_LONG).show();
                            }
                        } else {
                            Toast.makeText(MainActivity.this,"请填写密码",Toast.LENGTH_LONG).show();
                        }
                    } else {
                        Toast.makeText(MainActivity.this,"用户名不正确",Toast.LENGTH_LONG).show();
                    }
                } else {
                    Toast.makeText(MainActivity.this,"请填写用户名",Toast.LENGTH_LONG).show();
                }
            }
        });
    }

    @Override
    protected void onStart() {
        super.onStart();
        userNameEditText.setText(shareHelper.read("username"));
        passwordEditText.setText(shareHelper.read("password"));

    }
}
2. 记住密码功能
- 实现第一次登录成功后,再次登录会记住账号和密码的功能
这个功能我们用SharedPreferences
简单了解下什么是SharedPreferences
- SharedPreferences是Android平台上一个轻量级的存储辅助类,用来保存应用的一些常用配置,它提供了string,set,int,long,float,boolean六种数据类型。最终数据是以xml形式进行存储。在应用中通常做一些简单数据的持久化缓存。
package com.czie.qq;

import android.content.Context;
import android.content.SharedPreferences;

public class ShareHelper {
    //两个功能 保存,读取
    Context context;

    public ShareHelper() {
    }

    public ShareHelper(Context context) {
        this.context = context;
    }

    //保存
    public void save(String key, String value) {
        SharedPreferences sharedPreferences = context.getSharedPreferences("iot1921", Context.MODE_PRIVATE);
        //创建一个输入值
        SharedPreferences.Editor editor = sharedPreferences.edit();
        editor.putString(key, value);
        editor.commit();
    }

    //读取数据
    public String read(String key) {
        SharedPreferences sharedPreferences = context.getSharedPreferences("iot1921", Context.MODE_PRIVATE);
        return sharedPreferences.getString(key, "");
    }
}
注意事项:
- 输入值记得提交,editor.commit();
- 在
MainACtivity中记得在OnStart方法中使用ShareHelper.read传入需要记住的值!
预览一下成果!
3. Fragment界面跳转
这里有三个Fragment,所对应需要三个fragment布局界面
- 首先要创建3个按钮的切换xml
message.xml
<?xml version="1.0" encoding="utf-8"?>
<selector xmlns:android="http://schemas.android.com/apk/res/android">
    <item android:drawable="@drawable/message_on" android:state_selected="true"/>
    <item android:drawable="@drawable/message_off" android:state_selected="false"/>
</selector>
people.xml
<?xml version="1.0" encoding="utf-8"?>
<selector xmlns:android="http://schemas.android.com/apk/res/android">
    <item android:drawable="@drawable/people_on" android:state_selected="true"/>
    <item android:drawable="@drawable/people_off" android:state_selected="false"/>
</selector>
statue.xml
<?xml version="1.0" encoding="utf-8"?>
<selector xmlns:android="http://schemas.android.com/apk/res/android">
    <item android:drawable="@drawable/statue_on" android:state_selected="true"/>
    <item android:drawable="@drawable/statue_off" android:state_selected="false"/>
</selector>
然后在布局界面中使用
activity_home.xml
这个界面的布局可以随意发挥,本人做的比较简单,见谅
- 3个
ImageView和1个FrameLayout ImageView分别绑定点击事件
<?xml version="1.0" encoding="utf-8"?>
<LinearLayout xmlns:android="http://schemas.android.com/apk/res/android"
    xmlns:app="http://schemas.android.com/apk/res-auto"
    xmlns:tools="http://schemas.android.com/tools"
    android:layout_width="match_parent"
    android:layout_height="match_parent"
    android:orientation="vertical">

    <LinearLayout
        android:layout_width="match_parent"
        android:layout_height="wrap_content"
        android:orientation="horizontal">
        <ImageView
            android:layout_width="50dp"
            android:layout_height="50dp"
            android:src="@drawable/basketball">
        </ImageView>
        <TextView
            android:layout_width="wrap_content"
            android:layout_height="match_parent"
            android:text="Upcoming">
        </TextView>

        <TextView
            android:layout_width="50dp"
            android:layout_marginLeft="250dp"
            android:layout_height="match_parent"
            android:text="+  -"
            android:textSize="25sp">
        </TextView>
    </LinearLayout>

    <FrameLayout
        android:layout_marginTop="10dp"
        android:id="@+id/frameLayout"
        android:layout_width="match_parent"
        android:layout_height="550dp">
    </FrameLayout>

    <LinearLayout
        android:layout_width="wrap_content"
        android:layout_height="match_parent"
        android:orientation="horizontal">
    <ImageView
        android:id="@+id/messageImageView"
        android:layout_width="wrap_content"
        android:layout_height="wrap_content"
        android:layout_marginLeft="60dp"
        android:background="@drawable/message"
        android:layout_weight="1"
        android:layout_marginStart="0dp">
    </ImageView>

    <ImageView
        android:id="@+id/peopleImageView"
        android:layout_width="wrap_content"
        android:layout_height="wrap_content"
        android:layout_marginLeft="150dp"
        android:background="@drawable/people"
        android:layout_weight="1"
        android:layout_marginStart="150dp"
        tools:ignore="ContentDescription">
    </ImageView>

        <以上是关于Angdroid Studio仿QQ界面实现简单的功能的主要内容,如果未能解决你的问题,请参考以下文章