04.服务间的通信方式之RestTemplate
Posted 潮汐先生
tags:
篇首语:本文由小常识网(cha138.com)小编为大家整理,主要介绍了04.服务间的通信方式之RestTemplate相关的知识,希望对你有一定的参考价值。
服务间的通信方式之RestTemplate
前言
前面我们说了微服务是基于单体应用围绕业务进行的服务拆分,拆分出来的每个服务都是一个独立的应用(独立部署、运行、独自的进程)。这些独立的应用之间相互调用的过程就是我们本节学习的重点–微服务间的通信
服务间的通信方式
总的来说,目前有两种方式可以实现服务间的通信
-
HTTP Rest:使用http协议传输JSON格式的数据,它是基于OSI七层参考模型中的应用层进行通信的,效率较之于RPC要低。springcloud中使用的是spring提供的RestTemplate
-
RPC(远程过程调用):使用RPC协议传输对象序列化后的二进制数据,它是基于OSI七层参考模型中的传输层进行通信的,效率较之于HTTP Rest要高。代表是阿里的dubbo
下面我们主要学习使用HTTP Rest的方式来进行服务间的通信
HTTP Rest方式实现服务间通信
准备工作
我们上面说了,springcloud使用的是spring提供的RestTemplate来实现服务间的通信的。所以我们这里需要准备两个服务USER和ORDER,这两个服务不做具体业务逻辑,只负责演示服务间的通信。开发完这两个服务后将其注册到我们的consul中进行演示。
USER
1.新建module
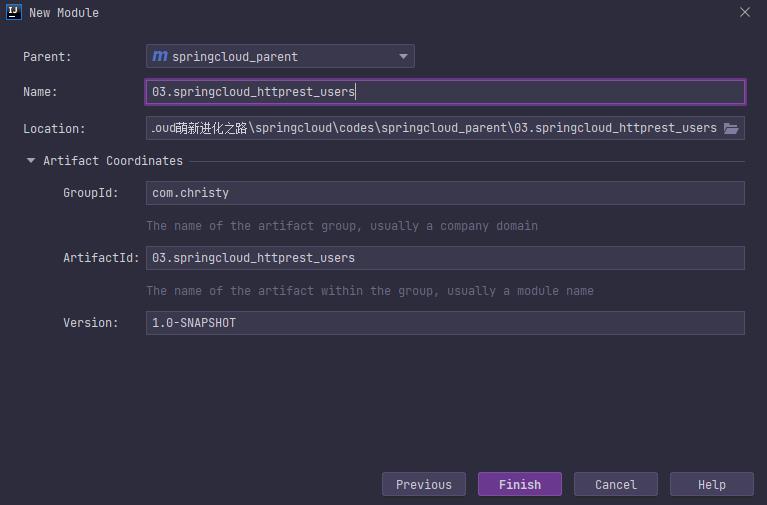
2.pom.xml
<?xml version="1.0" encoding="UTF-8"?>
<project xmlns="http://maven.apache.org/POM/4.0.0"
         xmlns:xsi="http://www.w3.org/2001/XMLSchema-instance"
         xsi:schemaLocation="http://maven.apache.org/POM/4.0.0 http://maven.apache.org/xsd/maven-4.0.0.xsd">
    <parent>
        <artifactId>springcloud_parent</artifactId>
        <groupId>com.christy</groupId>
        <version>1.0-SNAPSHOT</version>
    </parent>
    <modelVersion>4.0.0</modelVersion>

    <artifactId>03.springcloud_httprest_users</artifactId>

    <properties>
        <maven.compiler.source>8</maven.compiler.source>
        <maven.compiler.target>8</maven.compiler.target>
    </properties>

    <dependencies>
        <!-- 引入springboot web依赖 -->
        <dependency>
            <groupId>org.springframework.boot</groupId>
            <artifactId>spring-boot-starter-web</artifactId>
        </dependency>

        <!-- 引入consul客户端依赖 -->
        <dependency>
            <groupId>org.springframework.cloud</groupId>
            <artifactId>spring-cloud-starter-consul-discovery</artifactId>
        </dependency>

        <!-- 健康监控-->
        <dependency>
            <groupId>org.springframework.boot</groupId>
            <artifactId>spring-boot-starter-actuator</artifactId>
        </dependency>
    </dependencies>
</project>
3.application.properties
server.port=8881
spring.application.name=CONSUL-USER
# 注册consul服务的主机
spring.cloud.consul.host=localhost
# 注册consul服务的端口号
spring.cloud.consul.port=8500
4.UserApplication
package com.christy;

import org.springframework.boot.SpringApplication;
import org.springframework.boot.autoconfigure.SpringBootApplication;
import org.springframework.cloud.client.discovery.EnableDiscoveryClient;

/**
 * @Author Christy
 * @Date 2021/6/1 17:02
 **/
@SpringBootApplication
@EnableDiscoveryClient
public class UserApplication {
    public static void main(String[] args){
        SpringApplication.run(UserApplication.class, args);
    }
}
5.UserController
package com.christy.controller;

import org.springframework.web.bind.annotation.GetMapping;
import org.springframework.web.bind.annotation.RequestMapping;
import org.springframework.web.bind.annotation.RestController;
import org.springframework.web.client.RestTemplate;

/**
 * @Author Christy
 * @Date 2021/6/1 17:04
 **/
@RestController
@RequestMapping("/user")
public class UserController {

    @GetMapping("/orders")
    public String getUserOrders() {
        System.out.println("开始获取用户的所有运单");

        // 调用订单服务的接口
        RestTemplate restTemplate = new RestTemplate();
        String result = restTemplate.getForObject("http://localhost:8882/order/all", String.class);
        System.out.println("获取用户所有的运单成功,结果是:" + result);
        return "获取用户所有的运单成功!!!";
    }
}
ORDER
1.新建module
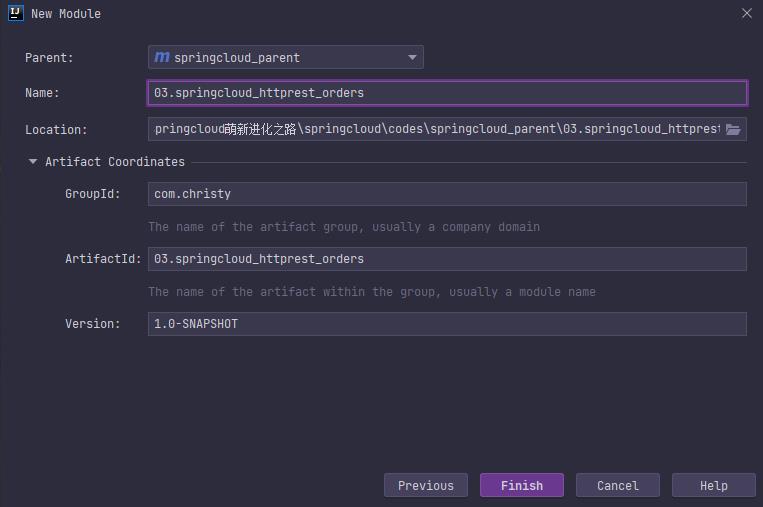
2.pom.xml
<?xml version="1.0" encoding="UTF-8"?>
<project xmlns="http://maven.apache.org/POM/4.0.0"
         xmlns:xsi="http://www.w3.org/2001/XMLSchema-instance"
         xsi:schemaLocation="http://maven.apache.org/POM/4.0.0 http://maven.apache.org/xsd/maven-4.0.0.xsd">
    <parent>
        <artifactId>springcloud_parent</artifactId>
        <groupId>com.christy</groupId>
        <version>1.0-SNAPSHOT</version>
    </parent>
    <modelVersion>4.0.0</modelVersion>

    <artifactId>03.springcloud_httprest_orders</artifactId>

    <properties>
        <maven.compiler.source>8</maven.compiler.source>
        <maven.compiler.target>8</maven.compiler.target>
    </properties>

    <dependencies>
        <!-- 引入springboot web依赖 -->
        <dependency>
            <groupId>org.springframework.boot</groupId>
            <artifactId>spring-boot-starter-web</artifactId>
        </dependency>

        <!-- 引入consul客户端依赖 -->
        <dependency>
            <groupId>org.springframework.cloud</groupId>
            <artifactId>spring-cloud-starter-consul-discovery</artifactId>
        </dependency>

        <!-- 健康监控-->
        <dependency>
            <groupId>org.springframework.boot</groupId>
            <artifactId>spring-boot-starter-actuator</artifactId>
        </dependency>
    </dependencies>

</project>
3.application.properties
server.port=8882
spring.application.name=CONSUL-ORDER
# 注册consul服务的主机
spring.cloud.consul.host=localhost
# 注册consul服务的端口号
spring.cloud.consul.port=8500
4.OrderApplication
package com.christy;

import org.springframework.boot.SpringApplication;
import org.springframework.boot.autoconfigure.SpringBootApplication;
import org.springframework.cloud.client.discovery.EnableDiscoveryClient;

/**
 * @Author Christy
 * @Date 2021/6/1 17:22
 **/
@SpringBootApplication
@EnableDiscoveryClient
public class OrderApplication {
    public static void main(String[] args) {
        SpringApplication.run(OrderApplication.class, args);
    }
}
5.OrderController
package com.christy.controller;

import org.springframework.web.bind.annotation.GetMapping;
import org.springframework.web.bind.annotation.RequestMapping;
import org.springframework.web.bind.annotation.RestController;

/**
 * @Author Christy
 * @Date 2021/6/1 17:29
 **/
@RestController
@RequestMapping("/order")
public class OrderController {

    @GetMapping("/all")
    public String all(){
        System.out.println("开始获取所有订单");

        return "所有运单获取成功!!!";
    }
}
启动consul
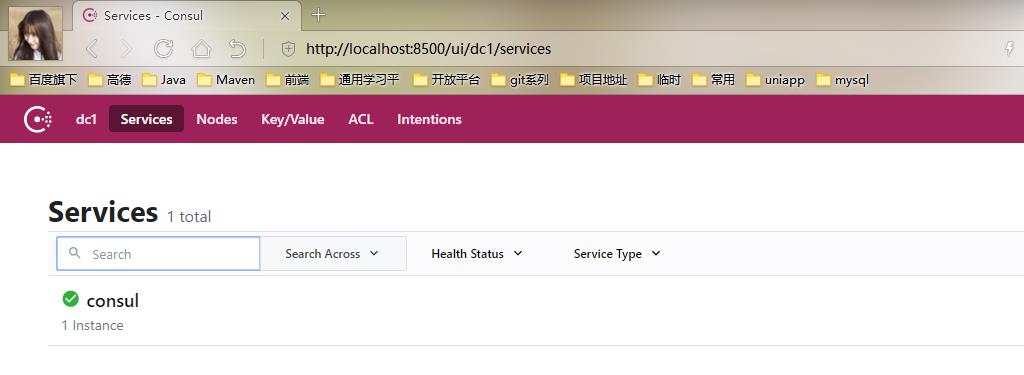
上述工作准备完毕后,我们在命令行输入consul agent -dev启动我们的服务注册中心consul,然后浏览器输入http://localhost:8500,如下图
启动服务
consul启动成功后我们依次启动上面的两个服务USER和ORDER
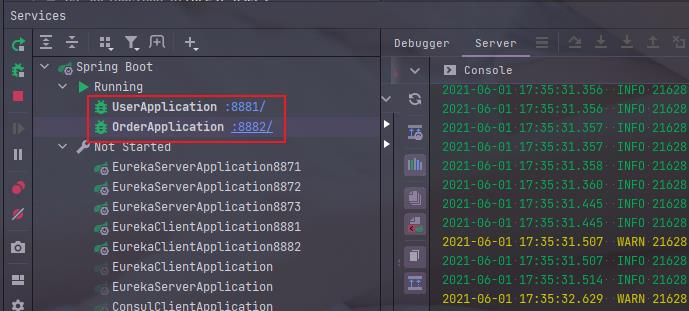
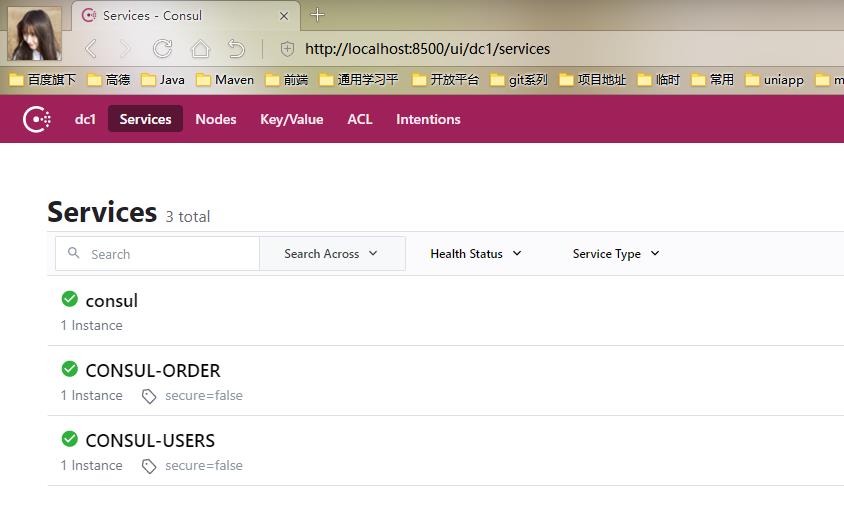
服务启动后我们在回到consul的管理界面,此时可以发现我们的两个服务都已经注册成功了
测试
我们上面是在User中调用了Order中的服务,所以我们在浏览器直接输入UserController中获取订单的方法http://localhost:8882/user/order,如下图

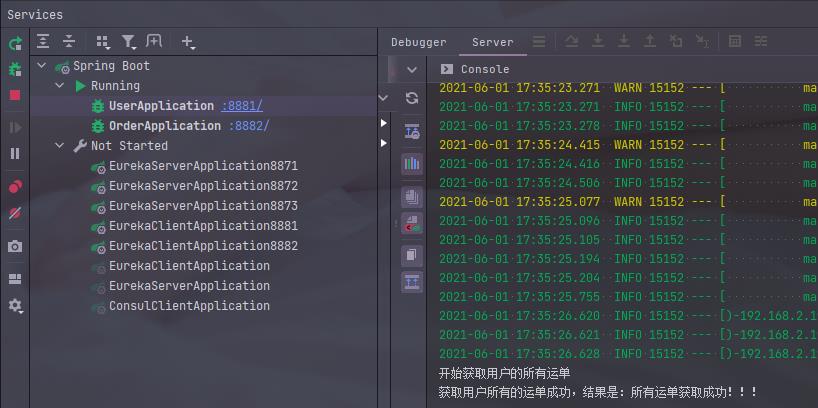
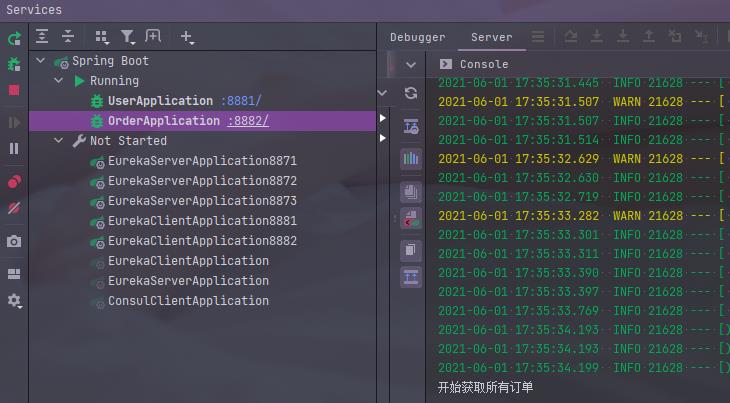
我们回到IDEA,可以看到user服务和order服务中都输出了相应的信息
以上是关于04.服务间的通信方式之RestTemplate的主要内容,如果未能解决你的问题,请参考以下文章