循循善诱!手把手一步一步教你部署项目到GitHub
Posted 四原色
tags:
篇首语:本文由小常识网(cha138.com)小编为大家整理,主要介绍了循循善诱!手把手一步一步教你部署项目到GitHub相关的知识,希望对你有一定的参考价值。
记一次GitHub项目发布后的心得体会
首先我们需要在本地新建一个项目,这里以我刚刚建好的一个登录案例来讲。
发布github项目的前提条件:
- 成功注册了一个github账号,没有github账号点击这里去官网注册
- 本地安装了git,没有安装git点击这里去官网下载安装
1.在github上新建一个项目
- 登录github,直接点击star a project新建一个项目
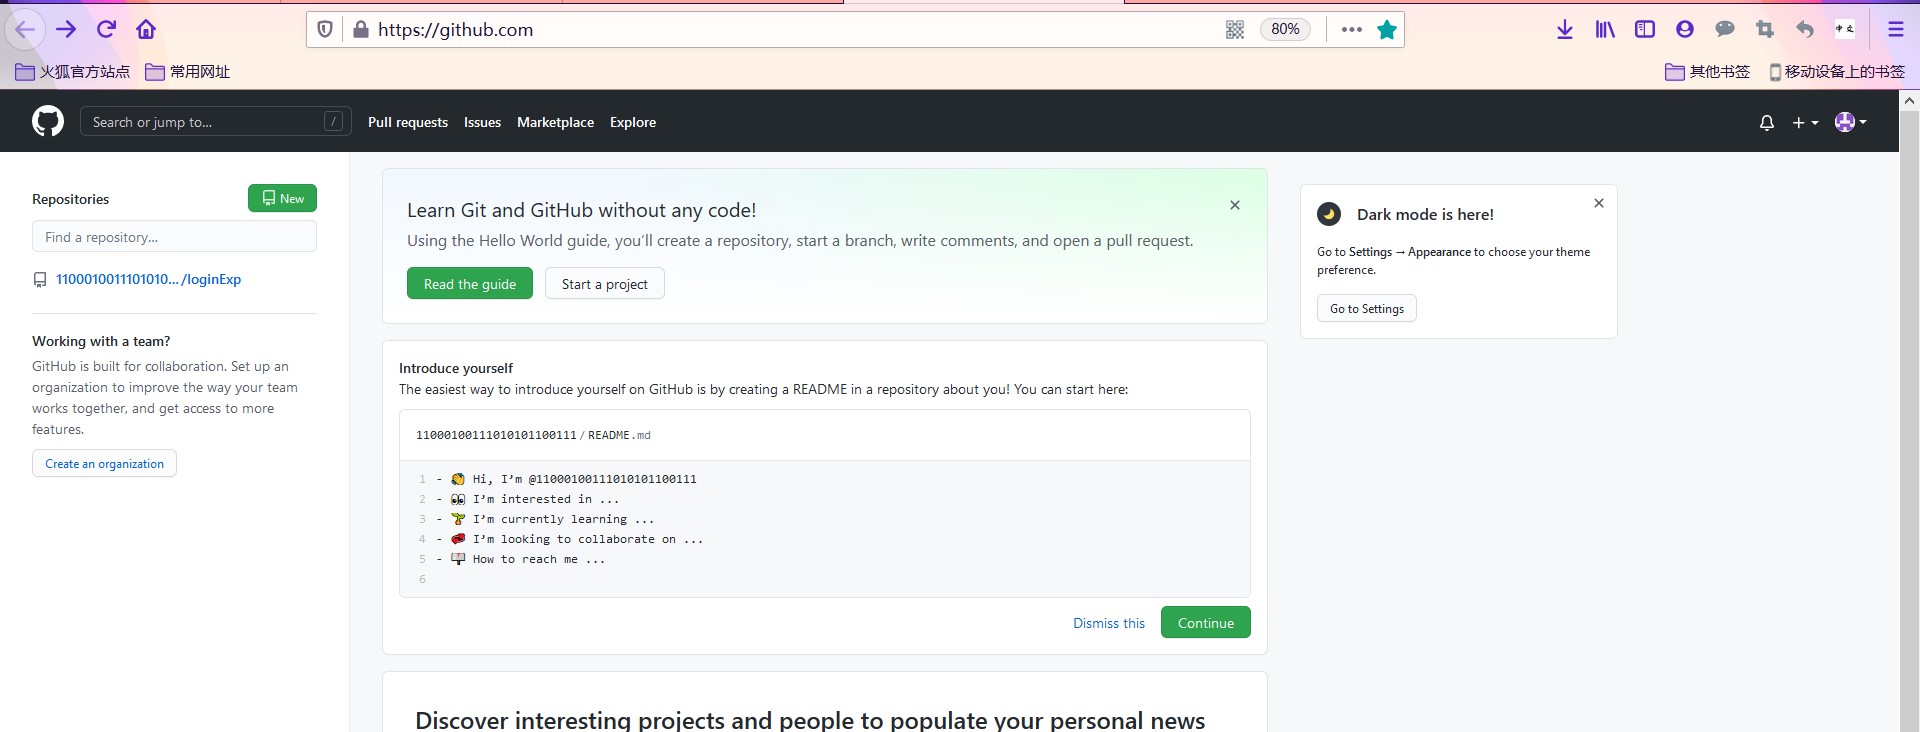
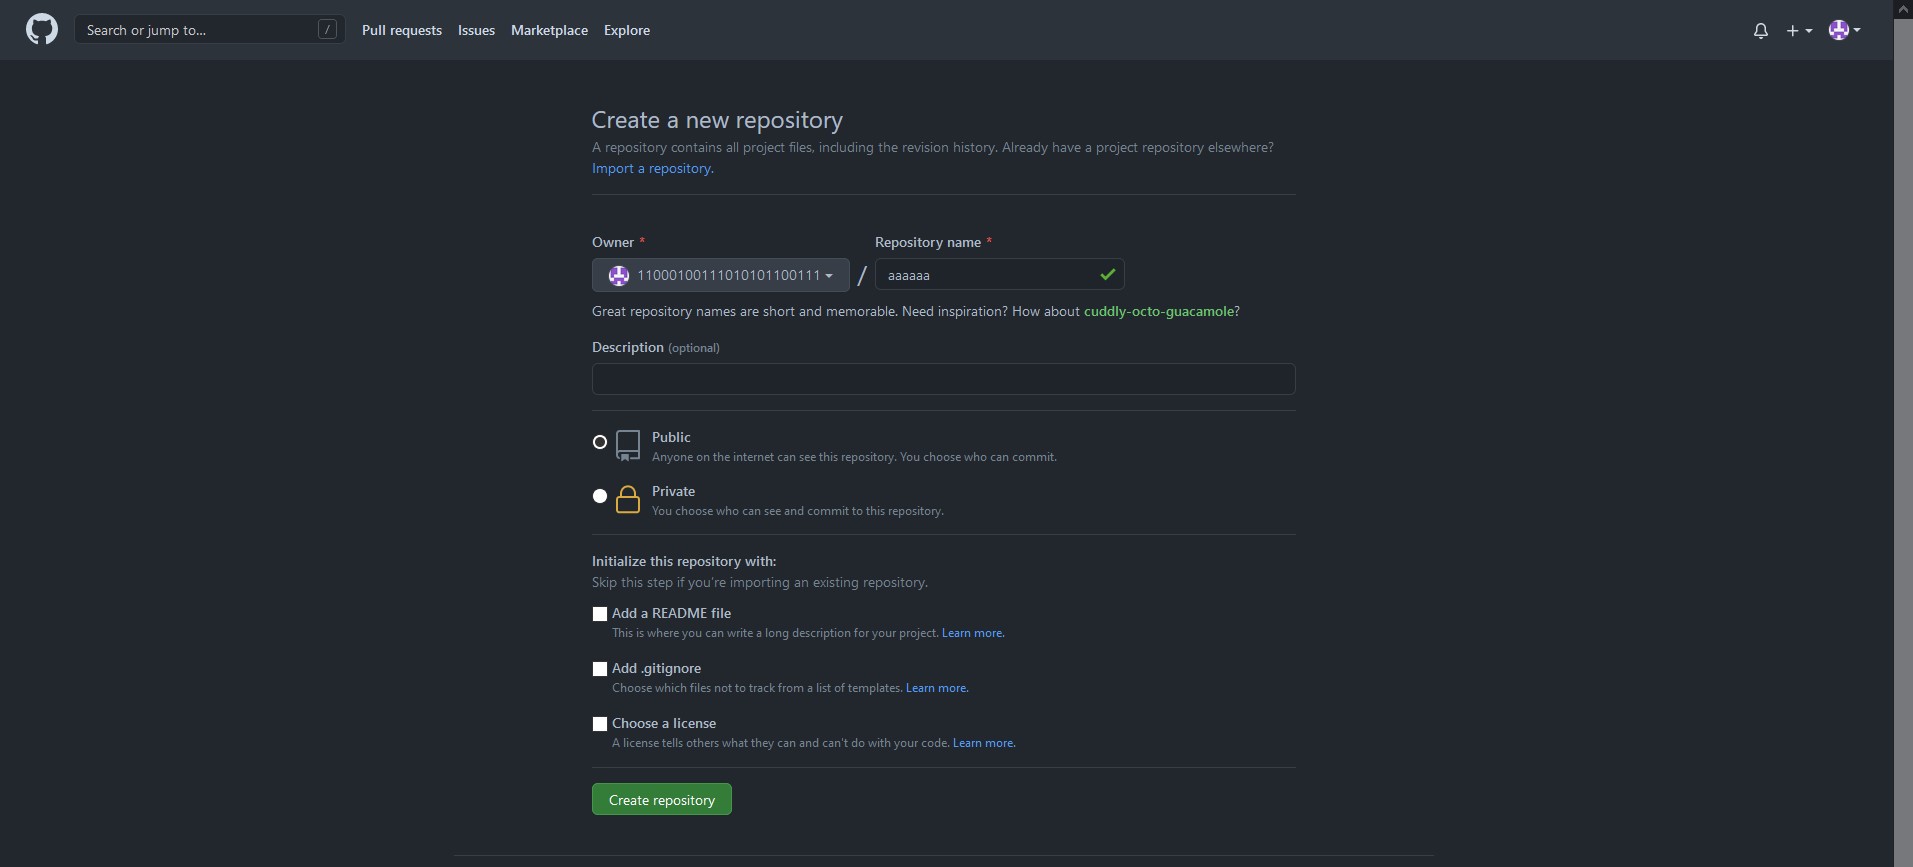
- 页面跳转后填写 Repository name 也就是说填写你要创建的项目名称,我这里先输入aaaaaa试一下,发现这个名字为aaaaaa草率项目没有人建,当然大家不能像我这么草率,毕竟我只是给大家做过演示,实际上命名应该遵循见名知意。我们这里输入后点击最下面的绿色名为Create repository按钮。
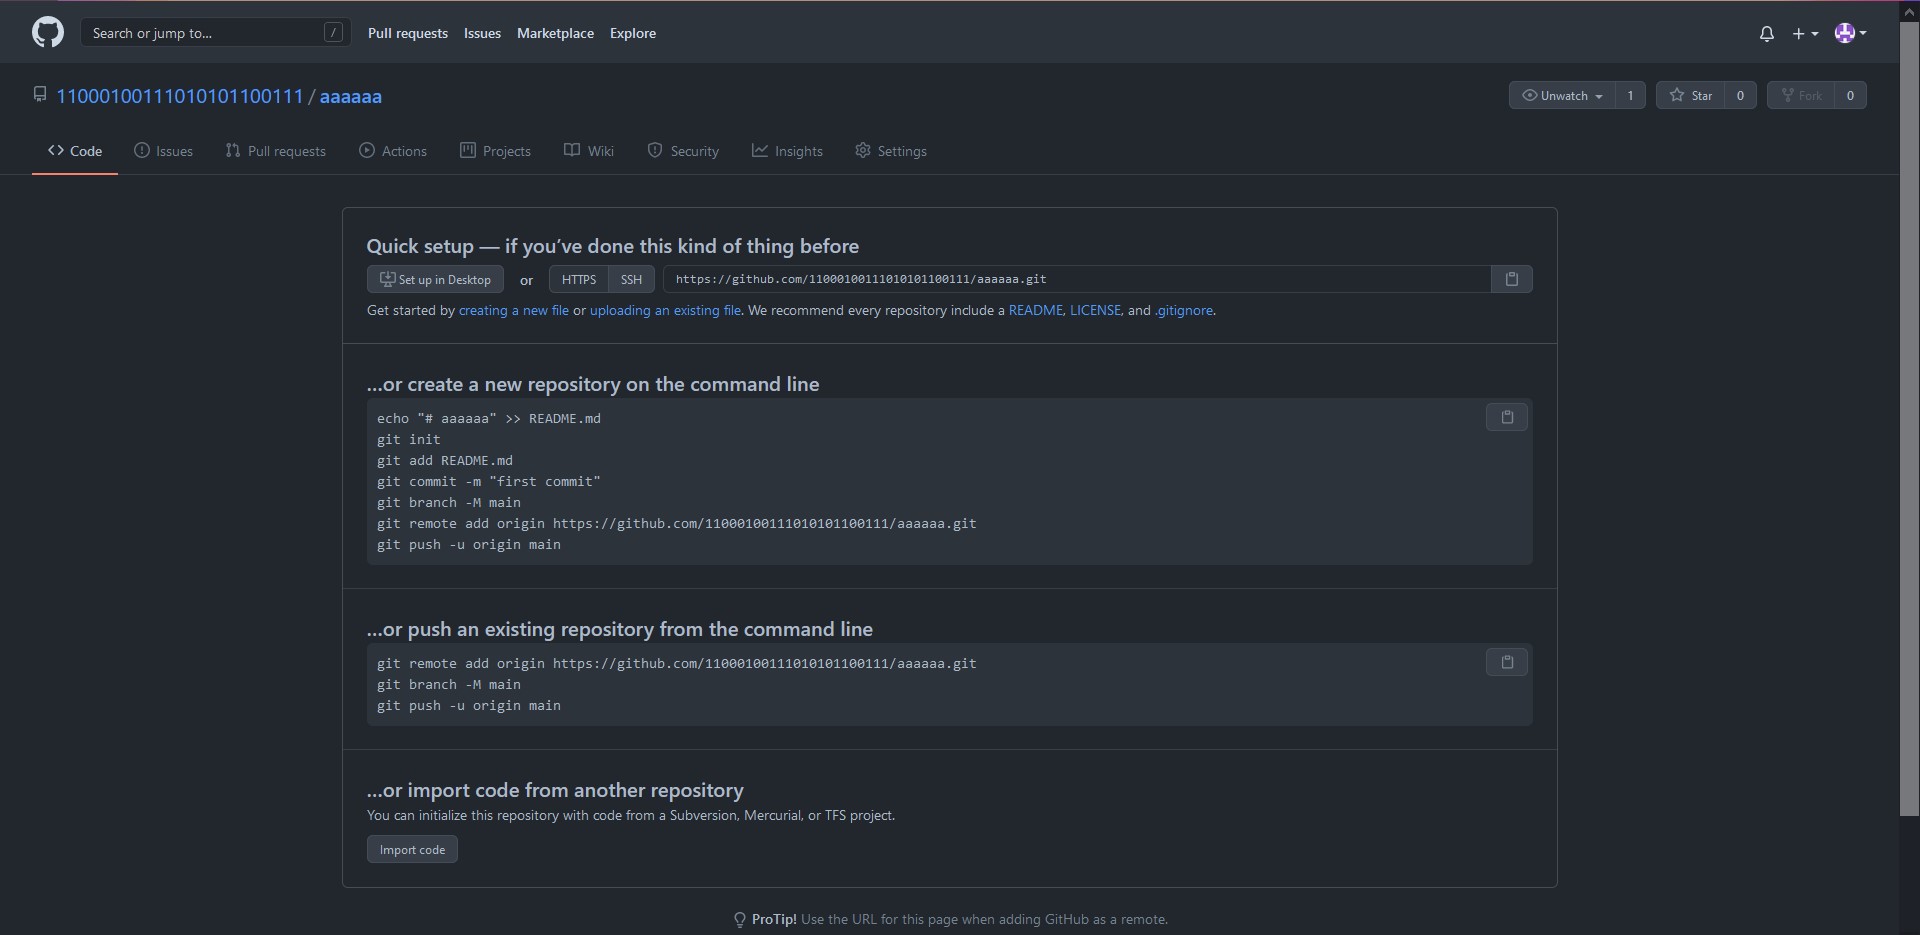
 4. 看到下面的页面说明我们的项目成功了,这一步比较重要,需要记住的是这个链接:
这里我们显示出来的是刚刚的例子https://github.com/11000100111010101100111/aaaaaa.git
2.在本地新建一个xxx文件工作目录
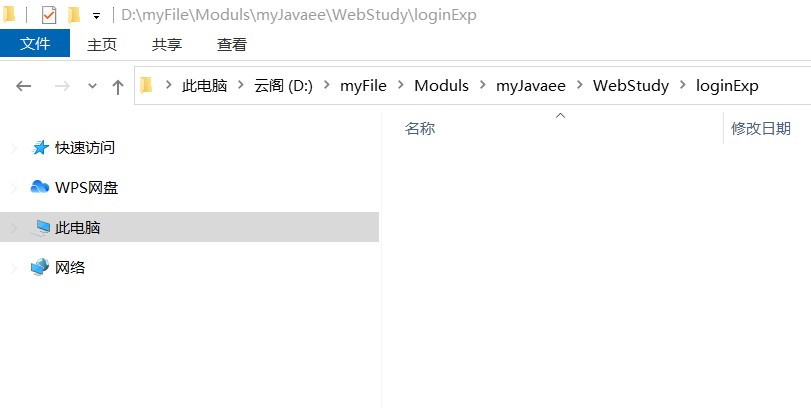
- 我这里就在D:/myFlie/Moduls/myJavaee/Webstudy/loginExp,这个看个人爱好,你说你硬要建在C盘也没关系,看个人爱好,比如说我就喜欢吧这些项目放在D盘,目录要全英文不留空格,一般都是驼峰命名。
2.在目录下创建Git项目
- win+R输入cmd进入控制台,定位到当前目录,依次输入:
d:
cd D:/myFlie/Moduls/myJavaee/Webstudy/loginExp
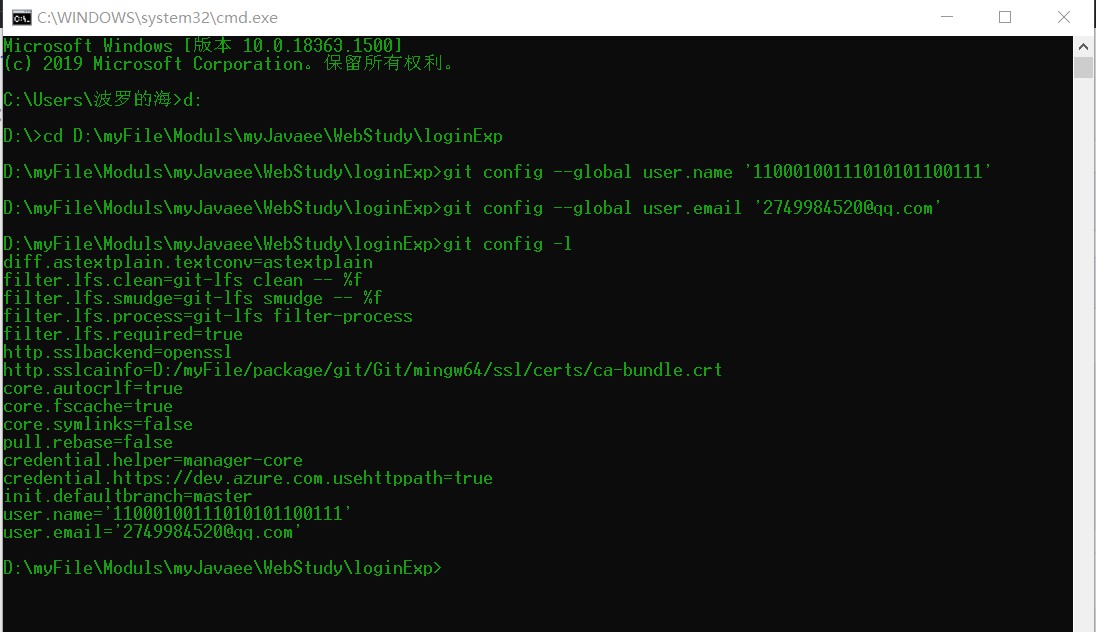
- 此时我们已经进入到了最开始创建的项目loginExp中,接下来我们配置我们的GitHub账号,依次输入:
git config --global user.name '11000100111010101100111'
//注意指令之间的空格以及我们账号需要用英文下的单引号包住,我的github账号是11000100111010101100111
git config --golbal user.email '2749984520@qq.com'
//同样要注意空格和单引号,这里的内容是配置注册github的邮箱,我的邮箱是2749984520@qq.com
- 配置完成后我们来检查一下自己的配置,输入下面的指令,回车后可以看到一堆,不用管,看最后的两行是不是跟你注册内容一致,这里要注意了,一定要是自己github账号的哦,要不然接下来的项目都提交给别了(如果有幸被你输错了这个github用户也存在的话,听我的今天去买一张彩票~~~),:
git config -l
- 看图,有图有真相:
 5. 我们现在就开始在当前目录做一个Github项目,依次输入下面的指令:
git init
这个指令输入完后我们就可以在里面进行操作了,增删改查之类的,就是现在,我们把握们的项目随便写写:
- 先键资源文件夹/img,然后导入一些需要的资源在里面,你比如说图片视频啥的…
- 编写代码了开始,直接在/loginExp下写一个login.html保存,我们一般用vsCode开始写代码(当然没有说一定要用VSCode写,你也可以用Idea,WebStorm、SublimeText、HBuilder、Dreamweaver、notepad++、editplus等等等,都可以,你要是就喜欢用txt写那你也可以用txt写,一般好屌的人都用txt),这里我随便写点:
<!DOCTYPE html>
<html lang="en">

<head>
    <meta charset="UTF-8">
    <meta http-equiv="X-UA-Compatible" content="IE=edge">
    <meta name="viewport" content="width=device-width, initial-scale=1.0">
    <title>login</title>
    <style>
        /* 消除浏览器默认元素的内外边距 */
        * {
            margin: 0;
            padding: 0;
        }

        /* 设置背景色 */
        body {
            /* background: rgba(181, 185, 171, 0.959); */
            background: rgba(153, 153, 153, 0.842);
        }

        .Bigbox {
            background: rgb(240, 240, 240);
            position: absolute;
            width: 300px;
            height: 420px;

            /* 居中 */
            top: 50%;
            left: 50%;
            transform: translateY(-50%) translateX(-50%);

            box-shadow: 0 0 12px rgba(58, 56, 56, 0.849);
            /* box-shadow: 0 0 12px rgba(255, 215, 39, 0.657); */
            border-radius: 20px;
        }

        /* Bigbox内所有孩子节点都设置为相对布局 */
        .Bigbox .child {

            position: relative;
            margin: 10px 20px 10px 20px;
        }

        .Bigbox input {
            width: 80%;
            height: 18px;
            font-size: 16px;
            /* 将Bigbox内所有input标签去除丑陋的边框 */
            outline: none;
        }

        .Bigbox .padding-class {
            padding: 10px;
        }

        .Bigbox #hi {
            position: fixed;
            top: 5%;
            left: 20%;
        }

        .Bigbox div img {
            width: 120px;
            height: 120px;
            border-radius: 50%;
            background: url('./img/10.jpg') no-repeat center;

            transform: translateX(70%);
            border: 2px solid rgba(255, 215, 39, 0.856);
            margin: 0;
            margin-top: 20px;
            animation: lighting 1.2s linear infinite;
        }

        @keyframes lighting {
            0% {
                box-shadow: 0 0 20px #43376e;
            }

            25% {
                box-shadow: 0 0 6px rgba(255, 215, 39, 0.856);
            }

            50% {
                box-shadow: 0 0 32px #4b9756;
            }

            25% {
                box-shadow: 0 0 6px rgba(255, 215, 39, 0.856);
            }

            100% {
                box-shadow: 0 0 20px #43376e;
            }
        }

        .Bigbox .check p,
        .Bigbox .check #checkbox1 {
            margin-left: auto;
            float: right;
        }

        .Bigbox .check #checkbox1 {
            width: 18.4px;
            height: 18.4px;
            padding: 0;
            background: rgba(200, 201, 168, 0.733);
            border-radius: 2px;
        }


        .Bigbox .check p {
            color: rgba(15, 68, 71, 0.972);
            margin: 10px 0px 10px 0px;
        }

        .Bigbox label {
            float: left;
            margin: 10px;
            color: rgba(15, 68, 71, 0.972);
        }

        .Bigbox input[type="submit"] {
            width: 87%;
            height: 45px;
            background: rgba(13, 122, 129, 0.972);
            border: 0;
            border-radius: 10px;
            color: #fff;
            transition: all 0.5s;
        }

        .Bigbox input[type="submit"]:hover {
            transform: scale(1.1);
            background: rgb(2, 70, 97);
        }

        .Bigbox input[type="text"],
        .Bigbox input[type="password"] {

            background: #fff;
            border: 0;
            border-bottom: 1px solid rgba(82, 80, 80, 0.603);
        }
    </style>
</head>

<body>
    <div class="Bigbox">

        <svg id="hi" t="1620881830154" class="icon" viewBox="0 0 1024 1024" version="1.1"
            xmlns="http://www.w3.org/2000/svg" p-id="4955" width="32" height="32">
            <path
                d="M526.3 488.9l-142.8 0.3c-0.2 0-0.3-0.1-0.3-0.3l19.2-156c0-0.2-0.1-0.3-0.3-0.3l-71.1 0.2c-0.1 0-0.2 0.1-0.3 0.2l-44 357.4c0 0.2 0.1 0.3 0.3 0.3l71.1-0.2c0.1 0 0.2-0.1 0.3-0.2l16.5-133.8c0-0.1 0.1-0.2 0.3-0.2L518 556c0.2 0 0.3 0.1 0.3 0.3L501.8 690c0 0.2 0.1 0.3 0.3 0.3l71.1-0.2c0.1 0 0.2-0.1 0.3-0.2l44-357.4c0-0.2-0.1-0.3-0.3-0.3l-71.1 0.2c-0.1 0-0.2 0.1-0.3 0.2l-19.2 156.1c0 0.1-0.1 0.2-0.3 0.2zM645.4 690l71.1-0.2c0.1 0 0.2-0.1 0.3-0.2L747 444c0-0.2-0.1-0.3-0.3-0.3l-71.1 0.2c-0.1 0-0.2 0.1-0.3 0.2l-30.2 245.5c0 0.2 0.2 0.4 0.3 0.4zM870 781.4c63.6-69 90-168.3 90-269.4 0-273.5-245.1-489.8-527.6-441.1C263.4 100 100 263.4 70.9 432.4 22.2 714.9 238.5 960 512 960h358.1c0.1 0 0.3-0.1 0.3-0.3-0.1-7.6-2.3-176.3-0.4-178.3z m-67.1 111.4h-288c-225.5 0-399.2-184.2-382.7-409.1 14.5-197.1 179-352.5 379.8-352.5 210.3 0 380.8 170.5 380.8 380.8 0 81.8-26.2 157.2-69.7 219.6-24.5 35.2-20.2 154.5-19.9 160.9 0 0.2-0.1 0.3-0.3 0.3zM725 332c-19.8 0-37.7 15.1-40 33.6-2.3 18.5 11.9 33.5 31.7 33.5 19.8 0 37.7-15.1 40-33.6 2.3-18.6-11.9-33.6-31.7-33.5z"
                fill="#0E0E0E" p-id="4956"></path>
        </svg>
        <div>
            <img src="" alt="">
        </div>

        <label class="child">ID:</label>

        <input class="child padding-class" type="text" id="txt">

        <label class="child" for="">Password:</label>

        <div class="check">
            <div class="child padding-class" id="checkbox1">
                <svg id="gou" t="1620880513442" class="icon" viewBox="0 0 1024 1024" version="1.1"
                    xmlns="http://www.w3.org/2000/svg" p-id="2493" width="16" height="16" style="visibility: hidden;">
                    <path
                        d="M289.0752 475.3408l138.3424 263.0656c0 0 224.768-534.6304 579.2768-712.9088-8.6016 127.2832-43.2128 237.568 17.3056 373.3504-155.648 33.8944-475.5456 415.8464-579.2768 602.5216C297.6768 823.296 124.7232 687.5136 3.6864 645.12L289.0752 475.3408z"
                        fill="#707070" p-id="2494"></path>
                </svg>
            </div>

            <p class="child">show:</p>

        </div>

        <input class="child padding-class" type="password" id="password">
        <input class="child" type="submit" value="Log In">
    </div>
    <script>
        var checkbox = document.getElementById("checkbox1");
        var checked = document.getElementById("gou");
        var pwd = document.getElementById("password");
        var txt = document.getElementById("txt");
        var img = document.querySelector("img");
        var flage = 0;
        checkbox.onclick = function () {
            if (flage == "0") {
                pwd.type = 'text';
                flage = "1";
                checked.style = "visibility: visible;";
                img.style = ' background: url("./img/see.jpg") no-repeat center; ';
            }
            else {
                pwd.type = 'password';
                flage = "0";
                checked.style = "visibility: hidden;";
                img.style = ' background: url("./img/notsee.jpg") no-repeat center; ';
            }
        }
        txt.onkeydown = function focus() {
            var length = txt.value.length;
            if (length <= 0) {
                length = 1;
            }
            else if (length >= 20) {
                length = 20;
            }
            img.style = ' background: url("./img/' + length + '.jpg") no-repeat center; ';
        }
        txt.onfocus = focus();
        txt.onblur = function blur() {
            img.style = ' background: url("./img/10.jpg") no-repeat center; ';
        }

        pwd.onfocus = function () {
            if (flage == "0") {
                img.style = ' background: url("./img/notsee.jpg") no-repeat center; ';
            }
            else {
                img.style = ' background: url("./img/see.jpg") no-repeat center; ';
            }
        }
    </script>
</body>

</html>
完了之后保存,开始输入下面的指令将自己本地的github项目与远端的github项目关联:
git remote add origin https://github.com/11000100111010101100111/login-Exp.git
//注意这个链接就是最开始在github上新建项目的链接,也就是说你需要把你在github上建好的仓库所在的位置放在这里
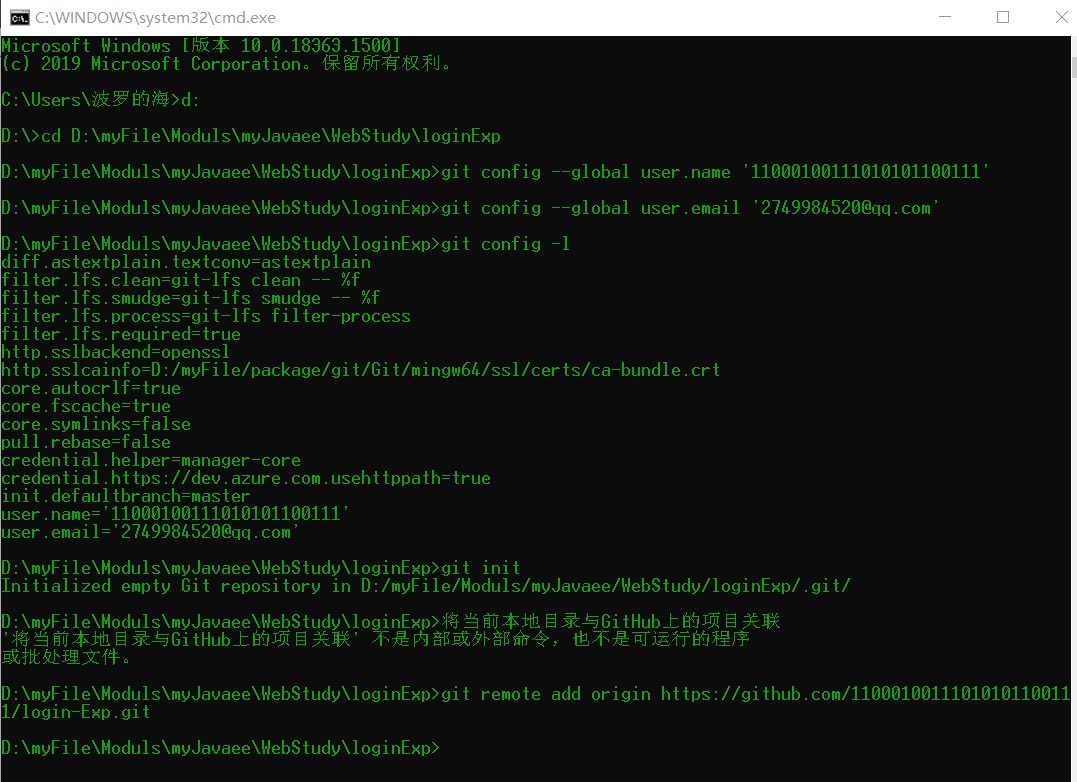 此时我们已经将两个项目进行了关联,这样当我们每次对项目进行修改和增加内容时我们就可以进行进行下面的步骤:将内容的推送Github上。
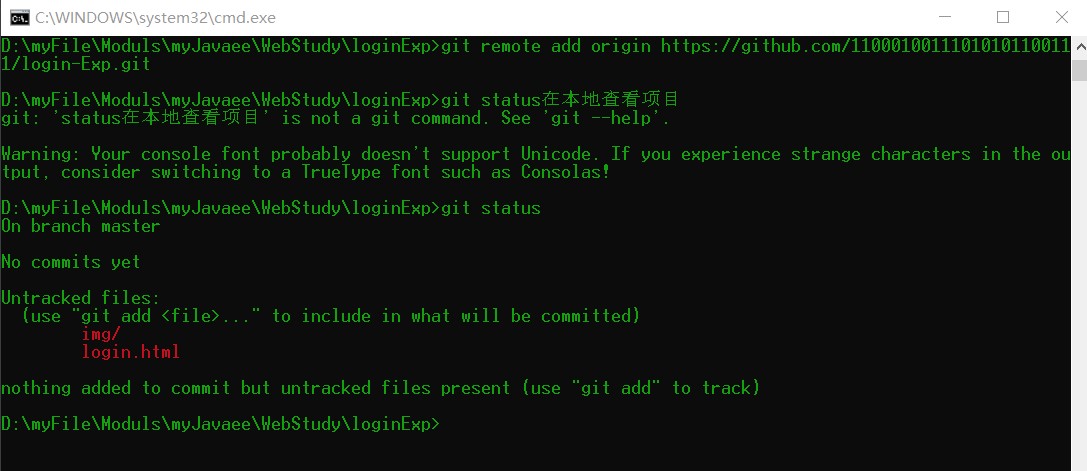
(1)查看本地项目的内容变化:
git status
观察下面的图片,不难看出,我的项目下有内容变化,一个是在img/文件夹下,另一个就是我们的html文件。
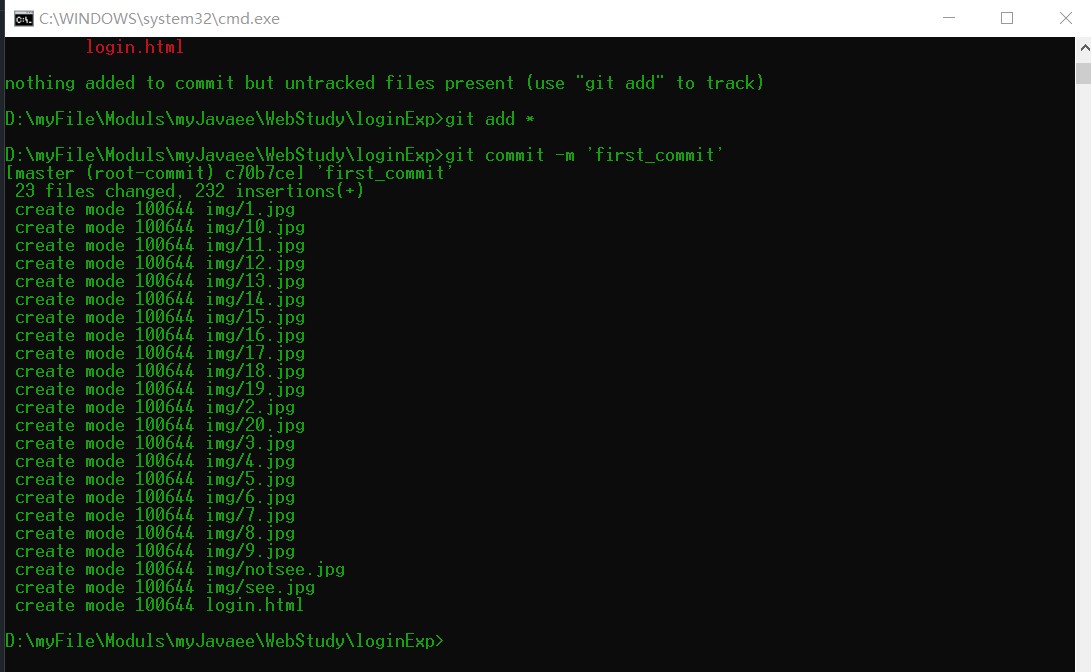
(2)让我们内容变化了的文件生效,依次输入:
git add *
//*表示所有文件
git commit -m 'firt_commit'
//注意,这里的firt_commit为注释内容,用来解释或者区分此次操作,会在文件同步到github后显示出来
此时已经将本地项目修改生效了,
 (3)接下来我们需要将本地修改的项目推送到Github上,依次输入:
git push -u origin master
稍等片刻后,推送完成,呈现这个样子:

接下来回到我们的Github去,按F5刷新页面,发现项目已经成功发布了!


点击查看发布后的效果,觉得有用就点一个赞吧!
以上是关于循循善诱!手把手一步一步教你部署项目到GitHub的主要内容,如果未能解决你的问题,请参考以下文章